Garmin GTX 330D Maintenance Manual
Hide thumbs
Also See for GTX 330D:
- User manual ,
- Installation manual (106 pages) ,
- Pilot's manual (78 pages)
Table of Contents
Advertisement
Quick Links
Download this manual
See also:
Installation Manual
GTX 33X and GTX 3X5 ADS-B
Maintenance Manual
Contains Instructions for Continued Airworthiness for STC
SA01714WI
Aircraft make, model, registration number, and serial
number and accompanying STC configuration
information in appendix A must be completed and saved
with aircraft permanent records.
190-00734-11
December 2017
Revision 6
Advertisement
Chapters
Table of Contents
Troubleshooting

Related Manuals for Garmin GTX 330D


Summary of Contents for Garmin GTX 330D
- Page 1 GTX 33X and GTX 3X5 ADS-B Maintenance Manual Contains Instructions for Continued Airworthiness for STC SA01714WI Aircraft make, model, registration number, and serial number and accompanying STC configuration information in appendix A must be completed and saved with aircraft permanent records. 190-00734-11 December 2017 Revision 6...
- Page 2 Adobe Systems Incorporated. All rights reserved. The Bluetooth word mark and logos are registered trademarks owned by Bluetooth SIG, Inc. and any use of such marks by Garmin is under license. Other trademarks and trade names are those of their respective owners.
- Page 3 RECORD OF REVISIONS Revision Revision Description Date Updated GTX 33/330 software to v8.04 Updated GTX 3X5 main software to v2.12 and ADSB software to v2.10 Added models to bonding table B-1 Updated the standard rack part number. 10/05/16 Moved GPS keep alive input requirement to optional interface. Updated main and ADS-B software to v2.05 07/21/16 Added GTX 3X5 vertical mount.
- Page 4 $1,000,000 under Section 2410 of the Export Administration Act of 1979. Include this notice with any reproduced portion of this document. This information in this document is subject to change without notice. Visit Garmin’s Dealer Resource Center for current updates and supplemental information concerning the operation of Garmin products.
-
Page 5: Table Of Contents
TABLE OF CONTENTS INTRODUCTION..........................1-1 Content, Scope, Purpose......................1-1 Organization ..........................1-1 Applicability..........................1-2 Publications ..........................1-2 Revision and Distribution......................1-2 Reference............................1-3 SYSTEM DESCRIPTION.........................2-1 GTX 330/330D...........................2-2 GTX 33/33D..........................2-4 GTX 335/335R ...........................2-6 GTX 345/345R ...........................2-8 GTX 335R/345R with Legacy G1000 ..................2-10 Electrical Load Information .....................2-11 GTX CONTROL AND OPERATION .....................3-1 GTX 330/330D...........................3-2 GTX 335/345..........................3-5 GTX 33/33D and GTX 335R/345R ...................3-8... - Page 6 Regulatory Test ..........................8-6 ADS-B Out Test .........................8-7 GTX 3X5 with TCAS System Test (GX000 Only) ..............8-8 SYSTEM RETURN TO SERVICE PROCEDURE................9-1 Maintenance Records .........................9-1 APPENDIX A INSTALLATION SPECIFIC INFORMATION............A-1 APPENDIX B SPECIAL BONDING PROCEDURES ................ B-1 B.1 Considerations for Untreated or Bare Dissimilar Metals ............B-1 B.2 Preparation of Aluminum Surfaces ...................
- Page 7 LIST OF FIGURES Figure 2-1 GTX 330 or GTX 330D Interface Summary ................2-3 Figure 2-2 GTX 33 or GTX 33D Interface Summary ................2-5 Figure 2-3 GTX 335 or GTX 335R Interface Summary ................2-7 Figure 2-4 GTX 345 or GTX 345R Interface Summary ................2-9 Figure 2-5 GTX 335R or GTX 345R Interface Summary with Legacy G1000 ........2-10...
- Page 8 Figure 7-8 GTX 3X5 Install Tool Software Upload Page ..............7-9 Figure B-1 Electrical Bonding Preparation – Nut Plate ................. B-1 Figure B-2 Electrical Bonding Preparation – Bolt/Nut Joint ..............B-1 Figure B-3 Electrical Bond Preparation – Terminal Lug ............... B-1 Figure B-4 Fiberglass Insulation for Carbon Material ................
- Page 9 Standard/G1000 Mount Back Plate Hardware ..............6-4 Table 6-3 Vertical Mount Back Plate Hardware ...................6-6 Table 6-4 Garmin Altitude Encoder Kit - P/N 011-03080-00 ............6-15 Table 8-1 Ramp Test Pressure Altitude Check Scenario ..............8-8 Table B-1 Ground Plane Definitions and Ground Path Resistance Requirements ....... B-2 Table B-2 Composite Airframe Bonding Hardware ................
-
Page 10: Introduction
1 INTRODUCTION 1.1 Content, Scope, Purpose ..................... 1-1 1.2 Organization........................1-1 1.3 Applicability ........................1-2 1.4 Publications......................... 1-2 1.5 Revision and Distribution ....................1-2 1.6 Reference ..........................1-3 1.6.1 Terminology........................1-3 1.6.2 Acronyms........................1-3 1.1 Content, Scope, Purpose This document provides Instructions for Continued Airworthiness (ICA) of the GTX 33X and GTX 3X5 with ADS-B functionality installed and compliant to ADS-B Out version 2, under AML STC SA01714WI. -
Page 11: Applicability
GTX 3XX Part 23 AML STC Installation Manual 190-00734-10 1.5 Revision and Distribution This document is required for maintaining the continued airworthiness of the aircraft. Garmin Dealers may obtain the latest revision of this document at the Garmin Dealer Resource Center, website. -
Page 12: Reference
FAA: Federal Aviation Administration TAS: Traffic Advisory System FIS-B: Flight Information System-Broadcast TCAS: Traffic Alert and Collision Avoidance System GAE: Garmin Altitude Encoder TIS: Traffic Information Service GNS: Garmin Navigation System TSO: Technical Standard Order GNSS: Global Navigation Satellite System... -
Page 13: System Description
All-Call interrogation. The GTX 345/345R units include ADS-B In which provides TIS-B and FIS-B data via UAT and 1090 MHz. The GTX 3X5 units offer an optional Garmin altitude encoder to meet the required barometric pressure altitude source and an optional internal GPS/SBAS source to meet the required GNSS position source integrity for ADS-B Out. -
Page 14: Gtx 330/330D
Figure 2-1 provides a summary of the interfaces provided for the GTX 330 or GTX 330D. Refer to GTX 3XX Part 23 AML STC Installation Manual for interfaces allowed under this STC. -
Page 15: Figure 2-1 Gtx 330 Or Gtx 330D Interface Summary
Altitude Source GTX 330D Secondary GPS Power/Ground Display Squat Switch Tem perature External Ident External STBY Radar Altitude Figure 2-1 GTX 330 or GTX 330D Interface Summary 190-00734-11 GTX 33X and GTX 3X5 ADS-B Maintenance Manual Rev. 6 Page 2-3... -
Page 16: Gtx 33/33D
2.2 GTX 33/33D GTX 33/33D units are remote mounted and require a display/control interface as provided by the GTN 6XX/7XX or GNS 480 in order to be installed in accordance with this STC. Basic transponder functions of the GTX 33/33D are identical to the GTX 330/330D. GTX 33/33D units provide the following features. -
Page 17: Figure 2-2 Gtx 33 Or Gtx 33D Interface Summary
Optional Interfaces Required Interfaces GTX 33D Installs Only Top Antenna Bottom Antenna Garmin Audio Panel GTN 6XX/7XX GTX 33 Heading Source GNS 480 Traffic System Altitude Source GTX 33D Secondary GPS Power/Ground Squat Switch Temperature External Ident External Standby Radar Altitude... -
Page 18: Gtx 335/335R
2.3 GTX 335/335R The GTX 335/335R units are panel or remote mounted units providing Mode S with ADS-B Out extended squitter capability. The panel mounted unit contains an integrated display while the remote mounted unit requires an interface to a control source for normal operation and functionality. GTX 335/335R units provide the following features. -
Page 19: Figure 2-3 Gtx 335 Or Gtx 335R Interface Summary
GTX 3X5 with GPS only GPS Antenna For XPDR Cross-Talk Secondary GPS GPS Source Squat Switch Temperature Altitude Source External Ident GTX 335/335R External Standby Garmin Altitude Encoder Air Data Source Power/Ground Radio Altitude Source GTX 335R Control Keep Alive Input Legend New LRU... -
Page 20: Gtx 345/345R
2.4 GTX 345/345R The GTX 345/345R units are panel or remote mounted units providing Mode S with ADS-B Out extended squitter, and UAT and 1090 receivers for ADS-B In capabilities. The panel mounted unit contains an integrated display while the remote mounted units require an interface to a control source for normal operation and functionality. -
Page 21: Figure 2-4 Gtx 345 Or Gtx 345R Interface Summary
GPS Antenna Squat Switch Temperature GPS Source External Ident External Standby GTX 345/345R Altitude Source Air Data Source Radio Altitude Source Garmin Altitude Encoder Bluetooth Device Bluetooth ADS-B Traffic Power/Ground FIS-B Display TAS/TCAS I GTX 345R Traffic Sensor Control For No Display Install... -
Page 22: Gtx 335R/345R With Legacy G1000
2.5 GTX 335R/345R with Legacy G1000 The Legacy G1000 configuration includes certain G1000 systems that can be updated with a G1000 interface card. The GTX 335R provides all the functions listed under the GTX 335/335R to include ADS-B Out. The GTX 345R provides all the functions listed under the GTX 345/345R with the exception that the ADS-B In traffic and weather will be displayed as an emulation of the GDL 90 weather and traffic displays. -
Page 23: Electrical Load Information
2.6 Electrical Load Information Electrical load information for the GTX is provided below. APPENDIX A of this document contains details specific to the load changes for the installation. Table 2-1 GTX Electrical Load Specification Unit Characteristic 14 VDC 28 VDC Maximum full TSO reply rate 3.1 A 1.6 A... -
Page 24: Gtx Control And Operation
3 GTX CONTROL AND OPERATION 3.1 GTX 330/330D ........................3-2 3.2 GTX 335/345 ........................3-5 3.3 GTX 33/33D and GTX 335R/345R..................3-8 3.4 GTX 335R/345R with Legacy G1000 ................3-9 3.5 GTX 3X5 Install Tool....................... 3-12 3.5.1 State Page........................3-13 3.5.2 Status Page ........................ -
Page 25: Gtx 330/330D
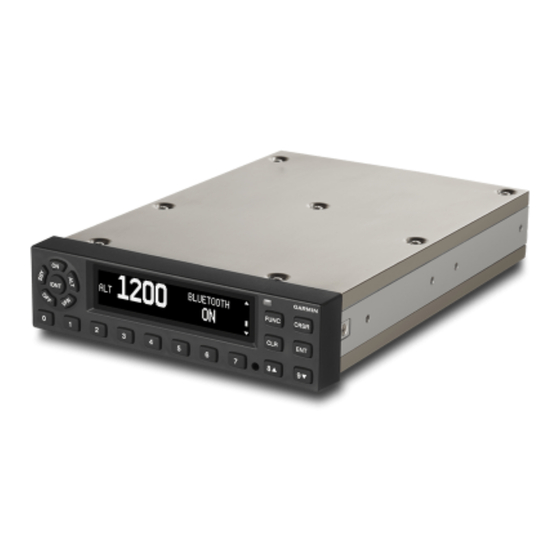
3.1 GTX 330/330D Figure 3-1 GTX 330/330D Front Panel Function Selection Keys The function selection keys are: Powers off the GTX 330. STBY Selects the standby mode. Pressing the STBY key when the GTX 330 is powered off automatically powers the unit on in standby mode. When in standby mode, the transponder does not reply to interrogations. - Page 26 START/STOP Starts and stops the altitude monitor, count up, count down, and flight timers. CRSR Initiates entry of the starting time for the count down timer and cancels transponder code entry. Selects changeable fields in Configuration mode. If using software v8.02 or later, holding the CRSR key during power on will place the unit into a Ground Test mode that forces the aircraft into an airborne status for testing purposes.
- Page 27 Function Display PRESSURE ALT Displays the altitude data supplied to the GTX 330 in feet, hundreds of feet (flight level), or meters, depending on configuration. FLIGHT TIME Displays the flight time, controlled by the START/STOP key or by one of four airborne sources (squat switch, GPS ground speed recognition, air data airspeed recognition, or altitude increase) as configured during installation.
-
Page 28: Gtx 335/345
3.2 GTX 335/345 Figure 3-2 GTX 335/345 Front Panel Function Selection Keys The function selection keys are: Powers off the GTX 3X5. STBY Selects the Standby mode. Pressing the STBY key when the GTX 335/345 is powered off automatically powers the unit on in standby mode. When in Standby mode, the transponder does not reply to interrogations but new codes can be entered and a SBY indication appears on the display. - Page 29 FUNC In normal mode, pressing the FUNC key changes the subpage group shown on the right side of the display. Subpages include flight ID, pressure altitude, flight time, altitude monitor, system count up, and count down timers. In the Configuration mode, steps through the function pages.
- Page 30 Function Display FLIGHT ID If ALLOW PILOT TO EDIT FLT ID is configured to YES, the FLIGHT ID can be changed by the pilot at any time in normal mode. This allows the pilot/ crew to enter the specific flight ID for transmission to ATC interrogations. UP COUNTER Timer controlled by ENT and CLR keys.
-
Page 31: Gtx 33/33D And Gtx 335R/345R
3.3 GTX 33/33D and GTX 335R/345R Figure 3-3, figure 3-4, and figure 3-5 show the GTX control pages associated with the GTN 6XX/7XX and GNS 480. Refer to the specific pilot guide and cockpit reference guide for details regarding control and function. -
Page 32: Gtx 335R/345R With Legacy G1000
Figure 3-5 GNS 480 Transponder Control 3.4 GTX 335R/345R with Legacy G1000 With specific installations, the GDU 1XXX (of the G1000 system) provides control and operation of the remote mounted GTX 335R/345R units. Figure 3-6 and figure 3-7 display screen shots of the GTX control pages associated with the G1000 system. -
Page 33: Figure 3-6 G1000 Transponder Control
Figure 3-6 G1000 Transponder Control 190-00734-11 GTX 33X and GTX 3X5 ADS-B Maintenance Manual Rev. 6 Page 3-10... -
Page 34: Figure 3-7 G1000 Transponder Control
Figure 3-7 G1000 Transponder Control 190-00734-11 GTX 33X and GTX 3X5 ADS-B Maintenance Manual Rev. 6 Page 3-11... -
Page 35: Gtx 3X5 Install Tool
The GTX 3X5 Install Tool pages shown within this manual may reflect older GTX 3X5 Install Tool versions. Some differences in operation may be observed when comparing information in this manual to later versions of the install tool. The GTX 3X5 Install Tool is available for download from the Garmin Dealer Resource Center. The GTX 3X5 Install Tool requires a computer with available USB 2.0 ports and Microsoft Windows XP or... -
Page 36: Figure 3-9 Gtx 3X5/3X5R State Page
3.5.1 State Page The State page of the GTX 3X5 Install Tool reports the current mode of the GTX 3X5/3X5R, Flight ID, Squawk Code, and Pressure Altitude. This page allows selection of Ground Test and Traffic Test modes. This page also allows selection of Standby or Operate TCAS Modes. Figure 3-9 GTX 3X5/3X5R State Page 190-00734-11 GTX 33X and GTX 3X5 ADS-B Maintenance Manual... -
Page 37: Figure 3-10 Gtx 3X5/3X5R Status Page
3.5.2 Status Page The Status page reports failures, faults, warnings, and pilot alerts. Information such as whether there is a configuration module present is also displayed. Figure 3-10 GTX 3X5/3X5R Status Page 190-00734-11 GTX 33X and GTX 3X5 ADS-B Maintenance Manual Rev. -
Page 38: Figure 3-11 Gtx 3X5/3X5R Configuration Group
Unit page - configuration of identification code, unit options, and display options Interfaces page - configuration of serial, A429, discretes, and HSDB settings Sensors page - configuration of Garmin altitude encoder, GPS, internal AHRS, and additional sensors Audio page - configuration of audio options and alerts ... -
Page 39: Diagnostics Group
3.5.4 Diagnostics Group NOTE GTX 3X5/3X5R must be in configuration mode to view connection status or get assert log. The Diagnostics group contains the following pages: DAP - reports status of the necessary data supporting ADS-B requirements Discretes - reports status of discrete inputs, outputs, and allows the user to override the Output pins for testing purposes ... -
Page 40: Figure 3-12 Gtx 3X5/3X5R Diagnostics Group
Figure 3-12 GTX 3X5/3X5R Diagnostics Group 190-00734-11 GTX 33X and GTX 3X5 ADS-B Maintenance Manual Rev. 6 Page 3-17... -
Page 41: Figure 3-13 Gtx 3X5/3X5R Product Data Group
GPS page - displays GPS and GPS loader information Garmin Altitude Encoder page - displays altitude encoder serial number Configuration page - displays configuration status of aircraft, unit, wiring, and display CRCs Figure 3-13 GTX 3X5/3X5R Product Data Group 3.5.6... -
Page 43: Servicing Information
4.3 Servicing Information GTX 33X and GTX 3X5 LRU maintenance is “on condition” only. Component-level overhaul is not required for the GTX 33X and GTX 3X5 with ADS-B installation. 4.3.1 On Condition Servicing On Condition replacement and/or servicing should occur when an item exhibits conditions, symptoms, and/or abnormalities as defined in section 5 of this manual. -
Page 44: Maintenance Intervals
4.4 Maintenance Intervals Table 4-1 shows systems and components, installed by this STC, which must undergo tests or checks at specific intervals. The inspections based on calendar elapsed time have specifically stated intervals. NOTE The maintenance intervals listed in the table below must be adhered to for each installed GTX. -
Page 45: Visual Inspection
4.5 Visual Inspection Perform a visual inspection in accordance with requirements in this section. Check for corrosion, damage, or other defects for each of the installed items. Replace any damaged parts as required. Inspection may require the temporary removal of a unit or units to gain access to connectors. Follow guidance in section 6 for equipment removal and replacement. - Page 46 GTX 33/33D/335R/345R Visual Inspection During normal aircraft inspections not to exceed 12 calendar month intervals, conduct a visual inspection of the GTX 33/33D/335R/345R installation in the following locations. Remote Mount Rack 1. Inspect GTX 33/33D/335R/345R units for security of attachment. 2.
-
Page 47: Electrical Bonding Test
4.6 Electrical Bonding Test 1. Disconnect the antenna coaxial cable from the GTX 33X or GTX 3X5. 2. Disconnect all connectors from the GTX 33X or GTX 3X5. 3. Measure the DC resistance between each of the following test points and the aircraft ground reference as defined in table B-1 and verify the resistance is less than or equal to the appropriate periodic test resistance value. -
Page 48: Troubleshooting
When troubleshooting the GTX, refer to the wire routing drawings and interconnect wiring diagrams that are retained in the aircraft permanent records. The following table describes possible symptoms associated with the Garmin transponders and provides corresponding actions for troubleshooting. -
Page 49: Figure 5-1 Gtx (All Models) Transponder Troubleshooting
1.5:1 at 1090 MHz or less. Insertion loss should be less than 1.5 dB at 1090 If fault still exists, contact Garmin. Figure 5-1 GTX (All Models) Transponder Troubleshooting 190-00734-11 GTX 33X and GTX 3X5 ADS-B Maintenance Manual Rev. -
Page 50: Gtx Failure Annunciations
Reload software the sky Ensure ADS-B TX is ON. This option is only available if ADS-B TX is configured for PILOT SET If fault still exists, contact Garmin. 190-00734-11 GTX 33X and GTX 3X5 ADS-B Maintenance Manual Rev. 6 Page 5-3... -
Page 51: Figure 5-3 Gtx 33/33D Transponder Failure/Fault Messages
Re-configure the GTX the Installation the Installation and GTX and GTX Guidance Guidance If fault still exists, return to Garmin. Figure 5-3 GTX 33/33D Transponder Failure/Fault Messages 190-00734-11 GTX 33X and GTX 3X5 ADS-B Maintenance Manual Rev. 6 Page 5-4... -
Page 52: Figure 5-4 Gtx 3X5 Transponder Alerts
G T X 3 X 5 M e s s a g e s T ra n s p o n d e r T ra n s p o n d e r T ra n s p o n d e r T ra n s p o n d e r T ra n s p o n d e r T ra n s p o n d e r... - Page 53 G TX 3X 5 M essages Transponder Transponder Transponder Transponder Transponder Transponder Transponder M inim um M axim um Tem perature Tem perature 1090 A D S -B 1090 A D S-B 1090 A D S-B 1090 A D S -B 1090 A D S -B 1090 A D S-B 1090 A D S -B...
- Page 54 G TX 3X 5 M essages A D S-B In Pressure A D S -B G round Test TAS /TCA S Traffic Traffic Traffic A ltitude P osition Input Alerting A lert W arning W arning W arning Fault Fault Fault P ressure N o A D S -B...
- Page 55 G TX 3X5 M essages 1090 U AT FIS -B FIS-B AD S-B IN Service Soon Service Soon S ervice Soon AD S-B In AD S-B In W eather W eather Fault Fault Fault Fault Fault Fault Fault Fault A D S-B In A D S-B In A D S-B In A D S -B/A D S-R /...
- Page 56 Cause Cause Cause Cause Cause Cause Cause Cause Cause - No GPS data Garmin Altitude ADS-B In software ADS-B In FPGA Non-volatile data Audio database Factory calibration Failure of the Fault on the Encoder (GAE) available. did not load or is...
-
Page 57: Gtx 33X Connector Pinout Information
5.3 GTX 33X Connector Pinout Information 5.3.1 GTX 33X (J3301) Figure 5-6 Rear View, Connector P3301 Table 5-1 GTX 33X Pinout GTX 33/33D Pin Name GTX 330/330D Pin Name RESERVED AVIONICS MASTER ON SELECT ALTITUDE A1 ALTITUDE A1 ALTITUDE C2 ALTITUDE C2 ALTITUDE A2 ALTITUDE A2... - Page 58 GTX 33/33D Pin Name GTX 330/330D Pin Name RS-232 OUT 2 RS-232 OUT 2 ARINC 429 IN 3 A ARINC 429 IN 3 A POWER GROUND POWER GROUND ARINC 429 OUT 2 B ARINC 429 OUT 2 B ARINC 429 IN 3 B ARINC 429 IN 3 B ARINC 429 OUT 2 A ARINC 429 OUT 2 A...
-
Page 59: Table 5-2 Gtx 33X Encoded Altitude Pin Assignments
GTX 33/33D Pin Name GTX 330/330D Pin Name SIGNAL GROUND RESERVED NOT USED SPARE AIRCRAFT POWER 2 AIRCRAFT POWER 2 NOT USED SPARE SWITCHED POWER OUT SWITCHED POWER OUT * Denotes Active-Low (Ground to activate) 5.3.2 Altitude Functions Gillham code altitude inputs are considered active if either the voltage to ground is < 1.9 V or the resistance to ground is <... -
Page 60: Table 5-3 Gtx 33/330 Discrete Outputs
5.3.3 Discrete Functions Discrete Outputs Table 5-3 GTX 33/330 Discrete Outputs Pin Name Pin Number Unit (33X) ALTITUDE ALERT ANNUNCIATE* Both EXTERNAL SUPPRESSION I/O In/Out Both *This output is considered active if either the voltage to ground is < 1.9 V or the resistance to ground is <... -
Page 61: Figure 5-7 Gtx 33/330 Arinc 429 Connections
5.3.5 ARINC 429 Input/Output Figure 5-7 GTX 33/330 ARINC 429 Connections Pin Name Pin Number Unit (33X) ARINC 429 OUT 1A Both ARINC 429 OUT 1B Both ARINC 429 IN 1A Both ARINC 429 IN 1B Both ARINC 429 IN 2A Both ARINC 429 IN 2B Both... -
Page 62: Gtx 3X5 Connector Pinout Information
5.4 GTX 3X5 Connector Pinout Information 5.4.1 GTX 3X5 (J3251) Figure 5-8 Rear View, Connector J3251 Table 5-6 J3251 Pinout GTX 3X5 Pin Name ALT ENCODER/CONFIG MODULE CLOCK In/Out USB DATA HI In/Out TEMP PROBE IN TIME MARK A ARINC 429 OUT A ARINC 426 OUT B RS-232 OUT 3 RS-232 OUT 2... - Page 63 GTX 3X5 Pin Name TEMP PROBE OUT TIME MARK B ARINC 426 IN 1A ARINC 429 IN 1B RS-232 IN 3 RS-232 IN 2 RS-232 IN 1 ALTITUDE A2 ALTITUDE B2 ALTITUDE C2 RESERVED EXTERNAL IDENT SELECT AUDIO INHIBIT 2 POWER CONTROL SWITCHED POWER OUT LIGHTING BUS LO...
-
Page 64: Figure 5-9 Rear View, Connector J3252
GTX 3X5 Pin Name AIR DATA SELECT POWER CONFIG GPS KEEP ALIVE AIRCRAFT POWER 2 AIRCRAFT POWER 2 5.4.2 GTX 345/345R (J3252) Figure 5-9 Rear View, Connector J3252 Table 5-7 J3252 Pinout GTX 345/345R Pin Name ETHERNET OUT 1B ETHERNET IN 1B ETHERNET OUT 2B ETHERNET IN 2B RS-232 OUT 4... -
Page 65: Table 5-8 Gtx 3X5/3X5R Encoded Altitude Pin Assignments
5.4.3 Altitude Functions Gillham code altitude inputs are considered active if either the voltage to ground is < 1.9 V or the resistance to ground is < 375 . These inputs are considered inactive if the voltage to ground is 11-33 VDC. -
Page 66: Table 5-9 Gtx 3X5/3X5R Discrete Outputs
5.4.4 Discrete Functions Discrete Outputs Table 5-9 GTX 3X5/3X5R Discrete Outputs Unit (335/345/ Pin Name Pin Number Connector 335R/345R) TRANSPONDER FAIL 1 J3251 EXTERNAL SUPPRESSION In/Out J3251 REPLY ACTIVE J3251/J3252 TRANSPONDER FAIL #2 J3251/J3252 ALTITUDE ALERT* J3251/J3252 EQUIPMENT STATUS J3251/J3252 TRAFFIC ALERT 345/345R J3251/J3252... -
Page 67: Table 5-10 Gtx 3X5/3X5R Configurable Output Pins
Table 5-10 GTX 3X5/3X5R Configurable Output Pins Unit (335/345/ Pin Name Pin Number Connector 335R/345R) TRANSPONDER FAIL #1 J3251 CONFIGURABLE DISCRETE #1 In/Out J3251 CONFIGURABLE DISCRETE #2 In/Out J3251 CONFIGURABLE DISCRETE #11 In/Out 345/345R J3252 CONFIGURABLE DISCRETE #12 In/Out 345/345R J3252 Discrete Inputs Table 5-11 GTX 3X5/3X5R Discrete Inputs... -
Page 68: Table 5-12 Gtx 3X5/3X5R Configurable Input Pins
Table 5-12 GTX 3X5/3X5R Configurable Input Pins Unit (335/345/ Pin Name Pin Number Connector 335R/345R) AUDIO INHIBIT #2 J3251 AIR DATA SELECT J3251 SQUAT SWITCH J3251 EXTERNAL IDENT J3251 EXTERNAL STANDBY J3251 EXTERNAL SUPPRESSION I/O In/Out J3251 CONFIGURABLE DISCRETE #1 In/Out J3251 CONFIGURABLE DISCRETE #2... -
Page 69: Table 5-14 Gtx 3X5/3X5R Arinc 429 Connections
5.4.6 ARINC 429 Input/Output Table 5-14 GTX 3X5/3X5R ARINC 429 Connections Unit (335/345/ Pin Name Pin Number Connector 335R/345R) ARINC 429 IN 1A J3251 ARINC 429 IN 1B J3251 ARINC 429 OUT 1A J3251 ARINC 429 OUT 1B J3251 ARINC 429 IN 2A J3251 ARINC 429 IN 2B J3251... -
Page 70: Unit Removal And Reinstallation
6.3.1 GTX 335/345 Panel Mounted Units ................6-8 6.3.2 GTX 3X5R with Standard or GX000 System Rack Mount........6-10 6.3.3 GTX 3X5R with Vertical Mount ................6-12 6.3.4 Garmin Altitude Encoder.................... 6-14 6.4 Transponder Antenna......................6-15 6.1 GTX 330/330D WARNING Ensure that the aircraft power is off before removal or reinstallation of the GTX 330/330D. -
Page 71: Figure 6-1 Gtx 330 Mounting Rack/Connector Assembly
115-00294-00 211-60234-08 (2 PLACES) 211-63234-12 (2 PLACES) 212-00022-00 (1 OR 2 PLACES) 330-00053-01 (BNC) 330-00228-20 CONTAINS 330-00053-02 (TNC) 336-00029-00 (1 OR 2 PLACES) 125-00002-00 NUT SUPPLIED 211-60234-12 WITH 330-00053-XX (2 PLACES) 330-00185-62 CONTAINS 336-00021-00 330-00220-37 125-00056-00 Figure 6-1 GTX 330 Mounting Rack/Connector Assembly 190-00734-11 GTX 33X and GTX 3X5 ADS-B Maintenance Manual Rev. -
Page 72: Gtx 33/33D
6.2 GTX 33/33D WARNING Ensure that the aircraft power is off before removal or reinstallation of the GTX 33/33D. Unplug any auxiliary power supply. This section contains procedures and requirements for removal and installation of equipment installed under STC SA01714WI. After removal and reinstallation, the GTX 33/33D return to service procedures must be performed in accordance with section 9. -
Page 73: Gtx 3X5
6.3 GTX 3X5 This section contains parts, procedures, and requirements for assembly, removal, and reinstallation of GTX 3X5 equipment installed under STC SA01714WI. After removal and reinstallation, the GTX 3X5 return to service procedures must be performed in accordance with section 9. Table 6-1 GTX 3X5 Connector Kit Hardware Description Connector, hi-dense, D-sub, mil crimp 62 ckt... -
Page 74: Figure 6-4 Gtx 3X5 Without Gps Back Plate Assembly (P/N 011-02976-00)
NUT SUPPLIED WITH ITEM 2 Figure 6-4 GTX 3X5 without GPS Back Plate Assembly (P/N 011-02976-00) NUTS SUPPLIED WITH ITEMS 2 & 4 Figure 6-5 GTX 3X5 with GPS Back Plate Assembly (P/N 011-02976-01) Refer to table 6-3 for the list of back plate items for the vertical mounting assembly. Refer to figure 6-6, figure 6-7, and figure 6-8 for the back plate assemblies. -
Page 75: Figure 6-6 Gtx 3X5 Vertical Mount Without Gps, Back Plate Assembly (P/N 011-02976-10)
Table 6-3 Vertical Mount Back Plate Hardware Item Description DCP, connector plate, remote, GTX 3X5, w/secondaries 125-00343-10 Connector, male/female special, BNC 330-00053-01 Washer, shoulder, GNC 400 212-00022-00 Connector, male/female, special, BNC/TNC 330-00053-02 Washer, centering, no float 212-00022-10 Washer, split lock, size 8 212-00018-04 Screw, captive, 8-32, .62", 3/832 hex drv 211-00290-00... -
Page 76: Figure 6-7 Gtx 3X5 Vertical Mount With Gps, Back Plate Assembly (P/N 011-02976-11)
NUTS SUPPLIED WITH ITEMS 2 & 4 Figure 6-7 GTX 3X5 Vertical Mount with GPS, Back Plate Assembly (P/N 011-02976-11) NUT SUPPLIED WITH ITEM 4 Figure 6-8 GTX 3X5 Vertical Mount with TNC XPDR Back Plate Assembly (P/N 011-02976-12) 190-00734-11 GTX 33X and GTX 3X5 ADS-B Maintenance Manual Rev. - Page 77 6.3.1 GTX 335/345 Panel Mounted Units WARNING Ensure that the aircraft power is off before removal or reinstallation of the GTX 3X5. Unplug any auxiliary power supply. This section contains procedures and requirements for removal and reinstallation of the GTX 335/345 panel-mounted units installed under STC SA01714WI.
-
Page 78: Figure 6-9 Gtx 3X5 Mounting Rack/Connector Assembly
Figure 6-9 GTX 3X5 Mounting Rack/Connector Assembly 190-00734-11 GTX 33X and GTX 3X5 ADS-B Maintenance Manual Rev. 6 Page 6-9... - Page 79 6.3.2 GTX 3X5R with Standard or GX000 System Rack Mount WARNING Ensure that the aircraft power is off before removal or reinstallation of the GTX 3X5R. Unplug any auxiliary power supply. This section contains procedures and requirements for removal and installation of GTX 335R/345R equipment installed using a standard remote mount or GX000 system rack mount.
-
Page 80: Figure 6-10 Gtx 3X5R Standard Mounting Rack/Connector Assembly
Figure 6-10 GTX 3X5R Standard Mounting Rack/Connector Assembly Figure 6-11 GTX 3X5R G1000 Mounting Rack/Connector Assembly 190-00734-11 GTX 33X and GTX 3X5 ADS-B Maintenance Manual Rev. 6 Page 6-11... - Page 81 6.3.3 GTX 3X5R with Vertical Mount CAUTION Before removal or reinstallation of the GTX 3X5R, ensure the aircraft power is off. Unplug any auxiliary power supply. This section contains procedures for removal and installation of the GTX 335R/345R equipment installed using a vertical mount.
-
Page 82: Figure 6-12 Gtx 3X5R Vertical Mounting Rack/Connector Assembly
UNIT: 011-03303-40 INSTALL RACK: 011-03762-00 BACK PLATE ASSEMBLY: 011-02976-11 CONNECTOR KIT: 011-02977-01 CONFIG MODULE: 011-00979-03 Figure 6-12 GTX 3X5R Vertical Mounting Rack/Connector Assembly 190-00734-11 GTX 33X and GTX 3X5 ADS-B Maintenance Manual Rev. 6 Page 6-13... - Page 83 Ensure that the aircraft power is off before removal or reinstallation of the GTX 3X5/3X5R. Unplug any auxiliary power supply. This section contains procedures and requirements for removal and installation of the Garmin altitude encoder equipment installed under STC SA01714WI. After removal and reinstallation, the GTX 3X5/3X5R return to service procedures must be performed in accordance with section 9.
-
Page 84: Transponder Antenna
Table 6-4 Garmin Altitude Encoder Kit - P/N 011-03080-00 Description Sub-assembly, altitude encoder, unit only 011-03080-01 Screw, 4-40 x .250, PHP, SS/P, w/nyl 211-60234-08 Screw, 4-40 x .312, FLHP 100, SS/P, nyl 211-63234-09 Harness, 4 cond, Garmin altitude encoder 325-00421-00... -
Page 85: Software
7 SOFTWARE 7.1 Software Check........................7-1 7.2 GTX 33/330 Software Update .................... 7-6 7.2.1 Download Procedures ....................7-7 7.2.2 GTX 33/330 Software Loading ..................7-7 7.3 GTX 3X5/3X5R Software Update..................7-8 7.1 Software Check If software is loaded during maintenance, conduct a final software review. NOTE It is essential that the software version is correct. -
Page 86: Figure 7-2 Gtx 330 Product Data Page
3. Press either the 8 key or the 9 key until you see the SYS software version screen. 4. Verify the version number matches the approved version listed in the Equipment List. Refer to figure 7-2 for details. Figure 7-2 GTX 330 Product Data Page 190-00734-11 GTX 33X and GTX 3X5 ADS-B Maintenance Manual Rev. -
Page 87: Figure 7-3 Gtx 3X5 Start-Up Screen
GTX 3X5 Software Version Check 1. Start the GTX 3X5 in normal mode. 2. Observe the start-up screen until you see “PRESS ENT FOR PRODUCT DATA.” Refer to figure 7-3 for details. Figure 7-3 GTX 3X5 Start-Up Screen 3. Press the ENT key to navigate to the software version screen. 4. -
Page 88: Figure 7-5 Gtn 6Xx/7Xx System Page
GTX 33/33D/3X5R Software Version Check (GTN 6XX/7XX) NOTE The following procedures provide an overview to verify the software version of the GTX 33/33D/3X5R when interfaced with the GTN 6XX/7XX. Refer to GTN 6XX/7XX Part 23 AML STC Installation Manual for additional details. 1. -
Page 89: Figure 7-6 Gx000 System Status Page
GTX 3X5R Software Version Check (GX000) NOTE The following procedures provide an overview to verify the software version of the GTX 3X5R when interfaced with the GX000. Refer to the applicable G1000 Series Pilot Guides or Installation Manual for additional details. 1. -
Page 90: Gtx 33/330 Software Update
The GTX 330 software can be updated in Configuration mode as well as in Test mode. Updating software in Configuration mode does not require the TEST MODE SELECT switch. However, the TEST MODE SELECT switch is required for the GTX 33 series. Refer to figure 7-7 for software update connections. GARMIN GTX 330/33 P3301 TRANSPONDER... - Page 91 CAUTION If the unit is removed from the aircraft and operated, connect J3302 (GTX 33/330/33D/330D) and J3303 (GTX 330D/33D) to a 50 Ω 5 watt load. The GTX transmits Mode S acquisition squitter pulses once per second whether interrogations are received or not.
-
Page 92: Gtx 3X5/3X5R Software Update
Dealer Resource Center. Software may be loaded by performing the following steps on the Software Upload page. 1. Download the latest GTX 3X5/3X5R software from the Garmin Dealer Resource Center. 2. Under “Step 1 - Select a File,” select the Browse key and locate the Boot Block software file containing the GTX 3X5/3X5R software previously downloaded. -
Page 93: Figure 7-8 Gtx 3X5 Install Tool Software Upload Page
Figure 7-8 GTX 3X5 Install Tool Software Upload Page 190-00734-11 GTX 33X and GTX 3X5 ADS-B Maintenance Manual Rev. 6 Page 7-9... -
Page 94: System Configuration And Checkout
8 SYSTEM CONFIGURATION AND CHECKOUT 8.1 Overview..........................8-1 8.2 System Checkout ........................ 8-1 8.3 GTX 33/330 Configuration....................8-1 8.3.1 GTX 330/330D Configuration..................8-2 8.3.2 GTX 33/33D Configuration (GTN 6XX/7XX) ............8-2 8.3.3 GTX 33/33D Configuration (GNS 480) ............... 8-2 8.4 GTX 3X5 Configuration..................... 8-2 8.4.1 GTX 3X5 Configuration .................... -
Page 95: Gtx 3X5 Configuration
8.3.1 GTX 330/330D Configuration Hold down the FUNC key and press the ON key to access the configuration pages. The FUNC key sequences forward through the configuration pages. The START/STOP key reverses through the pages, stopping at the Menu page. The CRSR key highlights selectable fields on each page. When a field is highlighted, the 0 –... -
Page 96: Gtx Airborne Test Mode
8.5 GTX Airborne Test Mode Operation of the GTX 330/330D and GTX 3X5 is accomplished using the faceplate of the unit. Refer to section 3.1 and section 3.2 for details. The GTX 33/33D and GTX 3X5R are controlled using the GTN 6XX/7XX or GNS 480. -
Page 97: Regulatory Test
5. After tests are completed, reconfigure the transponder and the GNS 480 back to their original settings. 8.5.2 GTX 3X5 Airborne Mode The transponder must be placed in an airborne state to reply to any Mode A or Mode C interrogations. The GTX uses advanced Air/Ground logic to determine the state of the transponder. -
Page 98: Ads-B Out Test
E paragraph C must be completed. For software updates, only a basic system functional test is required to verify normal transponder operation and ADS-B system performance is functional. These regulatory tests require the use of a Mode S transponder ramp tester such as an Aeroflex IFR-6000 or TIC TR-220. -
Page 99: Gtx 3X5 With Tcas System Test (Gx000 Only)
9. If dual GPS sources are connected to the GTX, repeat steps 5 - 8 for the other GPS source. 10. Revert the GTX squat switch back to its previous configuration as follows. a. If a connected squat switch was defeated in step 4, then place the connected switch back to the on-ground position. - Page 100 190-00734-11 GTX 33X and GTX 3X5 ADS-B Maintenance Manual Rev. 6 Page 8-7...
- Page 101 190-00734-11 GTX 33X and GTX 3X5 ADS-B Maintenance Manual Rev. 6 Page 8-8...
-
Page 102: System Return To Service Procedure
9 SYSTEM RETURN TO SERVICE PROCEDURE 9.1 Maintenance Records......................9-1 After removing and re-installing or replacing the GTX 33X or GTX 3X5, perform the system checkout procedures in section 8.2. 9.1 Maintenance Records After conducting the required return-to-service procedures in accordance with this document, the aircraft may be returned to service. -
Page 103: Appendix Ainstallation Specific Information
APPENDIX A INSTALLATION SPECIFIC INFORMATION electronic fillable form is available. Acrobat Reader 8.0 or later is necessary to view and fill out the form. You can download Acrobat Reader by visiting www.adobe.com. 190-00734-11 GTX 33X and GTX 3X5 ADS-B Maintenance Manual Rev. - Page 104 AIRCRAFT SPECIFIC INFORMATION GENE RAL INFORMATION Date: AIRCRAFT AIRCRAFT MAKE: AIRCRAFT MODEL: AIRCRAFT SERIAL #: AIRCRAFT REG. #: HEX ADDRESS: GTX #1 Unit P/N: Mod Level: Unit Model: Serial #: GTX #2 [N/A] Unit P/N: Mod Level: Unit Model: Serial #: 190-00734-11 GTX 33X and GTX 3X5 ADS-B Maintenance Manual Rev.
- Page 105 ELECTRICAL LOAD ANALYSIS ITEMS REMOVED FROM AIRCRAFT ELECTRICAL LOAD (A) [1] COMMENT Subtotal: ITEMS ADDED TO AIRCRAFT ELECTRICAL LOAD (A) [1] COMMENT Subtotal Net Change in Bus Load: [1] Use typical current draw when performing this calculation. 190-00734-11 GTX 33X and GTX 3X5 ADS-B Maintenance Manual Rev.
- Page 106 EQUIPMENT INTERFACED TO THE GTX Document the equipment which is interfaced to the GTX. Use the following guidance when filling out the information. Model(s): Write in the model number or numbers of the equipment which is interfaced to the GTX. GTX Port Numbers: When applicable, write in the GTX port number or numbers used for the interface.
- Page 107 GTX #2 INTERFACED EQUIPMENT Audio Panel Model: GTX Port Number: Display Model: GTX Port Number: Altitude Encoder Model: GTX Port Number: GPS #1 Model: GTX Port Number: GPS #2 Model: GTX Port Number: Heading Model: GTX Port Number: Air Data Model: GTX Port Number: Model:...
- Page 108 Wire Routing Single Engine The following diagram depicts approximate location of all LRUs along with the wire routing for the GTX throughout the aircraft structure for a single-engine aircraft. 190-00734-11 GTX 33X and GTX 3X5 ADS-B Maintenance Manual Rev. 6 Page A-6...
- Page 109 Twin Engine The following diagram depicts approximate location of all LRUs along with the wire routing for the GTX throughout the aircraft structure for a twin-engine aircraft. 190-00734-11 GTX 33X and GTX 3X5 ADS-B Maintenance Manual Rev. 6 Page A-7...
- Page 110 GTX 33X POST-INSTALLATION CONFIGURATION LOG NOTE This page applies to both GTX 330 and GTX 33 units. Post-installation configuration logs specific to each unit are included immediately following this page and must be filled out in addition to this page for your specific installation.
- Page 111 GTX 3X5 POST-INSTALLATION CONFIGURATION LOG NOTE This page applies to both GTX 335/335R and GTX 345/345R units. Post-installation configuration logs specific to each unit are included immediately following this page and must be filled out in addition to this page for your specific installation. RS-232 Configuration Transponder #1 Transponder #2...
- Page 112 DISCRETE INPUT OUTPUT FUNCTION FUNCTION † † TIS-A SELECT TRANSPONDER FAIL #1 † † ALTITUDE DATA SELECT EXTERNAL SUPRESSION I/O † † AUDIO INHIBIT #1 REPLY ACTIVE † † AUDIO INHIBIT #2 TRANSPONDER FAIL #2 † † AIR DATA SELECT ALTITUDE ALERT ANNUNCIATE †...
- Page 113 GTX 330 POST-INSTALLATION CONFIGURATION LOG NOTE A post- installation configuration log is available for the GTX 33 immediately following this configuration log. INSTALLATION SETTINGS (All settings in this section must be the same for each installed transponder) Voice Setting Volume Setting: Setting: Message...
- Page 114 GTX 330 POST-INSTALLATION CONFIGURATION LOG Transponder # VS Rate Format Setting: Setting: VFR ID Altitude Alert Deviation Setting: Setting: Squat Switch Temperature Sensor Installed/Units Setting: Setting: Sense US Tail Setting: Setting: Delay Time Hex Address Setting: Setting: Auto Flight Timer Mode S Flight ID Setting: Setting:...
- Page 115 GTX 330 POST-INSTALLATION CONFIGURATION LOG Transponder #2 VS Rate Format Setting: Setting: VFR ID Altitude Alert Deviation Setting: Setting: Squat Switch Temperature Sensor Installed/Units Setting: Setting: Sense US Tail Setting: Setting: Delay Time Hex Address Setting: Setting: Auto Flight Timer Mode S Flight ID Setting: Setting:...
- Page 116 GTX 33 POST-INSTALLATION CONFIGURATION LOG INSTALLATION SETTINGS (All settings on this page will be the same for each installed transponder) VFR Button Code Flight ID Setting: Setting: Aircraft Weight Aircraft Length Setting: Setting: Auto Standby Delay Aircraft Width Setting: Setting: Altitude Climb Rate for Airborne Transition Enhanced Surveillance Setting:...
- Page 117 GTX 335/335R POST-INSTALLATION CONFIGURATION LOG NOTE A post- installation configuration log is available for the GTX 345/345R following this configuration log. INSTALLATION SETTINGS (All settings in this section must be the same for each installed transponder) AUDIO Audio Output: ____________________________ Altitude Alert: ____________________________ Volume: ________________________________ Timer Expired Alert:________________________...
- Page 118 GTX 345/345R POST-INSTALLATION CONFIGURATION LOG INSTALLATION SETTINGS (All settings in this section must be the same for each installed transponder) AUDIO Audio Output: ____________________________ Altitude Alert: ____________________________ Volume: ________________________________ Timer Expired Alert:________________________ Voice: _________________________________ Traffic Alert: _____________________________ Test Audio: ______________________________ UNIT FIS-B Processing: _________________________ Altitude Units: ____________________________...
- Page 119 AIRCRAFT WIRING DIAGRAMS Attach the aircraft wiring diagrams showing the equipment installed by this STC or a markup of the interconnect diagrams from the STC installation manual detailing which equipment was installed and how it was connected. 190-00734-11 GTX 33X and GTX 3X5 ADS-B Maintenance Manual Rev.
-
Page 120: Appendix Bspecial Bonding Procedures
APPENDIX B SPECIAL BONDING PROCEDURES Considerations for Untreated or Bare Dissimilar Metals..............B-1 Preparation of Aluminum Surfaces....................B-4 Composite Aircraft .......................... B-4 Tube and Fabric Aircraft........................B-9 Bonding Jumper..........................B-12 Refer to SAE ARP1870 section 5 when surface preparation is required to achieve electrical bond. B.1 Considerations for Untreated or Bare Dissimilar Metals The correct material finish is important when mating untreated or bare dissimilar metals. -
Page 121: Table B-1 Ground Plane Definitions And Ground Path Resistance Requirements
Table B-1 Ground Plane Definitions and Ground Path Resistance Requirements Maximum Resistance Between GTX Chassis and Aircraft Type/Model Ground Reference Notes Ground Reference (mΩ) Periodic Reconditioned Metal airframe Nearby metal structure 10.0 Tube and fabric airframe Nearby metal structure 10.0 Composite VFR-only Models Aermacchi S.211A... - Page 122 Maximum Resistance Between GTX Chassis and Aircraft Type/Model Ground Reference Notes Ground Reference (mΩ) Periodic Reconditioned Triton A500 Local grounded structure 10.0 [1] Diamond DA 40 with Diamond OSB 40-004/3 incorporated, or aircraft with similar factory- installed lightning protection supporting IFR operation. [2] IFR models must use values of 10.0 and 5.0 for bonding tests, and use aircraft lightning ground per the aircraft SRM or other manufacturer-approved data, as ground reference instead of the instrument panel.
-
Page 123: Preparation Of Aluminum Surfaces
B.2 Preparation of Aluminum Surfaces The following general procedure is recommended to prepare an aluminum surface for proper electrical bonding. 1. Clean grounding location with solvent. 2. Remove non-conductive films or coatings from the grounding location. 3. Apply a chemical conversion coat such as Alodine 1200 to the bare metal. 4. -
Page 124: Figure B-4 Fiberglass Insulation For Carbon Material
When replacing damaged aluminum foil, the following procedure is recommended for bonding on composite structures. 1. The aluminum tape must be isolated from carbon composite material. Secure a thin layer of fiberglass cloth to the carbon fiber with fiberglass resin as shown in figure B-4. STRIP OF LIGHT FIBERGLASS CLOTH SUCH AS 1080-50 (1.45 OZ/SQ. -
Page 125: Figure B-5 Aluminum Tape Joint
Table B-2 Composite Airframe Bonding Hardware Item Number Description Tinned copper flat braid, 3/4”, QQB575F36T781 Tinned copper tubular braid, 7/16-inch, QQB575R30T437 Terminal lug, 5/16-inch, uninsulated, MS20659-131 Bolt, 5/16-inch, AN5-XA Lock washer, 5/16-inch, NASM35338-45 Flat washer, 5/16-inch, NAS1149F0563P Flat washer, 0.063-inch thick, NASM970-5 (AN970-5) Locknut, 5/16-inch, AN363-535 Figure B-5 Aluminum Tape Joint 190-00734-11... -
Page 126: Figure B-6 Aluminum Tape Ground Termination
SECONDARY STRUCTURE 0.063" ALUMINUM PLATE GROUND STUD-COMMON TO INSTRUMENT PANEL ALUMINUM BONDING STRAP TAPE REQUIRED IF SECONDARY RUCTURE IS NOT OTHERWISE BONDED TO THE INSTRUMENT 3 BOLTS WITH PANEL LOCKNUTS AND WASHERS VIEW A-A (NOT TO SCALE) ALUMINUM TAPE 0.063" ALUMINUM PLATE SECONDARY STRUCTURE Figure B-6 Aluminum Tape Ground Termination 190-00734-11... -
Page 127: Figure B-7 Remote Gtx Aluminum Tape Installation
GTX 33/33D AIRCRAFT SECONDARY STRUCTURE (E.G. EQUIPMENT SHELF) 7:1 LENGTH-TO-WIDTH RATIO MEASUREMENT BEGINS AT LAST ALUMINUM PLATE POINT OF ELECTRICAL CONTACT WITH MOUNTING RACK ALUMINUM TAPE GTX 33/33D ALUMINUM PLATE AIRCRAFT ALUMINUM TAPE STRUCTURE NOTES AIRCRAFT SECONDARY STRUCTURE, SUCH AS AN EQUIPMENT SHELF MUST HAVE CLEARANCE ON THE OPPOSITE SIDE FOR HARDWARE NEEDED TO INSTALL THE GTX 33/33D/3X5R TO THE AIRCRAFT STRUCTURE. -
Page 128: Tube And Fabric Aircraft
B.4 Tube and Fabric Aircraft If it is necessary to replace the existing AN742 clamp, install a new AN742 clamp in accordance with AC 43.13-1B Chapter 11, Section 11, Clamping, and Section 15, Grounding and Bonding and the following criteria. Refer to table B-3 for hardware. -
Page 129: Table B-3 Tube And Fabric Airframe Bonding Hardware
Table B-3 Tube and Fabric Airframe Bonding Hardware Refer to Conductive Clamp Assembly figure B-8 Bonding clamp, AN742-XX (Dash number determined by tube diameter) Bolt, #10, AN3-XA Flat washer, NASM970-3 (AN970-3) Locknut #10, AN363-1032 190-00734-11 GTX 33X and GTX 3X5 ADS-B Maintenance Manual Rev. -
Page 130: Figure B-8 Electrical Bonding Using Conductive Clamp
NOTES USE WASHER AND NUTS IDENTIFIED IN TABLE . IF USING AN742-6 THROUGH AN742-10 CLAMPS, TWO BONDING CLAMP ASSEMBLIES MUST BE USED. IF USING AN742-11 OR LARGER CLAMPS, ONLY ONE BONDING CLAMP ASSEMBLY IS REQUIRED. INSTALL BONDING CLAMP UNDER FABRICATED METAL PLATE. ENSURE MAXIMUM CONTACT AREA BETWEEN CLAMP AND FABRICATED METAL PLATE. -
Page 131: Bonding Jumper
B.5 Bonding Jumper To replace any bonding strap from vibration-isolated instrument panel grounding to metallic structure, use the following criteria. • The bonding strap length must not exceed six inches in length • The bonding strap must not loop back on itself •... -
Page 132: Figure B-9 Bonding Strap
Table B-4 Airframe Bonding Hardware Refer to Description figure B-9 Tinned copper flat braid, 3/4-inch, QQB575F36T781 Tinned copper tubular braid, 7/16”, QQB575R30T437 Terminal lug, 5/16-inch, uninsulated, MS20659-131 Bolt, 5/16-inch, AN5-XA Lock washer, 5/16-inch, NASM35338-45 Flat washer, 5/16-inch, NAS1149F0563P Flat washer, 0.063-inch thick, NASM970-5 (AN970-5) Locknut, 5/16-inch, AN363-524 INSTRUMENT PANEL AIRFRAME GROUND...
Need help?
Do you have a question about the GTX 330D and is the answer not in the manual?
Questions and answers