Table of Contents
Advertisement
Quick Links
Advertisement
Chapters
Table of Contents

Related Manuals for Wetif PMG84


Summary of Contents for Wetif PMG84
- Page 1 User Manual PMG84 WETIF Industrie EDV Telefon DE +49 8142 448976-0 Senserstraße 3 Telefon AT +43 664 28 68 223 D - 82140 Olching info@wetif.com www.wetif.com Techn. Änderungen ohne Vorankündigung und Irrtum vorbehalten. Alle Rechte geschützt.
- Page 2 Disclaimer: WETIF makes no representations or warranties with respect to the contents hereof and specifically disclaim any implied warranties of merchantability or fitness for any particular purpose. WETIF is not liable for technical and editorial error for this guide. WETIF reserves the right to revise or make changes to this publication without notice or obligation of WETIF to notify any person of such revision or changes.
- Page 3 Power Cord Requirements The power cord you received with this computer conforms to local specifications for use in the country where you purchased it. Power cord use in other countries may require an additional adapter and/or separate power cord. For additional information on local power requirements, contact an authorized dealer, reseller, or service provider.
- Page 4 Battery (Lithium-Ion) NOTE: Refer to following hazard statement within the service and operating documentation or on the adjacent label to the battery. 1. English CAUTION: DANGER OF EXPLOSION IF BATTERY IS INCORRECTLY INSTALLED. REPLACE ONLY WITH SAME OR EQUIVALENT TYPE RECOMMENDED BY THE MANUFACTURER.
- Page 5 FCC Statement This equipment has been tested and found to comply with the limits for a Class B digital device, pursuant to part 15 of the FCC Rules. These limits are designed to provide reasonable protection against harmful interference in a residential installation.
-
Page 6: Table Of Contents
Table of Contents ........... EFORE SING OMPUTER CHAPTER 1................................2 ETTING TARTED Unpacking the Product ..............3 Packing List ..................3 Power Supply .................. 4 Using the Battery ..................4 The External Battery Charger ..............5 Using the AC adapter................6 The Back Stand ................7 The Stylus Pen ................ - Page 7 ............31 PECIFICATIONS OFTWARE Specifications and Standard Features .......... 31 Warranty ..................34 Software ..................35 Using the WETIF Onscreen Keyboard ...........35 Using the WLAN Utility, Winbond Wireless Utility .........38 Using the Bluetooth Utility, BlueSoleil ..........40 Enabling Bluetooth Devices ..............43 Using Handwriting Recognition, Pensoft Pro ........45 Using the Smart Panel to Calibrate and Rotate the Screen ....46...
-
Page 9: Before Using Your Computer
Congratulations on your purchase of this WETIF PMG84. You will soon be in command of the worlds most lightweight, efficient and secure solution for managing all of your technology and mission critical data. Scale the computer and streamline the costs of day to day business operations and multimedia demands. - Page 10 Chapter Preview: • Unpacking and setting up the Product • Packing list • Power Supply Using the Battery Using the AC Adapter • The Back Stand • The Stylus Pen...
-
Page 11: Getting Started
CHAPTER 1 - Getting Started Unpacking the Product Before unpacking the product, prepare a suitable workspace for your computer. Make sure the workspace is level, stable and near an electrical outlet. 1. Open the box and remove the contents preserving the integrity of the box as you may need it and all of the packing materials for future shipping. -
Page 12: Power Supply
Power Supply The computer can be powered using either the built in battery or the AC Power Adapter plugged into any grounded AC power outlet. Using the Battery The primary source of power for the computer is a Lithium-Ion battery pack. The battery pack will first need to be installed on the underside of the computer. -
Page 13: The External Battery Charger
CHAPTER 1 - Getting Started 3. Turn the computer on using the power switch or begin recharging using the AC Adapter cord. Removing/Replacing the Battery: 2. Push the slide while gently pushing the battery away from the battery bay. The battery will release from the computer and allow you to remove 3. -
Page 14: Using The Ac Adapter
Using the AC Adapter When connecting the computer to external power: 1. Plug the DC power cord into the DC jack on the computer. 2. Plug the 3-prong AC power adapter cord into a grounded electrical outlet. Use the AC adapter to power the computer or recharge the battery when it is low. -
Page 15: The Back Stand
CHAPTER 1 - Getting Started The Back Stand Fig. 1 Fig. 2 Opening the Back Stand 1. Unfold the back stand (refer to fig. 2). 2. Place the computer on a flat and stable surface carefully leaning it onto the stand, ensuring that the back stand is securely in place. -
Page 16: Performing Mouse Clicks And Other Procedures With The Stylus Pen
Performing Mouse Clicks and Other Procedures with the Stylus Pen To select an item or open a menu on the screen as you usually left click on an external mouse: Tap the item or menu with the tip of the stylus pen To double-click an item on the screen as you normally double click an external mouse: Tap the item twice with the tip of the stylus pen. -
Page 17: For Optimal Performance From The Stylus Pen
CHAPTER 1 - Getting Started For Optimal Performance from the Stylus Pen • Hold the stylus pen in the same way that you would hold a pen or pencil when writing on paper. • Hold the computer securely when mobile and using the stylus pen. •... -
Page 18: Chapter 2
This chapter contains illustrations, highlighting each external component and its respective functions. Chapter Preview: • Front view of the Computer • Right side view of the Computer • Left side view of the Computer • Top view of the Computer •... -
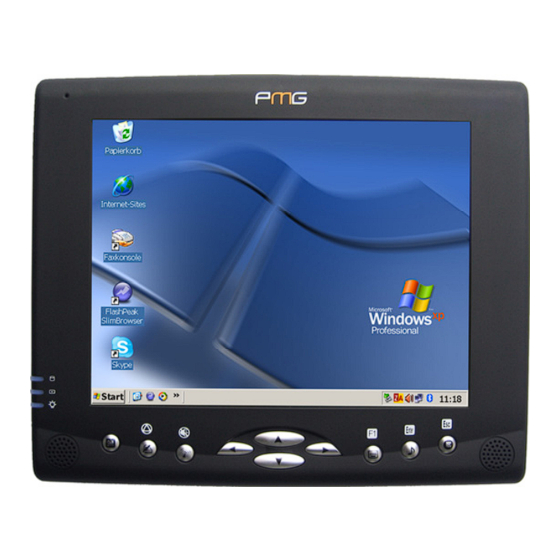
Page 19: Front View Of The Computer
8.4 inch TFT SVGA LCD Display with Touch Screen Control Panel: Data can be entered the computer module using the stylus pen, a USB/wireless keyboard or the installed WETIF Onscreen Keyboard. For use of the Onscreen Keyboard see chapter 4. Data can also be entered via a USB keyboard plugged into the USB port on the left side of the computer. - Page 20 Front Panel Buttons: The above 10 quick access buttons are used for navigating applications in the Microsoft Windows XP environment (or relevant OS) and to setup the System BIOS Utility in DOS mode (alternative function). • The Quick Reference table below illustrates the Button, its alternative Function, and a brief Function Description while in the System BIOS Utility in DOS Mode Button...
- Page 21 CHAPTER 2 – System Overview Level Button Label Brief Description of Function Rotate Key to Next Level Invokes Handwriting Recognition Invokes Wireless Utility Left Arrow <← > Up Arrow <↑ > Down Arrow <↓ > <← > Right Arrow Starts the Onscreen Keyboard <Enter>...
-
Page 22: Right Side View Of The Computer
Internal Dual Speakers: The computer’s built-in dual speakers support audio applications for all media software. Volume and equalizer control can be adjusted via the OS or additional multimedia application software. Sound will mute when headphones are detected. CMOS Camera (Optional on models P8N-CAM or P8N-SRCAM): The build-in 1.3M pixels CMOS camera module supports auto reverse function. -
Page 23: Left Side View Of The Computer
CHAPTER 2 – System Overview Left Side View of the Computer 21. Power Switch: This switch powers the computer ON and OFF. In Windows, use of the Power Switch will behave as defined in the Power Options in the Control Panel. -
Page 24: Top View Of The Computer
Top View of the Computer 31. Brightness Tuner: This slide adjusts the brightness for the LCD display screen. 32. External Microphone Jack: For recording or voice-control functions, an additional microphone plugs in here. 33. External Headphone (out) Jack: Connect devices such as headphones or speakers to this jack. 34. -
Page 25: Bottom View Of The Computer
CHAPTER 2 – System Overview Bottom View of the Computer 41. Battery Pack: A 6-cell 4400mAh removable Lithium-Ion battery pack comes standard with the computer. Each cell comes equipped with short circuit, over-charge, over-discharge and over-current protection. Rear View and Built In Back Stand Opening the Built In Stand: To use the built in stand to prop up the computer, pull it away from the computer housing. -
Page 26: Chapter 3
& & Chapter Preview: • Caring for your Computer • Restoring the Operating System • The System BIOS Utility • Adjusting the Resolutions for the Computer’s Display and an External Display • Enabling The IrDA Function... -
Page 27: Caring For Your Computer
CHAPTER 3 – Protecting & Maintaining Caring for Your Computer To guarantee a long life for the computer and to ensure it functions optimally, pay particular attention to the following recommended maintenance guidelines. Routine Care Follow these guidelines to keep the computer working properly: •... -
Page 28: Caring For The Ac Adapter
• To clean the exterior of the device, wipe the screen and the housing with the supplied, washable, WETIF 3M cleaning cloth. Never use soap or other cleaning products on the LCD screen. It may discolor the outer... -
Page 29: Restoring The Operating System
3. Place the enclosed WETIF restore key in the USB slot. 4. Turn the system on. 5. The system will now boot from this WETIF restore key and come with a notification stating that all software and data will be lost by continuing. - Page 30 20 minutes. All software and data on your hard disk will be lost. 8. When the restore is running you can remove the WETIF restore key. (We advise to do it at 20% of the restore) 9. After your computer has rebooted (this happens automatically) your tablet will have the default Operating System as pre-installed by WETIF.
-
Page 31: The System Bios Utility
CHAPTER 3 – Protecting & Maintaining The System BIOS Utility AWARD BIOS The computer operates using AWARD Basic Input / Output System (BIOS). Individual explanations are available on the system BIOS screen. BIOS Setup Utility The Setup Utility enables you to change the most important system settings, adjusting the system’s internal clock and the preferred boot device, etc. -
Page 32: Connecting To An Infrared Device
Connecting an Infrared Device The infrared port, a small, semi-circular lens located on the front of the computer provides wireless, serial communication between the computer and other infrared devices such as printers or other computers. Using the infrared port Make sure the infrared ports of the computer and the other device lie in a straight line. -
Page 33: Connecting To A Local Area Network (Lan)
CHAPTER 3 – Protecting & Maintaining Connecting to a Local Area Network (LAN) Users can connect to local area networks (LANs). LANs give users access to network resources, such as printers and file servers on the corporate network, and possibly to the Internet. To connect to a LAN: Check that the existing LAN supports Ethernet 10Base-T (10Mbps) or 100 Base-TX (100Mbps) connections. -
Page 34: Using The Modem
Using the Modem Users can connect the computer to a telephone line and communicate throughout the world. Users can explore the Internet, send and receive e-mail messages, and use the computer to send and receive faxes. For best performance, users can connect to any Internet Service Provider (ISP) or modem network that has V.90 or V.92 interoperable modems. - Page 35 CHAPTER 3 – Protecting & Maintaining To change the modem setting The modem is already set up to be compatible with telephone systems and modems in most area. However, in some situations, users may have to change modem settings to match local conditions. Control Panel: Open Phone and Modem Options in Control Panel to change many modem settings.
-
Page 36: Changing The Video Resolution Of The Computer
Adjusting the Computer’s and External Displays’ Resolution Changing the Video Resolution of the Computer 1. Choose one of the two options to open the Display Properties dialog box: 1.1. Click the right button of the mouse on the desktop and select Properties from the menu. -
Page 37: Chapter 4
& & Chapter Preview: • Specifications and Standard Features • Warranty • Software... -
Page 38: Specifications And Standard Features
Specifications and Standard Features Processor VIA C7-M Processor (1-GHz, Ultra Low Power Consumption, Ultra Low Heat) Chipset South Bridge VIA VT8237R+ and North Bridge VIA VN800 Operating System ® ® Microsoft Windows XP Professional Edition System BIOS AWARD BIOS Memory 256MB DDR II DRAM 200 pin (533MHz) Factory Option: 512MB or 1GB Display... -
Page 39: S Pecifications & S Oftware
CHAPTER 4 – Specifications & Software Communication ♦ 10/100Mbps Base-T Ethernet LAN ♦ High speed 56Kbps V.92 Fax/Modem MDC module Wireless Connectivity ® ♦ Wireless LAN : IEEE 802.11g OFDM with a Wi-Fi compliant internal antenna, operates at data rates up to 54Mbps and transmits power up to 15dBm. -
Page 40: Warranty
Interfaces RJ45 Port Ethernet LAN RJ11 Port 56Kbps V.92 Fax/Modem PCMCIA Slot Type II with 32 bit Card Bus 3x USB 2.0 Ports Series A Connectors FIR IrDA (infra-red) Port SIR, 115.2Kbps External Microphone In Port 2.5mm Receptacle External Headphone/Line-out Port 2.5mm Receptacle Extension Port VGA/Monitor... - Page 41 EasyBook is defect, damaged or requires service. Keep your WETIF Warranty booklet in a safe place and do not destroy or lose this document as it contains important information for support and service. Have the booklet at hand when contacting WETIF for support or service.
-
Page 42: Software
Keyboard installed. This keyboard provides many functions to easy the use of touch screen input possibilities. Typing Typing on the WETIF Onscreen Keyboard is almost the same as typing on a conventional keyboard. However, since touch screens, mice, digitizers etc. can only detect a single point at a time, combination keys should be typed sequentially. - Page 43 CHAPTER 4 – Specifications & Software Control Keys Close this board (closing the main board closes all boards) Minimize this board Dock the main board Options Window Help Application keys (volume applications) control, launching Function keys F1 ~ F12 Numeric keys Boards can be closed by either clicking the close button, the assigned hot key or by clicking the key pad button again.
- Page 44 Control Window Select another color scheme, change sound and see the about information by pressing the control button. Further developments WETIF will keep developing the Onscreen Keyboard for more and improved performance and functions. Check our website regularly for new updates.
-
Page 45: Using The Wlan Utility, Winbond Wireless Utility
CHAPTER 4 – Specifications & Software Using the WLAN Utility: Winbond Wireless Utility WLAN Utility allows the computer to view available network resources, such as printers and file servers on the corporate network, and possibly to the Internet. When launching WLAN Utility from the front panel hot key or the relevant icon in the Windows system tray, the following panel will appear: Site Survey SSID : The Service Set Identifier, also known as the Network Name, must... - Page 46 Network Mode: “Infrastructure” or “Ad-hoc” mode. Authentication : “Unknown”, “Open System”, “Shared-Key”, “Auto Switch” or “WPA-PSK” mode. Encryption: “None” or “WEP”. Contact the network administrator for network information. Status Users can select an available network from the Site Survey Panel, then click Status for the network status and information.
-
Page 47: Using The Bluetooth Utility, Bluesoleil Tm
CHAPTER 4 – Specifications & Software Using the Bluetooth Utility: BlueSoleil BlueSoleil allows the computer to wirelessly access a variety of Bluetooth enabled digital devices, such as cameras, mobile phones, headsets, printers, and GPS receivers. Users can also create networks and exchange data with other Bluetooth enabled computers or PDAs. - Page 48 My Bluetooth Menu Bluetooth Device Discovery Search for other Bluetooth enabled devices within range. Bluetooth Service Discovery Browse for relevant services of the selected remote device. Security Configure security settings for the local device. Device Properties Configure properties for the local device. My Services Menu Start Service Begin the selected local Bluetooth service.
- Page 49 CHAPTER 4 – Specifications & Software Unplug HID Remove Human Interface Devices from BlueSoleil. Note: For the connected HID, BlueSoleil will reconnect in the instance of connection loss, except however, the unplugged HID. My Bluetooth Device Recommended for advanced users only. Help Menu Contents and Index F1 Access BlueSoleil Help Online.
-
Page 50: Enabling Bluetooth Devices
Enable Bluetooth Devices Step 1. Press the Bluetooth Setting Button of the Device. Step 2. Select My Bluetooth and scroll down to Bluetooth Device Discovery to find out all your available Bluetooth devices. Step 3. BlueSoliel will display all available devices on the screen. Right-click the corresponding remote device icon and select Pair Device from the menu. - Page 51 CHAPTER 4 – Specifications & Software Step 5. Double-click the remote device icon and select Connect and then Bluetooth Human Interface Device Service from the menu. Be sure the Bluetooth Setting Button on the Device is active, if not, retry. Step 6.
-
Page 52: Using Handwriting Recognition, Pensoft Pro
Using Handwriting Recognition: Pensoft Pro (Optional) Select Start Menu ->All Programs -> Pensoft Pro -> Handwriting Recognition to launch the program. The following will appear: Toolbar Configures the system. Displays , and changes to Handwriting Recognition Mode Returns to the main toolbar and changes to English Words Mode Toggles between mouse and pen function. -
Page 53: Using The Smart Panel To Calibrate And Rotate The Screen
CHAPTER 4 – Specifications & Software Using the Smart Panel to Calibrate and Rotate the Screen Select the icon in the Windows system tray or Start Menu -> All Programs -> Hot Key & Smart Panel Utilities -> Hot Key & Smart Panel Utilities to launch the program. - Page 54 Rotates the screen 90 counter clockwise. Rotates the screen 90 clockwise. Rotates the screen 180 degrees. The First Installation The following panel will appear if the user installs the software setup procedure oneself. Users have to install Microsoft .NET Framework before the first installation of Hot Key &...
-
Page 55: Using The Front Panel Hot Key Utility
CHAPTER 4 – Specifications & Software Using the Front Panel Hot Key Utility Select the icon in the Windows system tray or Start Menu -> All Programs -> Hot Key & Smart Panel Utilities -> Hot Key & Smart Panel Utilities to launch the program. - Page 56 Primary Level Functions : Switches secondary level functions Handwriting Recognition Wireless LAN Utility On-Screen Keyboard Input <Enter> Record Audio (Start / Stop) Secondary Level Functions : Switches to third level functions System Warm Reboot (<Ctrl> + <Alt> + <Delete>) Disables / Enables Speakers Function Key <F1>...
- Page 57 CHAPTER 4 – Specifications & Software Scroll Page Down User Defined Program Function Setting Right-click icon in the Windows system tray to enter the setting menu. The following panel will appear: Action Type : Enable “Virtual Key” or “Executable Application” Virtual Key : Use top-down menu to select a simulating function Application : Use Brow to select an executable application Parameters : Specify the parameters for the above application...
-
Page 59: Troubleshooting
Troubleshooting WETIF Industrie EDV Telefon DE +49 8142 448976-0 Senserstraße 3 Telefon AT +43 664 28 68 223 D - 82140 Olching info@wetif.com www.wetif.com Techn. Änderungen ohne Vorankündigung und Irrtum vorbehalten. Alle Rechte geschützt. - Page 60 Contents of Troubleshooting Audio ....................T-3 Bluetooth ....................T-3 Ethernet Networking ................T-4 Hard Drive Drive ..................T-5 Intermittent, Lock-ups or Hangs............T-6 Modem ....................T-7 Power....................T-8 No power at all ..................T-8 System does not run on battery power ........... T-8 Power management................T-9 Projectors...................T-10 The projector does not display an image ...........T-10 The projector image is cut off.............T-10 The computer screen turns off ............T-10...
-
Page 61: Audio
Troubleshooting Audio 1. Click the speaker icon on the Microsoft Windows system tray to open the Taskbar Volume control to verify that the Microsoft Windows volume is properly set and is not muted. Also double-click the same speaker icon open the Master volume control to verify that the Wave device is not muted and is set to a proper level. -
Page 62: Ethernet Networking
Ethernet Networking 1. Check Microsoft Windows Device Manager to verify that the network adapter is installed. Verify that TCP/IP (or other appropriate protocol) is properly installed as the following steps: 2.1. Check Control Panel and double-click the Network Connections icon to display all networks. -
Page 63: Hard Drive Drive
Troubleshooting 4. Ping the loopback address. 4.1. Click Start, select Programs, select Accessories, and then click Command Prompt. 4.2. Type the command, ping 127.0.0.1. This will send a message to the internal network stack on the machine. You should see a response like this: Pinging 127.0.0.1 with 32 bytes of data: Reply from 127.0.0.1: bytes=32 time<1ms TTL=128... -
Page 64: Intermittent, Lock-Ups Or Hangs
Intermittent, Lock-ups or Hangs 1. Remove and reseat all hardware (power supply, battery, cables, adapters, etc.). Disconnect the AC adapter. Remove the battery pack. Remove any other external hardware. 2. For testing purposes, to remove hardware and associated drivers that are not required for normal system operation. -
Page 65: Modem
Troubleshooting Modem 1. Verify that the modem line is connected to a RJ-11 phone jack but not to a RJ-45 network port. 2. Verify that the modem line is connected directly to a wall outlet. Eliminate any devices like a Telephone, answering machine, surge protector, or line splitter. -
Page 66: Power
Power No power at all 1. Verify the power status indicator. 2. Check all power connections, and remove any power strips and surge protectors to connect the AC adapter directly to the AC power outlet. 3. Inspect the AC adapter. Check for any physical damage, and ensure the power cable is firmly attached to the adapter brick and the system. -
Page 67: Power Management
Troubleshooting Power Management 1. Adjust the power management settings according to user’s preferences and environment. 2. Disable any screen savers in the operating system. 3. Disable any terminate and stay resident (TSR) applications. 4. Scan all the files on the system with an anti-virus software using the vendor's latest virus definitions. -
Page 68: Projectors
Projectors The projector does not display an image 1. Enable the external monitor (VGA-Out) port on the computer 2. "Waking up" the projector Some projectors have power-saving states similar to a computer's sleep mode. Consult the projector's documentation if you need to "wake up"... -
Page 69: Usb
Troubleshooting Some USB devices are not APM/ACPI friendly and may not operate properly after resuming from Standby or Hibernation. Test the attached USB device after performing each step. 1. Verify that a USB port and an operating system with USB support are being used to attach a USB interface external device to the system. -
Page 70: Video Display
Video Display No video display on the LCD 1. Verify the system is powered on. 2. Ensure the system is not in the suspend mode. 3. Disconnect any external displays. 4. Power down the system. If the system is attached to a docking station or port replicator, then remove the system. -
Page 71: Viruses, Worms, And Spyware
Troubleshooting Viruses, Worms, and Spyware Viruses, worms, trojan horses and spyware are malicious software (malware) that are covertly loaded onto the computer through infected e-mail, bogus software, from an infected Web site, or simply by connecting to a network that has an infected machine on it. -
Page 72: Wireless Networking
Wireless Networking 1. Check Microsoft Windows Device Manager to verify that the network adapter is installed. 2. Verify that the radio is enabled. It is possible to disable the transmitter of the wireless card without Device Manager showing any problems. Most wireless cards will put an icon in the system tray. - Page 73 Troubleshooting Note: Only use a Static IP Address if the network/Service Provider requires one. 7. Verify the TCP/IP address. 7.1. Click Start, select Programs, select Accessories, and then click Command Prompt. 7.2. Type the command, ipconfig. This will list the IP address for the local machine.
Need help?
Do you have a question about the PMG84 and is the answer not in the manual?
Questions and answers