Table of Contents
Advertisement
Quick Links
Advertisement
Table of Contents

Related Manuals for Wetif XT1100


Summary of Contents for Wetif XT1100
-
Page 1: User Manual
Rugged Tablet PC XT1100 User Manual Ver 1.0... -
Page 3: Table Of Contents
XT1100 User Manual Table of Contents Preface ..............i CE Conformity Statement ..........i FCC Compliance Statement ........... ii Copyright Statement ...........iii Safety Instructions ..........v Battery Safety ............vi Battery Pack Caution ..........vi Battery Charge Notice ..........vi Storage and Safety Notice ........vii Rugged and Ready to Go ...........1... - Page 4 Connecting to a Telephone Line ......... 18 Connecting Headphones........... 18 Connecting a Microphone ......... 19 Turning On .............. 19 Controlling the XT1100..........20 Using the Touch Screen ........... 20 Using the Control Panel Buttons ......... 22 Using the On-Screen Keyboard ........23 Configuring the Function Buttons........
- Page 5 XT1100 Docking ............. 39 Docking Views............40 Connecting Power to the Docking ....... 40 Docking Stand Specifications ........41 XT1100 Handstrap and Shoulder Strap ......41 Maintenance ............44 Maintaining the Battery ........... 44 Maintaining the LCD Display ........44...
-
Page 7: Preface
XT1100 User Manual Preface CE Conformity Statement Radio products with the CE alert marking comply with the R&TTE Directive (1999/5/EC) issued by the Commission of the European Community. Compliance with this directive implies conformity to the following European Norms (in brackets are the equivalent international standards). -
Page 8: Fcc Compliance Statement
XT1100 User Manual FCC Compliance Statement This device complies with part 15 of the FCC Rules. Operation is subject to the following two conditions: 1. This device may not cause harmful interference; 2. This device must accept any interference received, includ- ing interference that may cause undesired operation. -
Page 9: Copyright Statement
XT1100 User Manual interference to radio or television reception, which can be determined by turning the equipment off and on, the user is encouraged to try to correct the interference by one or more of the following measures: • Reorient or relocate the receiving antenna •... -
Page 11: Safety Instructions
• Use only the AC adapter, power cord, and batteries that are approved for use with this XT1100. Use of another type of battery or AC adapter may cause risk of fire or explosion. -
Page 12: Battery Safety
XT1100 User Manual Battery Safety RTC Battery Caution RISK OF EXPLOSION IF BATTERY IS REPLACED BY AN INCORRECT TYPE. DISPOSE OF USED BATTERIES ACCORDING TO THE INSTRUCTIONS. • Do not place the battery incorrectly as this may cause danger of explosion. -
Page 13: Storage And Safety Notice
XT1100 User Manual Storage and Safety Notice Although charge Lithium-Ion batteries may be left unused for several months, their capacity may be depleted due to the build up of internal resistance. If this happens they will require recharging prior to use. Lithium-Ion batteries may be stored at temperatures between -20°C to 50°C, however they may be... - Page 14 XT1100 User Manual viii...
-
Page 15: Rugged And Ready To Go
This user manual outlines all you need to know to set up and use your XT1100. If you have any further questions or queries, contact our technical support team via our website: www.TabletPCworld.com. -
Page 16: Package Contents
XT1100 User Manual Package Contents Ensure all the following items are present when you receive your XT1100. If any of these items are missing, contact your vendor immediately. Note Screens used in this manual are for illustrative purposes only. Actual screens may vary based on your product version. -
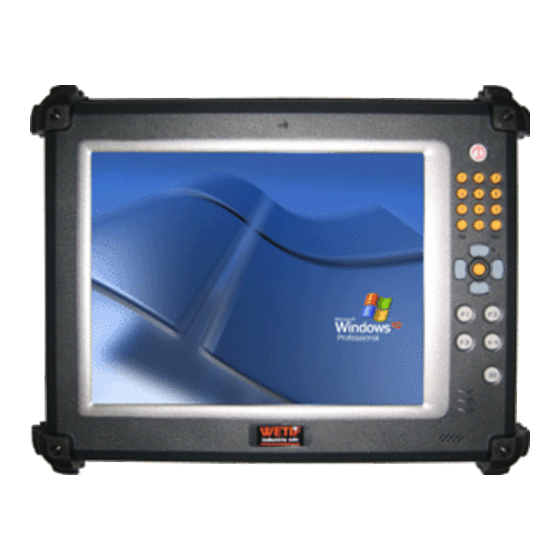
Page 17: Exploring The Xt1100
XT1100 User Manual Exploring the XT1100 Front View Component Microphone Touch-sensitive display (responds to stylus or finger) Power button Number / Tab / Esc buttons 4-Way navigation button with integrated enter button Function buttons Brightness / volume button Keyboard button... - Page 18 XT1100 User Manual Component Status LEDs: Battery charge LED: Off: power off Solid Green: green lights on when charging in power off mode, lights off when finish charging. Blinking Green: AC power on & battery is charging in power on mode.
-
Page 19: Left View
XT1100 User Manual Left View 3 4 5 6 Component PC card slot (PCMCIA) Compact Flash card slot Headphone jack Microphone jack Telephone line jack RJ45 jack (for network cables) DC-in jack Right View Component Serial ports VGA port USB ports... -
Page 20: Rear View
Rear View Component Stylus Battery compartment cover Bottom View Component Docking connector... -
Page 21: Getting Started
Repeat the above steps in reverse to remove the battery. Connecting the Power Before you can use your XT1100, you must fully charge the battery. Connect the power adapter as shown and leave to charge for a minimum of 4 hours before use. -
Page 22: Professional Embedded
Turning On for the First Time If you are using Windows XP Professional Embedded When you first turn on the XT1100, the following setup screens will appear. Follow these instructions to validate your version of Windows XP and set up your system correctly. - Page 23 Tap Next to continue. 5. Enter an administrator password and re-confirm. Tap Next to continue. 6. Choose whether or not to make the XT1100 part of a domain. If so, enter the domain name (ask your system administrator for details). Tap Next to continue.
- Page 24 Internet to run the Internet Configuration Wizard. Tap Next to continue. 9. Enter the names of other users of your XT1100. You can add up to five users. Tap Next to continue. 10. Tap Finish to complete the setup.
-
Page 25: Recovering From A System Crash If You Are Using Windows Xp Professional Embedded
In the unlikely event that your XT1100 should crash, do the following to re-boot your system. 1. Press the power button to turn on the XT1100. During boot- up, PRESS UP KEY TO RUN RESTORE... is displayed. Press the up arrow button. - Page 26 Windows XPE Recovery folder on your local drive to the USB flash drive. 7. Connect the USB flash drive and a keyboard to your XT1100 and turn on the computer. 8. Press the Del key repeatedly during boot up to enter the BIOS screen.
-
Page 27: Inserting A Memory Card
You can insert a Compact Flash memory card to store data, which needs to be later transferred to another machine, or to simply expand the storage capacity of the XT1100. You can use Compact Flash cards up to 2GB in size. -
Page 28: Removing A Memory Card
XT1100 User Manual Removing a Memory Card 1. Open the memory card compartment cover. 2. Press the Compact Flash card inwards, until it clicks. 3. Release and the card will pop out. 4. Remove the card and close the memory card compartment cover. -
Page 29: Inserting A Pcmcia Card
XT1100 User Manual Inserting a PCMCIA Card You can also insert a PCMCIA card to store and transfer data between computers with compatible PC card capabilities. 1. Open the memory card compartment cover. 2. Insert the PCMCIA card, until it clicks into place. -
Page 30: Removing A Pcmcia Card
XT1100 User Manual Removing a PCMCIA Card 1. Open the memory card compartment cover. 2. Press the PCMCIA card switch inwards until the card pops out. 3. Remove the card. 4. Close the memory card compartment cover. -
Page 31: Making Connections
XT1100 User Manual Making Connections Connecting to a Monitor You can connect the XT1100 to an external monitor for enhanced viewing. Connect one end of a VGA cable to the VGA port on the right side of the XT1100. Connect the other end to the VGA port on the monitor. -
Page 32: Connection To A Network
Connecting to a Telephone Line If you are accessing the Internet via a regular telephone line, you can connect the XT1100 using the telephone jack on the left side of the XT1100. Connecting Headphones You can connect a pair of... -
Page 33: Connecting A Microphone
The XT1100 features and in-built microphone, but you can connect an external microphone if needed. Connect the microphone to the microphone jack on the left side of the XT1100 as shown. Turning On Press and hold the power button to turn on the XT1100. -
Page 34: Controlling The Xt1100
Simply use the pen to select icons and run applications. Remove the pen from its holder at the rear of the XT1100 and you are ready to go. Calibrating the Touch Screen... - Page 35 XT1100 User Manual A confirmation window appears. Click OK to confirm the new settings. If you do not do this within 10 seconds, the new settings will not be saved. Configuring the Tap Function When you tap on the screen with the a pen or stylus, it emulates either a right or left button click on a regular mouse.
-
Page 36: Using The Control Panel Buttons
See below for a description of each button and its function. Button Name Function Power Press to power on and off the XT1100 Numbers Press to enter numbers Arrows Press to move up, down, left, right Enter Press to emulate the Enter key... -
Page 37: Using The On-Screen Keyboard
XT1100 User Manual Using the On-Screen Keyboard Press the button to bring up the on-screen keyboard. Use pen to tap and enter letters, numbers and symbols as you would with a regular keyboard. Configuring the Function Buttons The three function buttons can be configured as shortcuts to access your favorite or frequently used programs. -
Page 38: Adjusting Screen Brightness
XT1100 User Manual Adjusting Screen Brightness 1. Press and hold the button. 2. Press the up arrow to increase brightness, or the down arrow to decrease brightness. Adjusting the Volume 1. Press and hold the button. 2. Press the right arrow to increase the volume, or the left arrow to decrease the volume. -
Page 39: Wireless Connections
Should you experience any problems while attempting to configure a wireless connection, consult your systems administrator. The XT1100 comes pre-loaded with the RaLink Wireless Utility software. This software should automatically detect any local WLAN (Wireless Local Area Network) and configure the connection automatically. -
Page 40: Link Status Screen
XT1100 User Manual Link Status Screen This screen displays all status information for your current wireless connections. Site Survey Screen This screen displays all available wireless networks and a summary of information for each connection. Tap Rescan to scan the area again for available networks. -
Page 41: Advanced Screen
XT1100 User Manual Advanced Screen This screen displays detailed information on your current connection and is where you can adjust advanced settings. • Wireless mode: You can configure the type of wireless mode here. Select either a single (802.11 A only / 802.11 B only) or mixed (802.11 B/G... -
Page 42: Qos Screen
XT1100 User Manual QoS Screen You can configure various QoS (Quality of Service) settings to best suit your needs from this screen. • WMM Enable: Select this option to enable WMM. Tap Apply. • WMM - Power Save Enable: Select this option to enable the power save function for the WMM function. -
Page 43: Configuring A New Wireless Network
XT1100 User Manual Configuring a New Wireless Network Should you need to configure a set of computers to create a new wireless network, do the following: 1. Tap the wireless icon in the system tray to open the Wireless Network Connection Status screen. - Page 44 XT1100 User Manual 6. Insert your USB flash drive into a free USB slot and select the drive name from the drop- down list.Tap Next to continue. 7. All your current network settings are copied to your USB flash disk. Tap Next to continue.
-
Page 45: Bluetooth Connections
XT1100 User Manual Bluetooth Connections The XT1100 comes with built-in Bluetooth functionality that allows you to connect and communicate with other Bluetooth- enabled devices. Setting Up Bluetooth You can use the installed IVT BlueSoleil software to detect and connect to other Bluetooth devices in the local area. You can also manage existing connections using the software. -
Page 47: Advanced Settings
XT1100 User Manual Advanced Settings Configuring Pointer Device Settings Tap the pointer device icon in the system tray and select Adjust settings, or tap Start > All Programs > UPDD > Settings to access pointer device settings. Tab the tabs at the top of the screen to access the settings screens. -
Page 48: Checking Battery Status
XT1100 User Manual Checking Battery Status As it is likely you will be using your XT1100 when out and about, it is important that you monitor the battery status regularly, to ensure you do not run out of power at a critical moment. -
Page 49: Power Options
XT1100 User Manual Power Options You can configure specific power options to best suit your needs and to get the most out of your battery. Tap on the battery icon in the system tray to view the power options menu. See below for a description of the settings for each power option. - Page 50 XT1100 User Manual...
-
Page 51: Appendix
XT1100 User Manual Appendix Specifications Feature Description Windows XP Embedded/ Operating System Windows XP Professional / Windows XP Professional Embedded Processor VIA Eden 1GHz (Optional VIA Eden 1.5GHz ULV) Chipset VIA CX700M (with video acceleration) DDRII400 256MB on board or SO-DIMM module,... - Page 52 XT1100 User Manual Feature Description Power LED: Off: Power off Solid green: Lit when charging in power off mode, off when charging is complete Blinking green: Power on, battery is charg- ing in power on mode Solid yellow: Power on, battery low...
-
Page 53: Optional Xt1100 Accessory
Optional XT1100 Accessory XT1100 Docking You can use the supplied PC docking stand to dock the XT1100 when you are at your home or office desk. When docked, you can charge power to and transfer data from your XT1100 to another PC. -
Page 54: Docking Views
XT1100 User Manual Docking Views See below for the rear view of the docking and a description of all ports and connectors. Connect USB connectors Ports to these ports. Serial Connect serial cables to Ports these ports. Connect the AC adapter DC-IN to this port. -
Page 55: Docking Stand Specifications
A detachable handstrap and shoulder strap are provided to carry your Tablet PC securely and safely. You can use the supplied handstrap and shoulder strap separately or together to carry the XT1100 when you are outside your home or office. Handstrap Shoulder Strap... - Page 56 XT1100 User Manual When using the handstrap and shoulder strap separately: • Attach the handstrap to the rear of your XT1100 using the four short screws as shown. The handstrap makes it easy to carry the device in one hand.
- Page 57 When using the handstrap and shoulder strap together: • Attach the handstrap and shoulder bag to the rear of your XT1100 using four screws as shown. (Two long screws to the upper screwholes, and two short screws to the lower screw-...
-
Page 58: Maintenance
LCD screen cleaner. Cleaning the XT1100 1. Turn off the XT1100 and unplug the power cord. 2. Wipe the screen and exterior with a soft, damp cloth moistened only with water. Do not use liquid or aerosol cleaners on the screen, as these will discolor the finish and damage the screen.
Need help?
Do you have a question about the XT1100 and is the answer not in the manual?
Questions and answers