Table of Contents
Advertisement
Advertisement
Table of Contents

Related Manuals for Johannus Studio 370


Summary of Contents for Johannus Studio 370
- Page 2 All rights reserved. Nothing in this publication may be reproduced, stored in a data file or made public in any form or in any way either electronically, mechanically by way of photocopying, recording or in any other way without the prior written permission of Johannus Orgelbouw b.v. User Manual Studio 370...
-
Page 3: Table Of Contents
Stops ......................19 Couplers ....................19 Accessories ....................19 Pre-programmed memory locations ............20 Capture memory: ..................20 4.10 Transposer ....................21 4.11 Johannus Menu ..................21 4.11.1 Datadump ....................22 4.11.2 Demo Songs ....................22 4.11.3 Display Contrast ..................23 4.11.4... - Page 4 Warranty ....................31 SPECIFICATIONS ................32 MIDI Implementation Chart..............32 MIDI Specifications ................... 33 User Manual Studio 370...
-
Page 5: Safety
Follow the instructions and precautionary measures in this user manual. Keep this user manual with the organ. The organ may only be opened by a technician authorized by Johannus Orgelbouw B.V. The organ contains static-sensitive components. The warranty is void if the organ is opened by a non-authorized person. -
Page 6: Symbols On The Organ
/ touching the instrument. Symbols in this manual Caution, Warning or important information Do not, or forbidden to do Note User Manual Studio 370... -
Page 7: Transport, Storage And Cleaning
Make sure to have a firm grip, to protect yourself from injury and the instrument from damage. If you need to move the instrument, consult with your retailer, or Johannus Orgelbouw B.V. User Manual Studio 370... -
Page 8: Cautions And Important Notes
Do not use overseas, foreign countries. Before using the Organ in a foreign country, consult with your retailer, or Johannus Orgelbouw B.V. Adults must provide supervision in places where children are present. When using the Organ in locations where children are present, be careful so no mishandling of the Organ can take place. - Page 9 Or, the power switch must be accessible. The main power switch is the main power disconnect device for this Organ. Therefore, the power switch shall be readily accessible. User Manual Studio 370...
-
Page 10: Placement
During repairs, due care is taken to avoid the loss of data. However, in certain cases (such as when circuitry related to memory itself is out of order), we regret that it may not be possible to restore the data, and Johannus Orgelbouw B.V. assumes no liability concerning such loss of data. -
Page 11: Additional Precautions
(when possible). Unfortunately, it may be impossible to restore the contents of data that was stored in the Organ’s memory once it has been lost. Johannus Orgelbouw B.V. assumes no liability concerning such loss of data. Use a reasonable amount of care when using the Organ’s buttons, sliders, or other controls;... -
Page 12: Installation
Install the pedal board (D), see § 2.1.3. Place the organ bench (C) over the pedal. Make sure the voltage of the organ matches the voltage of the mains. See the serial plate (B). Connect the organ to a grounded power socket. User Manual Studio 370... -
Page 13: Installation Music Desk
Remove green protection foils (E) from plexiglas part of the music desk. 2.1.3 Installation pedal board Shift pedal board against black pedal front cover (A). Pedal bolts (B) will stick out 5 mm. For security reasons mount pedal board to organ with wing nuts (C). User Manual Studio 370... -
Page 14: Switch On
Tr: 0/440 the display. Transport and storage Pay attention to the following during transport and storage: Remove the music desk and the pedal board from the organ. Relative humidity within the storage area: 40 to 60%. User Manual Studio 370... -
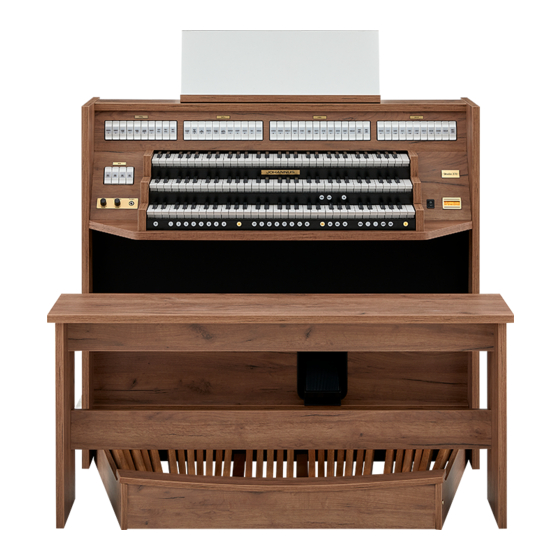
Page 15: Description Of The Organ
3 DESCRIPTION OF THE ORGAN Overview of the main components A Music desk B Loudspeakers C Organ bench D Expression pedal E Pedal board User Manual Studio 370... -
Page 16: Overview Of Controls
Capture memory locations (1 to 8) U On/Off (mains switch) K CH: Chorus V Manual Choir L Pre-programmed memory locations W Manual Great M RO: Reeds Off X Manual Swell N Intonation styles (ROM,SYM,BAR,HIS) Y Display User Manual Studio 370... -
Page 17: Connect And Switch On The Peripherals
MIDI SEQ: A non-programmable MIDI output for connecting a sequencer or PC (with the optional Johannus Intonat program), for example. AUX IN: A stereo audio input for playing the sound of an external device through the amplifiers of the organ. For example, an expander connected to the organ through the MIDI MOD can be played through the instrument's loudspeakers. -
Page 18: Operation
Swell only. This is indicated on Tr: 0/440 Exp:Sw the display with Exp:Sw. Using the Johannus Menu the expression pedal can also be set as a general swell for the entire organ, see § 4.11.4. If the Studio... -
Page 19: Intonation Styles
Reeds off is a function to switch off all reed stops simultaneously. As long as this piston is pressed, no reed stops can be activated. When this function is switched off, the reed stops that were on are activated again. Use the RO piston to activate the Reeds Off function. User Manual Studio 370... -
Page 20: Pre-Programmed Memory Locations
The capture memory consists of 75 levels. These levels can be seen on the display (Mem:… ). Each level has eight memory locations (pistons 1-8). The 600 capture memory locations are not pre-programmed and can be programmed by the musician. User Manual Studio 370... -
Page 21: Transposer
TRANS. piston is lit. 4.11 Johannus Menu In the Johannus Menu several functions of the organ can be set. Press the MENU piston to activate the Johannus Menu on the display. Navigating the menu is done with the - and + pistons. -
Page 22: Datadump
Do not use the organ when the Sending data... text is on the display. If the data dump is complete, the main menu appears Johannus Menu: on the display. Datadump Press the MENU piston to exit the Johannus Menu. Studio Mem: 1 Tr: 0/440 Exp:Sw 4.11.2 Demo Songs The Demo Songs function plays four different demo songs. -
Page 23: Display Contrast
Cathedral volume control: adjust the volume of the reverb. Press the MENU piston after having played the demo Johannus Menu: song(s) to return to the main menu. Demo Songs Press the MENU piston to exit the Johannus Menu. Studio Mem: 1 Tr: 0/440 Exp:Sw 4.11.3 Display Contrast The Display Contrast function adjusts the display contrast. -
Page 24: Key Volumes
Automatic first line of the display. Press the MENU piston to return to the main menu. Johannus Menu: Keyboard Config Press the MENU piston to exit the Johannus Menu. Studio Mem: 1 Tr: 0/440 Exp:Sw 4.11.6 Key Volumes If you are asked to enter a code, the Key... - Page 25 19. Press the MENU piston to return to the main menu. Johannus Menu: Key Volumes 20. Press the MENU piston to exit the Johannus Menu. Studio Mem: 1 Tr: 0/440 Exp:Sw More key volumes can be changed by pressing another key or by selecting another stop.
-
Page 26: Midi Config
Key Volumes menu. Reset one stop 11. Press the MENU piston to return to the main menu. Johannus Menu: Key Volumes 12. Press the MENU piston to exit the Johannus Menu. Studio Mem: 1 Tr: 0/440 Exp:Sw Reset ALL stops The Reset ALL stops function resets the key volumes of all stops in one intonation style to the factory setting. -
Page 27: Reset Procedures
MIDI code appears on the display. 13. Press the MENU piston to return to the main menu. Johannus Menu: MIDI Config 14. Press the MENU piston to exit the Johannus Menu. Studio Mem: 1 Tr: 0/440 Exp:Sw 4.11.8 Reset Procedures The Reset Procedures function is used to reset a number of settings to the factory settings. -
Page 28: Reverb Settings
Reverb Settings menu. Reverb Program Press the MENU piston to return to the main menu. Johannus Menu: Reverb Settings 10. Press the MENU piston to exit the Johannus Menu. Studio Mem: 1 Tr: 0/440 Exp:Sw 4.11.10 Startup Settings The Startup Settings function is used to select the startup defaults for Chorus and intonation style. -
Page 29: Temperaments
Startup Settings menu. Chorus On/Off Press the MENU piston to return to the main menu. Johannus Menu: Startup Settings Press the MENU piston to exit the Johannus Menu. Studio Mem: 1 Tr: 0/440 Exp:Sw 4.11.11 Temperaments The Temperaments function sets the temperament. -
Page 30: Tuning
Press the MENU piston to exit the Johannus Menu. Studio Mem: 1 Tr: 0/440 Exp:Sw 4.11.12 Tuning The Tuning function shifts the pitch in steps of 1 Hz from 426 Hz to 454 Hz (standard pitch is a = 440 Hz). -
Page 31: Maintenance, Troubleshooting And Warranty
Warranty The conditions are specified in the warranty certificate. The warranty is void if changes or repairs are made to the organ by persons or organisations that are not authorised by Johannus Orgelbouw b.v. User Manual Studio 370... -
Page 32: Specifications
: All Notes OFF : Active Sense : Reset Notes Depends on number of divisions Mode 1: OMNY ON, POLY Mode 2: OMNY ON, MONO Y=YES Mode 3: OMNY OFF, POLY Mode 4: OMNY OFF, MONO N=NO User Manual Studio 370... -
Page 33: Midi Specifications
Only the value of the 8th byte varies. This is the ‘sys ex message’ that Johannus generally uses: F0 00 4A 4F 48 41 53 XX F7 (hexadecimal). The ‘sys ex messages’ described below only indicates the value of the 8th byte (XX) and the output from which it is transmitted. - Page 34 When a piston is pressed, a sys ex code is transmitted with the value of the piston that is pressed (for example PP = 00 P = 01) through the MIDI MOD. output. These sys ex codes are only important when the Johannus sound module CSM 128 is connected to your instrument.
- Page 35 AVIS. Cet appareil numérique de la classe B respecte toutes les exigences du Règlement sur le matériel brouilleur du Canada. For C.A. US (Proposition 65): WARNING. This product contains chemicals known to cause cancer, birth defects and other reproductive harm, including lead. User Manual Studio 370...
- Page 36 For China: For EU: This product complies with the requirements of EMCD 2014/30/EU and LVD 2014/35/EU. User Manual Studio 370...
- Page 37 For additional safety, all externally accessible metal parts (such as headphones, Aux-in/out, MIDI, toe pistons, etc.) are floating from safety earth. THIS APPARATUS MUST BE EARTHED THE WIRES IN THIS MAINS LEAD ARE COLOURED IN ACCORDANCE WITH THE FOLLOWING CODE. GREEN-AND-YELLOW: EARTH, BLUE: NEUTRAL, BROWN: LIVE User Manual Studio 370...
- Page 38 WARNING: User Manual Studio 370...
Need help?
Do you have a question about the Studio 370 and is the answer not in the manual?
Questions and answers