Table of Contents
Advertisement
Advertisement
Table of Contents

Related Manuals for Johannus LiVE 3T-A


Summary of Contents for Johannus LiVE 3T-A
- Page 1 2T-A / 3T-A...
- Page 2 Johannus Orgelbouw B.V. User Manual LiVE 2T-A / LiVE 3T-A (AGO)
-
Page 3: Table Of Contents
Couplers ....................23 Accessories ....................23 Capture memory ..................25 Crescendo pedal ..................26 4.10 Quick Access ..................... 26 4.10.1 Programming mode crescendo pedal ............26 4.10.2 Keyboard assignment orchestrals .............. 27 User Manual LiVE 2T-A / LiVE 3T-A (AGO) - Page 4 Maintenance of the cabinet ............... 46 7.1.2 Maintenance of the manuals ..............46 Problems ....................46 Warranty ....................46 SPECIFICATIONS ................47 MIDI Implementation Chart..............47 MIDI Specifications ................... 48 8.3. Specifications of Instrument ..............49 User Manual LiVE 2T-A / LiVE 3T-A (AGO)
-
Page 5: Safety
Follow the instructions and precautionary measures in this user manual. Keep this user manual with the organ. The organ may only be opened by a technician authorized by Johannus Orgelbouw B.V. The organ contains static-sensitive components. The warranty is void if the organ is opened by a non-authorized person. -
Page 6: Symbols On The Organ
/ touching the instrument. Symbols in this manual Caution, Warning or important information Do not, or forbidden to do Note User Manual LiVE 2T-A / LiVE 3T-A (AGO) -
Page 7: Transport, Storage And Cleaning
Make sure to have a firm grip, to protect yourself from injury and the instrument from damage. If you need to move the instrument, consult with your retailer, or Johannus Orgelbouw B.V. User Manual LiVE 2T-A / LiVE 3T-A (AGO) -
Page 8: Cautions And Important Notes
Although the LCD and LEDs are switched off when the Organ is turned off, this does not mean that the Organ has been completely disconnected from the source of power. If User Manual LiVE 2T-A / LiVE 3T-A (AGO) - Page 9 Therefore, the power switch shall be readily accessible. Do not use internal connections. Do connect, do not use internal connections for optional external speakers by yourself. Refer all servicing to your retailer, or Johannus Orgelbouw B.V. User Manual LiVE 2T-A / LiVE 3T-A (AGO)
-
Page 10: Placement
(such as when circuitry related to memory itself is out of order), we regret that it may not be possible to restore the data, and Johannus Orgelbouw B.V. assumes no liability concerning such loss of data. Refer all servicing to your retailer, or Johannus Orgelbouw B.V. -
Page 11: Additional Precautions
5.5.2, or on paper (when possible). Unfortunately, it may be impossible to restore the contents of data that was stored in the Organ’s memory once it has been lost. Johannus Orgelbouw B.V. assumes no liability concerning such loss of data. ... -
Page 12: Installation
Place the organ bench (C) over the pedal board (D). Make sure the voltage of the organ matches the voltage of the main. See the serial plate (B). Connect the organ to a grounded power socket. User Manual LiVE 2T-A / LiVE 3T-A (AGO) -
Page 13: Installation Music Desk
Tune : 431Hz █ Temp : Original █ Cresc : Off The lights of the SET-piston and the as standard set functions light up. The settings appear on the display. User Manual LiVE 2T-A / LiVE 3T-A (AGO) -
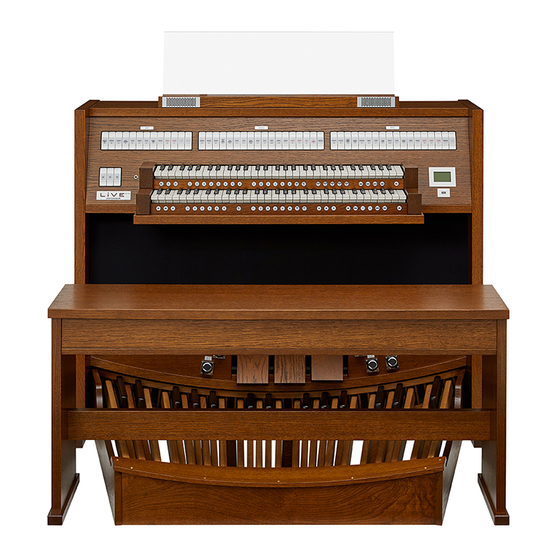
Page 14: Description Of The Organ
3 DESCRIPTION OF THE ORGAN Overview of the components LiVE 3T-A LiVE 2T-A Near field soundbar Loudspeakers Organ bench Programmable expression pedals Pedal board User Manual LiVE 2T-A / LiVE 3T-A (AGO) -
Page 15: Overview Of Controls
REC: Recall – to cancel last change On/Off switch (mains power switch) is placed on the right hand side bottom of the keybed. - Model is without “Solo voices” and “Orchestral voices”. User Manual LiVE 2T-A / LiVE 3T-A (AGO) - Page 16 RO: Reeds Off Capture memory locations Manual I Capture memory locations General Sub.I coupler for Manual I Capture memory locations Man.II Oct.I coupler for Manual I Sub II; Oct.II couplers for Manual II User Manual LiVE 2T-A / LiVE 3T-A (AGO)
- Page 17 - Standard model is without options (no pistons at point AO, AN). - Premium model has option pistons for ‘Solo voices’ (point AN). - Platinum model has both option pistons for ‘Orchestral voices’ (point AO) and ‘Solo voices’ (point AN). User Manual LiVE 2T-A / LiVE 3T-A (AGO)
-
Page 18: Connect And Switch On The Peripherals
MIDI SEQ: A non-programmable MIDI output for connecting the Johannus MIDI Sequencer+ or PC (with the optional Johannus Intonat program), for example. AUX IN: A stereo audio input for playing the sound of an external device through the amplifiers of the organ. -
Page 19: Operation
A sample set is a USB drive containing a professional, authentic set of recordings from an actual pipe organ. Just as you can on the Johannus LiVE III, you can upload sample sets for dozens of international pipe organs on the Johannus LiVE 2T-A/3T-A, but special sample sets have been developed for the Johannus LiVE 2T-A/3T-A. -
Page 20: Listening Positions
The LiVE 2T-A/3T-A organ has enough capacity to store five complete pipe organs. Practically speaking that means that you can copy five USB drives containing full recordings into the Johannus LiVE’s memory. With the pistons ORGAN 1 to ORGAN 5 you can easily switch between pipe organs. Press the ORGAN piston once to see the overview of available sample sets. -
Page 21: Stops
The Johannus LiVE’s are a high-quality digital organ equipped with a standard stoplist with 44 stops for LiVE 2T-A and 52 stops for LiVE 3T-A. The fixed stoplist was developed based on a sophisticated cross-section made by Johannus of pipe organs around the world. -
Page 22: Couplers
All Swells to Swell (S/S): All Swells to Swell transforms the expression pedal for Manual II, to a swell pedal for the whole organ. Activate the All Swells to Swell with the S/S-piston. User Manual LiVE 2T-A / LiVE 3T-A (AGO) - Page 23 Temp : Original █ Use the - and + pistons to set the pitch. Cresc : Off When the transposer change needs to be saved, press the ENTER-piston while the TRANS.-piston is illuminated. User Manual LiVE 2T-A / LiVE 3T-A (AGO)
-
Page 24: Capture Memory
(50 levels times 8 pistons locations, equals) 400 locations per sample set. Thus, the total amount of free programmable capture memory places in the LiVE 2T-A/3T-A is (400 locations times 5 Sample banks, equals) 2000. Programming a capture memory location: The current setting of the capture memory location will be lost. -
Page 25: Crescendo Pedal
Pedals. If the crescendo pedal is set as additional swell pedal, all functions of the original crescendo pedal are deactivated. 4.10 Quick Access Quick Access is a function to quickly access certain functions of the organ. 4.10.1 Programming mode crescendo pedal User Manual LiVE 2T-A / LiVE 3T-A (AGO) -
Page 26: Keyboard Assignment Orchestrals
3. Press a key of the manual or the pedal on which the solo- or orchestral voice has to be assigned. 4. The solo- or orchestral voice is now playable from the selected manual or pedal. User Manual LiVE 2T-A / LiVE 3T-A (AGO) -
Page 27: Johannus Menu
5 JOHANNUS MENU In the Johannus Menu several functions of the organ can be set: Press the MENU piston to activate the Johannus Menu on the display. Navigate in the menu with the - and + pistons. ... -
Page 28: Fine Tune
Press the ENTER-piston to program the new setting and to return to the Johannus Menu. Press the MENU-piston to exit the Johannus Menu. The actual Fine Tune setting appears in cents on the display behind the current transposer setting (Trans : ../..c... -
Page 29: Upload Organ
1 cent. The minimum value is -32 cents; the maximum value is +32 cents. The programming can be done using the middle octave of Manual I (for LiVE 2T-A), or Manual II (for LiVE 3T-A) and is automatically calculated for all keys of the organ. -
Page 30: Organ Settings
Repeat steps 6 and 7 if more crescendo pedal steps has to be changed. Press the MENU piston three times to exit the Johannus Menu. User Manual LiVE 2T-A / LiVE 3T-A (AGO) -
Page 31: Datadump
Settings to send are: the content of all capture memory locations and all settings which can be set via the Johannus Menu, except Key Volumes. Key Volume settings are a part of the intonation data. These data can be received with the optional Johannus Intonat software. -
Page 32: Expression Pedals
12. Press the MENU piston to return to the Expression Pedals menu. 13. If necessary, repeat steps 6 to 12 for another expression pedal. 14. Press the MENU piston three times to exit the Johannus Menu. User Manual LiVE 2T-A / LiVE 3T-A (AGO) -
Page 33: Intonation
Do not use the organ when the Busy... text is on the display. If the data dump is complete, the Intonation menu appears on the display. 10. Press the MENU-piston three times to exit the Johannus Menu. b. Uploading intonation data to the organ Make sure to upload only data files which are recorded from the instrument concerned. -
Page 34: Key Volumes
After several seconds you will return to the Key Volume menu. 14. Press the MENU piston three times to exit the Johannus Menu. More key volumes can be changed by pressing another key or by selecting another stop. - Page 35 10. Use the - and + pistons to select No or Yes. 11. Press the ENTER-piston to confirm and to return to the Key Volumes menu. 12. Press the MENU pistons three times to exit the Johannus Menu. c. Reset ALL stops The Reset ALL stops function resets the key volumes of all stops to the factory setting.
-
Page 36: Midi Config
13. Use the - and + pistons to select the desired Voice value. 14. Press the ENTER-piston. The selected configuration is now stored in memory. The pointer jumps back to the MIDI channel location. 15. Press the MENU piston three times to exit the Johannus Menu. 5.5.7 Orchestrals The ‘Orchestral menu’... -
Page 37: Reset
Press a key on the manual or pedal on which the solo- or orchestral voice has to be assigned. The new assignment appears on the display. Press the MENU piston three times to exit the Johannus Menu. Assigning a solo- or orchestral voice to a manual or pedal can also be done with the Quick Access function. -
Page 38: Sample Set Version
Press the ENTER-piston. A question to confirm appears on the display. Use the - and + pistons to select No or Yes. Press the ENTER-piston to confirm and to return to the Reset menu. Press the MENU piston three times to exit the Johannus Menu. 5.5.9 Sample Set Version... -
Page 39: Default Organ
6. Use the – and + pistons to select the desired listening position. 7. Press the ENTER-piston to confirm and to return to the System Settings menu. 8. Press the MENU-piston twice to exit the Johannus Menu. 5.6.2 Default Organ The System Setting Default Organ determines which sample set is selected at the startup of the organ. -
Page 40: Keyboard Mode
Use the - and + pistons to select No or Yes. Press the ENTER-piston to confirm and to return to the Reset menu. Press the MENU piston three times to exit the Johannus Menu. User Manual LiVE 2T-A / LiVE 3T-A (AGO) -
Page 41: Side Speakers Level
Use only unequal levels to correct different volumes caused by, for example, reflective surfaces on one side of the organ. 10. Press the MENU piston three times to exit the Johannus Menu. 5.6.7 Rear Speakers Level (optional) Optional: The System Settings function Rear Speakers Level determines the volume level of the external Rear Surround Loudspeakers at startup of the organ. -
Page 42: Tone Control
9. Press the ENTER-piston to confirm and to return to the Rear Speakers Level menu. 10. Press the MENU piston three times to exit the Johannus Menu. 11. Press the MENU piston three times to exit the Johannus Menu. 5.6.8... - Page 43 Press the ENTER-piston. The data of the software of the organ appears on the display. Press the MENU piston four times to exit the Johannus Menu. b. Load new version Make sure to upload only data files which are recorded from the instrument concerned.
-
Page 44: Voice Packages
Harp and Piano cannot be played simultaneously. Gospel Organ I (Full) and Gospel Organ II (Jazz) cannot be played simultaneously. If one of these orchestral voices is activated, the corresponding orchestral voice(s) will be disabled automatically. User Manual LiVE 2T-A / LiVE 3T-A (AGO) -
Page 45: Maintenance, Troubleshooting And Warranty
Rub the cabinet dry with a lint-free cloth. 7.1.2 Maintenance of the manuals By default, the Johannus LiVE 2T-A/3T-A comes with plastic manuals. Do not use aggressive cleaning agents such as paint thinner or acetone to remove dirt. Clean the manuals with a damp cloth. -
Page 46: Specifications
: Active Sense : Reset Notes Depends on number of divisions Mode 1: OMNI ON, POLY Mode 2: OMNI ON, MONO Y=YES Mode 3: OMNI OFF, POLY Mode 4: OMNI OFF, MONO N=NO User Manual LiVE 2T-A / LiVE 3T-A (AGO) -
Page 47: Midi Specifications
Only the value of the 8th byte varies. This is the ‘sys ex message’ that Johannus generally uses: F0 00 4A 4F 48 41 53 XX F7 (hexadecimal). The ‘sys ex messages’ described below only indicates the value of the 8th byte (XX) and the output from which it is transmitted. - Page 48 When a piston is pressed, a sys ex code is transmitted with the value of the piston that is pressed (for example PP = 00 P = 01) through the MIDI MOD. output. These sys ex codes are only important when the Johannus sound module CSM 128 is connected to your instrument.
-
Page 49: Specifications Of Instrument
When optional Rear Speaker connections are not used, the best sound quality can be obtained by setting the sound volume from 85% (default) to 0% in the menu ’System Settings’, ‘Rear Speakers Level’. User Manual LiVE 2T-A / LiVE 3T-A (AGO) - Page 50 AVIS. Cet appareil numérique de la classe B respecte toutes les exigences du Règlement sur le matériel brouilleur du Canada. For C.A. US (Proposition 65): WARNING. This product contains chemicals known to cause cancer, birth defects and other reproductive harm, including lead. User Manual LiVE 2T-A / LiVE 3T-A (AGO)
- Page 51 For China: For EU: This product complies with the requirements of EMCD 2014/30/EU and LVD 2014/35/EU. User Manual LiVE 2T-A / LiVE 3T-A (AGO)
- Page 52 THIS APPARATUS MUST BE EARTHED THE WIRES IN THIS MAINS LEAD ARE COLOURED IN ACCORDANCE WITH THE FOLLOWING CODE. GREEN-AND-YELLOW: EARTH, BLUE: NEUTRAL, BROWN: LIVE WARNING: User Manual LiVE 2T-A / LiVE 3T-A (AGO)
- Page 53 User Manual LiVE 2T-A / LiVE 3T-A (AGO)
- Page 54 User Manual LiVE 2T-A / LiVE 3T-A (AGO)
Need help?
Do you have a question about the LiVE 3T-A and is the answer not in the manual?
Questions and answers