
Related Manuals for Delmhorst RDM3-P


Summary of Contents for Delmhorst RDM3-P
- Page 1 RDM3-P Paper Moisture Meter MANUAL Version 1.0 Rev 02/13 DELMHORST EUROPE TITANIUMLAAN 100 NL 5221 CK ‘s-HERTOGENBOSCH THE NETHERLANDS info@Delmhorst.eu www.MoistureMetersDelmhorst.com +31 (0)73 6395080...
-
Page 2: Table Of Contents
TABLE OF CONTENTS PAGE GENERAL DESCRIPTION & SPECIFICATIONS OPERATING INSTRUCTIONS NAVIGATION BATTERY INSTALLATION POWER UP SETUP MENU METER USE MAIN MENU METER FUNCTIONS PIN MODE MODE – CONTINUOUS /TRIGGERED CREATE/EDIT A JOB ALARM SETTINGS USE OF THE VARIOUS SCALES TESTING PAPER, PAPER CORES, AND CORRUGATED PRODUCTS USING THE 0 –100 RELATIVE SCALE TESTING BALED SCRAP PAPER APENDING DATA TO A JOB... -
Page 3: General Description & Specifications
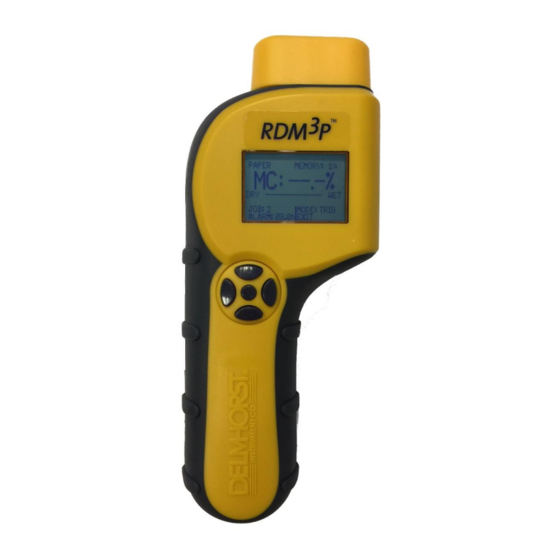
1. GENERAL DESCRIPTION Thank you for your purchase of Delmhorst Instrument Co.’s RDM-3P handheld paper moisture meter. The RDM-3P follows a long line of “RDM” meters with data acquisition capabilities, and offers the latest in features and functionality. The RDM-3P is intuitive and easy to operate. We recommend that you read the following pages in detail to take full advantage of all that the RDM-3P has to offer. -
Page 4: Operating Instructions
2. Operating Instructions -User Guide- This guide provides step-by-step instructions on powering up, using and powering down the meter. Figure 1. Key pad Layout NAVIGATION: The meter uses an on-screen, menu-driven approach to navigate through the meter features, allowing for an intuitive understanding of keypad functions. Each screen presents the user with a number of selectable options. -
Page 5: Power Up
LOW BATTERY: The meter features a battery status monitor, designed to warn the user as well as protect measurement accuracy from impending battery failure conditions. The battery warning is triggered by either continuous or temporary low voltage conditions. Visible (a battery icon on the top right side of the display) and audible (buzzer) indicators accompany a battery warning. -
Page 6: Setup Menu
SETUP MENU: The Setup group of features allows access to the configurable parameters of the meter. They are: Date and Time, Power-off time and Backlight. All can only be accessed in the Setup Menu. Storage Menu entry descriptions: Return to Main Menu: This menu option returns the meter to Main Menu. The meter also returns to Main Menu if no user input is detected for 20 Seconds. -
Page 7: Meter Use
Set Backlight: This menu option allows the user to change the amount of time allowed to lapse between the last key press and backlight shutdown. The default setting for this feature is “NO”, where the backlight is completely disabled. Backlight shutdown delays are 10, 20, 30sec. It is recommended that the backlight delay be set to the minimum amount of time necessary in order to maximize battery life. -
Page 8: Meter Functions
Meter functions: PIN MODE: The RDM-3P operates on the principle of electrical resistance - it uses paper as the element in a circuit by driving two electrode pins into it. This method is effective because moisture is an excellent conductor of electricity and paper is an effective insulator. The meter is able to store MC measurement results for review, statistical analysis or download to a PC. -
Page 9: Mode - Continuous /Triggered
Non-selectable items: SCALE NAME (top line) DRY/WET bar The MEMORY status (top right corner) Selectable items: MC reading (large text) JOB (current job) ALARM (current alarm setting) MODE (current measurement mode) EXIT (leave MC READ Mode) NOTE: The default selection on this screen is MC reading, which places the meter in measurement mode. -
Page 10: Create/Edit A Job
CREATE/EDIT A JOB: This menu option selects the job edit function: This screen always begins by displaying the current job. NOTE: If “DONE” is selected with the current job on the screen, there can be two outcomes: The current job is empty; the meter will proceed to the “Create Job” screen. This is done to give the user the opportunity to modify the settings for the current job (this is possible because no readings have been stored yet). -
Page 11: Alarm Settings
ALARM SETTING: Click SELECT on the ALARM to switch the ALARM on and off. If “on”, a Value% is shown. Use the left/right switches to lower or increase, and select DONE to return to the MC READ screen The “ALARM” feature in the meter provides the user with a set -point: readings above a specified value (considered “WET”... -
Page 12: Use Of The Various Scales
USE OF THE VARIOUS SCALES TESTING PAPER, PAPER CORES, AND CORRUGATED PRODUCTS Set the meter scale for PAPER. Check that the contact pins are firmly hand tightened. Push the contact pins into the paper product to their full penetration if possible. ... -
Page 13: Testing Baled Scrap Paper
TESTING BALED SCRAP PAPER Set the meter scale to BALED PAPER. Attach an external electrode to the meter. Push the external electrode into the material being tested. Take readings as described above. The level of accuracy of meter readings depends on a number of factors: similarity between the material tested and samples on which the calibration was made;... -
Page 14: Apending Data To A Job
APPENDING DATA TO A JOB: If the chosen job does already exist, the user does not have the option to edit the existing job settings. An “Append Data?” screen appears: If YES is selected, the meter will retrieve the selected job’s settings (during this time a “PROCESSING…”... -
Page 15: Storage Menu
STORAGE MENU: The Storage Menu groups all meter features related to measurement storage, retrieval and manipulation. All operations on stored readings may only be performed on a single job. Storage Menu entry descriptions: View Statistics: This menu option selects the meter’s statistical analysis option. Selecting this option gives the user access to two sets of statistical data. -
Page 16: Stored Readings
The first line indicates the specific MC job. The second line indicates the number of readings present in the specific job. The third line shows the 95% Confidence Interval for the specific job. This is the value (+/-) away from the calculated average value within which 95% of the stored readings are guaranteed to exist. -
Page 17: Clear Memory
VIEW SET: This option allows the user to view a specific range of readings in a particular job, as opposed to the entire set, by providing a configurable start point. It becomes useful when large numbers of readings are present in the meter. View Set always begins by displaying “1 TO XXX”, where XXX is the maximum number of readings in the selected job. -
Page 18: Restore Defaults
Base Unit. Separation requirements between the meter and Base Unit are anywhere from 0 to 30 cm (0” to 12”). Operation: 1. Begin by starting the Delmhorst Universal Application Program (double click the application icon, or chose the program from the Start Menu). 2. Once the RDM and Base Unit are lined up and the Base Unit is powered (a green LED should be lit), select the IR Link option in the Main Menu. -
Page 19: Trouble Shooting The Ir/Link
Unit and the meter. The meter, Base Unit and Application Program all have ample delays built in to allow the other link components to come online in any sequence. Troubleshooting The I/R Link: Most problems tend to occur due to the positioning of the meter relative to the Base Unit. There are a few error messages that may appear on the meter’s screen: a. -
Page 20: Care Of Your Meter
CARE OF YOUR METER To keep your meter in good working order: Store your meter in a clean, dry place. The protective carrying case provided is an ideal storage place when the meter is not in use. Change the 9-Volt battery as needed. -
Page 21: Warranty
If the meter or any optional electrodes have been tampered with, the warranty shall be void. At our option we may replace or repair the meter. DELMHORST shall not b e liable for incidental or consequential damages for the breach of any express or implied warranty with respect to this product or its calibration.
Need help?
Do you have a question about the RDM3-P and is the answer not in the manual?
Questions and answers