
Related Manuals for Skandika Fitness SPEEDBIKE HYPORION


Summary of Contents for Skandika Fitness SPEEDBIKE HYPORION
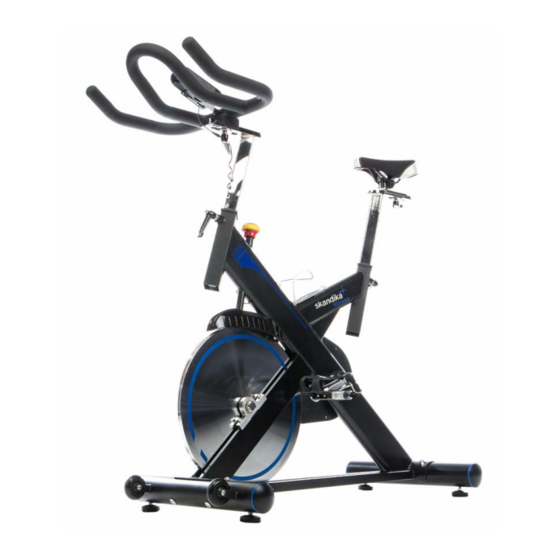
- Page 1 SPEEDBIKE HYPORION SF-1980 AUFBAU- und BEDIENUNGSANLEITUNG ASSEMBLY INSTRUCTIONS and USER GUIDE...
-
Page 2: Table Of Contents
Inhaltsverzeichnis Sicherheitshinweise ............................3 Teileliste ................................4 Explosionszeichnung ............................6 Aufbauanleitung ..............................7 Computerbedienung (SI8210-67) ........................9 iBiking+ Gebrauchsanleitung ........................14 SI8210 Bedienungsanleitung .........................25 Einstellmöglichkeiten .............................25 „Fit Hi Way“ Spezi kationen ........................26 Übungsanleitung ............................28 Garantiebedingungen ...........................58 Besuchen Sie auch unsere Webseite Scannen Sie den QR-Code für weitere Informationen mit Ihrem Smartphone www.skandika.com... -
Page 3: Sicherheitshinweise
Sehr geehrter Kunde, lesen Sie auf jeden Fall diese Anleitung komplett durch, bevor Sie Ihr Gerät zusammenbauen oder be- nutzen. Sie enthält wichtige Informationen hinsichtlich Ihrer Sicherheit. Sicherheitshinweise Beachten Sie folgende Sicherheitshinweise: 1. Halten Sie Kinder und Haustiere fern von dem Trainingsgerät. Lassen Sie Kinder niemals unbeauf- sichtigt allein in einem Raum mit dem Gerät. -
Page 4: Teileliste
Teileliste Teil Nr. Bezeichnung Menge Spezi kationen 01 R/L PEDALE (rechts/links) JD-304V (9/16”) ENDKAPPE Ø76 SCHRAUBBOLZEN GB/T12-1988 M10x90 HINTERER STANDFUSS UNTERLEGSCHEIBE Ø 10 MUTTER GB/T 802-1988 M10 UNTERLEGSCHEIBE SCHRAUBE GB/T 5780-2000 M8x40 LAGER 608ZZ SATTELSTÜTZE ENDKAPPE 38x38x1,5 SATTELVERSTELLUNG SATTEL VL-3127 STOPPER Ø70x36 VORDERER STANDFUSS... -
Page 5: Gb/T 5780-2000 M5X10
Teil Nr. Bezeichnung Menge Spezi kationen LAGER 6203ZZ ACHSE Ø20x162 LANGES FIXIERROHR Ø25xØ20,2x41,2 KURZES FIXIERROHR Ø25xØ20,5x12 INNERE ABDECKUNG 287x254x10 KEILRIEMEN 5P1180 KEILRIEMENRAD Ø200x24 SCHRAUBE GB/845-85 ST4,8x13 FEDER ø18x62 MUTTER M20x1,0 SCHRAUBE GB/T 5780-2000 M5x10 SCHWUNGRADABDECKUNG 294x71x92 UNTERLEGSCHEIBE GB/T 95-2002 12 MUTTER ø18x11 SCHRAUBE... -
Page 6: Explosionszeichnung
Explosionszeichnung Bei mechanischen Schwierigkeiten jeglicher Art nutzen Sie bitte nachfolgende Explosionszeichnung. Hier sind alle Teile mit einer spezi schen Nummer gekennzeichnet. Bitte nennen Sie uns diese Nummer,um das Teil gegebenenfalls im Laufe der Garantiezeit kostenlos zu ersetzen. Auch die Versandkosten werden von skandika getragen. -
Page 7: Aufbauanleitung
Aufbauanleitung 1. Vor dem Aufbau • Stellen Sie sicher, dass ausreichend Freiraum um das Gerät herum vorhanden ist. • Benutzen Sie das beigefügte Werkzeug für den Aufbau. • Prüfen Sie, ob alle benötigten Teile vorhanden sind. 2. Aufbau Schritt 1 Befestigen Sie den vorderen Standfuß... -
Page 8: Schraube
Schritt 3 Setzen Sie die Lenkerstütze (17) in den Hauptrahmen (16) ein und xieren Sie diese mit dem Feststeller (26) in der gewünschten Höhe. Montieren Sie den Lenker (18) an der Lenkerstütze (17) wie abgebildet und befestigen Sie ihn mit dem Feststeller (19) und der Unterlegscheibe (20). -
Page 9: Computerbedienung (Si8210-67)
Computerbedienung (SI8210-67) Funktionen und Eigenschaften Zeit (TIME): Der Computer zeigt die aktuelle Trainingszeit an (max. 99:59 Min.). Tempo (SPEED): Hier zeigt der Computer das aktuelle Trainingstempo an (max. 99,9). Distanz (DISTANCE): Die zurückgelegte Distanz wird hier angezeigt (max. 99,9). Kalorien (CALORIES): Die aktuell verbrannten Kalorien werden hier angezeigt (0-999 kcal). RPM: Zeigt die Drehzahl (Umdrehungen je Minute) an (0-999). - Page 10 Computerbedienung Standby/Aufwach-Funktion Der Computer wird nach ca. 4 Minuten ohne Eingabe oder Trainingssignal in den Standby-Modus schalten (Anzeige wird ausgeschaltet). Um den Computer wieder in den Normalbetrieb zu versetzen, drücken Sie eine beliebige Taste. Einschalten Setzen Sie 4 Batterien des Typs AA ein oder drücken Sie die RESET-Taste für 2 Sekunden, um den Com- puter einzuschalten.
- Page 11 Schnellstart 1. Durch Druck auf “START/STOP” können Sie di- rekt mit dem Training beginnen. Die Zeit zählt aufwärts. Die Funktionswerte Distanz / Kalorien / Drehzahl / Tempo und Pulsfrequenz werden eben- falls angezeigt. 2. Die Animation auf der Anzeige zeigt einen Fahr- radfahrer, der alle 0,1 km zum nächsten Segment wechselt.
- Page 12 Vorgabedistanz einstellen 1. Benutzen Sie das Drehrad, um eine Vor- gabedistanz (DISTANCE; Standardwert = 5.0) einzustellen und drücken Sie dann „START/STOP“, um mit der eingestellten Vorgabe zu trainieren. 2. Die Distanz zählt nun rückwärts. Eben- falls angezeigt werden: Zeit / Kalorien / Drehzahl / Tempo und Pulsfrequenz.
- Page 13 Einstellen einer Zielherzfrequenz 1. Benutzen Sie das Drehrad, um eine Vorgabeherzfrequenz (PULSE; Standard- wert = 100), einzustellen und drücken Sie dann „START/STOP“, um mit der einge- stellten Vorgabe zu trainieren. 2. Die Zeit zählt nun ganz normal aufwärts. Ebenfalls angezeigt werden: Distanz / Kalorien / Drehzahl / Tempo und Pulsfre- quenz.
-
Page 14: Ibiking+ Gebrauchsanleitung
iBiking+ Gebrauchsanleitung Inhaltsverzeichnis Bluetooth Einstellungsanweisungen für Android-Handys ............ 15 Bluetooth Einstellungsanweisungen für iOS-Handys ............17 Einloggen ..........................18 Zielwertvorgabe ........................22 Schnellstart ..........................23 Herzfrequenzvorgabe ......................24... -
Page 15: Bluetooth Einstellungsanweisungen Für Android-Handys
Bluetooth Einstellungsanweisungen für Android-Handys Laden Sie die App “iBiking+” im Google Play Store herunter. Systemvoraussetzungen: Anzeigeau ösung: 480x800, 720x1280 oder 1280x800, Android 4.3 und neuer. Bluetooth 4.0 und neuer. Hinweis: Abhängig von der verwendeten Hardware können unterschiedliche Vorgehensweisen zur Herstellung einer guten Verbindung notwendig sein. - Page 16 Hinweis: Abhängig von den Ein- stellungen Ihres Handys kann die Eingabe eines Passwortes notwen- dig sein. Tippen Sie auf ”SCAN FOR DEVICES”. Nach erfolgreicher Verbindung können Sie weitere Einstellungen in der App vornehmen.
-
Page 17: Bluetooth Einstellungsanweisungen Für Ios-Handys
Bluetooth Einstellungsanweisungen für iOS-Handys Aktivieren Sie Bluetooth auf Öffnen Sie die App und Laden Sie die App Ihrem Gerät. tippen Sie auf die linke, “iBiking+” im AppStore untere Schalt äche, um eine herunter. Verbindung herzustellen. Systemvoraussetzungen: iOS 8 und neuer. Wählen Sie das zu Verbindung erfolgreich Wählen Sie „BLUETOOTH“. -
Page 18: Einloggen
Einloggen Wählen Sie die Maßeinheit Tippen Sie auf “Setting”, Stellen Sie den Wert für die (“Imperial” oder “Metric”). um Ihr Pro l zu editieren. Antriebsübersetzung ein. Geben Sie einen Wert ein Wenn Sie die App zum Erstellen Sie ein neues (“x”... - Page 19 Tippen Sie “ACCEPT”. Einloggen mit Google- Laden..Konto. Erfolgreich eingeloggt. Einloggen mit Facebook- Laden..Konto.
- Page 20 Erstellen eines neuen Erfolgreich eingeloggt. Geben Sie die Kontos. Kontoinformationen und das Passwort ein. Loggen Sie sich in Ihr Öffnen Sie die email mit Drücken Sie nach dem E-Mail-Konto ein. dem Aktivierungslink und Log-in auf “EDIT”, um klicken Sie auf diesen. persönliche Daten eingeben zu können.
- Page 21 Tippen Sie auf das Kamera-Symbol, um ein Foto zu schießen Geben Sie die persönlichen oder auszuwählen. Drücken Sie „DONE“, um die Eingaben Daten ein. abzuschließen.
-
Page 22: Zielwertvorgabe
Zielwertvorgabe Geben Sie eine Zeitvorgabe Tippen Sie auf “TARGET”. Geben Sie eine (TIME) ein. Distanzvorgabe (DISTANCE) ein. Geben Sie eine Die Zeit zählt rückwärts Nach Trainingsende können Kalorienvorgabe (CALORIES) (Countdown). Sie können Sie die Trainingsdaten auf ein. auf dem Computer “START/ Facebook oder Twitter STOP”... -
Page 23: Schnellstart
Schnellstart Sie können auf dem Tippen Sie auf “QUICK Nach Trainingsende können Computer “START/STOP” START”. Sie die Trainingsdaten auf drücken, um zu pausieren. Facebook oder Twitter posten. -
Page 24: Herzfrequenzvorgabe
Herzfrequenzvorgabe Sie können nun ein Training Tippen Sie auf “HEART Geben Sie eine Zeitvorgabe abhängig von Ihrer Pulsfrequenz RATE”. (TIME) ein. absolvieren. Geben Sie den entsprechenden Prozentsatz Ihres Maximalpulses ein, welcher als Vorgabewert dienen soll. Die Zeit zählt rückwärts Wenn Ihre gemessene Nach Trainingsende können (Countdown). -
Page 25: Si8210 Bedienungsanleitung
Si8210 Bedienungsanleitung Installationsanleitung Computer • Der Computer kann nur im Standby-Modus mit der App verbunden werden • Während einer bestehenden Verbindung mit der App wird die LCD-Anzeige ausgeschaltet • Ohne eine Eingabe bzw. ein Signal für 4 Minuten oder mehr, wird die App automatisch getrennt und der Computer führt einen Neustart aus. -
Page 26: Fit Hi Way" Spezi Kationen
„Fit Hi Way“ Spezi kationen Systemvoraussetzungen Android 4.3 oder neuer mit Bluetooth® 3.0 und 4.0 iOS 9 oder neuer mit Bluetooth® 3.0 und 4.0 Installation der App Android: Suche nach “Fit Hi Way” im Google Play Store. iOS: Suche nach “Fit Hi Way” im Apple App Store. China: Suche nach “Fit Hi Way”... - Page 27 09 Rennmodus 10 Pro le 11 Trainingsziel 12 Trainingszussamenfassung 13 Trainingsaufzeichnung 14 Fitnessplan 15 Systemeinstellungen 16 Intervall...
-
Page 28: Übungsanleitung
Übungsanleitung Die Benutzung Ihres Spinning Bikes birgt verschiedene Vorteile. Ihre physische Fitness wird verbessert, Ihre Muskulatur wird geformt und – in Zusammenhang mit einer kalorienkontrollierten Diät – trägt das Training zu einem kontrollierten Gewichtsverlust bei. 1. Die Aufwärmphase Die Phase verbessert den Blut uss und hilft der Muskulatur, richtig zu arbeiten. Durch Aufwärmen wird das Risiko eines Krampfes oder von Muskelverletzungen reduziert. - Page 29 3. Die Abkühlphase (Cool Down) Diese Phase dient dazu, Ihr kardiovaskuläres System und Ihre Muskeln wieder zu entspannen. Sie können z. B. das Tempo reduzieren und für 5 weitere Minuten trainieren. Wiederholen Sie dann die Dehnungsübungen aus der Aufwärmphase – denken Sie wieder daran, keine Gewalt oder zu starken Druck bei der Dehnung auszuüben.
- Page 30 Table of contents Safety Information ............................31 Parts list ................................32 Exploded diagram ............................34 Assembly instructions .............................35 Computer instructions (SI8210-67) ........................37 iBiking+ User manual .............................42 Si8210 Instruction manual ..........................53 Adjustments ..............................53 „Fit Hi Way“ Speci cations ..........................54 Exercise instructions ............................56 Guarantee Conditions ............................59 Visit our website Scan the QR code for further information...
- Page 31 Dear customer, be sure to read the entire manual before you assemble or operate your machine. This manual contains important information regarding your safety. Important Safety Precautions Note the following safety precautions: 1. Keep children and pets away from the machine at all times. DO NOT leave children unattended in the same room with the machine.
-
Page 32: Parts List
Parts list Part No. Part description Speci cations 01 R/L PEDAL (right/left) JD-304V (9/16”) END CAP Ø76 CARRIAGE BOLT GB/T12-1988 M10x90 REAR STABILIZER FLAT WASHER Ø 10 DOMED NUT GB/T 802-1988 M10 WASHER BOLT GB/T 5780-2000 M8x40 BEARING 608ZZ SEAT POST END CAP 38x38x1,5 SEAT ADJUSTMENT POST... -
Page 33: Block
Part No. Part description Speci cations BEARING 6203ZZ AXIS Ø20x162 LONG FIXING TUBE Ø25xØ20,2x41,2 SHORT FIXING TUBE Ø25xØ20,5x12 INNER CHAIN COVER 287x254x10 BELT 5P1180 BELT WHEEL Ø200x24 SCREW GB/845-85 ST4,8x13 SPRING ø18x62 FIXING NUT M20x1,0 BOLT GB/T 5780-2000 M5x10 FLYWHEEL COVER 294x71x92 FLAT WASHER GB/T 95-2002 12... -
Page 34: Exploded Diagram
Exploded diagram In case of mechanical problems use this explosion drawing. All parts are marked with a specic part number in it. Tell us this number in order to replace the respective part (within warrany time this service may be free of charge). If necessary, you may additionally use the free user manual in pdf-format, available on www.skandika.com. -
Page 35: Assembly Instructions
Assembly instructions 1. Before assembling • Make sure that you will have enough space around the item. • Use the included tools for assembling. • Check if all needed parts are available. 2. Assembling Step 1 Attach the front stabilizer (15) to the front part of the main frame (16) with 2 at washers (5), 2 bolts M10x90 (3) and 2 nuts M10 (6). - Page 36 Step 3 Insert handlebar post (17) into main frame (16) and secure with the L-shape knob (26) in the desired height. Attach the handle- bars (18) to handlebar post (17) as shown and x with the L-shape knob (19) and washer (20).
-
Page 37: Computer Instructions (Si8210-67)
Computer instructions (SI8210-67) Functions and Features TIME: Computer shows actual exercise time (max. 99:59 min.). SPEED: The computer shows the current speed in the display (max. 99.9). DISTANCE: The workout distance is displayed here (max. 99.9). CALORIES: The currently burned calories are displayed here (0-999 kcal). RPM: Displays the rounds per minute (0-999). - Page 38 Computer operation Sleep / Wake-up function The monitor will enter SLEEP mode (LCD off) when there is no signal and no key pressed for 4 minutes. Press any button to wake up the monitor. Power on Install 4pcs AA batteries (or press RESET-key for 2 seconds) to power up the monitor. A buzzer sound will be emitted and the display will show all segments for 2 seconds and afterwards the wheel diame- ter for 1 second.
- Page 39 Quick start 1. You may start workout directly by pressing Start/ Stop. TIME begins to count up. DISTANCE/CA- LORIES/RPM/ SPEED/HEART RATE will also be displayed. 2. The animation on the monitor shows a biker, which will proceed to next gure every 0.1 km. 3.
- Page 40 Target Distance 1. Use joggle wheel to set target DISTANCE (preset value=5.0) and press START/STOP to workout with set target distance. 2. DISTANCE begins to count down. TIME/ CALORIES/RPM/SPEED/HEART RATE will also be displayed. 3. The character animation will proceed every 20% of the preset distance.
- Page 41 Target HR 1. Use joggle wheel to set target PULSE (preset value=100), and press START/STOP to workout with set target heart rate. Keep both hands on the handsensors during workout. 2. TIME begins to count up. DISTANCE/CA- LORIES/RPM/SPEED/HEART RATE will also be displayed.
-
Page 42: Ibiking+ User Manual
iBiking+ User manual Contents Bluetooth setting instruction for Android cell phone ............15 Bluetooth setting instruction for iOS Cell Phone ..............17 Log in ............................18 Target setting ........................... 22 Quick Start setting ........................23 HRC setting ..........................24... -
Page 43: Bluetooth Setting Instruction For Android Cell Phone
Bluetooth setting instruction for Android cell phone Download iBiking+ in Google Play Store. System requirements: Display resolution 480x800, 720x1280 or 1280x800, Android 4.3 and above. Bluetooth 4.0 and above. Notes: Depending on your hardware you may need to proceed in a different way to establish a proper connection. Not all smart device support BT 4.0 connections. - Page 44 Note: Depending on your smart device, you may need to enter a password. Click on ”SCAN FOR DEVICES”. After successful pairing, you can enter the app.
-
Page 45: Bluetooth Setting Instruction For Ios Cell Phone
Bluetooth setting instruction for iOS Cell Phone Turn on Bluetooth on your Open the app and click on Download iBiking+ in device. left bottom icon to connect. AppStore. System requirements: iOS 8 and above. Select device to connect. Connection established. Select „BLUETOOTH“. -
Page 46: Log In
Log in Select unit of measure Tap “Setting” to edit your Adjust gear ratio value. (“Imperial” or “Metric”). pro le. Enter a value (“x” to clear). If you use the app for the Create new account or log rst time, press “LOG IN”. in with Google or Facebook account. - Page 47 Press “ACCEPT”. Log in with Google account. Loading..Successfully logged in. Log in with Facebook Loading..account.
- Page 48 Create a new account. Successfully logged in. Key in account information and password. Log in into your email Find the email with the After log-in, press “EDIT” to account. activation link and click on enter personal data.
- Page 49 Click on camera icon to select or take photo. Press “DONE” to Enter personal data. nish setting procedure.
-
Page 50: Target Setting
Target setting Set TIME. Tap on “TARGET”. Set DISTANCE. Set CALORIES. Time will countdown. After nishing your You may press pause on exercise, you may post computer console to stop workout details on exercise. Facebook or Twitter. -
Page 51: Quick Start Setting
Quick Start setting You may press pause on Tap on “QUICK START”. After nishing your computer console to stop exercise, you may post exercise. workout details on Facebook or Twitter. -
Page 52: Hrc Setting
HRC setting You can run an automa- Tap on “HEART RATE”. Set TIME. tically steered training depending on your pulse frequency. Enter target pul- se percentage accordingly. Time will countdown. If your measured pulse is After nishing your above target value the exercise, you may post computer will show a workout details on... - Page 53 Si8210 Instruction manual Installation instructions • Console can be connected to app only in standby mode • During App connection the LCD will shut off • Without any signal for 4 minutes, the app will disconnect and the console will restart automatically.
- Page 54 „Fit Hi Way“ Speci cations System requirements Android 4.3 or newer with Bluetooth® 3.0 and 4.0 iOS 9 or newer with Bluetooth® 3.0 and 4.0 App installation Android: Search “Fit Hi Way” in Google Play Store. iOS: Search “Fit Hi Way” in Apple App Store. China: Search “Fit Hi Way”...
- Page 55 09 Race mode 10 Pro le 11 Exercise target 12 Exercise summary 13 Exercise record 14 Fitness plan 15 System settings 16 Interval...
- Page 56 Exercise instructions Using your spin bike will provide you with several bene ts, e.g. it will improve your physical tness, tone your muscles and - in conjunction with a calorie-controlled diet - help you to reduce weight. 1. The warm-up phase This stage helps to improve the blood circulation and prepares the muscles for your workout.
- Page 57 3. The cool-down phase This stage helps to soothe your muscles and your cardiovascular system after your workout. At the end of your workout, reduce the speed and exercise for approximately 5 minutes at this lower speed level. Afterwards, repeat the warm-up exercises as described above. It is recommended to exercise for at least 3 times a week –...
-
Page 58: Garantiebedingungen
Garantiebedingungen Für unsere Geräte leisten wir Garantie gemäß nachstehenden Bedingungen: 1. Wir beheben kostenlos nach Maßgabe der folgenden Bedingungen (Nummern 2-5) Schäden oder Män- gel am Gerät, die nachweislich auf einen Fabrikationsfehler beruhen, wenn Sie uns unverzüglich nach Feststellung und innerhalb von 24 Monaten nach Lieferung an den Endabnehmer gemeldet werden. Die Garantie erstreckt sich nicht auf leicht zerbrechliche Teile, wie z. - Page 59 Guarantee conditions For our devices we provide a warranty as de ned below. 1. In accordance with the following conditions (numbers 2-5) we repair defect or damage to the device free of charge, if the cause is a manufacturing defect. Therefore, these defects / damages need to be reported to us without delay after appearance and within the warranty period of 24 months after delivery to the end user.
- Page 60 Vertrieb & Service durch: MAX Trader GmbH Wilhelm-Beckmann-Straße 19 WEE-Reg. Nr. 45307 Essen DE81400428 Deutschland 20180214...
Need help?
Do you have a question about the SPEEDBIKE HYPORION and is the answer not in the manual?
Questions and answers