
Related Manuals for Skandika Fitness 600


Summary of Contents for Skandika Fitness 600
- Page 1 Art. SF-1091/1092/1093 Aufbau- und Bedienungsanleitung Assembly instructions and user guide Instructions de montage et mode d‘emploi...
- Page 2 VORWORT Bevor Sie beginnen Vielen Dank, dass Sie sich für eines unserer Produkte entschieden haben. Die Qualität jedes einzelnen Produkts wird bestmöglich geprüft und doch können gelegentliche Fehler nicht komplett ausgeschlossen werden. Sollten Sie feststellen, dass dieses Produkt in irgendeiner Art fehlerhaft ist oder dass ein Teil fehlt, nehmen Sie bitte Kontakt mit dem Händler auf.
-
Page 3: Table Of Contents
INHALTSVERZEICHNIS Inhaltsverzeichnis Einleitung .............................. 4 Bedienung ............................. 5 Anweisungen ............................7 Kontraindikationen ...........................7 Trainingsanweisungen ..........................7 Gleichgewichtsübungen ..........................8 Grundhaltung auf der Platte ........................9 Basic-Trainingsübungen ..........................9 Übergang vom Basic- zum Advanced-Training ..................12 Advanced-Trainingsübungen .........................13 Hinweise, Pflege, Wartung ........................16 Fehlerbehebung ............................16 Entsorgung | Service ..........................17 Explosionszeichnung/Teileliste (engl.) ....................50 Besuchen Sie auch unsere Webseite Scannen Sie den QR-Code... -
Page 4: Einleitung
Holen Sie das Beste einer Profi-Vibrationsplatte zu sich nach Hause. Eine kleine Platte mit echtem kommerziellen Feeling, Qualität und Design, zu einem erschwinglichen Preis. Die Home Vibration Plate 600 - Die coolste kleine Vibrationsplatte, die es jemals gab! Diese „Kleine“ kann alles, was größere Geräte auch können, im kompakten und einfach unterzubringenden Design - perfekt, wenn der Platz beschränkt ist aber Qualität und Stil dennoch wichtig sind. -
Page 5: Bedienung
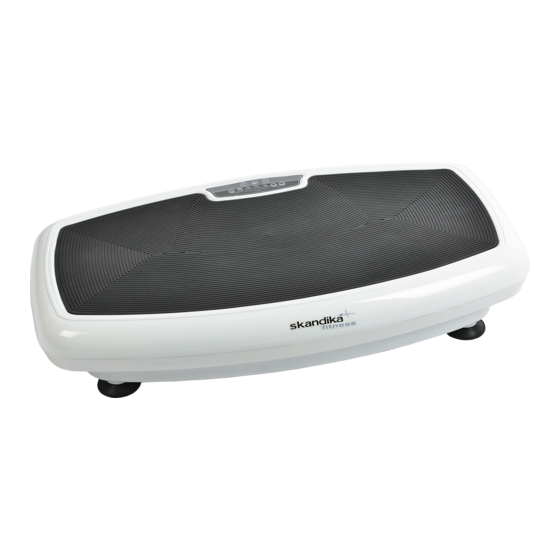
BEDIENUNG Produktübersicht Die Home Vibration Plate 600 besteht aus einem dreiteiligen Gehäuse und einer Standfläche mit Anti- Rutschbeschichtung. Die Standfüße sorgen für einen sicheren Stand. Eine geeignete Bodenschutz- matte (z. B. die skandika Unterlegmatte) sollte zum Schutz des Untergrundes verwendet werden. - Page 6 „88“ Die Fernbedienung hat einen Radius von max. 2,5m. Alle Funktionen der Home Vibration Plate 600 können am Hauptgerät oder mit der Infrarot Fernbedie- nung eingestellt werden. Die Programme P1-P3 wechseln automatisch die Geschwindigkeiten und bieten damit ein abwechs- lungsreiches Training.
-
Page 7: Anweisungen
6. Wir empfehlen das Training 3-4 mal wöchentlich, mit jeweils einem Tag Pause dazwischen. Transport des Gerätes Schalten Sie die Home Vibration Plate 600 am Netzschalter aus und entfernen Sie das Netzkabel. Halten Sie die Vibrationsplatte wie auf dem Bild beschrieben fest und rollen Sie diese auf den Transportrollen, welche nur auf einer Seite vorhanden sind. -
Page 8: Gleichgewichtsübungen
GLEICHGEWICHTSÜBUNGEN Gleichgewichtsübungen 1. Fußgelenk, Kniegelenk, Hüfte in eine gerade Beinachse bringen. So bekommen Sie Stabilität. 2. Ein Bein abwinkeln, Arme ausbreiten und versuchen das Gleichgewicht zu halten. 3. Sollten Sie sich unsicher fühlen, stellen Sie das Gerät vor eine Wand, damit Sie sich notfalls an der Wand abstützen können, wenn Sie das Gleichgewicht verlieren. -
Page 9: Grundhaltung Auf Der Platte
BASIC TRAININGSÜBUNGEN Grundhaltung auf der Platte 1. Position suchen 2. Körperspannung aufbauen 3. Position auspendeln ACHTUNG: Niemals mit ausgestreckten Gelenken trainieren! K: Kraft-Übung S: Stretch-Übung M: Massage-Übung K | 01: HOCKE Stellen Sie sich auf das Gerät, die Füße auf Schul- terbreite auseinander. - Page 10 BASIC TRAININGSÜBUNGEN K | 04: BIZEPSCURLS (ARMBEUGER) Stellen Sie sich auf das Gerät. Halten Sie die Knie leicht gebeugt und den Rücken und die Hand- gelenke gerade. Beugen Sie den Unterarm und ziehen Sie die Bänder fest nach oben. Sie sollten eine Spannung im Bizeps spüren.
- Page 11 BASIC TRAININGSÜBUNGEN S | 08: GESAMTER OBERKÖRPER Greifen Sie vorn an die Platte, legen Sie die Arme lang auf und ziehen Sie sich ganz lang. Sie spü- ren eine Dehnung der Schulter und des Rückens. M | 09: OBERSCHENKEL INNEN Liegen Sie seitwärts dem Gerät zugewandt.
-
Page 12: Übergang Vom Basic- Zum Advanced-Training
BASIC TRAININGSÜBUNGEN M | 13: OBERSCHENKEL-VORDERSEITE Oberschenkel-Vorderseite auf die Platte legen, auf die Unterarme stützen. Bauch immer frei blei- bend. Nicht auf die Platte legen. M | 16: WADEN Waden locker auf die Platte legen. Übergang vom Basic- zum Advanced-Training Wenn Sie die Basic-Übungen nach diesen Vorgaben erfolgreich absolviert und dabei regelmäßig (2 bis 3 mal die Woche) trainiert haben, können Sie mit den Advanced-Übungen beginnen. -
Page 13: Advanced-Trainingsübungen
ADVANCED TRAININGSÜBUNGEN K | 01: GERADER BAUCHMUSKEL Auf die Platte setzen, den Oberkörper aufrichten und gerade leicht nach hinten lehnen. Die Beine im rechten Winkel anheben, die Hände von der Platte lösen und nach vorne strecken. Körper- spannung halten. Nicht bei Rückenproblemen ausführen. K | 02: GERADER BAUCHMUSKEL Alternative mit Kissen: Kissen auf die Platte legen, mit dem unteren/mitt-... - Page 14 ADVANCED TRAININGSÜBUNGEN K | 05: SEITHEBER, SCHRÄGER BAUCHMUSKEL, RUMPF Seitlich auf die Platte legen, mit einer Hand am Boden und mit der anderen auf der Platte abstüt- zen, beide Beine lang strecken, die Füße aufei- nander legen, dann beide Beine gleichmäßig so weit es geht nach oben ziehen.
- Page 15 ADVANCED TRAININGSÜBUNGEN K | 09: SEITSTÜTZ, SCHRÄGER BAUCHMUSKEL, RUMPF Stützen Sie einen Arm auf die Platte, strecken Sie die Beine ganz lang, drücken Sie den Rumpf nach oben, strecken Sie den anderen Arm nach oben und halten Sie die Spannung. Schultern und Arm müssen in einer Linie sein.
-
Page 16: Hinweise, Pflege, Wartung
HINWEISE, PFLEGE UND WARTUNG Hinweise, Pflege und Wartung Während der Benutzung des Gerätes • Sollten Sie sich durch die Benutzung des Gerätes unwohl fühlen oder sonstige Auffälligkeiten auftre- ten, beenden Sie sofort das Training und kontaktieren Sie einen Arzt. • Benutzen Sie keine Gewalt. -
Page 17: Entsorgung | Service
ENTSORGUNG | SERVICE Batterie-Entsorgung rien zurückzugeben. Sie können Ihre alten Batterien bei den öffentlichen Sammelstellen in Ihrer Gemeinde oder überall dort abge- ben, wo Batterien der betreffenden Art verkauft werden. WIR EMPFEHLEN ALKALI-MANGAN BATTERIEN. Pb = Batterie enthält Blei Cd = Batterie enthält Cadmium Hg = Batterie enthält Quecksilber Hinweise zum Umweltschutz Dieses Produkt darf am Ende seiner Lebensdauer nicht über den normalen Haushaltsabfall entsorgt werden,... -
Page 18: Before You Begin
WELCOME Before you begin Thank you for choosing one of our products. Although the quality of our products is checked on a re- gularly base, we cannot eliminate each possible mistake completely. If you shoud find any product is incomplete or defective, please contact your dealer. Please follow the safety hints and instruction given in this manual in order to use the device correctly and effectively. - Page 19 CONTENTS Contents Introduction ............................20 Use ..............................21 Directions ............................. 23 Contraindications ...........................23 Exercise instructions..........................23 Balance exercises ..........................24 Basic posture on the device ........................25 Basic-Exercise instructions........................25 Transition from Basic- to Advanced-Exercises ..................28 Advanced-Exercise instructions ......................29 Hints, Care, Maintenance ........................32 Troubleshooting .............................32 Disposal | Service ..........................33 Exploded drawing/Parts list ........................50 Please visit our website...
-
Page 20: Introduction
A small appliance with commercial feeling, quality and design - at an affordable price. The Home Vibration Plate 600 is the most fashionable small vibration plate ever! The „little thing“ is able to provide all the features of a big professional plate. The small and easy-to-store design enables you to use it in limited space, but does not limit quality and style. -
Page 21: Use
Product overview The Home Vibration Plate 600 consists of a tripartite cover and a non-slip stand. We recommend to use a suitable floor protection mat (e.g. the skandika floor protection mat) to protect your floor. Stand Middle cover Upper cover... - Page 22 2.5 metres. All functions of the Home Vibration Plate 600 may be set on the main device or with the help of the remote control. The programmes P1 to P3 are changing the vibration speed automatically and therefore provide a diversified exercise.
-
Page 23: Directions
6. We recommend to exercise 3 to 4 times a week, each with at least 1 day rest in between. Transportation of the device Switch off the Home Vibration Plate 600 and remove the mains cable. Grab the device as shown on the drawing and roll it with the help of the transportation rolls, which are only fixed on one side of the device. -
Page 24: Balance Exercises
BALANCE EXERCISES Balance Exercises 1. Foot joint, knee joint and hips should build a straight axle in order to attain stability. 2. Bend one leg, stretch your arms and try to maintain balance. 3. If you should feel insecure, place the device in front of a wall so that you can use the wall as a sup- port in case you should lose the balance. -
Page 25: Basic Posture On The Device
BASIC POSTURE ON THE DEVICE Basic posture on the device 1. Search position 2. Build up body tension 3. Stabilize position ATTENTION: Never exercise with outstretched joints! K: Strength exercise S: Stretch exercise M: Massage K | 01: CROUCH Stand on the device, feet shoulder width apart. Keep back straight, bend knees and upper body slightly to the front and contract your leg muscles. -
Page 26: Basic-Exercise Instructions
BASIC EXERCISE INSTRUCTIONS K | 04: BICEPS CURLS Stand on the device. Hold your knees slightly ben- ded and back and wrists straight. Bend the lower arm and pull up the bands powerfully. You should feel a tension in the upper arms (biceps). K | 05: BENT PULL (BACK) Stand in front of the device. - Page 27 BASIC EXERCISE INSTRUCTIONS S | 08: FULL UPPER BODY Grasp the device as shown and stretch your arms to the front. You will feel the stretch in your shoul- der and back. M | 09: INNER THIGHS Lay on the floor with the device on the side as shown.
-
Page 28: Transition From Basic- To Advanced-Exercises
BASIC EXERCISE INSTRUCTIONS M | 13: FRONT THIGHS Place the front thighs on the plate and steady yourself on your lower arms. Abdomen should al- ways be free in the air - never lay it on the plate. M | 16: CALVES Lay your calves on the plate - do not tense. -
Page 29: Advanced-Exercise Instructions
ADVANCED EXERCISE INSTRUCTIONS K | 01: RECTUS ABDOMINIS MUSCLE Sit on the plate, erect the upper body and slowly lean to the back side. Lift your legs in a 90° angu- lar, loose your hands from the plate and stretch out your arms. - Page 30 ADVANCED EXERCISE INSTRUCTIONS K | 05: SHOULDER, TORSO AND ABDOMINAL MUSCLES Lay on the device laterally with one hand on the floor and the other hand on the plate. Stretch out both legs keeping your feet against each other. Pull up both legs as far as possible. Hold the ten- sion.
- Page 31 ADVANCED EXERCISE INSTRUCTIONS K | 09: SIDEREST, TRANSVERSE AB MUSCLE, TORSO Rest on arm on the device, stretch your legs and press the torso upwards. Now raise the other arm and keep the tension. Arms and shoulders should be aligned, never let the upper body sag. K | 10: FRONT SHOULDER Position yourself in front of the device and place on foot on the plate.
-
Page 32: Hints, Care, Maintenance
HINTS, CLEANING AND MAINTENANCE Hints, Cleaning and Maintenance During the use of the device • If you should feel unwell during the use of the device or any other abnormalities should occur, imme- diately stop exercise and contact your physician. •... -
Page 33: Disposal | Service
DISPOSAL | SERVICE Battery-Disposal ries can be bought. WE RECOMMEND THE USE OF ALCALI-MANGAN BATTERIES. Pb = Battery contains lead Cd = Battery contains cadmium Hg = Battery contains mercury In the interest of Environmental Protection At the end of its life cycle, this product must not be disposed of with household waste but must be taken to a collection unit for the recycling of electric and electronic equipment. - Page 34 BIENVENUE Avant de commencer Merci d’avoir choisi un de nos produits. La qualité de chaque produit a été testée par des méthodes les plus modernes, mais des erreurs ne peuvent pas être totalement exclues. Si vous constatez que ce produit est défectueux de quelque façon ou si une pièce est manquante, veuillez contacter votre reven- deur.
- Page 35 CONTENU Contenu Introduction ............................36 Opération .............................. 37 Instructions ............................39 Contre-indications..........................39 Instructions d’entraînement ........................39 Exercices d’équilibre ..........................40 Position de base sur la plaque ......................41 Exercices BASIC ...........................41 Transition de l’entraînement Basic à Advanced ..................44 Exercices ADVANCED .........................45 Instructions, entretien et maintenance ....................48 Dépannage ............................48 Élimination | SAV ...........................49 Schémas éclatés / Liste de pièces (anglais) ..................50...
-
Page 36: Introduction
à un prix abordable. Home Vibration Plate 600 – la petite plaque vibrante, plus cool que jamais ! Cette petite plaque est capable de tout ce que font les appareils plus grands, mais elle est beaucoup plus compacte et simple à... -
Page 37: Opération
OPÉRATION Présentation du produit La Home Vibration Plate 600 se compose d’un boîtier en trois parties et d’une surface d’appui avec un revêtement antidérapant. Les pieds assurent une assise ferme. Utilisez un tapis de sol de protection (par exemple le tapis de sol skandika) approprié pour protéger le plancher. - Page 38 La télécommande dispose d’une portée de max. 2,5 m. Toutes les fonctions de la Home Vibration Plate 600 peuvent être réglées sur l’unité principale ou avec la télécommande infrarouge. Les programmes P1-P3 changent automatiquement les vitesses et permettent un entraînement varié.
-
Page 39: Instructions
6. Nous vous recommandons de vous entraîner 3 à 4 fois par semaine, avec un jour de repos entre les séances. Transporter l’appareil Eteignez le Home Vibration Plate 600 par l’interrupteur et dé- branchez l’appareil du secteur. Tenez la plaque vibrante comme décrit dans l’image ferme- ment et faites-la rouler sur des rouleaux de transport, qui sont présents sur que un seul côté. -
Page 40: Exercices D'équilibre
EXERCICES D’ÉQUILIBRE Exercices d’équilibre 1. Mettez la cheville, le genou, et la hanche dans un seul axe. Ainsi, vous serez plus stable. 2. Pliez une jambe, tendez les bras et essayez de maintenir l’équilibre. 3. Si vous ne vous sentez pas à l’aise, mettez l’appareil en face d’un mur, de sorte que vous pussiez vous soutenir au mur si vous perdez l’équilibre. -
Page 41: Position De Base Sur La Plaque
EXERCICES BASIC Position de base sur la plaque 1. Rechercher la position 2. Construire la tension de corps 3. Equilibrer la position ATTENTION: Ne vous entraînez jamais les articulations tendues ! K : Exercice de puissance S : Exercice d’étirement M : Exercice de massage K | 01: Position accroupie Montez sur l’appareil, les pieds écartés à... - Page 42 EXERCISES BASIC K | 04: Biceps Curls (fléchisseurs du bras) Montez sur l’appareil. Tenez les genoux légère- ment pliés et le dos et les poignets droits. Pliez vos bras et tirez les sangles fermement vers le haut. Vous devriez ressentir une tension dans vos biceps.
- Page 43 EXERCICES BASIC S | 08: Haut du corps Saisissez l’avant de la plaque, posez-y les bras tendus et étendez-vous. Vous sentirez un étire- ment dans les épaules et au dos. M | 09: Intérieur des cuisses Allongez-vous le long de l’appareil en vous tournant vers celui-ci.
-
Page 44: Transition De L'entraînement Basic À Advanced
EXERCISES BASIC M | 13: Partie avant des cuisses Posez la partie avant des cuisses sur la plaque en vous appuyant sur les avant-bras. Le ventre ne doit pas toucher la plaque. M | 16: Mollets Posez les mollets légèrement sur la plaque. Transition de l’entraînement Basic à... -
Page 45: Exercices Advanced
EXERCICES ADVANCED K | 01: Abdominaux droits Asseyez-vous sur la plaque, tenez le torse droit et penchez-vous légèrement en arrière. Levez les jambes à un angle droit, levez les mains de la plaque et étendez-les vers l’avant. Maintenez la tension du corps. Cet exercice est déconseillé... - Page 46 EXERCISES ADVANCED K | 05: Levage latéral, abdominaux obliques, torse Positionnez-vous latéralement sur la plaque, une main sur le sol et l’autre sur la plaque, étendez les deux jambes, les pieds ensemble, puis levez les deux pieds en même temps le plus haut possible. Maintenez la tension.
- Page 47 EXERCICES ADVANCED K | 09: Levage latéral, abdominaux obliques, torse Appuyez un bras sur la plaque, tendez vos jam- bes, poussez le torse vers le haut en tendant l’autre bras. Maintenez la tension, les épaules et les bras alignés. Maintenez le torse droit. K | 10: Epaule avant Positionnez-vous devant la plaque, un pied posé...
-
Page 48: Instructions, Entretien Et Maintenance
INSTRUCTIONS, ENTRETIEN ET MAINTENANCE Instructions, entretien et maintenance Pendant l’utilisation du dispositif • Si vous vous ressentez un malaise lors l’utilisation de l’appareil ou si d’autres anomalies se produi- sent, arrêtez immédiatement l’exercice et consultez un médecin. • Ne forcez pas l’appareil. Il existe un risque de blessures et de dysfonctionnements. Installation N’installez pas l’appareil : Près d’une source de chaleur ou de flammes nues. -
Page 49: Élimination | Sav
ÉLIMINATION | SAV Elimination des piles Les piles n’entrent pas dans la catégorie des ordures ménagères. En tant que consommateur, vous êtes léga- lement tenu de remettre les piles usagées. Vous pouvez remettre vos anciennes piles aux centres de collecte publics de votre commune ou partout où... -
Page 50: Explosionszeichnung/Teileliste (Engl.)
EXPLOSION DRAWING / PARTS LIST Spare Parts Name Specs Qty. Material Remoter 148.5*43.7*17.5 Controller box 185.0*95.0*57.3 Sway brace welded components 582.0*244.0*50.0 Swing base fixed frame welded components 630.0*326.0*78.5 Sway brace welded components 286.0*74.0*26.7 Eccentric brace welded components 93.0*66.0*33.5 Fixed frame welding components of the motor 222.0*133.8*86.0 Φ30.0*35.0 Cushion combination... - Page 51 PARTS LIST Spare Parts Name Specs Qty. Material Cross recessed countersunk head screw M5x16 steel M5 cross trough pan head screws and elastic washer, plain washer combination M5x12 M5 cross trough pan head screws and elastic washer, plain washer combination M5x30 M5 cross trough pan head screws and elastic washer, plain washer combination M5x30...
- Page 52 M-V1.0 10/2014...
Need help?
Do you have a question about the 600 and is the answer not in the manual?
Questions and answers