Table of Contents
Advertisement
Advertisement
Table of Contents

Related Manuals for Watec WAT-933


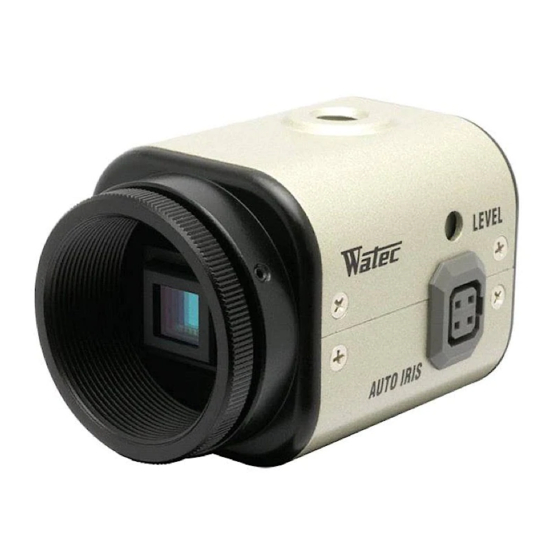
Summary of Contents for Watec WAT-933
-
Page 1: Wat-933&Wat-2400S User's Manual
WAT-933&WAT-2400S User’s Manual Rev. 1.03 Watec Co., Ltd. 2018/6/11... -
Page 2: Revision Record
Revision Record Rev. Date Changes Remarks 1.00 November 15, 2017 ・New function added. 1.01 January 25, 2018 ・Specification changed. 1.02 April 10, 2018 ・New function added. 1.03 June 11, 2018... -
Page 3: Table Of Contents
A case of VLC media player ....................8 Changing the camera settings ..................10 4.1. Configuration changes from the Web browser ........... 10 4.1.1. WAT-933 System Configuration: Overview (top page) ....... 10 Setting file Retrieve & Load ..................13 5.1. Retrieve Settings ....................13 5.2. -
Page 4: Network Connection And Power Activation Of The Camera
+12VDC input plug on back panel of the camera, and the other is powered by PoE using a LAN connector. ※simply called “WAT-933” from now on if there is no difference in the function “WAT-933” and “WAT-2400S” Please supply power by the one or the other of the way above and do not supply the both power systems simultaneously. -
Page 5: Network Settings
The network default setting of the WAT-933 is as follows. IP Address: 192.168.1.250 (static) Netmask: 255.255.255.0 Gateway: 192.168.1.1 The network settings of the WAT-933 can be changed in the setting change by the Web browser which will be described later. -
Page 6: Pc Network Settings
2.2. PC network settings Set the PC network settings in order to accommodate WAT-933’s requirement. PC network settings for a local area connection in Windows7 as follows. Control Panel>>Network and Internet>>Network and Sharing Center >>Local Area Connection >>Properties>>Internet Protocol Version 4(TCP/IPv4) Properties... - Page 7 An example of PC network settings Connect the WAT-933 and your PC as shown in the below figure. And if the network setting of the camera is in default configuration (IP Address: 192.168.1.250 (static)), go through the following steps to set up the PC network settings.
-
Page 8: Checking The Image From The Camera
Click on Media <Open Network Stream from the menu. Paste your copied URL in the ‘Network Protocol’ box and click the play button. Wait till the video start streaming in your VLC. rtsp://”WAT-933 IP Address”:554/h264 H264: rtsp:// ”WAT-933 IP Address”:554/jpeg MJPEG: (Example: rtsp://192.168.1.250:554/h264)... - Page 9 The network connections and settings work property, video starts to stream. Please check again the network settings if it does not start. The screen might become grey during the viewing, in that case, please click the stop button in the lower left and click the play button again.
-
Page 10: Changing The Camera Settings
4.1. Configuration changes from the Web browser (WAT-933 System configuration) The network settings of the WAT-933 can be changed in the setting change by the Web browser. The Web browser must correspond to html5 and recommended web browser is Internet Explorer 11. - Page 11 ”WAT-933 MENU” will be displayed as shown in the below figure. This page is the top page.
- Page 12 Network Settings Click on “Ethernet” from the menu. ”Network Information” will be displayed as shown in the below figure. At this page, you can change the following network settings; Switching of AUTO IP (DHCP) and STATIC IP Advanced settings for STATIC IP Enter the each item and click the “Submit”...
-
Page 13: Setting File Retrieve & Load
5.1. Retrieve Settings Click on the download link to download the file "setting.w933". 5.2. Load Settings Click the "Brows" button to display the file selection dialog and select "setting.w933". When a message appears asking you to restart “WAT-933”, click "OK". -
Page 14: Sd Card Information
6. SD Card Information This screen is used to make settings related to the SD card. 6.1. Continuous Recording "Continuous Recording" function can be arbitrarily turned ON/OFF. "Video&Snapshot Files" described later can be used only when "Continuous Recording" is off. 6.2. -
Page 15: Ftp Access
7. FTP Access You can access internal storage by using FTP. This section explains the connection method of using "FileZilla". 7.1. A case of FileZilla Download the appropriate Installer which meets your PC from FileZilla official download page (https://filezilla-project.org/) and install it. Open the FileZilla when the installation is completed. -
Page 16: Selection Of Streaming To Record
8. Selection of Streaming to Record You can select video streaming to be recorded on the SD card. Switch the h264 Main / Sub with the red line "Select Recording" shown below. Main Settings Sub Settings... -
Page 17: Display / Hide Timestamp
9. Display / hide timestamp You can choose to show / hide the timestamp of the image. Toggle display / non-display on "Timestamp Display" in the figure below. -
Page 18: Selection Of Audio Input
10. Selection of Audio Input You can select audio input. Select from "INTERNAL MICROPHONE", "EXTERNAL AUDIO" or "MIX BOTH" with the red line "Select Audio" shown below. -
Page 19: Onvif
11. ONVIF You can use the ONVIF Profile S. This section explains the display method of using "ONVIF Device Manager". 11.1. A case of ONVIF Device Manager Download the appropriate Installer which meets your PC from ”ONVIF Device Manager” official download page (https://sourceforge.net/p/onvifdm/wiki/Home/) and install it. Open the “ONVIF Device Manager”... -
Page 20: Live Video
11.3. Live video Click the red line part "Live video" in the figure below to enable live viewing. 11.4. Stream switching Although it is streaming "H264 Main" in the initial state, you can switch to "H264 Sub" and "MJPEG". Click the red line part "Profiles" in the figure below to display the Profiles setting screen. Select "subStream"...
Need help?
Do you have a question about the WAT-933 and is the answer not in the manual?
Questions and answers