Advertisement
Quick Links
Product Description
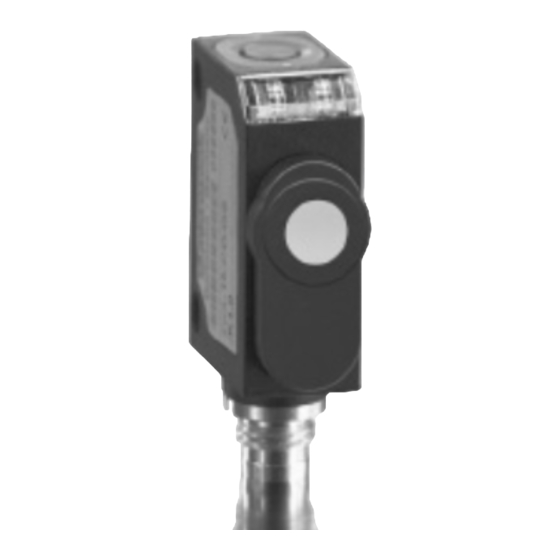
The zws sensor offers a non-contact
measurement of the distance to an
object which must be positioned
within the sensor's detection zone.
The switched output is set in depen-
dence of the adjusted detect dis-
tance.
Via the push-button, the detect dis-
tance and operating mode can be
adjusted (teach-in). Two LEDs indi-
cate operation and the state of the
Operating Instructions
switched output.
Ultrasonic proximity switch with
Safety Notes
one switched output
Read the operating instructions
prior to start-up.
zws-15/CD/QS
zws-15/CE/QS
Connection,
adjustment works may only be
zws-24/CD/QS
zws-24/CE/QS
carried out by expert personnel.
zws-25/CD/QS
zws-25/CE/QS
No
zws-70/CD/QS
zws-70/CE/QS
accordance with the EU Machine
Directive
Sensor adjustment with Teach-in procedure
Set detect point
Set window mode
Place object at position
Place object at position
Press push-button for about
Press push-button for about
3 s until LEDs flash
3 s until LEDs flash
simultaneously
both LEDs:
flash
both LEDs:
mutually
Place object at position
Press push-button for
Press push-button for
about 1 s
Proper use
zws ultrasonic sensors are used for
non-contact detection of objects.
Installation
Mount the sensor at the installa-
tion site with the aid of the
enclosed mounting plate.
Maximum torque: 0,5 Nm
installation
and
Fig. 1: Attachment with mounting plate
safety
component
in
Connect a connection cable to the
M8 device plug.
Set two way reflective
barrier
Place object at position
Press push-button for about
3 s until LEDs flash
simultaneously
simultaneously
flash
both LEDs:
flash
mutually
mutually
Press push-button for
about 1 s
about 10 s
Normal operating mode
Set switched output
Avoid mechanical load on the con-
nector.
4
2
1
3
1
+U
B
-U
3
B
4
D
2
Sync
Fig. 2: Pin assignment with view onto sensor
plug and colour coding of the
microsonic connection cable
Start-Up
Connect the power supply.
Carry
out
the
in accordance with the diagram.
Factory Setting
Operation with one detect point
Enable/disable Teach-in
Set NOC/NCC
Switch off power supply
While pressing the push-
button switch on power
Press button for about 13 s
Keep push-button pressed
until LEDs flash
for about 3 s until both
mutually
LEDs flash simultaneously
green LED:
flashes
green LED:
yellow LED:
on: NOC
yellow LED:
off: NCC
To change output characte-
To enable/disable Teach-in
ristic press push-button
press push-button
for about 1 s
Wait for 10 s
Switched output on NOC
Detect points at operating range
Operating modes
Three operating modes are available
for the switched output:
colour
Operation with one detect point
brown
The switched output is set if the ob-
blue
ject falls below the set detect point.
black
white
Window mode
The switched output is set if the ob-
ject is within the set window mar-
gins.
Two-way reflective barrier
The switched output is set if the ob-
ject is between sensor and reflector.
adjustment
Synchronization
You can synchronize as many sensors
as you like.
Apply a square-wave signal to the
sync-input with pulse width t
Reset to factory setting
push-button
Switch off power supply
While pressing the push-
button switch on power
supply
supply
Keep push-button pressed
for about 13 s until both
LEDs stop flashing
flashes
on: push-button
enabled
off: push-button
disabled
for about 1 s
Wait for 10 s
Normal operating mode
Further settings
repetition rate t
(Fig. 3 and
p
technical data).
A high level on the sync-input will
deactivate the sensor.
Sensor disabled
Sensor disabled
+U
B
Start
-U
B
t
t
i
p
Fig. 3: External synchronization signal
Checking operation mode
In normal mode shortly press the
push-button.
The green LED stops shining for one
second, then it will show the current
operating mode:
1 x flashing = operation with one
and
switching point
i
2 x flashing = window mode
3 x flashing = reflective barrier
After a break of 3 s the green LED
shows the output function:
1 x flashing = NOC
2 x flashing = NCC
Maintenance
microsonic sensors are maintenance-
free. In case of excess caked-on dirt
we recommend cleaning the white
sensor surface
Advertisement

Summary of Contents for Microsonic zws-15/CD/QS
- Page 1 Set window mode Set NOC/NCC Reset to factory setting barrier push-button Maintenance microsonic sensors are maintenance- Switch off power supply Switch off power supply free. In case of excess caked-on dirt we recommend cleaning the white sensor surface While pressing the push-...
- Page 2 *B6284* microsonic GmbH / Phoenixseestraße 7 / 44263 Dortmund / Germany / T +49 231 975151-0 / F +49 231 975151-51 / E info@microsonic.de / W microsonic.de The content of this document is subject to technical changes. Specifications in this document are presented in a descriptive way only. They do not warrant any product features.


Need help?
Do you have a question about the zws-15/CD/QS and is the answer not in the manual?
Questions and answers