Table of Contents
Advertisement
Quick Links
Advertisement
Table of Contents

Summary of Contents for AMX DXLITE DXL-TX-4K60
- Page 1 INSTRUCTION MANUAL DXLITE 4K60 TRANSMITTER DXL-TX-4K60 A V FOR AN IT WORLD ®...
-
Page 2: Safety Instructions
COPYRIGHT NOTICE AMX© 2018, all rights reserved. No part of this publication may be reproduced, stored in a retrieval system, or transmitted, in any form or by any means, electronic, mechanical, photocopying, recording, or otherwise, without the prior written permission of AMX. Copyright protection claimed... -
Page 3: Esd Warning
Anyone performing field maintenance on AMX equipment should use an appropriate ESD field service kit complete with at least a dissipative work mat with a ground cord and a UL listed adjustable wrist strap with another ground cord. -
Page 4: Table Of Contents
Table of Contents Table of Contents Safety Instructions ......................2 ESD Warning ........................3 Table of Contents ......................4 Overview ..........................5 Features ........................5 Package Contents ...................... 5 Specifications ........................6 Front Panel Description ....................9 Rear Panel Description ...................... 10 Installation ........................ -
Page 5: Overview
The onboard USB 2.0 available on the DXLite allows for easy distribution of USB signals between the transmitter and receiver. A USB device, such as an AMX Acendo Vibe conferencing soundbar, can be mounted at the display and connected to a DXLite receiver. -
Page 6: Specifications
2 x 3P-3.5MM Phoenix Connectors 1 x 2P-3.5MM Phoenix Connectors 1 x 12V/2A Power Adapter 1 x IR Receiver 1 x US exchangeable adapters 1 x EU exchangeable adapters 1 x UK exchangeable adapters 2 x mounting ear 4 x M2.5 screw (for mounting ears) AMX Products • (1) Power Cord, Universal Compatible with •... - Page 7 Specifications Specifications DCL-TX-4K60 Specifications (cont.) Rear Connectors Local Power Screw Down Locking Power Connector HDBaseT output Serial RJ-45 Serial 3 Position 3.5mm Pluggable Phoenix Terminal HDMI Input HDMI Type A Female USB 2.0 HDBaseT (4) USB Type A Connectors for USB Peripheral Devices (1) USB 2.0 Type B Connector For Host Device Pass-through Either Host or Peripheral Devices Active Based on Front USB Switch Selection IR RX...
- Page 8 Specifications Specifications DCL-TX-4K60 Specifications (cont.) Signal Transport - HDBaseT Connector (1) RJ-45 Supported Signal Digital video, audio, bidirectional control, USB 2.0 and power Styles Transport Layer 10.2 Gbps Throughput (Max) Input Formats Supports 4K60 4:4:4 HDMI 2.0, HDCP 2.2., embedded audio, power, bidirectional control and USB 2.0 pass-through Twisted Pair Cable Shielded Cat6, Cat6A and Cat7 HDBaseT cable runs for equipment shall only be run within a common...
-
Page 9: Front Panel Description
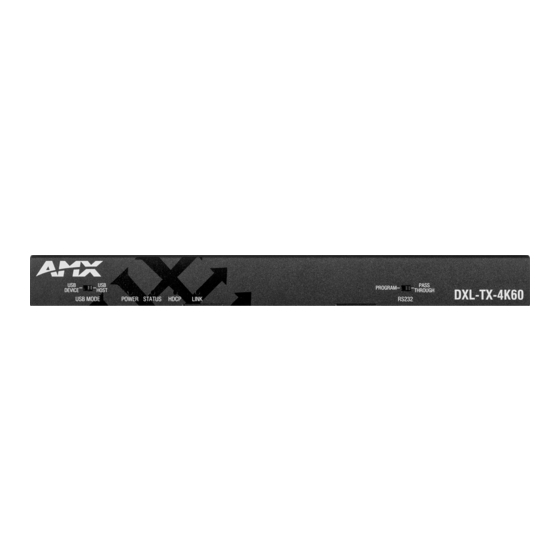
Front Panel Description Front Panel Description Name Description Switch to USB Host (default setting) or USB Device mode. USB Mode Switch On: DXL-TX-4K60 is powered on. POWER LED (Green) Off: DXL-TX-4K60 is powered off. Blinking: DXL-TX-4K60 is working properly. STATUS LED (Green) Off: DXL-TX-4K60 is not working properly. -
Page 10: Rear Panel Description
Rear Panel Description Rear Panel Description Name Description DC 12V Connect the power adapter provided. HDBT OUT Connect to the HDBT IN of an HDBT receiver with a Cat 5e/6/7 cable. RS232 Fo RS232 pass-through HDMI IN Connect to an HDMI source using an HDMI cable. Connect to USB devices (e.g. -
Page 11: Installation
Installation & Wiring Installation Note: Before installation, ensure the device is disconnected from the power source. To install the DXL in a suitable location: Position and install the mounting brackets with the four mounting screws provided. Mount and secure the device to a surface or a suitable location with the mounting screws. Attach the brackets provided to side panels of the device Wiring... - Page 12 Installation & Wiring Wiring TV Remote Blu-ray Player HDMI IN IR Emitter USB HOST Receiver DXL-TX-4K60 HDBT HDBT Receiver USB DEVICE IR Emitter HDMI OUT Receiver Player Remote Interactive Whiteboard/ Keyboard/Mouse Instruction Manual - DXLite 4K60 Transmitter...
-
Page 13: Rs232 Operation
RS232 Operation RS232 Operation RS232 Pinout The following figure shows the RS232 pinout. Connect with the phoenix connectors provided. TXD RXD RS232 Port Connected RS232 Device Pins TX GND Firmware Upgrade The RS232 port of the DXL can be used for firmware upgrading. Download firmware upgrading execution software to your PC. -
Page 14: For Rs232 Pass-Through
RS232 Operation RS232 Pass-through The RS232 port of DXL can be used for bi-directional RS232 signal pass-through between the DXL and an HDBT receiver. To set up for RS232 pass-through: Switch the “RS232” to “PASS THROUGH” mode on the transmitter’s front panel. Connect an RS232 Master (or Slave) Device to the RS232 port of the DXL with an RS232 cable. -
Page 15: Troubleshooting
Troubleshooting Troubleshooting Power: Ensure all devices are powered on. Indicator: Ensure all LED indicators of the DXL are normal according to the User Manual. Devices: Ensure display picture can be shown normally when directly connecting a source to display device.. Cable: Plug the HDMI/CatX cable in and out or try a different HDMI/CatX cable. - Page 16 The AMX Warranty and Return Policy and related documents can be viewed/downloaded at www.amx.com. 3000 RESEARCH DRIVE, RICHARDSON, TX 75082 AMX.com | 800.222.0193 | 469.624.8000 | +1.469.624.7400 | fax 469.624.7153 AMX (UK) LTD, AMX by HARMAN - Unit C, Auster Road, Clifton Moor, York, YO30 4GD United Kingdom • +44 1904-343-100 • www.amx.com/eu/...


Need help?
Do you have a question about the DXLITE DXL-TX-4K60 and is the answer not in the manual?
Questions and answers