Table of Contents
Advertisement
Quick Links
TS3
TS3
GelDoc-It
& ChemiDoc-It
Imagers
®
®
Installation and User Instructions
UVP, LLC
Ultra-Violet Products Ltd.
2066 W. 11th Street
Unit 1, Trinity Hall Farm Estate
Upland, CA 91786
Nuffield Road, Cambridge CB4 1TG UK
Phone: (800) 452-6788
Phone: +44(0)1223-420022
Fax: (909) 946-3597
Fax: +44(0)1223-420561
Web Site:
www.uvp.com
81-0360-01 Rev B
Advertisement
Table of Contents

Related Manuals for UVP GelDoc-It TS3


Summary of Contents for UVP GelDoc-It TS3
- Page 1 GelDoc-It & ChemiDoc-It Imagers ® ® Installation and User Instructions UVP, LLC Ultra-Violet Products Ltd. 2066 W. 11th Street Unit 1, Trinity Hall Farm Estate Upland, CA 91786 Nuffield Road, Cambridge CB4 1TG UK Phone: (800) 452-6788 Phone: +44(0)1223-420022 Fax: (909) 946-3597...
-
Page 2: Table Of Contents
GelDoc-It and ChemiDoc-It Imagers Table of Contents Table of Contents ............................2 1.0 Introduction ............................4 2.0 Safety Instructions ..........................5 General Notes ..........................5 Safety Instructions – Operation and Maintenance ..............5 3.0 System Components ..........................6 Specifications ..........................7 Built-In Touch Screen ........................ - Page 3 GelDoc-It and ChemiDoc-It Imagers Running Saved Templates ......................28 8.0 Image Enhancement and Analysis ..................... 30 Using the Gallery to Access Images ..................30 Compositing for Applications ..................... 32 Additional Features ........................35 9.0 Service Procedures ..........................39 Return Procedure ........................39 Replacement Parts and Accessories ..................
-
Page 4: Introduction
Imagers for image analysis and quantitation of gels, blots and colony plates. VisionWorks requires an external computer and cannot be operated directly on the TS3’s integrated computer. *System/software configurations may vary by country. Contact UVP or authorized distributor for details. -
Page 5: Safety Instructions
GelDoc-It and ChemiDoc-It Imagers Safety Instructions General Notes For your own safety, please read this chapter carefully before operating. Observe all safety notes listed in this user manual. Symbols and signal words used The user manual uses the following symbols and signal words to indicate safety hazards or warnings. General warning Caution: ultraviolet radiation Safety Instructions –... -
Page 6: System Components
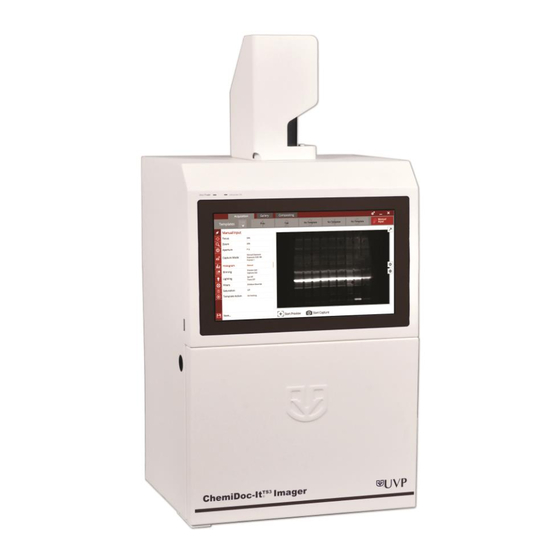
GelDoc-It and ChemiDoc-It Imagers System Components Refer to the packing slip and pictured components for specific parts and components included with the system. GelDoc-ItTS3 & ChemiDoc-ItTS3 Camera and Lens Located at Top of Darkroom Five Position Slide- Power Indicator Lights Out Emission Filter Wheel USB Port... -
Page 7: Specifications
GelDoc-It and ChemiDoc-It Imagers Specifications General Technical Data 100/115V, 50/60Hz; 3.1 Amps at 120 Volts 230V, 50/60Hz; 1.55 Amps at 230 Volts Power Requirements Mains supply voltage fluctuations are not to exceed 10 percent of the nominal supply voltage Pollution Degree Installation Category Altitude Up to 2000m... -
Page 8: Cameras And Lenses
The MegaCam 815 has a peak quantum efficiency of 50%. All camera settings are factory pre-set for optimum performance when viewing gels, films or membranes under low light level conditions. Contact UVP Technical Support prior to making any adjustments to internal camera settings. -
Page 9: Fold Down Tray For Blots
® The GelDoc-It and ChemiDoc-It transilluminator models. UVP offers a variety of transilluminator configurations, including Benchtop models with multiple wavelengths and variable intensities, as well as the highly uniform, patented FirstLight transilluminator. Note: For UV protection and to extend the life of the UV transilluminator, the system incorporates a customizable transilluminator shutoff timer built into the software. -
Page 10: 3.11 Optional Equipment
ChemiDoc-It Imagers 3.11 Optional Equipment UVP offers a variety of optional equipment to support the needs of varying laboratory environments. Refer to Replacement Parts and Accessories at the end of this manual for optional equipment part numbers. BioLite MultiSpectral Light Source The BioLite™... - Page 11 VisionWorks touch. NOTE: VisionWorks software must be installed and operated on an external computer. *System/software configurations may vary by country. Contact UVP or authorized distributor for details. 81-0360-01 Rev B...
-
Page 12: Setup Instructions And Installation
Black chemi tray for blots (ChemiDoc-It TS3 only) Gel tray and gel ruler (GelDoc-It TS3 only) When unpacking and setting up the darkroom, two people are required to move the darkroom. Place the darkroom on a flat surface which can provide adequate support for up to 100 pounds. -
Page 13: Installing The Camera, Brackets And Cables
GelDoc-It and ChemiDoc-It Imagers Installing the Camera, Brackets and Cables The camera will come equipped with a bracket, mount, brass thumb screws and black screws. Note: Not all cameras, brackets and bases will look exactly as pictured below. 4.3.1 Installing the Bracket and Mount 1. - Page 14 GelDoc-It and ChemiDoc-It Imagers 4.3.3 Installing the Camera Cables 1. Plug-in the camera USB cable and camera power cable to the top of the camera. 2. The connection ports for the camera and lens, are labeled on the back of the system.
- Page 15 Refer to section 7.1.2 Filters in this manual for more information. Additional and replacement emission filters are available through UVP. Refer to the Replacement Parts and Accessories section of this manual for ordering information. 81-0360-01 Rev B...
-
Page 16: Operating The System
GelDoc-It and ChemiDoc-It Imagers Operating the System Powering Up the System Set the black power switch on the back of the system to the ON (I) position. Once plugged in to a wall outlet and the black power switch on the back of the system is placed in the ON (I) position, the GelDoc-It and ChemiDoc-It darkroom and camera are always powered on. -
Page 17: Setting Up Visionworks Touch
GelDoc-It and ChemiDoc-It Imagers Setting up VisionWorks touch Powering up the Software Set the power switch on the back of the system to the ON (I) position to power up the darkroom. To power up the built-in computer, press the Computer Power button located on the upper right side of the TS3. - Page 18 GelDoc-It and ChemiDoc-It Imagers The Settings portion of the software allows the user to select preferences which are normally set once and rarely changed. Such settings include saving images and image save location. Access the preferences by pressing the Settings button in the upper-right corner of the main TS3 screen and selecting from the following tabs: ...
- Page 19 GelDoc-It and ChemiDoc-It Imagers Save Images To: Select the location where images are to be saved. The black dot within the radio button indicates which selection is activated. 1. Select USB to save the file to the USB drive if one is currently inserted. If a USB device is not present, the user will be notified that a USB drive is not present when attempting to save an image.
-
Page 20: Image Capture
GelDoc-It and ChemiDoc-It Imagers Image Capture Preparing for Image Capture Prior to capturing an image, prepare the image focus as follows: 1. Remove the blue protective film from the Fluorescent Focus Target (see the “Fluorescent Focus Target” section of this manual for more information). 2. -
Page 21: Capturing An Image
GelDoc-It and ChemiDoc-It Imagers Filters: Press the Filters button on the main TS3 screen to access the filter selection menu. Filter Selection: Select the desired emission filter by pressing the appropriate radio button. Select from one of five filter positions on the built-in filter wheel. Reset Wheel: Press the Reset Wheel button to recalibrate the emission filter wheel alignment after the wheel has been moved by hand to load, change or remove filters. - Page 22 GelDoc-It and ChemiDoc-It Imagers Templates provide the ability to adjust settings and automate image capture. They are used to recall pre-saved image capture settings for repeated experiments. An unlimited number of templates can be saved in the system, with up to five quick-access templates available at the top of the main system screen for easy access and other templates saved to the templates list.
-
Page 23: Image Capture Settings
GelDoc-It and ChemiDoc-It Imagers the selected folder. 5. To digitally zoom into the image: Digital Zoom Buttons: Use the “+” and “–” buttons below located to right of the preview window. Note that the higher the zoom percentage is, the larger the image will appear. - Page 24 GelDoc-It and ChemiDoc-It Imagers 1. Adjust the exposure, focus, zoom (if applicable) and aperture controls using the Focus, Zoom and Aperture menus in the VisionWorks touch screen until an ideal image is visible. In addition to Lighting, Binning and Filters, Templates can be used to preset the following settings: Focus and Aperture: Press the Focus and Aperture button to access lens focus and aperture adjustment.
- Page 25 GelDoc-It and ChemiDoc-It Imagers allow for quicker image capture overall. For sequential capture modes which manipulate frames and stacking, refer to Section 8.3 Additional Features Histogram: Press the Histogram button to access image histogram adjustment. Use the pointers on the vertical slider bar to make adjustments to this setting.
- Page 26 GelDoc-It and ChemiDoc-It Imagers effectively increases an image’s resolution beyond the camera’s native resolution. To activate image interpolation, select the desired interpolated resolution from the Capture Binning dropdown menu. Saturation Warning: Turn on Saturation Warning to provide a bright yellow or red image overlay on oversaturated areas of the image during Live Preview.
- Page 27 GelDoc-It and ChemiDoc-It Imagers 3. For new templates, a pop-up will appear requesting for the template to be assigned a name. 4. For changes to existing templates, the keyboard will appear with the template name shown. The user can then accept the current name by pressing the Checkmark button, enter a new template name then press the Checkmark button, or press the “X”...
-
Page 28: Running Saved Templates
GelDoc-It and ChemiDoc-It Imagers Running Saved Templates Once the template is selected, all template settings and actions will automatically be performed on the system. 1. To select the quick-access templates to be shown at the top of the TS3 screen, press the Templates button until the list of saved templates is shown. - Page 29 GelDoc-It and ChemiDoc-It Imagers 5. Once the template is selected, all template settings and actions will automatically be performed on the system. To run a template, either: a. Select the desired template from the Templates menu by pressing the gray check box icon to the right of the template name, or b.
-
Page 30: Image Enhancement And Analysis
GelDoc-It and ChemiDoc-It Imagers Image Enhancement and Analysis Using the Gallery to Access Images The Gallery can be used to access all saved image files. Gallery: To access the photo gallery, press to select the Gallery tab. Once active, select the desired image from the top of “Gallery”... - Page 31 GelDoc-It and ChemiDoc-It Imagers in the Settings menu (described earlier in this manual) and the Save button is pressed, both the Selected & Original formats will be saved. However, if the Save Burned button is pressed, only the selected format will be saved.
-
Page 32: Compositing For Applications
GelDoc-It and ChemiDoc-It Imagers Compositing for Applications The VisionWorks touch can be used to composite images for several applications including chemiluminescence, and fluorescence. Compositing: To access image compositing tools, press to select the Compositing tab. Copositing tools include Fluorescent, Merge and Chemiluminescent. - Page 33 GelDoc-It and ChemiDoc-It Imagers image(s) to determine the intensity of the overlay image(s) in the final composited image. Note that the percentage shown pertains to the saturation levels in the overlay image(s). Therefore, as higher percentages are selected, only pixels with higher saturation levels will be shown in the final composited image.
- Page 34 GelDoc-It and ChemiDoc-It Imagers chemiluminescent white light overlays. For more information on using this tool, see the Fluorescent Compositing Tool as described earlier in this manual. 81-0360-01 Rev B...
-
Page 35: Additional Features
GelDoc-It and ChemiDoc-It Imagers Additional Features Additional features and detailed explanations can be found in this section. Optical zoom: Both the GelDoc-It with the GelCam 315 camera and the ChiemiDoc-It with the BioChemi 515 camera are equipped with optical zoom lenses, meaning that the system uses the lens’... - Page 36 GelDoc-It and ChemiDoc-It Imagers Integration - Continuous, except the software automatically stops image capture and “stacking” when the ideal level of saturation has been achieved. Select the Number of Frames to be captured during Manual Exposure and Sequential – Constant Time image capture modes.
- Page 37 GelDoc-It and ChemiDoc-It Imagers chemi-capable systems.) Select a higher Capture Binning to decrease image capture time or to acquire more image signal in the same amount of time, especially in low light situations. Note that increased capture binning will decrease the overall pixel resolution of the captured image.
- Page 38 GelDoc-It and ChemiDoc-It Imagers the “Preferences” section of this manual for more information. 81-0360-01 Rev B...
-
Page 39: Service Procedures
ChemiDoc-It Imagers Service Procedures Return Procedure A Returned Goods Authorization (RGA) number must be obtained from UVP Customer Service before returning any product. INCLUDE CONTACT INFORMATION HERE. Replacement Parts and Accessories To order accessories or replacement parts for the GelDoc-It... -
Page 40: Troubleshooting
Windows, please contact your system administrator for assistance. 2. If an error message appears repeatedly and your system administrator does not recognize it as a Microsoft Windows error, contact UVP Technical Support for further assistance. Care and Cleaning... -
Page 41: Technical Support
ChemiDoc-It Imagers Technical Support UVP offers free lifetime technical support on all of its products and software. Should you have any questions regarding the product’s use, operation or repair, contact UVP’s offices at the locations below, or visit www.uvp.com.
Need help?
Do you have a question about the GelDoc-It TS3 and is the answer not in the manual?
Questions and answers