Table of Contents
Advertisement
Quick Links
GelDoc-It
& ChemiDoc-It
Imagers
2
2
®
®
Installation and User Instructions
UVP, LLC
Ultra-Violet Products Ltd.
2066 W. 11th Street
Unit 1, Trinity Hall Farm Estate
Upland, CA 91786
Nuffield Road, Cambridge CB4 1TG UK
Phone: (800) 452-6788
Phone: +44(0)1223-420022
Fax: (909) 946-3597
Fax: +44(0)1223-420561
Web Site: www.uvp.com
81-0220-01 Rev K
Advertisement
Table of Contents

Related Manuals for UVP GelDoc-It2


Summary of Contents for UVP GelDoc-It2
- Page 1 UVP, LLC Ultra-Violet Products Ltd. 2066 W. 11th Street Unit 1, Trinity Hall Farm Estate Upland, CA 91786 Nuffield Road, Cambridge CB4 1TG UK Phone: (800) 452-6788 Phone: +44(0)1223-420022 Fax: (909) 946-3597 Fax: +44(0)1223-420561 Web Site: www.uvp.com 81-0220-01 Rev K...
-
Page 2: Table Of Contents
GelDoc-It and ChemiDoc-It Imagers Table of Contents Table of Contents ................................. 2 Introduction .................................. 3 System Components ..............................4 Optional Equipment ..............................6 Setup Instructions ................................ 8 Components ................................8 Camera Setup ................................9 GelCam 310 Camera ..............................9 MegaCam 810, OptiChemi™ 610 and Chemi 415 Cameras ................... 11 Using the System ............................... -
Page 3: Introduction
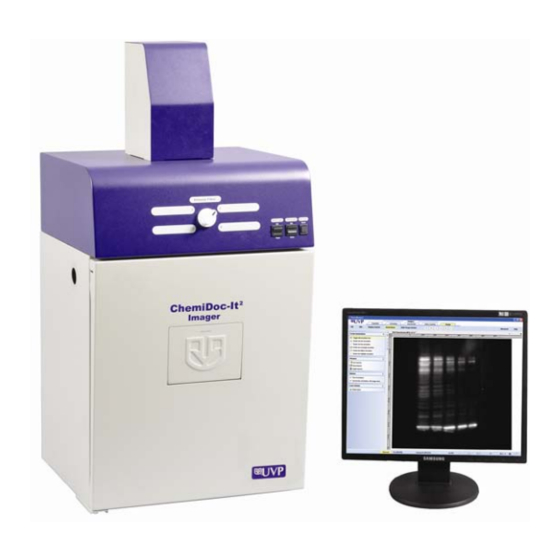
GelDoc-It and ChemiDoc-It Imagers Introduction The GelDoc-It Imager is designed as a high resolution imager capable of capturing, documenting and analyzing fluorescent gel images. In addition to gel documentation capabilities, the ChemiDoc-It Imager is equipped with a cooled, scientific- grade CCD camera allowing users to capture, document and analyze chemiluminescent blot images, including Western blots. -
Page 4: System Components
GelDoc-It and ChemiDoc-It Imagers System Components Refer to the packing slip and pictured components for parts included with the system. Camera and Lens Kit (actual configuration may be different than that shown in the photo) Four Position Emission Filter Selector Lighting and UV Timer Switches Epi Overhead... - Page 5 1x1 to 8x8. All camera settings are factory pre-set for optimum performance when viewing gels, films or membranes under low light level conditions. Contact UVP Technical Support prior to making any adjustments to the camera settings. Lens Kit (Motorized or Manual) The zoom lens used with the GelCam 310 and Chemi 415 cameras comes in two configurations: ...
-
Page 6: Optional Equipment
Fluorescent Focus Target Optional Equipment UVP offers a variety of optional equipment to support the needs of varying laboratory environments. Refer to “Replacement Parts and Accessories” at the end of this manual for optional equipment part numbers. Thermal Printer The thermal printer provides archive quality, 256 grayscale prints and five optional cost-effective print sizes. - Page 7 GelDoc-It and ChemiDoc-It Imagers LED White Light Plate The LED White Light Plate emits high uniformity with less than 5% coefficient of variance (CV). Plug the LED White Light Plate directly into the power supply within the system darkroom, or store it in the exterior darkroom side pocket when not in use.
-
Page 8: Setup Instructions
GelDoc-It and ChemiDoc-It Imagers Setup Instructions Components When unpacking the GelDoc-It and ChemiDoc-It , the following items will be included: GelDoc-It or ChemiDoc-It darkroom Transilluminator Camera with lens and bracket Ethidium Bromide (EtBr) emission filter Electrical and computer cables ... -
Page 9: Camera Setup
High sensitivity, scientific-grade CCD cameras are designed for use with UVP’s GelDoc-It and ChemiDoc-it Imagers. This section covers the components and steps required to UVP’s cameras. The following cameras are covered in this manual (refer to the packing list for the camera included with your specific system): ... - Page 10 Imagers GelCam 310 Camera with Motorized Lens The GelCam 310 camera, zoom lens and diopter are assembled at the UVP factory. Remove the cap from the lens (if in place). Using the four brass thumb screws provided, secure the bracket to the base of the darkroom.
-
Page 11: Megacam 810, Optichemi™ 610 And Chemi 415 Cameras
GelDoc-It and ChemiDoc-It Imagers Plug the serial cable from the motorized lens into the lens control box. Connect the USB cable to the PC connection port on the lens control box. Leave the other end of the USB cable unplugged until installation of VisionWorksLS is complete. - Page 12 GelDoc-It and ChemiDoc-It Imagers USB Cable MegaCam 810/OptiChemi 610/Chemi 415 Camera Base Mount (ships attached to the darkroom) Bracket Black Thumb Screw and Brass Thumb Nuts Camera Lens & Controller Lens Controller Power Supply Cable Hardware Installation The photograph shows the parts required for assembly of the MegaCam 810 and Chemi 415 camera kits with the automated lens on the ChemiDoc-It Imager.
- Page 13 Fly activation. If the computer is not connected to the Internet, select Offline activation and proceed to the following page of this manual, or call UVP to register the software. Click Next to continue. The Already have an activation ID option is useful when reloading the software after receiving an initial activation code.
- Page 14 GelDoc-It and ChemiDoc-It Imagers Installing GelCam 310 Camera Drivers Open the VisionWorksLS software suite. Plug the 90 degree USB cable from the camera into the USB port. The computer should display Found New Hardware. Click Yes, Next, Install from a list, Next, Don’t search, Next, double click on Show all Devices, click Have disk, and then Browse.
-
Page 15: Using The System
GelDoc-It and ChemiDoc-It Imagers Using the System Powering Up the System Once plugged in to a surge-protected wall outlet, the GelDoc-It and ChemiDoc-It systems are always powered on. Power to specific system components, including epi and transillumination lighting, is controlled by switches located on the front of the unit. -
Page 16: Using The Transilluminator
GelDoc-It and ChemiDoc-It Imagers Using the Transilluminator To use the UV transilluminator or LED White Light Plate, ensure that the components are plugged into the system (see “Connecting the Power Cables”). Using the power switches located on the front of the unit, select either White Light: Trans or Ultraviolet: Trans depending upon application. -
Page 17: Capturing Images And Using Templates
GelDoc-It and ChemiDoc-It Imagers Capturing Images and Using Templates Image Focusing Manual Lens (GelCam 310 with Manual Lens) Prior to capturing an image, prepare the image focus: Turn on the transilluminator and place the Fluorescent Focus Target (see “System Components”) on the transilluminator surface. -
Page 18: Capturing Images Without Using The Preset Capture Buttons
GelDoc-It and ChemiDoc-It Imagers Capturing Images Without Using the Preset Capture Buttons Depending on the sample type, place the sample on the chemi tray, transilluminator or white light plate. For a chemiluminescent sample, turn off all darkroom lighting, place the black chemi tray on top of the transilluminator and place the sample on the tray. - Page 19 GelDoc-It and ChemiDoc-It Imagers Chemi Blot with Slower Capture and Higher Resolution: For this application, use a preview binning of 8x8, a capture binning of 1x1, and an exposure time of 5min. This will result in the best possible capture resolution. However, the exposure takes longer because the image is unbinned. Set Up Darkroom Templates NOTE: Without using templates, darkroom settings can be manually adjusted directly in the software.
-
Page 20: Service Procedures
Imagers Service Procedures Return Procedure A Returned Goods Authorization (RGA) number must be obtained from UVP Customer Service before returning any product. Replacement Parts and Accessories To order accessories (including additional emission filters) or replacement parts for the GelDoc-It System, contact UVP’s offices. -
Page 21: Care And Cleaning
Ensure that the system is turned OFF and unplugged during cleaning. Technical Support UVP offers free lifetime technical support on all of its products and software. Should you have any questions regarding the product’s use, operation or repair, contact UVP’s offices at the locations below, or visit www.uvp.com. -
Page 22: Warranty
Moreover, UVP makes no warranties whatsoever with respect to parts not supplied by UVP or that have been installed, used and/or serviced other than in strict compliance with instructions appearing in this manual.
Need help?
Do you have a question about the GelDoc-It2 and is the answer not in the manual?
Questions and answers