Advertisement
Quick Links
Specifications Information and Repair Parts Manual
Please read and save this Repair Parts Manual. Read this manual and the General Operating Instructions carefully before attempting to assemble, install, operate
or maintain the product described. Protect yourself and others by observing all safety information. The Safety Instructions are contained in the General Operating
Instructions. Failure to comply with the safety instructions accompanying this product could result in personal injury and/or property damage! Retain instructions
for future reference. AMT reserves the right to discontinue any model or change specifications at any time without incurring any obligation.
©2015 AMT Pump Company, A Subsidiary of The Gorman-Rupp Company, All Rights Reserved.
Periodic maintenance and inspection is required on all pumps to ensure proper operation. Unit must be clear of debris and sediment. Inspect for leaks and loose bolts. Failure to do so
voids warranty.
Centrifugal Laundry Tray Pump
Refer to pump manual 1808-634-00 for General Operating and Safety Instructions.
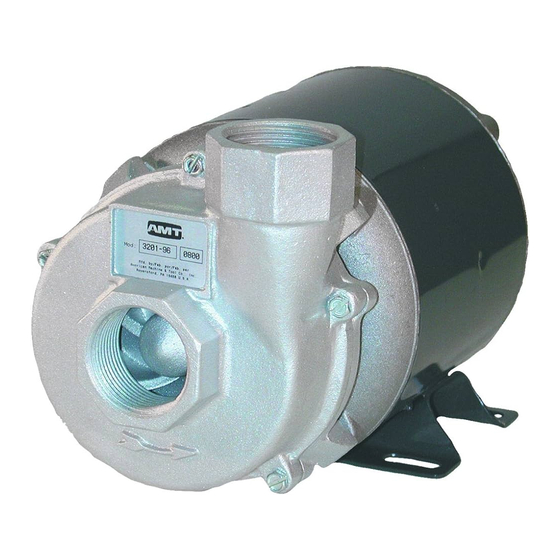
DESCRIPTION
This centrifugal laundry tray pump is designed for gravity-feed pumping operations. Unit can handle laundry water or other nonflammable, non abrasive fluids
compatible with pump construction. Pump is equipped with mechanical seal (carbon face with Buna-N seal cartridge), cast aluminum body and impeller, and
a split-phase motor. This is a manual unit, no controls are supplied. Unit does not come supplied with any type of switch or control device to turn unit on or off.
INSTALLATION
Refer to Figure 1 and proceed as follows:
1.
Locate pump as close to the laundry tub as possible. Support the
pump and piping adequately to keep pump and piping from being
strained.
2.
Pitch the piping from tub drain to pump suction to avoid air traps.
(Do not use the conventional trap). Keep the pipe-size at least
11/4". Use pipe dope to avoid joint leakage. Install necessary
piping for pressure switches or any other control devices (not
supplied). Follow manufacturer's instructions for their installation.
3.
Install a check valve on the discharge side to prevent drain-back.
4.
Locate check valve below level of bottom of tub.
5.
Wire motor by following wiring diagram on nameplate. It is
strongly recommended that this unit is plugged into a GFCI
(Ground Fault Circuit Interrupter). Consult your local electrician
for installation and availability. Be sure unit is grounded (General
Safety Information). If unit is to be controlled by an on and off
switch, install at this time.
6.
If laundry water from a washer is discharged into the laundry tub,
it should be filtered. Filtering can be accomplished many ways.
An easy way is by taking an old pair of panty hose, putting one
leg into the other, and then putting it on the end of the washer
discharge hose with a rubber band. Most of the panty hose
should be lying in the laundry tub. Eventually, the panty hose will
become full of lint and a hole will develop. The panty hose should
then be replaced.
7.
Installation is now complete.
NOTE: To prevent accidents, locate motor in a suitable (ventilated)
enclosure, or guard all moving parts and ventilation openings.
Figure 1 - Typical Installation
3201-250-00
OPERATION
Turn unit on by either plugging pump in, turning switch on, or if unit
is installed with an automatic device, (not supplied) it will activate
itself as well as turn itself off. On units without automatic devices, it is
necessary to shut pump off when water stops draining out of the tub
(last couple of inches). The pump has become air bound. After a few
seconds, when the water has gone down, turn unit on again. The unit
may have to be turned on and off a few times to completely drain tub.
This is normal. When water has been completely pumped out of the
tub, turn pump off immediately.
MAINTENANCE
Disconnect from power source before servicing or inspecting
the pump for any reason. Failure to do so could result in fatal
electrical shock!
MOTOR
Dirt accumulations can cause motor overheating and a fire hazard.
Remove dirt accumulations from the motor, especially in and around
vent openings by vacuuming.
Periodically inspect the installation. Check for dirt accumulations;
unusual noises or vibration; overheating; worn or loose couplings,
sheaves and belts; high motor current; poor wiring or overheating
connections; loose mounting bolts or guards.
Figure 2 - Location of Bearings
1
3201-96
6/2015
Advertisement

Subscribe to Our Youtube Channel
Related Manuals for AMT 3201-96


Summary of Contents for AMT 3201-96
- Page 1 Instructions. Failure to comply with the safety instructions accompanying this product could result in personal injury and/or property damage! Retain instructions for future reference. AMT reserves the right to discontinue any model or change specifications at any time without incurring any obligation.
- Page 2 3201-96 Specifications Information and Repair Parts Manual Centrifugal Laundry Tray Pump The motor used with this pump uses sleeve bearings which require Press old seal cartridge out of adapter by pushing from motor periodic reoiling. Each motor has two bearings, which should be side.
- Page 3 3201-96 Specifications Information and Repair Parts Manual Centrifugal Laundry Tray Pump For Repair Parts contact dealer where pump was purchased. Please provide following information: -Model Number -Serial Number (if any) Part description and number as shown in parts list Figure 5 - Repair Parts Illustrations...
Need help?
Do you have a question about the 3201-96 and is the answer not in the manual?
Questions and answers