Advertisement
Specifications Information and Repair Parts Manual
x
Please read and save this Repair Parts Manual. Read this manual and the General Operating Instructions carefully before attempting to assemble,
install, operate or maintain the product described. Protect yourself and others by observing all safety information. The Safety Instructions are contained
in the General Operating Instructions. Failure to comply with the safety instructions accompanying this product could result in personal injury and/or
property damage! Retain instructions for future reference. AMT reserves the right to discontinue any model or change specifications at any time without
incurring any obligation.
©2019 AMT Pump Company, A Subsidiary of The Gorman-Rupp Company, All Rights Reserved.
Periodic maintenance and inspection is required on all pumps to ensure proper operation. Unit must be clear of debris and sediment. Inspect for leaks and loose bolts. Failure
to do so voids warranty.
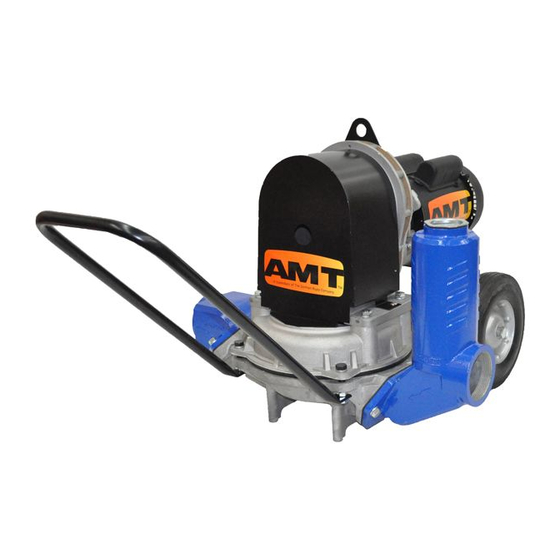
Diaphragm Pumps
DESCRIPTION
These diaphragm pumps are high capacity, self-priming (to 25 ft. lift), portable units shipped completely assembled (except for handle). The pumps are
used for operation with fluids mixed with abrasive solids such as sand, silt, mud, sludge and waste. Not for use with pumping cement or mortar. Handles
liquids from 40º to 180º F (4º to 82 º C). Pump is capable of handling solids up to 1-5/8" diameter. For use with water and other non-flammable fluids
compatible with pump component materials.
Model
Driver Type
336Z-96
Hatz 1B20 Diesel
336G-96
Honda GX120
336E-96
1.5 HP 115 VAC @60 Hz
335A-96
B&S 525 Series
335G-96
Honda GX120
335E-96
1.5 HP 115 VAC @60 Hz
335B-96
B&S CP550
335H-96
Honda GX160
335Z-96
Hatz 1B20 Diesel
NOTE: Driver is subject to change without notice, see labels and manual with driver for operation, specifications, maintenance and warranty.
UNPACKING
After unpacking the unit, inspect carefully for any damage that may
have occurred during transit. Check for loose, missing or damaged
parts.
Specific Safety Information for Gasoline Engine
Driven Pumps
1.
Carefully read the instruction manuals supplied by the
engine manufacturer before attempting to assemble,
disassemble or operate the engine or any other part. The
"Warning" and "Caution" statements in this manual signal
potentially
hazardous
equipment. Know when these conditions can exist. Take
necessary steps to protect personnel, as well as equipment.
Gasoline is a highly combustible fuel. Use it with care! The
improper use, handling and/or storage of gasoline can be
dangerous. Help prevent accidents by following these safety
rules:
a.
Use gasoline only as a fuel, never as a cleaning fluid.
b.
Always use an approved container to hold or store gasoline.
Never store gasoline in familiar containers such as milk
gallons or soda pop bottles.
c.
Never store gasoline near a heater or an open flame.
d.
When storing or using gasoline, make sure container is out
of the reach of children.
e.
Never add gasoline to a running or hot engine. Spilled
gasoline on a hot engine may cause a fire or an explosion.
Fill gasoline tank outdoors and wipe up any spills.
f.
Have a fire extinguisher nearby. Be sure extinguisher is in
operating condition – check the pressure gauge or indicator.
Be familiar with its proper use. Consult the local fire
335A-250-00
Material
Aluminum
Aluminum
Aluminum
Aluminum
Aluminum
Aluminum
Aluminum
Aluminum
Aluminum
conditions
to
the
operator
Diaphragm
Check Valve
Thermoplastic/TPE
Neoprene
Thermoplastic/TPE
Neoprene
Thermoplastic/TPE
Neoprene
Thermoplastic/TPE
Neoprene
Thermoplastic/TPE
Neoprene
Thermoplastic/TPE
Neoprene
Thermoplastic/TPE
Neoprene
Thermoplastic/TPE
Neoprene
Thermoplastic/TPE
Neoprene
department for the correct type of extinguisher for your
application. Extinguishers rated ABC by the National Fire
Protection Association are appropriate for all applications.
g.
On permanent installations, be sure all fuel supplies have a
positive shutoff valve. Fuel lines must be of steel piping,
adequately secured and free from leaks. Do not use copper
piping on flexible lines as copper becomes hardened and
brittle and will break. Use black pipe on natural gas or
gaseous fuels, but not on gasoline or diesel fuels. Piping at
the engine should be a suitable flexible line that is
compatible with the fluid.
or
Positively no smoking!
2.
Check engine oil, fuel levels and gear box oil levels before
initial startup each day. Stay away from moving parts due to
the danger of becoming caught in moving parts. Avoid loose
jackets, shirts, sleeves and ties. Make sure all nuts and bolts
are secure. Keep power shields and guards in place. If
adjustment MUST be made while the unit is running, use
extreme caution around hot manifolds, moving parts, etc.
3.
Do not work with this equipment when mentally or physically
fatigued.
4.
Be careful not to touch the exterior of the engine, especially
the muffler and the area around it. It is hot enough to be
painful or cause injury.
5.
To prevent accidental starting, always remove the spark
plug or disconnect and ground the spark plug wire before
working on the engine or the equipment driven by the
engine.
6.
DO NOT RUN THE ENGINE IN AN ENCLOSED AREA!!
Exhaust gases contain carbon monoxide, which is an
odorless and deadly gas that will cause death if breathed too
long. If equipment is located in an enclosed area with an
1
335 Series and 336 Series
Gear Box
Bearings
Oil Bath
Needle
Oil Bath
Needle
Oil Bath
Needle
Oil Bath
Needle
Oil Bath
Needle
Oil Bath
Needle
Oil Bath
Needle
Oil Bath
Needle
Oil Bath
Needle
3/2019
NPT
2"
2"
2"
3"
3"
3"
3"
3"
3"
Advertisement
Table of Contents

Subscribe to Our Youtube Channel
Related Manuals for AMT 335 Series


Summary of Contents for AMT 335 Series
- Page 1 General Operating Instructions. Failure to comply with the safety instructions accompanying this product could result in personal injury and/or property damage! Retain instructions for future reference. AMT reserves the right to discontinue any model or change specifications at any time without incurring any obligation.
-
Page 2: Diaphragm Pumps
335 Series and 336 Series Specifications Information and Repair Parts Manual Diaphragm Pumps motor. exhaust line to the outside, regularly check the exhaust Disconnect power before servicing a motor or its load. If the system for leaks. Be sure the area is well ventilated. -
Page 3: Operation
335 Series and 336 Series Specifications Information and Repair Parts Manual Diaphragm Pumps ELECTRIC MOTOR UNITS: It is strongly recommended In some applications, it may be preferable to have suction/discharge that this unit is plugged into a G.F.I. (Ground Fault ports rotated 90 degrees to be in line with driver. -
Page 4: Maintenance
335 Series and 336 Series Specifications Information and Repair Parts Manual Diaphragm Pumps Remove adapter by removing four bolts (Ref. No. G27). Remove gear box from pump base (Ref. No. A8) by Pump jamming with an over-torqued lock screw may cause removing four bolts (Ref. - Page 5 335 Series and 336 Series Specifications Information and Repair Parts Manual Diaphragm Pumps Symptom Possible Cause(s) Corrective Action Pump will not prime or retain 1. Air leak in suction line 1. Repair or replace prime after operating 2. Defective flapper valves 2.
- Page 6 335 Series and 336 Series Specifications Information and Repair Parts Manual For Repair Parts contact dealer where pump was purchased. Please provide following information: -Model Number -Serial Number (if any) Part description and number as shown in parts list Assembled Pump – Figure A...
- Page 7 335 Series and 336 Series Specifications Information and Repair Parts Manual Repair Parts List - Assembled Pump (Reference Figure A) 3" Engine 3" Motor 2" Engine 2" Motor Ref. Driven Pump Driven Pump Driven Pump Driven Pump Description Part Number...
- Page 8 335 Series and 336 Series Specifications Information and Repair Parts Manual For Repair Parts contact dealer where pump was purchased. Please provide following information: -Model Number -Serial Number (if any) Part description and number as shown in parts list Gearbox – Figure G...
- Page 9 335 Series and 336 Series Specifications Information and Repair Parts Manual Repair Parts List - Gearbox (Reference Figure G) Ref. 3" Pumps 2" Pumps Description Part Number Qty. Part Number Qty. Gearbox Output Half 3354-090-01 3354-090-01 Gearbox Input Half 3354-091-01 3354-091-01 ¼-20x7/8”...
- Page 10 335 Series and 336 Series Specifications Information and Repair Parts Manual For Repair Parts contact dealer where pump was purchased. Please provide following information: -Model Number -Serial Number (if any) Part description and number as shown in parts list Plunger Assembly – Figure P Repair Parts List - Plunger Assembly (Reference Figure P) Ref.
- Page 11 335 Series and 336 Series Specifications Information and Repair Parts Manual For Repair Parts contact dealer where pump was purchased. Please provide following information: -Model Number -Serial Number (if any) Part description and number as shown in parts list Well Assembly – Figure W Repair Parts List - Well Assembly (Reference Figure W) Ref.
- Page 12 335 Series and 336 Series Specifications Information and Repair Parts Manual 335A-250-00 3/2019...
Need help?
Do you have a question about the 335 Series and is the answer not in the manual?
Questions and answers