Espressif Systems ESP8266 SDK Getting Started Manual
Hide thumbs
Also See for ESP8266 SDK:
- At instruction set (76 pages) ,
- Beginner's manual (55 pages) ,
- Faq (191 pages)
Table of Contents
Advertisement
Quick Links
Download this manual
See also:
User Manual
Advertisement
Table of Contents

Subscribe to Our Youtube Channel
Related Manuals for Espressif Systems ESP8266 SDK


Summary of Contents for Espressif Systems ESP8266 SDK
- Page 1 ESP8266 SDK Getting Started Guide Version 2.8 Copyright © 2017...
- Page 2 About This Guide This document takes ESP-LAUNCHER and ESP-WROOM-02 as examples to introduce how to use the ESP8266 SDK. The contents include preparations before compilation, SDK compilation and firmware download. The document is structured as follows. Chapter Title Content Introduction to the overall procedure of using the SDK, and...
- Page 3 Date Version Release notes 2017.05 V2.8 Update Chapter 4 for 8MB and 16MB flash support.
-
Page 4: Table Of Contents
Table of Contents 1. Overview ..........................1.1. Procedure Overview ........................1.2. ESP8266 HDK ..........................1.3. ESP8266 SDK ..........................1.3.1. Non-OS SDK ......................... 1.3.2. RTOS SDK ........................1.4. ESP8266 FW ..........................1.5. ESP8266 Toolkit ......................... 1.5.1. Compiler ........................1.5.2. Firmware Download Tool .................... - Page 5 5.1.2. Downloading SDK Files ....................5.2. Compilation ..........................5.2.1. Compile ESP8266_NONOS_SDK_v0.9.5 and Later Versions ........5.2.2. ESP8266_NONOS_SDK_v0.9.4 and Earlier Versions ..........6. Downloading the Firmware ....................6.1. Download Procedure ....................... 6.2. Check Log File ......................... 6.2.1. ESP8266 IOT Demo ....................6.2.2.
-
Page 6: Overview
Chapter 3. Preparing the Software Chapter 2. Preparing the Hardware Tool Download SDK Download ESP-WROOM-02 ESP-LAUNCHER Chapter 4. Flash Chapter 5. Compiler ESP8266 SDK Compiling the SDK Tool Download ESP8266 FW ESP8266 HDK Chapter 6. ESP8266 Toolkit Downloading the Firmware Figure 1-1 Procedure Overview 1.2. -
Page 7: Esp8266 Sdk
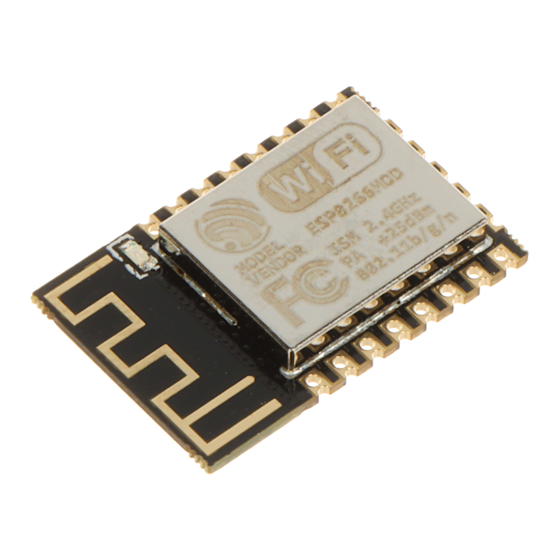
1. Overview 1.3. ESP8266 SDK The ESP8266 Software Development Kit (SDK) is an Internet of Things (IoT) application development platform developed by Espressif for developers. It includes such examples of application development as Smart Lights and Smart Plugs. Depending on whether they are based on an operating system (OS), SDKs can be categorized into two types: Non-OS SDK and RTOS SDK. -
Page 8: Esp8266 Toolkit
1.5. ESP8266 Toolkit 1.5.1. Compiler Linux OS is required to compile the ESP8266 SDK. When using Windows OS, we recommend VirtualBox as the virtual machine for ESP8266. In order to simplify the compilation procedure, we have installed the compiling tools on the virtual machine. Users can directly compile the ESP8266 SDK by importing the ESP8266 compiler (OVA image) into the virtual machine. - Page 9 1. Overview Users may directly input commands into the terminal and view or record responses in real time. �� Note: We recommend CoolTerm (for Windows and Mac OS) and Minicom (for Linux OS) as the serial port debug tool. Espressif ! /33 2017.05...
-
Page 10: Preparing The Hardware
2. Preparing the Hardware Preparing the Hardware Depending on whether the ESP-LAUNCHER or the ESP-WROOM-02 is used, users will need either of the hardware mentioned in Table 2-1 below: Table 2-1. Hardware Preparations ESP-LAUNCHER ESP-WROOM-02 • 1 × ESP-WROOM-02 • 1 × ESP-LAUNCHER •... -
Page 11: Esp-Wroom-02
2. Preparing the Hardware 3. Connect the USB-to-TTL converter to the PC. �� Note: Make sure that the proper driver for the USB-to-TTL converter is installed and recognized by the PC. 4. Power on ESP-LAUNCHER by sliding the Power Switch towards the inner side. 5. - Page 12 2. Preparing the Hardware 2. Connect ESP-WROOM-02 to the USB-to-TTL converter, using Dupont lines, as shown in Figure 2-1. ESP-WROOM-02 USB-to-TTL converter IO15 Figure 2-1. ESP-WROOM-02 Download Mode 3. Connect the USB-to-TTL converter to the PC. 4. Download firmware to flash with the ESP8266 DOWNLOAD TOOL. ��...
-
Page 13: Preparing The Software
3. Preparing the Software Preparing the Software 3.1. Non-OS SDK Users can download the non-OS SDK (including application examples) from: http://www.espressif.com/en/support/download/sdks-demos? keys=&field_type_tid%5B%5D=14. Figure 3-1 shows the directory structure of the non-OS SDK. Figure 3-1. Non-OS SDK Directory Structure bin: compiled binaries to be downloaded directly into the flash. •... - Page 14 3. Preparing the Software ESP8266_IOT_PLATFORM • https://github.com/espressif/ESP8266_IOT_PLATFORM Table 3-2 shows the directory structure of the RTOS SDK. Figure 3-2. RTOS SDK Directory Structure • bin: boot and initialization firmware. • documents: ESP8266_RTOS_SDK files. driver_lib: sample codes of drivers. • • examples: sample codes for Espressif’s application programs.
-
Page 15: Esp8266 Toolkit
3. Preparing the Software 3.3. ESP8266 Toolkit 3.3.1. Compiler Please download VirtualBox from: https://www.virtualbox.org/wiki/Downloads. �� Note: Please choose the right version of VirtualBox according to the host machine's OS. Please download the compiler ESP8266_lubuntu_20141021.ova from: http://downloads.espressif.com/FB/ESP8266_GCC.zip Steps Results 1. Start Windows OS and install the virtual machine. •... - Page 16 3. Preparing the Software Steps Results Select File > Import Appliance, and • a dialog box will show up �� . Select the image file to import, for • example, C: \ESP8266_lubuntu_20141021.ova, and click Next. Click Import to confirm the settings. •...
-
Page 17: Firmware Download Tool
3. Preparing the Software Steps Results After importing, a virtual machine • named ESP8266_lubuntu shows up �� . Double-click ESP8266_lubuntu or • Start to run the virtual machine. The system shows the ESP8266 • virtual machine �� . • If a dialog box like the one below�� shows up, please enter the password: espressif. -
Page 18: Flash Maps
4. Flash Maps Flash Maps This chapter provides the flash maps for OTA firmware and non-OTA firmware in flash memories with a different capacity. Users can modify the map as needed. Figure 4-1 shows the flash maps for the two different types of firmware. Non-FOTA Partition 2 Partition 1... -
Page 19: Non-Ota
4. Flash Maps - master_device_key.bin: In IOT_Demo, it is located in the third sector of user parameter area. System Param: this area contains the last four sectors of the flash. • - blank.bin: the download address is the second-to-last sector in the flash. - esp_init_data_default.bin: the download address is the fourth-to-last sector of flash. -
Page 20: Download Addresses
4. Flash Maps Flash User/System eagle.flash.bin eagle.irom0text.bin User data capacity Param 2048 ≤ 64 ≤ 768 ≥ 176 0xC0000 4096 ≤ 64 ≤ 768 ≥ 176 0xC0000 8192 ≤ 64 ≤ 768 ≥ 176 0xC0000 ≤ 64 ≤ 768 ≥ 176 0xC0000 16*1024 ��... -
Page 21: Download Addresses
4. Flash Maps User/System Flash capacity boot user1.bin user2.bin User data Param 2048 (Partition 1 = 512) ≤ 492 ≤ 492 ≥ 1024 2048 (Partition 1 = 1024) ≤ 1004 ≤ 1004 ≥ 0 4096 (Partition 1 = 512) ≤ 492 ≤... -
Page 22: Compiling The Sdk
5. Compiling the SDK Compiling the SDK �� Notes: This chapter demonstrates how to compile the SDK by taking ESP8266_NONOS_SDK/examples/ • IoT_Demo as an example. • IoT_Demo defines three types of devices, i.e., LIGHT_DEVICE, PLUG_DEVICE and SENSOR_DEVICE in examples>IoT_Demo/include/user_config.h. Users can only configure one device at a time. The default device for configuration is LIGHT_DEVICE. -
Page 23: Downloading Sdk Files
5. Compiling the SDK �� Note: Users need not modify the SDK files if using a 512-KB flash. 5.1.2. Downloading SDK Files 1. Start Linux OS. 2. Run LXTerminal on the desktop of the virtual machine. 3. Copy the files to be compiled to the shared folder. Steps Results Copy ESP8266_NONOS_SDK folder to the... -
Page 24: Compilation
5. Compiling the SDK �� Note: Users can add it to .bashrc file, otherwise Step 5 needs to be repeated each time the compiler is restarted. 5.2. Compilation 5.2.1. Compile ESP8266_NONOS_SDK_v0.9.5 and Later Versions 1. Switch to the /Share/ESP8266_NONOS_SDK/IoT_Demo directory in the terminal. cd /home/esp8266/Share/ESP8266_NONOS_SDK/IoT_Demo ./gen_misc.sh The system shows the following information:... -
Page 25: Esp8266_Nonos_Sdk_V0.9.4 And Earlier Versions
5. Compiling the SDK �� Notes: The sample options are marked in green. Users can select the right options as needed. • For OTA and non-OTA firmware, please refer to Section 1.4, "ESP8266 FW". • Only sdk_v1.1.0 + boot 1.4 + flash download tool_v1.2 and higher versions support options 5 and 6 in •... -
Page 26: Downloading The Firmware
6. Downloading the Firmware Downloading the Firmware 6.1. Download Procedure 1. Start Windows OS. 2. Double-click ESP_DOWNLOAD_TOOL.exe to open Flash tool. Figure 6-1. ESP8266 DOWNLOAD TOOL—SPIDownload SPIDownload For SPI Flash download. HSPIDownload For HSPI Flash download. RFConfig RF initialization Configuration. MutiDownload For multi-mother boards download. - Page 27 6. Downloading the Firmware 3. Double-click ! in Download Path Config panel to select the binaries to be downloaded. Set the corresponding download addresses in ADDR. 4. Configure SPIDownload. �� Note: The binaries to be downloaded and the corresponding addresses vary with different SPI Flash sizes and actual demands.
-
Page 28: Check Log File
6. Downloading the Firmware Items Description SPI FLASH CONFIG BAUDRATE Select the baud rate of downloading. The default value is 115200. 5. After downloading, turn GPIO0 Control on ESP-LAUNCHER to the outer side and power the board on to enable the working mode. 6.2. -
Page 29: Esp8266 At
6. Downloading the Firmware add if0 add if1 dhcp server start:(ip:192.168.4.1,mask:255.255.255.0,gw:192.168.4.1) bcn 100 finish 6.2.2. ESP8266 AT If users download the ESP8266 AT firmware, or the default firmware in ESP-LAUNCHER or ESP-WROOM-02, the system in working mode will display “Ready” at the end. Input command “AT” in the terminal and the system will return “OK”, which means that the firmware works properly. -
Page 30: Configuration Of Rf Initconfig Options
6. Downloading the Firmware Figure 6-2. ESP8266 DOWNLOAD TOOL - RF InitConfig 6.3.1. Configuration of RF InitConfig Options RF InitConfig options are listed in the upper part of Figure 6-2. Please refer to Table 6-3 for a description of this configuration. Table 6-3. -
Page 31: Configuration Of Rf Initconfig Parameters
6. Downloading the Firmware Items Description Configure the TOUT pin according to the actual TOUT pin status. We recommend the default value. • TOUT_ADC_EN: When the TOUT pin connects to an external circuit, measure the external voltage (0V - 1V) through the internal ADC. •... - Page 32 6. Downloading the Firmware The following section introduces how to modify the 112 ~ 114 byte parameters. Figure 6-3 shows the initial configuration. Figure 6-3. 112 ~ 114 Byte Parameters Modify the RF Initialization Parameters Byte 114 is used to control THE RF initialization when ESP8266 is powered on. Table 6-5 provides the parameter configuration.
-
Page 33: Configuration Examples
6. Downloading the Firmware Option Description The default value of byte 112 is 0. When value = 0, it means that the bbpll is 168 M. Both positive and negative frequency offsets can be corrected. However, this may effect the digital peripheral performance and, therefore, it is not bit 1 recommended. - Page 34 6. Downloading the Firmware 4. Applications, such as smart lights, work at a wide temperature range of -40 °C to 125 °C, and need to track and correct the frequency offset automatically. The frequency offset at ambient temperature is large, so the initial offset correction value is needed.
-
Page 35: Appendix-Configuring Issi & Mxic Flash Qio Mode
Appendix A A. Appendix—Configuring ISSI & MXIC Flash QIO Mode ⚠ Notice: Choose DIO or DOUT mode when downloading, otherwise errors may occur. There is no need to modify binaries in DIO or DOUT mode. When using QIO mode of ISSI flash or MXIC flash, users need to modify the first two bytes in blank.bin, as shown in Table A-1. -
Page 36: Appendix-Learning Resources
Appendix B Appendix—Learning Resources B.1. Must-Read Documents • ESP8266EX Datasheet Description: This document introduces the specifications of ESP8266EX, including an overview of the features, protocols, technical parameters and applications. It also describes the pin layout, as well as major functional modules integrated in ESP8266EX (CPU, flash and memory, clock, radio, Wi-Fi, and low-power management). -
Page 37: Must-Have Resources
Fi related APIs, boot APIs, etc. • B.2. Must-Have Resources ESP8266 SDKs • Description: This webpage provides links to the latest version of ESP8266 SDK and the older ones. RTOS Sample Code • Description: This webpage provides the sample code for the commonly used functions. - Page 38 Disclaimer and Copyright Notice Information in this document, including URL references, is subject to change without notice. THIS DOCUMENT IS PROVIDED AS IS WITH NO WARRANTIES WHATSOEVER, INCLUDING ANY WARRANTY OF MERCHANTABILITY, NON-INFRINGEMENT, FITNESS FOR ANY PARTICULAR PURPOSE, OR ANY WARRANTY OTHERWISE ARISING OUT OF ANY PROPOSAL, SPECIFICATION OR SAMPLE.
Need help?
Do you have a question about the ESP8266 SDK and is the answer not in the manual?
Questions and answers