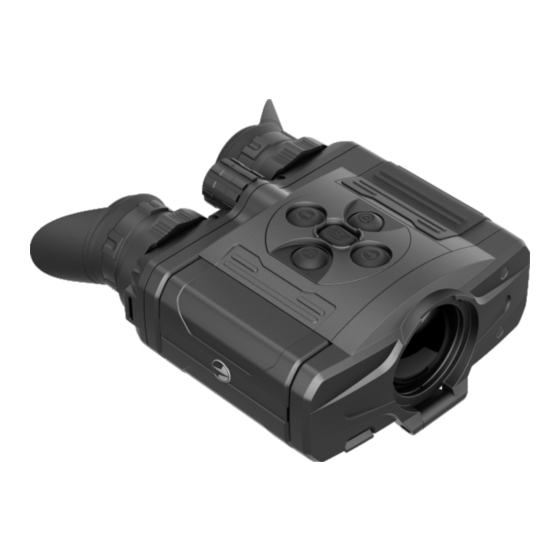
Pulsar Accolade XQ38 Instructions Manual
Thermal imaging binoculars
Hide thumbs
Also See for Accolade XQ38:
- Instructions manual (92 pages) ,
- Operating instructions manual (86 pages)
Table of Contents
Advertisement
Advertisement
Table of Contents

Summary of Contents for Pulsar Accolade XQ38
- Page 1 Accolade Thermal Imaging Binoculars...
- Page 2 Pic. 1...
- Page 3 Thermal Imaging Binoculars ACCOLADE 1-24 25-48 49-74 75-100 101-126 Electromagnetic compliance This product complies with EU Standard EN 55032:2015, Class A. Warning! Operation of this equipment in a residential environment could cause radio interference. Attention! Export of ACCOLADE models (SKU#77411/77412/77413/77414) have export limitations depending on the laws in your region.
- Page 4 Pixel size, µm This product is subject to change in line with improvements to its design. Optical characteristics: Magnification, x The latest edition of this user manual is available online at www.pulsar-nv.com Continuous digital zoom, x 3.1-12.4 4.1-16.4 1.9-15.2 2.5-20...
- Page 5 Extra features: FUNCTIONS OF CONTROL BUTTONS Long lasting battery life “Picture-in-Picture” mode BUTTON CURRENT FIRST SHORT OTHER SHORT LONG PRESS Color palettes OPERATING MODE PRESS PRESSES Observation modes Calibration modes (non-uniformity correction) Manual contrast and brightness adjustment Device is off Power device on Calibrate the sensor Turn display off/ ON/OFF...
- Page 6 Install the Battery Pack into the charging base by inserting the pins (A) of the battery into the grooves (B) of the charger – the Pulsar logo on the battery Pack should be located closer to the lever; click the Battery Pack Pic.
- Page 7 Never use a modified or damaged charger. OPERATION Do not leave the Battery Pack with a charger connected to the mains longer than 24 hours after full charge. WARNING! Do not point the objective lens of the device at intensive Do not expose the battery pack to high temperature or to a naked sources of light such device emitting laser radiation or the sun.
- Page 8 Select the desired mode in the menu option “CALIBRATION” Digital zoom - press the UP/ DOWN buttons to change digital zoom from 1.0x to 4.0x (or 8.0x in XP models). Incremental digital Mode М (manual) zoom is in 0.1x increments. - Close the lens cover, press briefly the ON/OFF (1) button.
- Page 9 Menu contents and description MENU CONTENTS: Tab 1 Wi-Fi Wi-Fi ON/OFF Rocks Press and hold down the М (3) button to enter the main menu. Forest Wi-Fi ON/OFF Select the desired menu option with the Identification UP (2)/DOWN (5) buttons. Operating mode Turn Wi-Fi on/off with a short press of the M button.
- Page 10 Press and hold down the М (3) button to enter the Set the desired password with the UP (10) and main menu. DOWN (8) buttons (button UP to increase value; button DOWN to reduce). Switch between digits Select the desired palette with the UP (2)/DOWN with a short press of the M button.
- Page 11 Date format is displayed as: YYYY/MM/DD Reset Restore default settings (year/month/day) Press and hold down the М (3) button to enter the Select the correct values for the year, month and main menu. date with a short press of the UP/ DOWN buttons. Select option “Settings”...
- Page 12 Enter the Format submenu with a short press of Defective Defective pixel repair the M button. pixel repair When operating a thermal imager, defective Press briefly М to confirm. (dead) pixels (bright or dark dots with constant With a short press of the UP/ DOWN buttons brightness) may become visible on the sensor.
- Page 13 This option allows the user to view the following VIDEO RECORDING AND PHOTOGRAPHY information about the device: Device Full name information ACCOLADE thermal imaging binoculars feature video recording and SKU number photography of the image being ranged to the internal memory card. serial number Before using this feature please read the menu options “Date setup”, software version...
- Page 14 Attention! - Maximum duration of a recorded file is seven minutes. After STADIAMETRIC RANGEFINDER this time expires a video is recorded into a new file. The number of recorded files is limited by the capacity of unit's internal Thermal imagers are equipped with a stadiametric rangefinder which memory.
- Page 15 The device keeps running. You can find further guidelines on Stream Vision on our web site When the device is on, hold down the ON/OFF (1) button. Display www.pulsar-nv.com goes out, message “Display off”. To activate the display, press briefly the ON/OFF button.
- Page 16 WIRELESS REMOTE CONTROL USB CONNECTION (bought separately) Connect one end of the USB cable (16) to the Micro-USB (15) port of Wireless remote control (RC) duplicates the your device, and the other end to the USB port of your PC/laptop. POWER ON function, digital zoom, video Turn the device on with a short press of the ON/OFF (11) button start/stop and menu navigation.
- Page 17 The unit does not USB cable is damaged. Replace USB cable. Follow the link to read FAQs on thermal vision operate on external http://www.pulsar-nv.com/support/faq/ External power supply is Charge the external power power supply. discharged. supply (if necessary).


Need help?
Do you have a question about the Accolade XQ38 and is the answer not in the manual?
Questions and answers