
Related Manuals for Hillyard TRIDENT T26 SC PLUS


Summary of Contents for Hillyard TRIDENT T26 SC PLUS
- Page 1 Scrubbing machine Use and maintenance manual Translation of the original instructions - DOC. 10075757- Ver. AA - 11-2017...
-
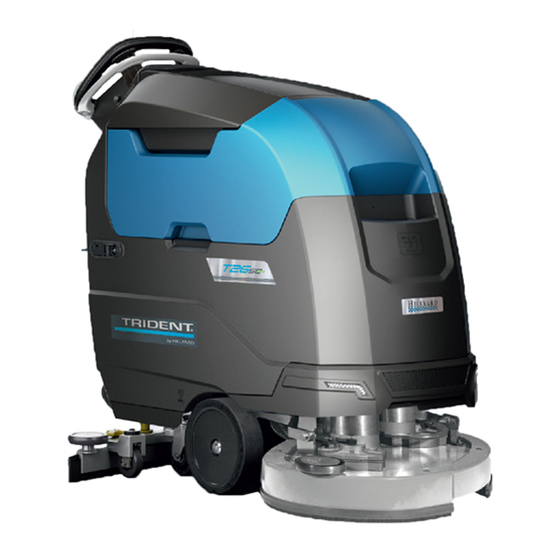
Page 3: Main Machine Components
Solution tank filler cap/measuring inlet. Emergency button. Solution tank filler tube cap. Spray gun control switch (optional). Cover cap for HFF (“HILLYARD FAST FILL”) quick coupling kit (optional). Vacuum wand control switch (optional). Recovery tank. Support hook for recovery tank drainage tube. -
Page 4: Table Of Contents
DS SELECTOR (DRIVE SELECT) ............19 ECO MODE ..................19 MANUAL MODE ..................19 ZONE PROGRAM BUTTON ...............19 REVERSE ...................19 EXTRA BRUSH HEAD PRESSURE ...........20 HILLYARD DOSING CONTROL (HDC) SYSTEM .......20 TUTORIAL ...................20 EMERGENCY SWITCH ..............20 HOUR METER ..................20 BATTERY CHARGE LEVEL INDICATOR ...........20 VACUUM WAND KIT................21 SMART DRYING SYSTEM ..............21... -
Page 5: General Safety Regulations
GENERAL SAFETY REGULATIONS The following symbols are used to indicate any potentially hazardous situations. Always read this information carefully and take the necessary precautions to protect any people and/or objects that may be present. Operator cooperation is paramount for accident prevention. No accident prevention programme can be effective without the full cooperation of the person directly responsible for operating the machine. -
Page 6: Using The Machine
• Before starting the charging operation, carefully read the user manual of the battery charger that you want to use. USING THE MACHINE DANGER: • In the event of danger, take prompt action by pressing the emergency button on the back of the machine (near the control handlebars). - Page 7 • The machine must only be powered with a voltage equal to that shown on the serial number plate. • Read the labels on the machine carefully. Do not cover them for any reason, and replace them immediately if they become damaged. •...
-
Page 8: Deactivation Of The Machine
DEACTIVATION OF THE MACHINE WARNING: • Always protect the machine against sunlight, rain, and other atmospheric agents, both while it is stationary and while it is functioning. Store the machine in a dry, sheltered place: this machine is only designed for use under dry conditions, and must not be used or stored outdoors in humid conditions. -
Page 9: Transport
• If the machine needs to be pushed for maintenance purposes (batteries absent; discharged batteries; etc.), never exceed 2.49 mph. • If there are any machine operation anomalies, check they are not due to a lack of proper maintenance. Otherwise, request the intervention of authorised personnel or an authorised service centre. -
Page 10: Symbols Used In The Manual
The descriptions contained in this document are not binding. The company therefore reserves the STORING THE USE AND MAINTENANCE MANUAL right to make any modifications at any time to elements, details, or accessory supply, as considered necessary for reasons of improvement or manufacturing/commercial requirements. The reproduction, The Use and Maintenance Manual must be stored in its special pouch close to the machine, protected even partial, of the text and drawings contained in this document is prohibited by law. -
Page 11: Technical Data
TECHNICAL DATA TRIDENT TRIDENT TECHNICAL DATA TECHNICAL DATA RS26 SC RS26 SC Rated machine power 1410 Vacuum motor (voltage - nominal power rating) V - W 24 - 422 Working capacity up to 34552 Vacuum on vacuum head 1,75 Working width 25,8 Maximum solution tank capacity 13,9... -
Page 12: Symbols Used On The Machine
Located on the right-hand side of the machine, to identify the control knob of the detergent solution tap. HFM symbol, if visible it shows that the “HILLYARD FLEET MANAGEMENT” system is active. HDC symbol, if visible it shows that the “HILLYARD DOSING CONTROL” system is active. -
Page 13: Machine Preparation
17. Set the main switch to “0”, turning the key (1) to the left (Fig. 2). Remove the key from the main MACHINE PREPARATION switch. 18. Grip the handle (2) and raise the recovery tank to the maintenance position (Fig.3). HANDLING THE PACKAGED MACHINE 19. -
Page 14: Machine Safety Measures
MACHINE SAFETY MEASURES To ensure that work is carried out in the best safety conditions, proceed as follows: Make sure the solution tank is empty. If it isn't, empty it (see "EMPTYING THE SOLUTION TANK"). Make sure the recovery tank is empty. If it isn't, empty it (see "EMPTYING THE RECOVERY TANK"). -
Page 15: Assembling The Brush
Fill with clean water, at a temperature no greater than 122°F and no less than 50°F. The amount ASSEMBLING THE BRUSH inside the tank can be seen by means of the level tube (5) (Fig.6) on the rear left-hand side of For packaging reasons, the brushes are supplied disassembled from the machine. -
Page 16: Preparing To Work
Grip the handle (3) on the right-hand side of the recovery tank (Fig.3) and turn the tank as far as it will go, until it reaches the maintenance position. NB: it is possible to disable the password entry. Contact your nearest HILLYARD assistance centre. -
Page 17: Transfer
NB: when the dead man's lever is released, the brush head motor stops with the relative delay. HFM symbol. If visible, it indicates that the “HILLYARD FLEET MANAGEMENT” system is active. HDC symbol. If visible, it indicates that the “HILLYARD DOSING CONTROL” system is active. -
Page 18: Drying
The squeegee support is taken to its idle position (raised off the floor) and the vacuum motor is switched off with the relative delay. HFM symbol. If visible, it indicates that the “HILLYARD FLEET MANAGEMENT” system is active. HDC symbol. If visible, it indicates that the “HILLYARD DOSING CONTROL” system is active. -
Page 19: Ds Selector (Drive Select)
Maximum forward movement speed level. DS SELECTOR (DRIVE SELECT) NB: the four keys are always present, but can only be used depending on the working mode selected. In particular: 0000.00 0000.00 100% 100% • Transfer: the visible button will be that of maximum speed. •... -
Page 20: Extra Brush Head Pressure
HILLYARD DOSING CONTROL (HDC) SYSTEM This machine is equipped with an emergency switch. To activate it, just press the button (1) on the Upon request, the machine can be fitted with HILLYARD DOSING CONTROL (HDC), a system that back of the control handlebars (Fig.1). -
Page 21: Vacuum Wand Kit
NB: the symbol (1) (Fig.1) remains visible until the error has been resolved. 0000.00 100% NB: if the machine is fitted with the HFM (HILLYARD FLEET MANAGEMENT) system, it will send an e-mail to the affiliated service centre. 0000.00 100% 0000.00... -
Page 22: Recommended Maintenance Operations
RECOMMENDED MAINTENANCE OPERATIONS CLEANING THE BRUSH HEAD BRUSH Careful cleaning of the brush guarantees better cleaning of the floor, as well as a longer brush head gearmotor lifespan. To clean the brush, proceed as follows: Take the machine to the maintenance area. Make sure the machine is in a safe condition (see “MACHINE SAFETY MEASURES”). -
Page 23: Cleaning The Recovery Tank
To clean the recovery tank filters (with the optional tank cleaning kit), proceed as follows: CLEANING THE RECOVERY TANK Take the machine to the maintenance area. To clean the recovery tank (without the optional tank cleaning kit), proceed as follows: CAUTION: users are advised to always wear protective gloves, to avoid the risk of serious Make sure the machine is in a safe condition (see “MACHINE SAFETY... -
Page 24: Emptying The Solution Tank
EMPTYING THE SOLUTION TANK CLEANING THE SOLUTION TANK Proceed as follows to empty the solution tank: Proceed as follows to empty the solution tank: Take the machine to the maintenance area. Take the machine to the maintenance area. Make sure the machine is in a safe condition (see “MACHINE SAFETY MEASURES”). -
Page 25: Replacing The Squeegee Body Rubber Blades
Adjusting the tilt of the squeegee body: REPLACING THE SQUEEGEE BODY RUBBER BLADES Ensuring the good condition of the squeegee body rubber blades guarantees better floor cleaning and Loosen the retainer knob (3) of the squeegee tilt adjustment knob (4) (Fig.3). To adjust the tilt of the squeegee body rubber blades in relation to the floor, tighten or loosen the drying results, as well as a longer service life for the vacuum motor. -
Page 26: Troubleshooting
TROUBLESHOOTING This chapter lists the most common problems linked with the use of the machine. If you are unable to resolve the problems with the information given here, please contact your nearest assistance centre. PROBLEM POSSIBLE CAUSE SOLUTION The main switch is set to “0”. Make sure the main switch is on “I”. - Page 28 HILLYARD INDUSTRIES - PO Box 909 - St.Joseph, Missouri 64502-0909 U.S.A. - Telephone: 816-233-1321 - www.hillyard.com...
Need help?
Do you have a question about the TRIDENT T26 SC PLUS and is the answer not in the manual?
Questions and answers
How do I lift the machine off the ground to be able to work on something underneath by the rear of the machine?
To lift the Hillyard T26 SC PLUS machine off the ground to work underneath it:
1. Grip the handle and raise the recovery tank to the maintenance position.
2. Ensure the machine is in a safe condition according to safety measures.
3. Always wear protective gloves to avoid injury.
No specific instructions for lifting the entire machine off the ground are provided. Use appropriate lifting equipment if needed.
This answer is automatically generated