Table of Contents
Advertisement
Quick Links
Advertisement
Table of Contents

Related Manuals for LAUNCH TECH X-431 PRO


Summary of Contents for LAUNCH TECH X-431 PRO
- Page 2 Version: V1.00.000 Revised date: 2013-05-17...
- Page 3 X-431 PRO User’s Manual — Safety Precautions Copyright Information Copyright © 2013 by LAUNCH TECH. CO., LTD. All rights reserved. No part of this publication may be reproduced, stored in a retrieval system, or transmitted in any form or by any means, electronic, mechanical, photocopying, recording or otherwise, without the prior written permission of LAUNCH.
- Page 4 Keep X-431 PRO far away from magnetic devices because its radiations may erase the data stored on the devices. Store X-431 PRO out of reach of children and do not allow children to use it unsupervised. Please use the included battery and charger. Otherwise, explosion may happen.
- Page 5 LAUNCH X-431 PRO User’s Manual — Safety Precautions messaging, because it may cause a data communication interruption. If it happens, it is abnormal and just try to re-do it. Precautions on Operating Vehicle’s ECU Do not disconnect the vehicle inner consumer when the ignition switch is on.
-
Page 6: Table Of Contents
LAUNCH X-431 PRO User’s Manual — Table of Contents Table of Contents 1 INTRODUCTIONS.................... 1 ................... 1 RODUCT ROFILE ....................1 EATURES X-431 PRO ..............2 NOWLEDGE OF 1.3.1 X-431 PRO Whole Set............... 2 1.3.2 X-431 PRO pad computer ..............3 1.3.3 X-431 PRO protection sleeve............ - Page 7 4.3.7 Customize internet settings ............. 22 4.4 U ..................23 SING LUETOOTH 4.4.1 Open Bluetooth................23 4.4.2 Allow other devices to search for X-431 PRO ......... 23 4.4.3 Search other devices and pair X-431 PRO with it ......23 4.4.4 Send file via Bluetooth..............23...
- Page 8 LAUNCH X-431 PRO User’s Manual — Table of Contents 4.5 C ....................24 AMERA 4.5.1 Open and close camera ..............24 4.5.2 Take a photo ..................24 4.5.3 View a photo ..................24 4.5.4 Record a video ................24 4.5.5 View a video ..................25 4.5.6 Customize camera settings .............
-
Page 9: Introductions
X-431 PRO User’s Manual — Knowledge of X-431 PRO 1 Introductions 1.1 Product Profile X-431 PRO is a new vehicle trouble diagnostic device developed based on internet and mobile terminals by Launch with over 20 years R&D experience in vehicle diagnosis. Through the Bluetooth communication between vehicle... -
Page 10: Knowledge Of X-431 Pro
1.3 Knowledge of X-431 PRO 1.3.1 X-431 PRO Whole Set X-431 PRO is composed of an X-431 PRO pad computer, a protection sleeve and a DBScar diagnostic connector. Fig. 1-1 X-431 PRO whole set A ---- X-431 PRO pad computer (See Chapter“1.3.2”) B ---- Protection sleeve (See Chapter “1.3.3”) -
Page 11: X-431 Pro Pad Computer
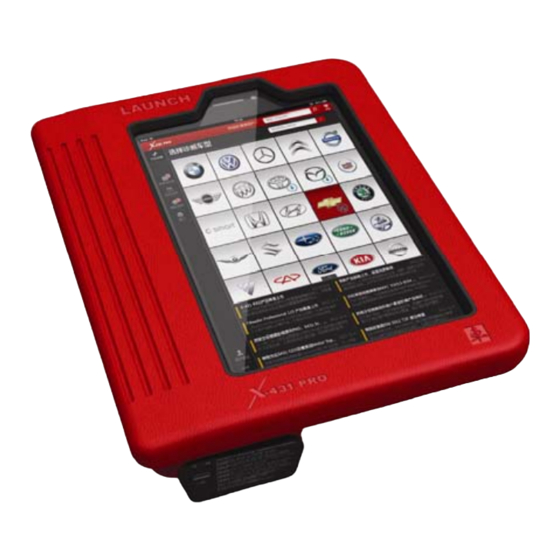
LAUNCH X-431 PRO User’s Manual — Knowledge of X-431 PRO 1.3.2 X-431 PRO pad computer Fig. 1-2 X-431 PRO pad computer Name Notes POWER key In Off mode, press it to turn on X-431 PRO; In On mode, press it to activate the LCD if the LCD is blank. -
Page 12: X-431 Pro Protection Sleeve
To remove protection sleeve from X-431 PRO main unit, follow the steps described as below to proceed: 1. Pull the red sleeve outwards from the right margin of X-431 PRO, and then remove it completely. 2. Reverse the upper enclosure and then user the screwdriver to loosen all screws. -
Page 13: Dbscar Diagnostic Connector
LAUNCH X-431 PRO User’s Manual — Knowledge of X-431 PRO 1.3.4 DBScar diagnostic connector Fig. 1-5 DBScar diagnostic connector ① OBD-16 diagnostic To connect to vehicle’s OBD2 connector DLC. ② Power indicator It lights up while plugging the DBScar connector into vehicle’s DLC. -
Page 14: Technical Parameters
LAUNCH X-431 PRO User’s Manual — Knowledge of X-431 PRO 1.4 Technical Parameters X-431 PRO: Operating system: Android CPU: Dual core 1GHz Battery: 3000mh, rechargeable polymer lithium battery Standby time: it is subject to the using environment. Generally it can keep working for 4 hours. - Page 15 LAUNCH X-431 PRO User’s Manual — Knowledge of X-431 PRO • Password envelope • X-431 PRO protection sleeve • DBScar diagnostic connector • OBD II extension cable • Cigarette lighter cable • Power adaptor • USB data cable • Non-16pin connector...
-
Page 16: Preparations
The charging time of battery varies with temperature condition and battery consumption status. While X-431 PRO has low battery, a beep will sound. If it is very low, X-431 PRO will be switched off automatically. Note: Do one of the followings to save power:... -
Page 17: Power On / Power Off X-431 Pro
2.4 Power on / power off X-431 PRO 2.4.1 Power on 1. Press the POWER key to turn on X-431 PRO. 2. If it is the first time you turned on X-431 PRO, the system will prompt you to make some initial setup. 3. Set your account. -
Page 18: Customize Your Desktop
LAUNCH X-431 PRO User’s Manual — Knowledge of X-431 PRO MAIN MENU key: To switch to main menu screen. SHORTCUT key: To view the recent applications. OPTION MENU key: To select operation option from the list. Notice bar: To notify users of new events and display the status (For detailed indicators, please see the following table.). -
Page 19: Delete Items From The Desktop
LAUNCH X-431 PRO User’s Manual — Knowledge of X-431 PRO 2.6.3 Delete items from the desktop 1. Hold and press the desired item, “X Delete” appears in the upper middle of the screen. 2. Drag it on the icon until it change into red, then release it. -
Page 20: Auto - Rotate The Screen
2.9 Lock & unlock the screen 2.9.1 Lock the screen • When X-431 PRO is ON, press POWER key once to lock the screen; • The system will lock the screen automatically after X-431 PRO remains idle for a long time. -
Page 21: How To Set As Airplane Mode
According to the regulations of some countries or areas, PC device must be turned off before boarding on the airplane. The way to disable functions of X-431 PRO is to set it as airplane mode. In this mode, all wireless radio waves will be disabled, including mobile network, Bluetooth and WLAN. -
Page 22: How To Diagnose
LAUNCH X-431 PRO User’s Manual — Vehicle Diagnosis 3 How to diagnose 3.1 Connect DBScar Follow the steps mentioned below to connect DBScar connector: Locate vehicle’s DLC socket. The DLC (Data Link Connector or Diagnostic Link Connector) is the standardized 16-cavity connector where diagnostic code readers interface with the vehicle's on-board computer. -
Page 23: Bluetooth Setting
3.2 Bluetooth setting Enter X-431 PRO Bluetooth setting screen (“Settings” --> “Wi-Fi” --> “Bluetooth”), slide the Bluetooth switch to ON and X-431 PRO will start searching available Bluetooth device, click the desired connector to piar and match. By default, the Bluetooth name is 98269*****00 (where ***** stands for 5 digits.). -
Page 24: User And Connector Registration
LAUNCH X-431 PRO User’s Manual — Vehicle Diagnosis 3.4 User and connector registration 3.4.1 User registration Click the icon on the desktop to launch the application, a disclaimer page will pop up on the window. Click “I’ve read it” to enter the login interface of diagnosis software, as indicated in Fig. - Page 25 LAUNCH X-431 PRO User’s Manual — Vehicle Diagnosis Fig. 3-5 In Fig. 3-5, fill in the information in each field. After inputting, click “Register and Log In” to enter software main menu screen. If you have registered to be a member, input your name/CC and password in Fig.
-
Page 26: Software Layout
LAUNCH X-431 PRO User’s Manual — Vehicle Diagnosis 3.4.2 Software layout Fig. 3-6 Click to unfold function menu, it mainly includes the following items: Diagnosis: to enter vehicle diagnosis function. Service Info.: to provide a large amount of service data for car owners and maintenance personnel to make reference and review. -
Page 27: Dbscar Connector Registration
LAUNCH X-431 PRO User’s Manual — Vehicle Diagnosis More: To view software version and user’s manual. Click to search vehicle models. Click to change the software theme. Click next to “Select Diag Model” to select the corresponding connector. While accessing other menus, click shown on the bottom of the screen to extend the display window. -
Page 28: Start Diagnosing
LAUNCH X-431 PRO User’s Manual — Vehicle Diagnosis 3.5 Start diagnosing Take Demo as an example to demonstrate how to diagnose a vehicle. Start the software to enter vehicle selection screen. Click “Demo” to enter demo menu screen. Click “DEMO” to enter system selection screen. -
Page 29: Special Function
This function provides a mass of service information for various vehicle models, which enables users to retrieve service data of some vehicle online. Note: To access service information successfully, please make sure X-431 PRO is properly connected to internet. Click “Service info.” to enter. Click on the bottom of the screen to unfold the browse window. -
Page 30: Diagnostic Report
LAUNCH X-431 PRO User’s Manual — Vehicle Diagnosis shopping record. 3.7.1 Diagnostic report This option is used to view the diagnostic report generated in process of vehicle diagnosis. Additionally, delete, send operations are also supported. Click “Report”, a list of diagnostic report will appear below the tab. Click the desired one to view its content. -
Page 31: Management
LAUNCH X-431 PRO User’s Manual — Vehicle Diagnosis to start searching. To view public circle, click it, the Chat and Circle Data tabs will appear. Click “Chat” to view all history messages, you can also input the message in the input field and then click “Send”... -
Page 32: More
LAUNCH X-431 PRO User’s Manual — Vehicle Diagnosis 3.11 More This option is used to view software information, quick start guide and user’s manual etc. -
Page 33: Others
LAUNCH X-431 PRO User’s Manual — Others 4 Others 4.1 Email The function allows you to send and receive email. You can add POP3 or IMAP email account for some common web email service provider. 4.1.1 Add an email account Note: Before sending or receiving email, you have to set up an email account. -
Page 34: View Email
LAUNCH X-431 PRO User’s Manual — Others 6. Enter the content in Compose email area. 7. After inputting, click , you can perform any one of the followings: attach file, add CC/BCC, save draft, discard and setting. 8. Click to send email. -
Page 35: Wlan
LAUNCH X-431 PRO User’s Manual — Others 4.2 WLAN This function enables you to enjoy surfing on the internet and downloading data from the internet via Wi-Fi. 4.2.1 Set Wi-Fi on 1. Enter main menu screen, choose “Settings” > “Wi-Fi”. -
Page 36: Browser
LAUNCH X-431 PRO User’s Manual — Others 4.3 Browser 4.3.1 Open browser Enter main menu screen, click to launch the browser. You can choose the desired homepage or input the website address to browse. 1 Click to input or edit the web link... -
Page 37: Zoom In / Zoom Out A Page
LAUNCH X-431 PRO User’s Manual — Others 4.3.3 Zoom in / zoom out a page There are two ways to zoom in/ zoom out while browsing a webpage. • To zoom in so that the text on a webpage appears in a column that fits your device’s screen, double-tap with the tip of your finger. -
Page 38: Using Bluetooth
Enter main menu screen, click “Settings” > “Bluetooth”. X-431 PRO starts scanning all Bluetooth devices. Choose the desired one from the search result to pair it with X-431 PRO. 4.4.4 Send file via Bluetooth You can send pictures, video, audio files or test reports to others for sharing and review via Bluetooth. -
Page 39: Camera
LAUNCH X-431 PRO User’s Manual — Others audio file. Click and choose “Bluetooth” from the pull-down menu. Click the target Bluetooth device you want to transmit files. 4.5 Camera 4.5.1 Open and close camera • Enter main menu screen, click •... -
Page 40: View A Video
LAUNCH X-431 PRO User’s Manual — Others 4.5.5 View a video After a video is recorded, it will be displayed in thumbnail at the lower right corner of the screen. Click it to view in full-screen mode. The following operations can be done: •... -
Page 41: Gallery
This option is used to manage pictures and video files. 4.6.1 Open gallery Enter main menu screen, click “Gallery” to access it. The system searches images and videos in X-431 PRO and SD card automatically, and categorizes it into corresponding folders. 4.6.2 Browse images Enter main menu screen, click “Gallery”. -
Page 42: Music Player Interface
LAUNCH X-431 PRO User’s Manual — Others Open music file list. Click the desired audio files to start playing. Press VOLUME+/- key to increase or decrease the volume. Hint: While playing, click to switch to other applications and the player will be running in background. -
Page 43: Create A New Playlist
LAUNCH X-431 PRO User’s Manual — Others ringtone, delete, sound effect and search etc. Click to return to the previous screen. Click to go back to desktop. 4.7.3 Create a new playlist 1. Enter main menu screen, and click “Music” to enter. -
Page 44: Delete An Alarm
LAUNCH X-431 PRO User’s Manual — Others 4.9.2 Delete an alarm Enter main menu screen, click “Alarms”. Click the desired alarm. Click , then click “OK” in the confirmation dialog box to delete it. Hint: Alternatively, you can also hold and press the desired alarm on the alarm list screen, then choose “Delete alarm”... -
Page 45: Auto-Rotate The Screen
4.12 Set screen lock This item allows you to protect your X-431 PRO from unauthorized use by creating a personal screen unlock pattern. Once it is set, X-431 PRO screen will not be unlocked until you draw the right pattern. -
Page 46: Language & Input
“Settings” > SD card and X-431 PRO memory. Release X-431 PRO memory In case your X-431 PRO encounters low memory, please try to solve it by doing the following: • Move the file and email attachments to SD card. -
Page 47: Restore X-431 Pro To Factory Settings
• Reset X-431 PRO to the default settings. 4.17 Restore X-431 PRO to factory settings This option enables you to restore X-431 PRO to the default factory settings. Once it is reset, all data (including downloaded applications) will be deleted. - Page 48 Warranty THIS WARRANTY IS EXPRESSLY LIMITED TO PERSONS WHO PURCHASE LAUNCH PRODUCTS FOR PURPOSES OF RESALE OR USE IN THE ORDINARY COURSE OF THE BUYER’S BUSINESS. LAUNCH electronic product is warranted against defects in materials and workmanship for one year from date of delivery to the user. This warranty does not cover any part that has been abused, altered, used for a purpose other than for which it was intended, or used in a manner inconsistent with instructions regarding use.
- Page 49 Send the unit pre-paid to: Attn: Customer Service Department LAUNCH TECH. CO., LTD. Launch Industrial Park, North of Wuhe Avenue, Banxuegang, Bantian, Longgang, Shenzhen, Guangdong P.R.China, 518129...
- Page 50 FCC STATEMENT This equipment complies with FCC RF radiation exposure limits set forth for an uncontrolled environment. This device complies with Part 15 of the FCC Rules. Operation is subject to the following two conditions: ( 1) this device may not cause harmful interference, and (2) this device must accept any interference received, including interference that may cause undesired operation.
Need help?
Do you have a question about the X-431 PRO and is the answer not in the manual?
Questions and answers