Zeversolar Zeverlution 1500S Installation And Operating Insctructions
Solar inverters
Hide thumbs
Also See for Zeverlution 1500S:
- Quick installation manual (2 pages) ,
- Quick installation manual (2 pages) ,
- Assembly, installation and operating instructions (74 pages)
Table of Contents
Advertisement
Quick Links
Advertisement
Table of Contents

Related Manuals for Zeversolar Zeverlution 1500S


Summary of Contents for Zeversolar Zeverlution 1500S
-
Page 2: Table Of Contents
Table of Contents 1 Notes on this manual ..................4 1.1 Validity .................... 4 1.2 Target group .................. 4 1.3 Symbols used in this manual ............5 2 Safety ........................ 6 2.1 Intended use ................... 6 2.2 Safety standards ................6 2.3 Important safety information ............ - Page 3 5.4.2 Grid connection ......................22 5.4.3 Second protective grounding connection ............ 25 5.4.4 Residual current protection ................. 26 5.4.5 Overvoltage category ..................... 27 5.4.6 Rating of AC circuit breaker ................. 27 5.5 DC connection ................28 5.5.1 Requirements for the DC connection .............. 28 5.5.2 Assembling the DC connectors ................
- Page 4 10.4 Safety regulations ..............55 10.5 Efficiency ................... 57 10.5.1 Efficiency curve Zeverlution 1000S ..............57 10.5.2 Efficiency curve Zeverlution 1500S .............. 58 10.5.3 Efficiency curve Zeverlution 2000S ............59 10.5.4 Efficiency curve Zeverlution 3000S ............60 10.6 Power reduction ................. 61 10.7 Tools and torque ................
-
Page 5: Notes On This Manual
(AC) and feeds it into the utility grid. 1.1 Validity This manual describes the mounting, installation, commissioning and maintenance of the following Zeversolar inverters: Zeverlution 1000S, Zeverlution 1500S, Zeverlution 2000S, Zeverlution 3000S. Observe all documentation that accompanies the inverter. Keep them in a convenient place and available at all times. -
Page 6: Symbols Used In This Manual
1.3 Symbols used in this manual The following safety precautions and general information are used in this manual: DANGER indicates a hazardous situation which, if not avoided, will result in death or serious injury. WARNING indicates a hazardous situation which, if not avoided, can result in death or serious injury. -
Page 7: Safety
The inverters are labeled with the CE mark and RCM mark, fulfill the requirements specified in the specific standards. For more information about certificates in other countries and regions, please visit website ( http:// www.zeversolar.com ). Installation and Operating Instructions V02... -
Page 8: Important Safety Information
2.3 Important safety information • All work on the inverter must only be carried out by qualified personnel who have read and fully understood all safety information contained in this manual. • Children must be supervised to ensure that they do not play with this device. - Page 9 Risk of injury due to electric shock and fire caused by high leakage current • The inverter must be reliably grounded in order to protect property and personal safety. Risk of injury due to hot heat sink • The heat sink may get hot during operation. Do not touch! Possible damage to health as a result of the effects of electromagnetic radiation •...
- Page 10 Damage to the seal of the cover in sub-zero conditions • If you open the cover in sub-zero condition,the sealing of the cover can be damaged. This can lead moisture entering the inverter. • Do not open the inverter at ambient temperatures lower than -5℃. •...
-
Page 11: Symbols On The Type Label
2.4 Symbols on the type label Icon Explanation Risk of danger, warning and caution Safety information important for human safety. Failure to observe the safety information in this manual may result in injury or death. Danger to life due to electric shock The product operates at high voltages. -
Page 12: Basic Safety Protection
2.5 Basic safety protection We provide the following safety protection: 1) Overvoltage, undervoltage protection 2) Overfrequency, underfrequency protection 3) Overtemperature monitoring 4) Residual current monitoring 5) Isolation monitoring 6) Anti-islanding protection 7) DC feed-in monitoring Installation and Operating Instructions V02... -
Page 13: Unpacking
3 Unpacking 3.1 Scope of delivery Object Description Quantity Inverter Wall bracket Mounting accessory kit: Wall anchors and hexagon bolts (2× ) M5× 12 pan head screw (2× ) *M5× 14 pan head screw (1× ) *Ground washer (2× ) DC connector Documentation WiFi antenna... -
Page 14: Mounting
4 Mounting 4.1 Ambient conditions Be sure the inverter is mounted out of the reach of children. Mount the inverter in areas where it cannot be touched inadvertently. Ensure good access to the inverter for installation and possible service. The ambient temperature should be below 40° C to ensure optimal operation. Observe the recommended clearances to walls, other inverters, or objects as follows to ensure sufficient heat dissipation. - Page 15 Ensure optimum operation and extend service life, avoid exposing theinverter to direct sunlight, rain and snow. The mounting method, location and surface must be suitable for the inverter's weight and dimensions. If mounted in a residential area, we recommend mounting the inverter on a solid surface.
-
Page 16: Selecting The Mounting Location
4.2 Selecting the mounting location Danger to life due to fire or explosion • Do not mount the inverter on flammable construction materials. • Do not mount the inverter in areas where flammable materials are stored. • Do not mount the inverter in areas where there is a risk of explosion. Mount the inverter vertically or tilted backward by a max of 15°... -
Page 17: Mounting The Inverter With The Wall Bracket
4.3 Mounting the inverter with the wall bracket Risk of injury when lifting the inverter, or if it is dropped The inverter weighs approximately 8 kg. There is risk of injury if the inverter is lifted incorrectly or dropped while being transported or when attaching it to or removing it from the wall bracket. - Page 18 Holding the inverter using the housing side edges and attach it onto the wall bracket tilted slightly downwards. 4. Check both sides of the heatsink to ensure that it is securely in place. 5. Push the inverter as far as possible and attach it to both sides of the wall bracket using the M5 screws.(screw driver type: T25,torque: 2.5Nm) If a second protective conductor is required in installation site, ground the inverter and secure it so that it cannot be lifted off the wall bracket (see section 5.4.3...
-
Page 19: Electrical Connection
5 Electrical connection 5.1 Safety Danger to life due to high voltages of the PV array When exposed to sunlight, the PV array generates dangerous DC voltage which is present in the DC conductors and the live components of the inverter. Touching the DC conductors or the live components can lead to lethal electric shocks. -
Page 20: System Layout Of Units Without Integrated Dc Switch
Risk of injury due to electric shock • The external protective grounding conductor is connected to the inverter’s protective grounding terminal through the screw terminal block. Make sure the connection is reliable. • When connecting, connect the AC connection first to ensure the inverter grounding reliably and then connect the DC inputs. -
Page 21: Overview Of The Connection Area
5.3 Overview of the connection area Object Description DC-SWITCH (optional): switch on or off for PV-load. DC: plug-in connector to connect the strings. COM: connect the monitoring device with network cable. ANT (optional): antenna, transmit and receive Wi-Fi signal. AC: connect the grid. Installation and Operating Instructions V02... -
Page 22: Ac Connection
5.4 AC connection Danger to life due to high voltages in the inverter • Before performing the electrical connection, ensure that the AC circuit breaker is switched off and cannot be reactivated. 5.4.1 Conditions for the AC connection Cable Requirements The grid connection is established using three conductors (L, N, and PE). -
Page 23: Grid Connection
The maximum cable lengths relative to the conductor cross-section as follows: Maximum cable length Conductor Zeverlution Zeverlution Zeverlution Zeverlution cross-section 1000S 1500S 2000S 3000S 2.5 mm² 37 m 28 m 17 m 4 mm² 74 m 59 m 44 m 27 m 6 mm²... - Page 24 Procedure: 1. Switch off the AC circuit breaker and secure it against reconnection. 2. Loosen the screws of the cover using a screwdriver (T25) and remove the cover. loosen the screws of the cover During loosening the screws of the cover, it is not necessary to take off the screws and conical spring washers, which can remain on the cover and will not fall off.
- Page 25 Connect the L,N,protective conductor(PE) to the screw terminal block(screw driver type:DIN5264(blade: 1× 5.5),torque: 1.2Nm). •Insert the protective conductor (green-yellow) into the screw terminal with the grounding sign and tighten the screw. •Insert the neutral conductor (blue) into the screw terminal with N sign and tighten the screw.
-
Page 26: Second Protective Grounding Connection
5.4.3 Second protective grounding connection If required, the grounding terminal can be used to connect a second protective conductor or as equipotential bonding. Procedure: 1. Take out the terminal lug, insert the stripped grounding conductor into the terminal lug and crimp the contact. 2. -
Page 27: Residual Current Protection
5.4.4 Residual current protection The inverter is equipped with an all-pole sensitive residual current monitoring unit (RCMU) with an integrated differential current sensor which fulfills the requirements of DIN VDE 0100-712 (IEC60364-7-712:2002). Therefore an external residual current device (RCD) is not required. If an external RCD needs to be installed because of local regulations, a RCD type A or type B can be installed as an additional safety measure. -
Page 28: Overvoltage Category
5.4.5 Overvoltage category The inverter can be deployed in grids of installation category III or lower, as defined under IEC 60664-1. This means that it can be permanently connected at the grid-connection point in a building. In installations involving long outdoor cable routing, additional overvoltage-reducing measures must be taken so that the overvoltage category is reduced from IV to III. -
Page 29: Dc Connection
5.5 DC connection Danger to life due to high voltages in the inverter • Before connecting the PV array, ensure that the DC switch is switched off and that it cannot be reactivated. • Do not disconnect the DC connectors under load. 5.5.1 Requirements for the DC connection Use of Y adapters for parallel connection of strings The Y adapters must not be used to interrupt the DC circuit. -
Page 30: Assembling The Dc Connectors
5.5.2 Assembling the DC connectors Danger to life due to high voltages on DC conductors When exposed to sunlight, the PV array generates dangerous DC voltage which is present in the DC conductors. Touching the DC conductors can lead to lethal electric shocks. •... - Page 31 Route the stripped cable all the way into the DC connector. Ensure that the stripped cable and the DC connector have the same polarity. Press the clamping bracket down until it audibly snaps into place. Ensure that the cable is correctly positioned: Result Measure If the stranded wires are visible in the...
-
Page 32: Disassembling The Dc Connectors
5.5.3 Disassembling the DC connectors Danger to life due to high voltages on DC conductors When exposed to sunlight, the PV array generates dangerous DC voltage which is present in the DC conductors. Touching the DC conductors can lead to lethal electric shocks. •... -
Page 33: Connecting The Pv Array
5.5.4 Connecting the PV array Damage to the inverter due to overvoltage If the voltage of the strings exceeds the maximum DC input voltage of the inverter, it can be destroyed due to overvoltage. All warranty claims become void. • Do not connect strings with an open-circuit voltage greater than the maximum DC input voltage of the inverter. -
Page 34: Communication
Ethernet. Then you will be able to connect the inverter to the remote monitoring platform ‛Solarcloud“. You can monitor the operating status or power generation data via a smart phone or PC. The website http://solarcloud.zeversolar.com address of the ‛Solarcloud“ is Installation and Operating Instructions V02... - Page 35 Pinout detail of the RJ45 interface on the inverter as follows: Pin1------- TX_RS485A Pin2-------TX_RS485B Pin3-------RX_RS485A Pin4-------GND Pin5-------GND Pin6-------RX_RS485B Pin7-------+7V Pin8-------+7V For detailed information, please refer to ZeverManager user manual. CAT-5 with shield or higher level cable is required as the RS485 communication cable between inverter and ZeverManager.
- Page 36 1. Loosen the screws of the cover using a screwdriver (T25) and remove the cover. (see Section 5.4.2). 2. Unscrew the swivel nut of the M25 cable gland, remove one filler-plug from the cable gland and keep it well. If there is only one network cable, please keep another filler-plug in the remaining hole of the sealing ring against water ingress.
- Page 37 If the inverter has integrated ComBox (with Ethernet module), you need to insert the network cable into the RJ45 socket on the upper circuit board(ComBox). 5. Connect the inverter to ZeverCom/ZeverManager via the above mentioned network cable. 6. Press the sealing ring with the network cable into the cable gland, and then tighten the swivel nut firmly.
-
Page 38: System Monitoring Via Ethernet
6.2 System monitoring via Ethernet User can monitor the inverter through the integrated ComBox with Ethernet module (optional), The connection diagram between the inverter and internet with network cable is shown as follows. Internet Internet Solarcloud Router Inverter_1 Inverter_2 Inverter_n Possible reason of communication failure due to closed port The ComBox uses port #6655 and #80 to communicates with the Solarcloud. -
Page 39: System Monitoring Via Wifi
More detailed information for ComBox and Solarcloud: In order to achieve remote monitoring reliably, please visit website ( http:// www.zeversolar.com ) and download the ComBox’s manual for detailed information, you can also find how to use Solarcloud in it. Installation and Operating Instructions V02... -
Page 40: Communication With A Third-Party Devices
6.4 Communication with a third-party devices This interver supports communication with a third party monitoring device such as Metecontrol, Solar-Log etc. For detailed wiring method please refer to operating manual of corresponding third party monitoring device. Installation and Operating Instructions V02... -
Page 41: Commissioning
7 Commissioning Risk of injury due to incorrect installation We strongly recommend carrying out preliminary checks before commissioning to avoid possible damage to the device caused by faulty installation. 7.1 Electrical checks Carry out the main electrical checks as follows: ①... -
Page 42: Mechanical Checks
Danger to life due to the presence of AC voltage • Only touch the insulation of the AC cables. • Wear personal protective equipment such as insulating gloves. ⑤ Check the grid voltage: check that the grid voltage at the point of connection of the inverter complies within the permitted value. -
Page 43: Start-Up
7.3 Start-up After finishing the electrical and mechanical checks, switch on the AC circuit breaker and DC switch in turn. Once the DC input voltage and power are sufficiently high and the grid-connection conditions are met, the inverter will start operation automatically. Usually, there are three states during operation: Waiting: When the initial voltage of the strings is greater than the minimum DC input voltage but lower than the start-up DC input voltage, the inverter is waiting for... -
Page 44: Disconnecting The Inverter From Voltage Sources
8 Disconnecting the inverter from voltage sources Prior to performing any work on the inverter, disconnect it from all voltage sources as described in this section. Always adhere strictly to the prescribed sequence. Destruction of the measuring device due to overvoltage •... - Page 45 Damage to the inverter due to electrostatic discharge •Touching electronic components can cause damage to or destroy the inverter through electrostatic discharge. • Ground yourself before touching any component. Use a suitable measuring device to check that no voltage is present at the AC screw terminal blocks between L and N and L and PE.
-
Page 46: Operation
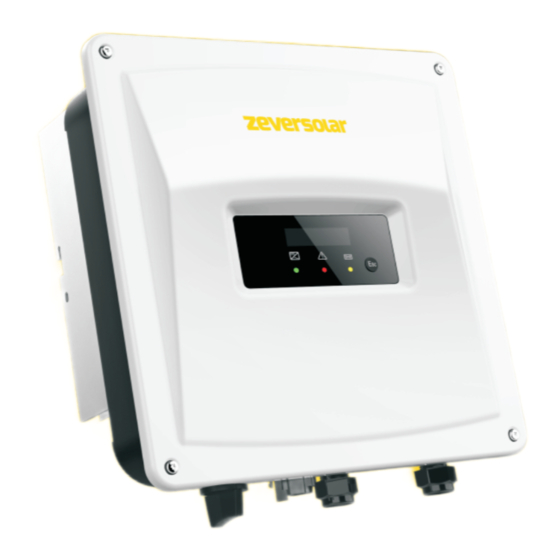
9 Operation The information provided here covers the LED indicators, control button, display messages, and the language and safety regulation settings. 9.1 Overview of the control panel The inverter is equipped with a text display, three LEDs indicators and one control button. -
Page 47: Display
9.1.1 Display The display consist of 16 characters× 2 lines. The bottom line always shows the current output (Pac = xxxx.xW). The top line shows the current state by default, it will switch to different running information by pressing the control button, as follows. -
Page 48: Control Button
9.1.2 Control button The inverter has a control button which is necessary to switch between the various displays for measured values and data, enter next entry and lock the expected information. The display menus wrap around, which means that when you arrive at the last entry, the first entry is displayed when you press the button again. -
Page 49: Display Messages
9.2 Display messages Along with the various operating states, various messages may be shown on the display, as follows. State Error Description Causes code Initial PV voltage is between minimum DC Waiting input voltage and the start-up DC input voltage of the inverter. The inverter is checking the feed-in conditions after the start-up PV voltage Initializat-... - Page 50 The grid voltage is outside the permitted Vac Fault range. The utility cannot be detected, which may No Utility Grid be caused by no utility, grid disconnected, Available AC cables damaged, fuse broken or island mode. Residual The residual current exceeds the current fault permitted upper limit.
-
Page 51: Language And Safety Regulation Settings
9.3 Language and safety regulation settings Before setting, switch on the DC switch, and ensure that the AC circuit breaker is switched off and cannot be reactivated, while the inverter should be reliably grounded. 9.3.1 Language setting The inverter provides two languages: English and German. Press the button for approx. - Page 52 Then press the control key for 10 seconds. The LCD will show the safety regulation as illustrated below: DE VDE-AR-N 4105 means the German safety regulation (VDE4105) DE VDE-AR-N 4105 Pac= 0.0W Step 3: Before the display goes out from above mentioned step 2, press the control key again once a second to scroll to the safety regulations you want.
-
Page 53: Technical Data
10 Technical Data 10.1 DC input data Zeverlution Zeverlution Zeverlution Zeverlution Type 1000S 1500S 2000S 3000S Max DC convertible 1150W 1750W 2350W 3150W power (@cosφ=1) Max. input voltage 500V 600V MPP voltage range 70-450V 70-520V Rated input voltage 360V Min. start voltage Min. -
Page 54: Ac Output Data
10.2 AC output data Zeverlution Zeverlution Zeverlution Zeverlution Type 1000S 1500S 2000S 3000S Rated active power 1000W 1500W 2000W 3000W Max. apparent AC power 1100VA 1650VA 2200VA 3000 VA Nominal AC voltage / 220V,230V,240V / 180V-280V range AC power frequency / 50,60 / ±... -
Page 55: General Data
10.3 General data Zeverlution Zeverlution Zeverlution Zeverlution Type 1000S 1500S 2000S 3000S communication ● / ○ / ○ RS485 / Ethernet / WiFi 16 x 2 characters Display 346 x 346 Dimensions 346 x 346 x 132mm x 146mm (W x H x D) 7.5Kg Weight convection... -
Page 56: Safety Regulations
Integrated Islanding protection Integrated EMC immunity EN61000-6-1, EN61000-6-2 EMC emission EN61000-6-3, EN61000-6-4 Utility interference EN61000-3-2, EN61000-3-3 -—N/A ●—Standard ○—Optional 1) Detailed approvals and certificates are available from the ‘Certificate Overview’ of download area at www.zeversolar.com. Installation and Operating Instructions V02... - Page 57 Information for choosing the safety standard VDE-AR-N 4105 If a central network and system protection device is used for power generation systems, the value of the rise-in-voltage protection U > of 1.1Un presented in the integrated network and system protection can be changed, but a password is required.
-
Page 58: Efficiency
10.5 Efficiency The operating efficiency is shown for the three input voltages (V mppmax dc,r ) graphically. In all cases the efficiency refers to the standardized power mppmin output (P ). (According to EN 50524 (VDE 0126-13): 2008-10, cl. 4.5.3). ac,r Notes: Values are based on rated grid voltage, cos(phi) = 1 and an ambient temperature of 25℃. -
Page 59: Efficiency Curve Zeverlution 1500S
10.5.2 Efficiency curve Zeverlution 1500S Max. efficiency, η 97.1% European weighted efficiency, η 96.4% MPPT efficiency 99.50% Installation and Operating Instructions V02... -
Page 60: Efficiency Curve Zeverlution 2000S
10.5.3 Efficiency curve Zeverlution 2000S Max. efficiency, η 97.2% European weighted efficiency, η 96.6% MPPT efficiency 99.50% Installation and Operating Instructions V02... -
Page 61: Efficiency Curve Zeverlution 3000S
10.5.4 Efficiency curve Zeverlution 3000S Max. efficiency, η 97.4% European weighted efficiency, η MPPT efficiency 99.50% Installation and Operating Instructions V02... -
Page 62: Power Reduction
PV modules. This device can decrease power output during certain periods of the day according to these parameters. Notes: Values are based on rated grid voltage and cos (phi) = 1. Power reduction with increased ambient temperature (Zeverlution 1000S) Power reduction with increased ambient temperature (Zeverlution 1500S) Installation and Operating Instructions V02... - Page 63 Power reduction with increased ambient temperature (Zeverlution 2000S) Power reduction with increased ambient temperature (Zeverlution 3000S) Installation and Operating Instructions V02...
-
Page 64: Tools And Torque
10.7 Tools and torque Tools and torque required for installation and electrical connections. Tools, model Object Torque Screws for the cover Screw for second protective grounding Torque screwdriver, connection 2.2Nm Screws for tightening the inverter and wall bracket Flat-head screwdriver, Screw terminal block for AC cable 1.2Nm blade with 1×... -
Page 65: Troubleshooting
11 Troubleshooting When the PV power plant does not operate normally, fault information will be shown up on the display of the inverter and the red LED will be lit at the same time. We recommend the following actions for quick troubleshooting. The corresponding causes are described in section 9.2 ‛Display messages“. - Page 66 PV arrays, reconnect them after display and LED turn Fault 4,5,6, 8,9 off. If this fault is still being displayed, contact the service. Contact the Zeversolar service if you meet other problems not in the above table. Installation and Operating Instructions V02...
-
Page 67: Maintenance
12 Maintenance Normally, the inverter needs no maintenance or calibration. Regularly inspect the inverter and the cables for visible damage. Disconnect the inverter from all power sources before cleaning. Clean the housing, cover and display with a soft cloth. Ensure the heat sink at the rear of the inverter is not covered. 12.1 Cleaning the contacts of the DC switch Clean the contacts of the DC switch annually. -
Page 68: Recycling And Disposal
If these conditions are not met, Zeversolar has the right to refuse to provide with the relevant warranty service. -
Page 69: Contact
15 Contact If you have any technical problems concerning our products, please contact zeversolar service. We require the following information in order to provide you with the necessary assistance: • Inverter device type • Inverter serial number • Type and number of connected PV modules •...
Need help?
Do you have a question about the Zeverlution 1500S and is the answer not in the manual?
Questions and answers
Can the 2000s Inverter be fitted with a Zero to grid excess controller.