Table of Contents
Advertisement
Advertisement
Table of Contents

Subscribe to Our Youtube Channel
Related Manuals for Kress Robotik Mission NANO


Summary of Contents for Kress Robotik Mission NANO
- Page 1 Owner's Manual KR100...
-
Page 2: Table Of Contents
Original instructions Table of contents Product safety 1.1 General & Additional safety instruction 1.2 Information on MissionNANO Component list Technical data and noise data 3.1 Technical data 3.2 Noise data Control panel Understanding your MissionNANO 5.1 How does my MissionNANO know what to mow? 5.2 How does my MissionNANO know where to go? -
Page 3: Product Safety
1. Product safety Operation 1. General a) Never operate the appliance with defective 1.1 General & Additional safety instruction guards, or without safety devices, for example deflectors, in place. WARNING: Read all safety warnings and b) Do not put hands or feet near or under rotating parts. all instructions. - Page 4 are not damaged. Replace all blades and screws the liquid to come into contact with the skin at the same time if necessary so that the rotating or eyes. If contact has been made, wash the parts are balanced. affected area with copious amounts of water d) Ensure that only replacement cutting means of and seek medical advice.
-
Page 5: Information On Missionnano
1.2 Information on MissionNANO WARNING – robotic lawnmower can be dangerous if incorrectly used. Read Do not expose to rain or water. through the Operator’s manual carefully and understand the content before using your robotic lawnmower. Do not wash the machine with a high pressure washer. -
Page 6: Component List
2. Component list 10.2 inch 10.2 inch... -
Page 7: Technical Data And Noise Data
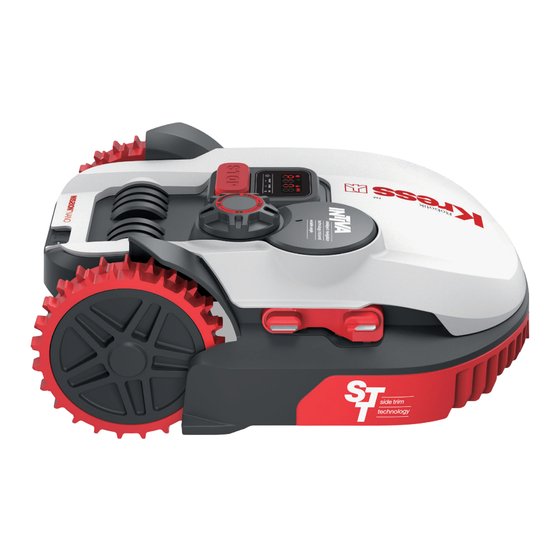
Charging strips Cutting blade Cutting height adjustment knob Protective cover Rear driving wheel Contact pins Rain sensor Charging base Main switch Power adapter STOP button Wire pegs Control panel Boundary wire Handle Charging base fixing nails Battery pack Boundary wire distance gauge 10. -
Page 8: Noise Data
3.2 Noise data A weighted sound pressure = 47.6 dB (A), K = 3.0 dB(A) A weighted sound power = 67.6 dB (A), K = 3.0 dB(A) Wear ear protection when sound pressure is over 80dB(A) A degree of noise from the machine is not avoidable. Route noisy work is to be licensed and limits for certain periods. -
Page 9: Control Panel
Intended Use The garden product is intended for domestic lawn mowing. It is designed to mow often, maintaining a healthier and better looking lawn than ever before. Depending on the size of your lawn, MissionNANO may be programmed to operate at any time or frequency. It is not intended for digging, sweeping or snow cleaning. 4. -
Page 10: Understanding Your Missionnano
5. Understanding Your MissionNANO Congratulations on your new purchase of the MissionNANO and welcome to the care-free life of automatic mowing. In the following, we would like to help you better understand how your MissionNANO thinks. 5.1 How does my MissionNANO know what to mow? The MissionNANO chooses its direction at random. -
Page 11: How Does My Missionnano
5.2 How does my MissionNANO know where to go? Your MissionNANO™ is capable of doing things on its own. MissionNANO™ knows when it needs to go to its charging base to charge, can sense when it is raining, can stop itself if it senses a problem, and knows to stop, draw back, and turn around when it bumps into something blocking its path. -
Page 12: Cut To Edge
5.3 Cut to edge Off-centered blade turning disc design provides a clean cut with narrowest distance to the boundary or wall. It helps minimize the amount and frequency of manual trimming along the boundary. Additionally, MissionNANO™ is designed with a protective cover underneath that prevents objects from touching the turning blades and/or injury. -
Page 13: How Efficiently Will My Missionnano
Tall grass working schedule For the first mowing when the grass grows very tall after winter or a long holiday, you can change it to tall grass mowing mode by keep pressing button for 5 0:00 24:00 seconds until a beep sound is heard. Press then Day 1 10hrs... -
Page 14: App
• Remove or prevent access to obstacles that MissionNANO™ could accidentally climb on and damage its blade turning disc. • Remove all debris and foreign objects from your lawn. 6. App Your MissionNANO™ is able to connect with smartphone. Using MissionNANO™ App for your smartphone, you can change your MissionNANO™'s general settings, and view the machine's status and error messages. -
Page 15: Burying The Boundary Wire
and store this additional wire in a separate location. It is important to leave the necessary length where it connects to the charging base so it can be connected and still remain buried. 7.2 Burying the Boundary Wire If you are planning to bury the boundary wire, it is recommended to first peg it down. This allows you to easily change the layout if necessary before burying the wire. -
Page 16: Maintenance
your MissionNANO™. 3) Lift the rear of MissionNANO™ to access the underside. 4) Open the protective rubber cover under MissionNANO™ to access the USB port. 5) Insert the USB drive (flash drive) in the port. (See Fig. K) 6) Place MissionNANO™ on the ground again. 7) Turn the main switch to the “I”... -
Page 17: Keep It Clean
replacing the blades, make sure to replace ALL of them at the same time. You can replace them with one of the spare blade kits and extra blade screws supplied with your MissionNANO™. Before attempting to replace your MissionNANO™’s blades, turn the power off and put on protective gloves and follow these steps: 1. -
Page 18: Cleaning The Contact Pins And The Charging Strips
C. Clean the contact pins and the charging strips Clean the contact pins located on the charging base and the charging strips located on the MissionNANO™ using a cloth. Remove any built up grass clippings or debris around the contact pins and charge strips periodically to ensure the MissionNANO™... -
Page 19: Function Messages
NOTE: Do not pull by the cables. Hold the connectors and release the latch. 4. Connect a new original battery by attaching the connectors until they click into position. (See Fig. Q3, Q4) 5. Fit the battery as shown. (See Fig. Q5) Place the cover back in its position and tighten the screws. 10. -
Page 20: Error Messages
11. Error messages Symptom Cause Action 1. Turn MissionNANO off; 2. Take MissionNANO to an area in your lawn free of obstacles obstacles; 3. Turn MissionNANO on. Wait until the battery indication light stays green. (If MissionNANO has low battery capacity, the battery indication MissionNANO light will stay red.) Press trapped. -
Page 21: Security
Blue light flashing three MissionNANO™ Turn MissionNANO™ upright. times per is upside down. cycle NOTES • Before turning power on, always return MissionNANO™ to its territory. If not, the error indication light will flash red. This message is also displayed when MissionNANO™ is sitting over the boundary wire when turned on. - Page 22 MissionNANO is searching for the charging base (unless you This is normal. MissionNANO needs to MissionNANO turns on, but press the HOME button to make recharge, the blade disc does not rotate the blade disc does not move. it go to the charging base, or the while it is searching for the charging “Enable boundary cut”...
- Page 23 The clock is not set to the Set the clock to the correct time by correct time. using App. MissionNANO is not Programmed cutting times for Change the time settings for the mower operating at the correct time. MissionNANO are not correct. to start and stop.
- Page 24 Declaration of conformity Positec Germany GmbH Grüner Weg 10, 50825 Cologne, Germany Declare that the product, Description Robotic Lawnmower Type KR100 (100-199- designation of machinery, representative of Robotic Lawnmower) (Year, article number and month of serial number are placed on the back page. The complete serial number is clearly stated on the enclosure of lawnmower) with battery charger KA0200 / KA0201 and charging base KA0070 Function Cutting grass...
- Page 26 www.kress-robotik.com...
Need help?
Do you have a question about the Mission NANO and is the answer not in the manual?
Questions and answers