Table of Contents
Advertisement
Quick Links
Download this manual
See also:
Owner's Manual
Quick Start Guide
NetDirector
1U Rackmount
®
KVM Switches with IP Access
Models: B022-U08-IP, B022-U16-IP
PROTECT YOUR INVESTMENT!
Register your product for quicker service and ultimate peace of mind.
You could also win an ISOBAR6ULTRA surge protector—a $100 value!
www.tripplite.com/warranty
1111 W. 35th Street, Chicago, IL 60609 USA • www.tripplite.com/support
Copyright © 2018 Tripp Lite. All rights reserved. All trademarks are the property of their respective owners.
1
Advertisement
Table of Contents

Related Manuals for Tripp Lite B022-U16-IP


Summary of Contents for Tripp Lite B022-U16-IP
- Page 1 Register your product for quicker service and ultimate peace of mind. You could also win an ISOBAR6ULTRA surge protector—a $100 value! www.tripplite.com/warranty 1111 W. 35th Street, Chicago, IL 60609 USA • www.tripplite.com/support Copyright © 2018 Tripp Lite. All rights reserved. All trademarks are the property of their respective owners.
-
Page 2: Fcc Information
• Connect either USB or PS/2 computers using P778-Series USB/PS2 Combo KVM Cable Kits – no need for separate cable kits. • Control up to 8 (B022-U08-IP) or 16 (B022-U16-IP) computers on a single KVM switch. • Remotely access computers via LAN, WAN or Internet via the Windows™ or Java browser clients. -
Page 3: System Requirements
4. Introduction ( continued ) 4.2 System Requirements 4.2.1 External Console • A VGA, SVGA or MultiSync monitor capable of displaying the highest resolution provided by any computer in the installation. • PS/2 or USB keyboard and mouse. 4.2.2 Computers The following equipment must be installed on each computer: •... -
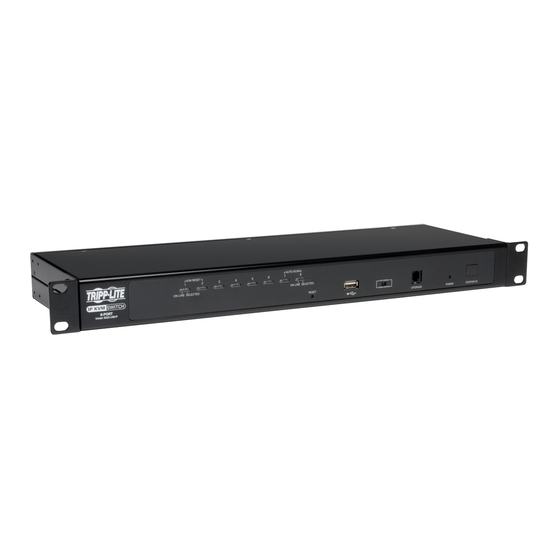
Page 4: Front View
4.3.1 Front View Note: The diagram below shows the B022-U08-IP . The B022-U16-IP will be the same, except for the number of KVM ports and KVM pushbuttons. Also, an Auto Scan can be initi- ated on the B022-U16-IP by pressing pushbuttons 15 and 16 instead of 7 and 8. -
Page 5: Installation
• To help protect your system from sudden, transient increases and locking position, and then slide the device into the rack. decreases in electrical power, use a Tripp Lite Surge Protector, Line • Do not overload the AC supply branch circuit that provides power to the Conditioner or Uninterruptible Power Supply (UPS). -
Page 6: Rack Mounting Instructions
Connect the LAN port on the back of the unit to the network using Cat5e/6 cable. Connect the included external power supply to the KVM switch, and then plug it into a Tripp Lite Surge Suppressor, PDU or Uninterruptible Power Supply (UPS). -
Page 7: Local Console
5. Installation ( continued ) 5.5.1 Local Console (continued) 2. Press the [F4] key to bring up the OSD Admin page. 3. In the OSD Admin page, highlight SET IP ADDRESS and press the [Enter] key. 4. DHCP – The first field allows you to enable or disable DHCP . When enabled, the KVM is assigned an IP address by the DHCP server. This setting is enabled by default. -
Page 8: Changing The Super Administrator Login
5. Installation ( continued ) 5.5.3 Browser/Non-Browser Clients (continued) 5. By default, the Obtain IP address automatically [DHCP] checkbox is checked. To set a fixed IP address, check the Set IP address manually [Fixed IP] check box in the IPv4 or IPv6 settings section, depending on your network. 6. -
Page 9: Kvm Operation
6. KVM Operation 6.1 Local Console Login When accessing the console KVM switch for the first time, a prompt will appear asking for a username and password. The default username is administrator, and the default password is password. For security purposes, it is strongly recommended that you change the username and password on this account to something unique. -
Page 10: Logging Into The Kvm Over Ip
6. KVM Operation ( continued ) 6.3 Logging Into the KVM over IP There are three methods that can be used to connect to the KVM switch over IP; Web Browser, AP Windows Client and AP Java Client. 6.3.1 Browser Login The B022-Series KVM Switches can be accessed via Internet browser from any platform that has the Java Runtime Environment 6, Update 3, or higher installed. -
Page 11: Ap Java Client Login
6. KVM Operation ( continued ) 6.3.2 AP Windows Client Login (continued) The Connection Screen A description of the contents of the Connection Screen is given in the following table: Item Description Menu Bar The Menu Bar contains two menus; File and Help. The File Menu allows the operator to Create, Save, and Open Work files. Server List Each time the WinClient.exe file is run, it searches the User’s LAN segment for B022-Series KVM Switches, and lists the ones it finds in this box. -
Page 12: Remote Session Operation
6. KVM Operation ( continued ) 6.4 Remote Session Operation After you have successfully logged in (see Logging Into the B022-Series KVM Switch section), the B022-Series KVM Switch OSD Main Page appears with the Port Access tab selected: Note: The AP Client and Local Console versions feature a Control Panel in the top center of the screen that appears when scrolled over with the mouse. The web browser version’s Control Panel is only available when a port has been accessed. - Page 13 6. KVM Operation ( continued ) 6.4.1 The OSD Toolbar The OSD provides a toolbar to help you control the B022-Series KVM Switch from within the captured port. There are three hotkey combinations that can be used to pull up the OSD Toolbar and/or OSD when in a remote session: •...
-
Page 14: Mouse Synchronization
6. KVM Operation ( continued ) 6.4.2 Mouse Synchronization If the local mouse pointer goes out of sync with the remote system’s mouse pointer, there are a number of methods to bring them back into sync. Before trying any mouse synchronization procedures, it is always a good idea to ensure that you go to your Mouse Properties Settings and set them according to the instructions that follow. -
Page 15: Warranty And Product Registration
BE LIABLE FOR DIRECT, INDIRECT, SPECIAL, INCIDENTAL OR CONSEQUENTIAL DAMAGES ARISING OUT OF THE USE OF THIS PRODUCT, EVEN IF ADVISED OF THE POSSIBILITY OF SUCH DAMAGE. Specifically, TRIPP LITE is not liable for any costs, such as lost profits or revenue, loss of equipment, loss of use of equipment, loss of software, loss of data, costs of substitutes, claims by third parties, or otherwise. - Page 16 1111 W. 35th Street, Chicago, IL 60609 USA • www.tripplite.com/support 18-02-036 93-327A_RevD...
Need help?
Do you have a question about the B022-U16-IP and is the answer not in the manual?
Questions and answers