Tripp Lite B022-U08-IP Owner's Manual
Netdirector 1u rackmount kvm switches with ip access
Hide thumbs
Also See for B022-U08-IP:
- Owner's manual (59 pages) ,
- Quick start manual (17 pages) ,
- Quick manual (4 pages)
Table of Contents
Advertisement
Quick Links
Owner's Manual
NetDirector
1U Rackmount
®
KVM Switches with IP Access
Models: B022-U08-IP, B022-U16-IP
PROTECT YOUR INVESTMENT!
Register your product for quicker service and ultimate peace of mind.
You could also win an ISOBAR6ULTRA surge protector—a $100 value!
www.tripplite.com/warranty
1111 W. 35th Street, Chicago, IL 60609 USA • www.tripplite.com/support
Copyright © 2018 Tripp Lite. All rights reserved. All trademarks are the property of their respective owners.
1
Advertisement
Table of Contents

Related Manuals for Tripp Lite B022-U08-IP


Summary of Contents for Tripp Lite B022-U08-IP
- Page 1 Register your product for quicker service and ultimate peace of mind. You could also win an ISOBAR6ULTRA surge protector—a $100 value! www.tripplite.com/warranty 1111 W. 35th Street, Chicago, IL 60609 USA • www.tripplite.com/support Copyright © 2018 Tripp Lite. All rights reserved. All trademarks are the property of their respective owners.
-
Page 2: Table Of Contents
Table of Contents 1. FCC Information 7. Administration 2. User Notice 7.1 Local Console OSD 7.1.1 Local Console OSD F2 LIST Function 3. Package Contents 7.1.2 Local Console OSD F3 Settings (SET) Page 4. Introduction 7.1.3 Local Console OSD F4 Administration (ADM) 4.1 Features Page 4.2 System Requirements... -
Page 3: Fcc Information
• Connect either USB or PS/2 computers using P778-Series USB/PS2 Combo KVM Cable Kits – no need for separate cable kits. • Control up to 8 (B022-U08-IP) or 16 (B022-U16-IP) computers on a single KVM switch. • Remotely access computers via LAN, WAN or Internet via the Windows™ or Java browser clients. -
Page 4: System Requirements
4. Introduction ( continued ) 4.2 System Requirements 4.2.1 External Console 4.2.3 Remote Console • A VGA, SVGA or MultiSync monitor capable of displaying the • For best results, computers that remotely access the KVM switch highest resolution provided by any computer in the installation. should have at least a Pentium III 1 GHz processor. -
Page 5: Components
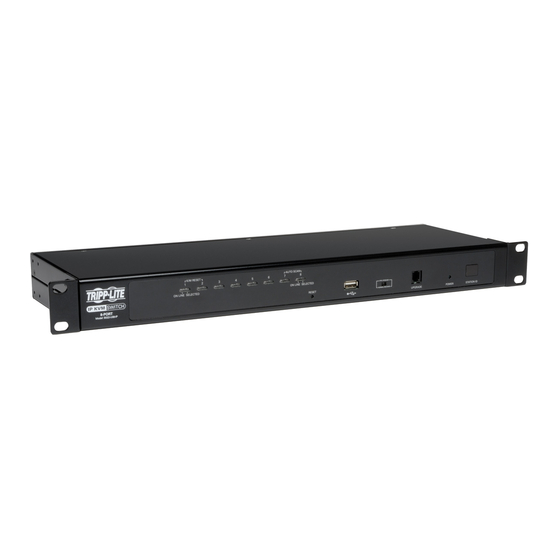
4.3.1 Front View Note: The diagram below shows the B022-U08-IP . The B022-U16-IP will be the same, except for the number of KVM ports and KVM pushbuttons. Also, an Auto Scan can be initiated on the B022-U16-IP by pressing pushbuttons 15 and 16 instead of 7 and 8. -
Page 6: Installation
• To help protect your system from sudden, transient increases and • Use caution when pressing the device rail release latches and decreases in electrical power, use a Tripp Lite Surge Suppressor, sliding a device into or out of a rack; the slide rails can pinch your Line Conditioner or Uninterruptible Power Supply (UPS). -
Page 7: Rack Mounting Instructions
Cat5e/6 cabling. Connect the included external power supply to the KVM switch, Power OFF all computers that are being connected to the KVM and then plug it into a Tripp Lite Surge Suppressor, PDU or switch. Uninterruptible Power Supply (UPS). -
Page 8: Network Setup-Ip Address Configuration
5. Installation ( continued ) 5.5 Network Setup-IP Address Configuration In order to configure a fixed IP address, you will need to access the KVM switch in one of four ways; Local Console, IP Installer, Browser or Non-Browser Clients. 5.5.1 Local Console Note: The local console OSD only allows you to configure IPv4 network settings. -
Page 9: Browser/Non-Browser Client
5. Installation ( continued ) 5.5.3 Browser/Non-Browser Client By default, the KVM switch is set to have an IP address assigned automatically via DHCP server. If this is the case, you will need to obtain the IP address from your network administrator. If connected to a network without a DHCP server, it boots with a default IP address. The default IPv4 and IPv6 addresses can be found on the sticker on the bottom of the unit. -
Page 10: Changing The Super Administrator Login
5. Installation ( continued ) 5.5.4 Changing the Super Administrator Login To change the default Super Administrator Username and Password, do the following: 1. At the top of the OSD page, click User Management. 2. Click Administrator in the left panel; or, select Administrator in the central panel and click the Modify button at the bottom of Since this is the first time the page is being accessed, only the the page. -
Page 11: Kvm Operation
6. KVM Operation Computers connected to the KVM can be accessed via the local console or over IP . This chapter discusses the basic operation of the KVM switch, both locally and remotely. 6.1 Sharing USB Peripheral Devices The USB 1.1 port on the front panel of the KVM switch can be used to share USB peripherals between connected computers. Simply connect a USB device to this port, and any connected computer you switch to will have access to the device. -
Page 12: Local Console Port Access
6. KVM Operation ( continued ) 6.4 Local Console Port Access Once logged into the KVM, you can access connected computers via the local console using the Local Console OSD, Local Console Pushbuttons or Hotkey Commands. The following sections describe all of the ways in which you can access connected computers via the local console. -
Page 13: Local Console Osd F6 Broadcast Mode (Brc)
6. KVM Operation ( continued ) 6.4.6 Local Console OSD F6 Broadcast Mode (BRC) Broadcast Mode is an Administrator-ONLY function. Clicking the F6 at the top of the OSD or pressing the [F6] key invokes Broadcast Mode. When this function is in effect, commands sent from the console are broadcast to all available computers on the installation. This function is particularly useful for operations that need to be performed on multiple computers, such as performing a system-wide shutdown, installing or upgrading software, etc. - Page 14 6. KVM Operation ( continued ) Selecting the Active Port Computer Keyboard/Mouse Reset You can directly access a port by doing the following: If the keyboard or mouse ceases to function for a particular port, you can perform a keyboard/mouse reset via the hotkey command 1.
-
Page 15: Logging Into The Kvm Over Ip
The certificate is now trusted. string along with the IP address when you log in. (For example, a computer with a login string of B022-U08-IP would have a URL such as Upon installing the certificate or accepting the unrecognized 192.168.0.100/ B022-U08-IP .) -
Page 16: Ap Windows Client Login
6. KVM Operation ( continued ) 3. Provide a valid Username and Password (set by the KVM Note: If you supply an invalid login, the authentication routine will return an Invalid Username or Password message. If you see this message, log switch’s administrator), and click Login to bring up the OSD in again being careful to enter the correct Username and Password. -
Page 17: Ap Java Client Login
6. KVM Operation ( continued ) 6.5.3 AP Java Client Login In those cases in which the Administrator does not want the B022-Series KVM Switch to be available via browser and the remote user is not running Windows, the AP Java Client provides access to the KVM switch. After downloading the AP Java Client, go to the location on your hard disk where you downloaded the program and double-click on it to bring up the connection screen. -
Page 18: Remote Session Operation
6. KVM Operation ( continued ) 6.6 Remote Session Operation After you have successfully logged in (see Logging Into the All the ports that a user is permitted to access are listed in the B022-Series KVM Switch section), the B022-Series KVM Switch Port Selection panel at the left of the page. - Page 19 6. KVM Operation ( continued ) Hotkeys Various configuration actions related to the keyboard, video and mouse can be performed via hotkey combinations. The Hotkey setup utility is accessed by clicking on the Hotkey / Macros icon and then clicking on the Hotkeys button at the top of the screen. The Hotkeys screen displays the available hotkeys and their corre- sponding hotkey combinations.
- Page 20 6. KVM Operation ( continued ) User Macros To create a macro, follow the steps below. 1. Click the Add button on the right side of the screen. 2. In the name field that appears, key in a name for the macro you are adding.
- Page 21 6. KVM Operation ( continued ) Video Settings – The Video Settings screen allows you to adjust the placement and picture quality of the remote screen. The quality of the image display has a direct affect on the keyboard and mouse response time. Higher quality video results in more information being transferred over the network, which can cause slow keyboard and mouse response time in slower networks.
- Page 22 6. KVM Operation ( continued ) Gamma Adjustment Video Auto Sync – Click this icon to have the vertical and If it is necessary to correct the gamma level for the remote horizontal offset values of the remote screen automatically computer, use the Gamma function in the Video Settings screen.
- Page 23 6. KVM Operation ( continued ) The buttons on the button bar at the top of the message board are toggles. The actions for each of these buttons are described in the table below. Button Function Enable/Disable Chat – When disabled, this icon displays next to the disabled user’s name in the User List panel of all users’ message boards.
- Page 24 6. KVM Operation ( continued ) Mouse Sync Mode – Click to toggle between automatic and manual mouse sync modes. When set to automatic, a green check- mark appears on the icon. When set to manual, a red x appears on the icon. Note: This icon is only active on computers that are connected to the KVM using a USB SIU.
- Page 25 6. KVM Operation ( continued ) Macro List – Click this icon to display a drop-down list of the User Macros (see User Macros section under Control Panel for details) that have been added to the KVM switch. Select a macro to run it on the selected computer. First Port –...
- Page 26 6. KVM Operation ( continued ) Screen Options – This section allows you to make Full Screen Mode and Keep Screen Size the default settings when a remote session is activated. Note: Keep Screen Size is not available when using the Java clients. •...
-
Page 27: The Osd Toolbar
6. KVM Operation ( continued ) 6.6.2 The OSD Toolbar The OSD provides a toolbar to help you control the B022-Series The OSD Toolbar is shown below: KVM Switch from within the captured port. There are three hotkey combinations that can be used to pull up the OSD Toolbar and/or OSD when in a remote session: Depending on the settings that were selected for ID Display, the •... - Page 28 6. KVM Operation ( continued ) Panel Array Mode Clicking the Panel Array icon on the OSD Toolbar or Control Panel • Each panel represents one B022-Series KVM Switch’s ports, invokes Panel Array Mode. Under this mode, the OSD divides your beginning with Port 1 at the upper left and continuing from left screen into a grid of panels: to right and top to bottom.
-
Page 29: Auto Scanning
6. KVM Operation ( continued ) 6.6.3 Auto Scanning The Auto Scan function automatically switches among all accessible ports at regular intervals, so that the user can monitor their activity without having to manually switch between ports. The ports that are accessed in Auto Scan mode can be further filtered via the Filter section of the Port Access page. -
Page 30: Administration
7. Administration Administration of the KVM switch can be done through three different interfaces; Local Console OSD, Web Interface and Remote OSD. The Web Interface and Remote OSD give you the most administrative access to the KVM, whereas the settings in the Local OSD are more limited. -
Page 31: Local Console Osd
7. Administration ( continued ) 7.1 Local Console OSD Upon logging into the Local Console OSD, the main page appears (see figure). Administrators have access to all features in the OSD, whereas Users have access to everything except the F4 Admin page and the F6 Broadcast (BRC) function. -
Page 32: Local Console Osd F4 Administration (Adm) Page
7. Administration ( continued ) The settings in the F3 SET page are explained in the following table: Setting Description OSD HOTKEY Select the hotkey sequence that invokes the OSD (both Local Console OSD and Remote OSD); [Scroll Lock, Scroll Lock] or [Ctrl, Ctrl]. - Page 33 7. Administration ( continued ) The settings in the F4 ADM page are explained in the following table: Setting Description SET IP This page allows administrators to set the network settings for the KVM. DHCP: The first field allows you to enable or disable DHCP . When enabled, the KVM is assigned an IP address by the DHCP server. This ADDRESS setting is enabled by default.
-
Page 34: Local Console Firmware Upgrade
7. Administration ( continued ) 7.1.4 Local Console Firmware Upgrade The KVM has two sets of firmware, one to control IP Access and another to control the KVM’s Mainboard, Input/Output Ports and Keyboard. The IP Access firmware must be updated via the Web Management Interface or Remote OSD. -
Page 35: Osd Operation
7. Administration ( continued ) 7.2 OSD Operation When logging into the KVM switch via web browser, you are first taken to the Web Management Interface, with the Port Access page displayed. In addition to providing Windows Client and Java Applet applications used in accessing the connected computers, the Web Management Interface allows administrators to configure the KVM switch, view the log file and manage user accounts. -
Page 36: Osd Tab Bar
7. Administration ( continued ) 7.2.2 OSD Tab Bar The number and type of icons that appear on the tab bar at the top of the page are determined by user type (Super Administrator, Administrator or User) and the permissions assigned when the account was created. The functions associated with each of the icons are explained in the following table: Icon Description... -
Page 37: Connections
If this is the case, click on the option to continue to the web page anyway. 2. You will then be prompted to run the Java Viewer, and trust the publisher (Tripp Lite). Click Run. - Page 38 7. Administration ( continued ) The Port Selection List Port Configuration • Users only see the switches and ports they have been given When accessing the KVM via AP Windows or Java Client, right-click access to. on any port in the Sidebar to configure a connected computer or switch.
- Page 39 7. Administration ( continued ) Interactive Display Panel Filter The Connections sub-section will display port status information Filter allows you to control which ports are displayed in the Port on the Device Level and port connection and configuration options Selection List, as well as which ports are scanned when Auto Scan at the Port Level.
-
Page 40: Favorites
7. Administration ( continued ) 7.2.5 Favorites Favorites is similar to a bookmarks feature. Frequently visited ports can be listed on this page. Open this page and select the port instead of searching for it in the tree view. This feature is especially useful for larger, cascaded installations. Note: Each Favorites bookmark that you create is a folder in which multiple ports can be saved. -
Page 41: User Preferences
7. Administration ( continued ) 7.2.6 User Preferences The User Preferences page allows users to set up their own individual working environments. The B022-Series KVM Switch stores a separate record for each user profile, and sets up the working environment according to the Username that was used to access the KVM switch. -
Page 42: Access
7. Administration ( continued ) 7.2.8 Access The Access sub-section allows Super Administrators and Administrators to set user access and configuration rights for switches and ports. As with the Sessions sub-section, Super Administrators can see all accounts, whereas Administrators can only see Administrator, User and Group accounts. -
Page 43: Port Configuration
7. Administration ( continued ) 7.2.9 Port Configuration The Port Configuration sub-section allows Super Administrators and Administrators to edit port properties settings, assign system mac- ros to a port, and add/remove associated links. When the master KVM is highlighted and the Port Configuration sub-section is selected, the following screen appears. -
Page 44: User Management
7. Administration ( continued ) 7.2.10 User Management The User Management section allows Super Administrators, and Administrators and Users who have been given User Management permission, to add/edit accounts on the KVM switch. If an account has not been given User Management permission, the User Management icon will not show up in the OSD when they log in. - Page 45 7. Administration ( continued ) Field Description Username Enter a username for the account here. The username can contain up to 16 characters, and must meet the Account Policy requirements set in the Security sub-section. (See Security section under Device Management for details.) Password Enter a password for the account here.
- Page 46 7. Administration ( continued ) At this point you can do any of the following: • Assign port access rights for a user by selecting the Devices tab. • Add more users and/or create groups and finish configuring the user account later. Modifying User Accounts To modify a user account, do the following: 1.
-
Page 47: Device Management
7. Administration ( continued ) 7.2.11 Device Management The Device Management section allows Super Administrators, and Administrators/Users who have been given permission, to configure and control the KVM switch. When the Device Management icon is selected, it opens with the Device Information page displayed. Note: If you do not have permission to configure the KVM switch, the Device Management icon will not appear when you log onto the KVM. -
Page 48: Network
7. Administration ( continued ) 7.2.14 Network The Network sub-section is where the KVMs network settings are entered. The settings in this sub-section are described in the table below. Item Description IP Installer The B064-Series KVM switch comes with an IP Installer application that allows Windows computers to easily view and edit the KVMs network settings. -
Page 49: Advanced Network Management Settings
7. Administration ( continued ) 7.2.15 Advanced Network Management Settings The ANMS sub-section is used to set up login authentication and authorization management from external sources. It is split up into two pages; Event Destination and Authentication, which are explained in the sections that follow. Event Destination The Event Destination page allows the KVM to be set up to record and send notifications of events that take place on the system. - Page 50 Set the time in seconds that the B022-Series KVM Switch waits for an LDAP or LDAPS server reply before it times out. Admin DN Consult the LDAP / LDAPS administrator to ascertain the appropriate entry for this field. For example, the entry might look like this: ou=b022-u08-ip,dc=tripplite,dc=com Admin Name Key in the LDAP administrator’s username.
- Page 51 7. Administration ( continued ) Step 2 - Extend the Object Class With the New Attribute: Extend and Update the Active Directory Schema a) Open Control Panel Administrative Tools Active Step 1 - Create a New Attribute: Directory Schema. a) Open Control Panel Administrative Tools Active Directory Schema.
- Page 52 7. Administration ( continued ) f) In the list that comes up, select userprofile, then click OK to f) Click Edit to bring up the String Attribute Editor: complete step 2 of the procedure. g) Replace the value shown with su/xxxx, where xxxx represents the username assigned to the user in the KVM switch.
- Page 53 7. Administration ( continued ) OpenLDAP Server Installation Starting the OpenLDAP Server After downloading the program, launch the installer, select your To start the OpenLDAP Server, run slapd (the OpenLDAP Server language, accept the license and choose the target installation executable file) from the command line.
- Page 54 7. Administration ( continued ) LDAP DIT Design and LDIF File The following figure illustrates an LDIF file that defines the OpenLDAP group for the B064-Series KVM Switch. LDAP Data Structure An LDAP Directory stores information in a tree structure known as the Directory Information Tree (DIT).
-
Page 55: Security
7. Administration ( continued ) 7.2.16 Security The following section describes the settings found in the Security sub-section. Login Failures The Login Failures section allows you to set up the parameters for what occurs when an account fails to login successfully. To enable the settings entered here, check the Enable checkbox. - Page 56 7. Administration ( continued ) Login String MAC Filtering The Login String allows the KVMs IP address to be more secure by To add a MAC filter: adding extra text to the end of it. When text is entered into the 1.
- Page 57 7. Administration ( continued ) Working Mode The Working Mode section allows you to enable/disable operation features of the KVM switch. The table below describes the available settings. Setting Description Enable ICMP When this box is checked, the KVM switch can be pinged. If it is not checked, the KVM cannot be pinged. Enable Multiuser Operation When this box is checked, multiple accounts (up to 32) can log onto the same bus (see Bus Info section under Control Panel in Remote Session Operation for details) at the same time.
-
Page 58: Date/Time
7. Administration ( continued ) 2. Fill in the form with the appropriate information for your company. The table below is an example of a filled out form. Field Example Country (2 letter code) State or Province Taiwan Locality Taipei Organization Your Company, Ltd. - Page 59 7. Administration ( continued ) 7.2.18 Log The B022-Series KVM switch logs all the events that take place and writes them to a log file. The Log section is split into two sub-sec- tions; Log Information and Notification Settings. Log Information The Log Information page can store up to 512 events, at which The Log Information sub-section is where you can view the time the oldest files are deleted and replaced with newer files.
-
Page 60: Log
4. Click the Browse button, and then navigate to and select the below. firmware upgrade file you downloaded from the Tripp Lite 1. Click on the Browse button to the right of the filename field, website. When selected, the Upgrade Firmware button and then navigate to and select the backup file. -
Page 61: Download
7. Administration ( continued ) Ping Host The Ping Host subsection lets you check the network status of devices on the KVM installation. To ping a device, follow the instructions below. 1. Key in the IP address or Host Name of the device into the IP address/Host Name field. -
Page 62: Log Server
7. Administration ( continued ) 7.3 Log Server The Windows-based Log Server is an administrative utility that Menu Bar records all the events that take place on the selected unit and The Menu bar consists of four drop-down menus: writes them to a searchable database. This chapter describes how •... - Page 63 7. Administration ( continued ) Events Maintenance The Events menu consists of two items; Search and Maintenance. This function allows the Administrator to remove all records that have passed their expiration limit. In order to delete old files from Search the log server, the maintenance function must be performed.
- Page 64 7. Administration ( continued ) The List Panel The List panel contains the following fields: Field Description Recording Determines whether the Log Server records log events for the corresponding KVM switch. If this checkbox is checked, the field displays Recording, and log events are recorded. If this checkbox is not checked, the field displays Paused, and log events are not recorded for the corresponding KVM.
-
Page 65: Specifications
8. Specifications Specification B022-U08-IP B022-U16-IP Computer Ports (x8) HD18 (Female) (x16) HD18 (Female) KVM Cable Kit Model P778-Series P778-Series KVM Cable Kit Connectors KVM Side: HD18 (Male) KVM Side: HD18 (Male) Computer Side: HD15 (Male), USB A (Male), Computer Side: HD15 (Male), USB A (Male),... -
Page 66: Osd Default Settings
8. Specifications 8.1 OSD Default Settings Setting Default OSD Language English OSD Hotkey [Scroll Lock] [Scroll Lock]* Port ID Display Position Upper Left Corner Port ID Display Duration 3 Seconds Port ID Display Mode The Port Number plus the Port Name Scan Duration 5 Seconds Scan/Skip Mode... -
Page 67: Warranty & Product Registration
BE LIABLE FOR DIRECT, INDIRECT, SPECIAL, INCIDENTAL OR CONSEQUENTIAL DAMAGES ARISING OUT OF THE USE OF THIS PRODUCT, EVEN IF ADVISED OF THE POSSIBILITY OF SUCH DAMAGE. Specifically, TRIPP LITE is not liable for any costs, such as lost profits or revenue, loss of equipment, loss of use of equipment, loss of software, loss of data, costs of substitutes, claims by third parties, or otherwise.
Need help?
Do you have a question about the B022-U08-IP and is the answer not in the manual?
Questions and answers