Table of Contents
Advertisement
Quick Links
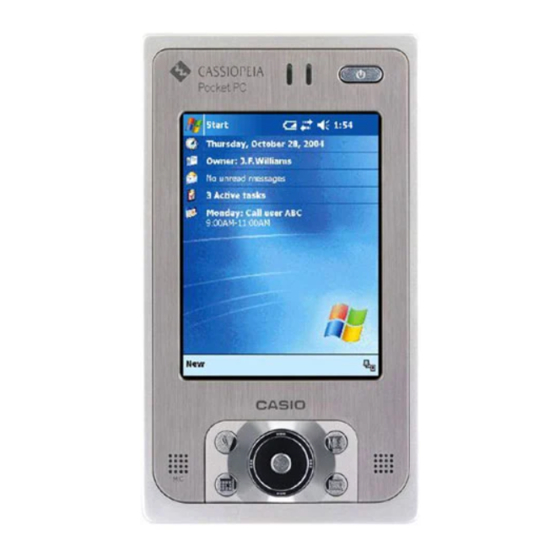
Pocket PC
CASSIOPEIA
IT-10series User' s Manual
Thank you for purchasing the CASSIOPEIA Rugged
PDA.
This Manual describes the basic operations of the CAS-
SIOPEIA IT-10 series Rugged PDA.
Read this Manual in its entirely before handling or op-
erating the product, and keep it close at hand so it
can be easily referenced.
Advertisement
Table of Contents

Subscribe to Our Youtube Channel
Related Manuals for Casio CASSIOPEA IT-10 SERIES


Summary of Contents for Casio CASSIOPEA IT-10 SERIES
- Page 1 Pocket PC CASSIOPEIA IT-10series User’ s Manual Thank you for purchasing the CASSIOPEIA Rugged PDA. This Manual describes the basic operations of the CAS- SIOPEIA IT-10 series Rugged PDA. Read this Manual in its entirely before handling or op- erating the product, and keep it close at hand so it can be easily referenced.
- Page 2 Power Plug and AC Adaptor AC cord plug and wall outlet illustrated in this User's Manual shows the two-pin plug type. It may not be the same shape of AC cord plug used in your area. Rugged PDA AC adaptor has an automatic voltage switching circuit (input: 100 to 240VAC, 50/60Hz) and lets you use your Rugged PDA under AC power virtually anywhere in the world without having an extra power-transformer.
-
Page 3: Packing List
Packing List Thank you for purchasing the Pocket PC "Rugged PDA". A list of the items included with this product is given below. Confirm that nothing is missing or damaged. If anything is missing or damaged, contact the dealer from which you pur- chased this product. -
Page 4: Finding Information
Be sure to read this manual before operating the Rugged PDA. User's Guide The User's Guide is a PDF file on the CASIO Companion CD. The User's Guide explains the various useful programs available with the Rugged PDA. Refer to "Using the CASIO Companion CD" included later in this manual. - Page 5 PLREASE READ CAREULLY BEFORE USING THIS EQUIPMENT: This End-User license Agreement ("EULA") is a legal agreement between (a) you (either an individual or a single entity) and (b) CASIO COMPUTER CO., LTD. ("CASIO"), that is not otherwise subject to a written license agreement between you and CASIO or its suppliers.
- Page 6 EULA for Pocket PC 2003 Operating System You have acquired a device ("Rugged PDA") that includes software licensed by CASIO COMPUTER CO., LTD. (CASIO) in the United States from Microsoft Licensing Inc. or its affiliates ("MS") . Those installed software products of MS origin, as well as associated media, printed materials, and "online"...
- Page 7 7. PRODUCT SUPPORT. Product support for the SOFTWARE is not provided by MS, its parent corporation, Microsoft Corporation, or their affiliates or subsidiaries. For product support, please refer to the CASIO support number provided in the documentation for the Rugged PDA. Should you have any questions concerning this EULA, or if you desire to contact CASIO for any other reason, please refer to the address provided in the documentation for the Rugged PDA.
-
Page 8: Safety Precautions
Safety Precautions • To use this product safely and correctly, read this User’s Manual thoroughly and operate as instructed. After reading this guide, keep it close at hand for easy reference. Please keep all informations for future reference. • Always observe the warnings and cautions indicated on the product. •... - Page 9 Warning! Handling Rugged PDA Stop using the Rugged PDA and turn it off in places where its operation is prohibited such as on board airliners or in hospitals. The effects of electromagnetic radiation may result in an accident. Should Rugged PDA malfunction, start to emit smoke or a strange odor, or otherwise behave abnormally, immediately shut down the power, remove batteries, and unplug the AC adaptor...
- Page 10 Warning! Should you drop Rugged PDA and damage it, immediately shut down the power and unplug the AC adaptor from the power outlet. Contin- ued use creates the danger of shorting, fire and electric shock. ■ Attempting to repair Rugged PDA yourself is ex- tremely dangerous.
- Page 11 ■ Contact your authorized distributor whenever the power cord or plug requires repair or maintenance. Use only the AC adaptor specified by CASIO for this product. Use of another type of AC adaptor creates the danger of fire. Specified...
- Page 12 Use only the battery pack that comes with Rugged PDA. When the battery pack reaches the end of its life, replace it with a new battery pack as specified by CASIO. Other types of batteries have different voltage rating and po- Battery...
- Page 13 Caution! Rugged PDA Do not place Rugged PDA on an unstable or uneven surface. Doing so can cause Rugged PDA to fall, creating the danger of malfunc- tion, fire, and electric shock. Do not leave Rugged PDA in the following ar- eas.
- Page 14 Caution! Power Cord and Peripherals Do not overly bend the power cord, do not al- low it to be caught between desks or other fur- niture, and never place heavy objects on the power cord. Doing so can cause shorting or breaking of the power cord, creating the dan- ger of fire and electric shock.
-
Page 15: Before Using Rugged Pda
AC adaptor from the power outlet. Con- tact your original retailer or authorized distributor. CASIO COMPUTER CO., LTD. shall not be held liable for any loss or ・ claims due to using this product except as instructed to do so in this User's Manual. - Page 16 The bottom of Rugged PDA on the AC adaptor becomes warm during use. This is caused by the CPU operation or the current when Rugged PDA's bat- ・ tery is charged. This is not malfunction. The heating value charges according to the condition of use.
- Page 17 Check with each manufacturer for compatibility before using any non-CASIO ・ options with this unit. CASIO assumes no responsibility for any loss (including but not limited to per- ・ sonal injury, material loss, damage to Rugged PDA) suffered by you or other arising out of the use of a non-CASIO option.
- Page 18 Notes on transfer of ownership of this product ● Transferring ownership (selling) this product should be done in compliance with item 1 below. Accepting ownership (buying) this product should be done in compliance with item 2 below. 1) If you transfer ownership of this device When transferring ownership of this device to a third party, hand over every- ...
-
Page 19: Maintenance And Care
Rugged PDA's case, and even malfunction of Rugged PDA. Never use such agents when cleaning Rugged PDA. Use only the stylus accompanied with the Rugged PDA (or specified by CASIO) ・ for inputting on the LCD screen. Before using the stylus, remove any dirt from the tip of it and on the screen. -
Page 20: Storage
Storage Follow the procedure below to put the Rugged PDA into storage. If you have used the Rugged PDA for a long period, it will have become dusty. We recommend cleaning it before put- ting it into storage. You can find information about cleaning in the previous section "Maintenance and Care."... -
Page 21: Table Of Contents
.............. Button Operation Settings ..............When Initial Setup Is Finished ............Connecting to a Computer ............Compatible computers ................. Connecting to a Computer ..............Using the CASIO Companion CD ............ Appendix Specifications ................Options List ................... DECLARATION OF CONFIRMITY ........ -
Page 23: Getting Ready
etting eady... - Page 24 Names of Parts and Their Functions Names of Parts and Their Functions Front !7 C F card slot !6 S D card slot !8 S tylus holder !5 E ject button qPower switch !4 H and strap hole wIndicator lamp eLCD screen !3 H eadphone jack !2 R eset switch...
- Page 25 Speaker Sounds such as the alarm come out of the speaker. Sound does not come out of the speaker when earphones or headphones are con- nected to the headphone jack. Program buttons Pushing the program buttons starts the program assigned to that button.
- Page 26 Rear !9 S tylus !9 S tylus @0 H and strap hole @7 P ower adaptor port @2 B attery pack cover lock switch @1 B attery pack cover @6 S erial connector cover @3 I nfrared communication port @5 B asic Cradle connector @4 S erial connector Stylus Use this pen for entering items on the touch panel screen.
-
Page 27: Operating The Rugged Pda
Serial connector cover Use this rubber cover when not using the serial I/F. Power adaptor port ( ) Connect the power cord from the AC adaptor to this port. Remove the rubber cover to use it. Operating the Rugged PDA About buttons on the side The buttons on the side of the Rugged PDA can be used for the follow- ing operations. - Page 28 • Take care to avoid misplacing the stylus. • Take care to avoid damaging or breaking the tip of the sty- lus. • Keep the tip of the stylus and the Rugged PDA screen clean and free of dirt. Performing stylus operations when the stylus or screen is dirty can damage the screen.
-
Page 29: Connecting The Strap
Connecting the strap It is possible to attach a commercially available hand strap. Attaching the Screen Protect Sheet Follow the procedure below to attach the screen protect sheet (No. HA-C90PS5). • Do not press strongly on the LCD screen when attaching the screen protect sheet. - Page 30 Hold the screen protect sheet with the front side facing forward, position the cut out part to the lower left of the screen, and insert it into the screen edges. • Be careful not to let dust or dirt get in between the screen protect sheet and the screen.
-
Page 31: Power Supply
Casio bears no responsibility for lost data if the battery is not re- charged or replaced correctly. The user is expected to acknowl- edge this before the fact. -
Page 32: Attaching And Removing The Battery Pack
Attaching and Removing the Battery Pack Attaching Turn the Rugged PDA over. slide the battery pack cover lock switches with the end of the stylus to FREE ( ), and remove the battery pack cover. q LOCK→FREE Align the battery pack with the slot and insert it into the slot ( Next, reattach the battery pack cover, and slide the lock switch from FREE to LOCK ( w Insert battery pack... - Page 33 Removing Turn off the Rugged PDA, and turn it over. Slide the battery pack cover lock switches with the end of the stylus to FREE ( ), and remove the battery pack cover. w Remove the battery pack q LOCK→FREE •...
-
Page 34: Charging The Battery Pack
Charging the Battery Pack The AC adaptor is used not only to supply power from the AC power outlet but also to charge the battery pack. The battery pack is also charged while Rugged PDA is in use (power is on) if the AC adaptor (provided) is connected with the battery pack inserted in the Rugged PDA unit. - Page 35 Charging the Battery with the AC Adaptor Pull back the rubber cover from the AC adaptor jack and insert the cable. The battery pack takes about two hours (when the Rugged PDA is turned off) to fully charge, and then the left side indicator LED lights green.
- Page 36 Checking Remaining Battery Power • You can check the remaining power level in the batteries on the "Power management" screen. The battery loses power slowly even if the Rugged PDA is not being used. The battery may lose all power if the Rugged PDA is stored for a long period of time.
-
Page 37: Using The Ac Adaptor
Using the AC Adaptor The battery attached to the Rugged PDA charges when the AC adap- tor is attached. Besides charging the battery, we recommend attach- ing the Rugged PDA to the AC adaptor when doing operations that use a lot of energy. •... -
Page 38: Initial Setup
Initial Setup Initial setup procedure The first time you use the Rugged PDA, fully charge the battery (if possible connect it to the AC adaptor), then do the following proce- dure, according to the on screen instructions, to do the initial setup. Doing initial setup Push the power switch to turn the power ON. - Page 39 The "Today" screen appears, you can start using the Rugged PDA. • After initial setup, or after Full reset, set the "Clock," "Owner informa- tion" or "Password" if necessary. • If tapping on the screen has no effect, or if the screen is blank, first do a "Full reset (initialize memory)."...
-
Page 40: Various Screen Adjustments
Various Screen Adjustments Do the following adjustments, if after initial setup the screen is difficult to see or to do operations on. Adjusting screen brightness You can adjust the screen brightness with the Action button and the Cursor button to make the screen easier to see when operating the Rugged PDA in dark locations. -
Page 41: Button Operation Settings
Button Operation Settings Pushing the Program button on the front of the Rugged PDA while it is turned off automatically turns the power on. You can use the "Button operation settings" to set whether or not pushing the Program button turns on the power. -
Page 42: When Initial Setup Is Finished
When Initial Setup Is Finished This section describes the Rugged PDA's basic operations after initial setup is finished. Today Screen When you turn on your device for the first time each day (or after 4 hours of inactivity), you'll see the Today screen. You can also display it by tapping and then Today. - Page 43 Status Icon Meaning Turns all sounds on and off Backup battery is low Main batteries are charging Main batteries are low Main batteries are very low Main batteries are full Notification that one or more instant messages were received Notification that one or more e-mail messages were received If more notification icons need to be displayed than there is room to display them, the Notification icon,...
- Page 44 The following table contains a partial list of programs that are on your device. Look on the Pocket PC Companion CD for additional programs that you can install onto your device. Additional applications can be installed from Club Pocket PC at http://www.pocketpc.com. Icon Program Description...
- Page 45 Navigation Bar and Command Bar The navigation bar is located at the top of the screen. It displays the active program and current time, and allows you to switch to pro- grams and close screens. Use the command bar at the bottom of the screen to perform tasks in programs.
- Page 46 Pop-up Menus With pop-up menus, you can quickly choose an action for an item. For example, you can use the pop-up menu in the contact list to quickly delete a contact, make a copy of a contact, or send an e-mail mes- sage to a contact.
- Page 47 Enter Information on Your Device You have several options for entering new information: • Use the input panel to enter typed text, either by using the soft key- board or other input method. • Write directly on the screen. • Draw pictures on the screen.
- Page 48 When you use the input panel, your device anticipates the word you are typing or writing and displays it above the input panel. When you tap the displayed word, it is inserted into your text at the insertion point. The more you use your device, the more words it learns to an- ticipate.
- Page 49 By default, small keyboard with on-screen special commands is pro- vided. This looks much like a standard QWERTY keyboard found on your desktop PC. Here is the large keyboard without gestures enabled. Notice the ab- sence of numerical keys. Finally, here is large keyboard with gestures enabled. To space forward, swipe horizontally in a forward direction with stylus on the keyboard To move backwards, swipe horizontally in a backwards direc-...
- Page 50 To use Letter Recognizer: With Letter Recognizer you can write letters using the stylus just as ® you would on paper. It uses technology similar to that of CIC's Jot product. Tap the arrow next to the Input Panel button and then Letter Recognizer.
- Page 51 Writing on the Screen In any program that accepts writing, such as the Notes program, and in the Notes tab in Calendar, Contacts, and Tasks, you can use your stylus to write directly on the screen. Write the way you do on paper.
- Page 52 If you accidentally write on the screen, tap Tools, then Undo and try again. You can also select text by tapping the Pen button to deselect it and then dragging the stylus across the screen. You can cut, copy, and paste written text in the same way you work with typed text: tap and hold the selected words and then tap an ed- iting command on the pop-up menu, or tap the command on the Edit menu.
-
Page 53: Connecting To A Computer
Connecting to a Computer Connecting to a computer allows you to share data with the computer, trans- fer files to and from the computer and back up files to the computer. Compatible computers Computers must meet the following minimum conditions to connect to and exchange data with the Rugged PDA. -
Page 54: Connecting To A Computer
For more information refer to Help for the Rugged PDA. Using the CASIO Companion CD The Companion CD-ROM contains software and the User's Guide. Put the CD-ROM into the CD drive of the computer and it will start automatically and display a menu. -
Page 55: Appendix
ppendix... -
Page 56: Specifications
Specifications Item IT-10M20 IT-10M20BR Microsoft Windows Mobile 2003 second edition soft- ® ware for Pocket PC Intel PXA270 Application Processor 416MHz ® Display functions × Semi-transparent TFT color LCD (65,536 colors) * Resistive film touch panel with built-in LED backlight Memory ROM 48MB Flash memory RAM 64MB... - Page 57 1 Though TFT screens are made using extremely high-grade technology, * uneven brightness or fine dots sometimes occurs on these screens. Also, some dots on the screen do not light or stay continually lit. These, however, are not malfunctions. 3 Operating time and charging time using the battery pack sometimes *...
-
Page 58: Options List
Options List The useful options shown below are available for use with the Rugged PDA. Basic Cradle HA-C60IO AC Adaptor AD-S15050A : : • C o n n e c t A C a d a p t e r ( A D - S15050AE) to use Bridge Satellite Cradle HA-C61IO... -
Page 59: Declaration Of Confirmity
The CE marking indicates compliance to applicable European Directives and Norms declared by; CASIO Europe GmbH Bornbarch 10, D-22848 Norderstedt, Germany DECLARATION OF CONFIRMITY CASIO Europe GmbH Bornbarch 10, D-22848 Norderstedt, Germany declare under our sole responsibility that the product... - Page 60 Declaration of Conformity Model Number: IT-10M20, IT-10M20BR Trade Name: CASIO Responsible party: CASIO INC. Address: 570 Mt. Pleasant Avenue, Dover, New Jersey 07801. Telephone number: 973.361.5400 This device complies with part 15 of the FCC Rules. Operation is subject to the...
- Page 61 The content of this guide is subject to change without notice. • CASIO has, to the best of its ability, endeavored to make this guide as accurate as possible. However, if any unclear portions or omissions are found, please contact your dealer.
- Page 62 Pocket PC CASIO COMPUTER CO., LTD. 6-2, Hon-machi 1-chome Shibuya-ku, Tokyo 151-8543, Japan...
- Page 63 IC Statement Operation is subject to the following two conditions: 1) this device may not cause interference and 2) this device must accept any interference, including interference that may cause undesired operation of the device To prevent radio interference to the licenced service, this device is intended to be operated indoors and away from windows to provide maximum shielding.
Need help?
Do you have a question about the CASSIOPEA IT-10 SERIES and is the answer not in the manual?
Questions and answers