
Subscribe to Our Youtube Channel
Related Manuals for ETEKCITY ESW01-EU


Summary of Contents for ETEKCITY ESW01-EU
- Page 1 Voltson Smart WiFi Outlet Model No.: ESW01-EU English Questions or Concerns? support.eu@etekcity.com...
-
Page 2: Table Of Contents
Table of Contents Safety Information Function Diagram LED Indicator Overview Setup Configuration APN Mode Operation · Turning Devices On/Off · Energy Consumption Data · Creating Schedules · Using Sunrise & Sunset Scheduling · Set Timer · Away Mode · Device Setting ·... -
Page 3: Safety Information
Safety Information IMPORTANT: Please read, understand, and comply with all of the instructions provided in this manual before using the device. Failure to comply with the instructions given in this manual and/or using the device in ways other than the ones mentioned in this manual may result in serious injury and/or damage to the product. Do not exceed the maximum load current of The VeSync home automation app is only •... -
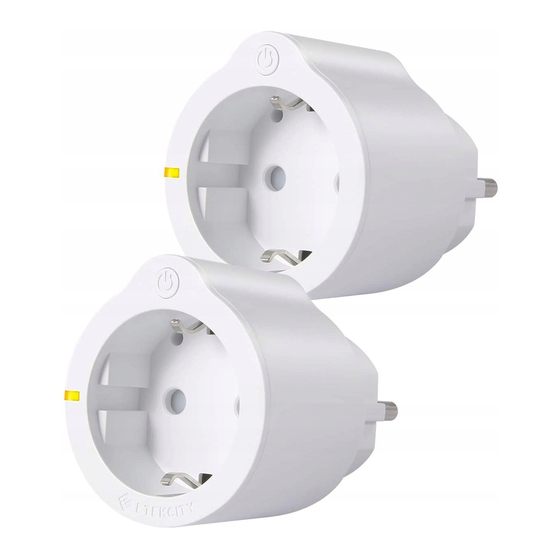
Page 4: Function Diagram
Function Diagram 1. Power Button 2. LED Indicator Front Back... -
Page 5: Led Indicator Overview
LED Indicator Overview Indicator Colour Action Description Solid yellow Outlet is turned on Yellow Outlet is turned off Outlet is not configured or configured Blue Blinks 1 time per second Outlet is in Smart Configuration Mode Blinks 2 times per second Outlet is in APN Configuration Mode Blinks 4 times per Outlet is being factory reset... -
Page 6: Setup
2. Open the VeSync App and tap to create Setup Sign Up a new account. Enter a new email and password, then tap 1. Scan the QR code or download the VeSync App Note: It is recommended create an account so that from the App Store or Google Play Store. -
Page 7: Configuration
Configuration 2. Select 1. Tap the button to add your device. Wi-Fi Outlet. - Page 8 3. Select the model. 4. Plug your smart outlet into a powered electrical ESW01-EU outlet or power strip. Press and hold the power button for 5 seconds until the blue LED light starts to slow blink. Note: Refer to LED Indicator Overview on page 5 if...
- Page 9 5. Type in the name of your home WiFi network 6. The system will take a moment to connect. and password, then tap Join Network. Note: This smart outlet configuration requires a 2.4GHz WiFi network.
-
Page 10: Apn Mode
7. You have successfully set up your smart outlet. APN Mode Give it a unique name, or simply tap to use the default name. If setup fails, you can use APN Mode to configure your WiFi outlet. 1. Tap Use APN Mode. - Page 11 2. Press and hold the power button for 10 seconds 3. Enter your home WiFi network name and until the blue LED light starts to blink rapidly. password to start setup.
- Page 12 4. Open settings on your mobile device, and 5. The system will take a moment to connect. select the WiFi network that begins “VeSync” (Settings -> WiFi).
-
Page 13: Operation
Operation 6. You have successfully set up your smart outlet. Turning Devices On/Off Give it a unique name, or simply tap to use the default name. Method 1 Your connected devices will appear on the My Home Screen under Devices. Tap to turn on or turn off the outlet. - Page 14 Method 2 While on the My Home screen, tap on the name of Note: Although controls the flow of power to the device. You will now see the detailed view page the smart outlet, the smart outlet itself will remain for the device.
-
Page 15: Energy Consumption Data
Energy Consumption Data The VeSync app gathers information from the outlet 2. Tap W, M, to see weekly, monthly, and yearly and will automatically calculate your energy usage. energy consumption, respectively. Tapping allows you to view the energy consumption over 1. -
Page 16: Creating Schedules
3. To select a custom time period, tap the desired Creating Schedules dates to define a start and end time. The app will display the data. 1. Tap to create a scheduled time Create Schedule for the device to turn on/off. - Page 17 2. Set your scheduled start time. You can also set 3. You can turn on or off a schedule at any time on an end time or leave it blank. Tap when you the detailed view page. √ are done. Note: This smart outlet supports up to 26 groups of schedules, timers, and away modes.
-
Page 18: Using Sunrise & Sunset Scheduling
Using Sunrise & Sunset Scheduling You can schedule the outlet to turn on or off at sunrise or sunset based on your location. 1. Make sure your Location or Location Services has been turned on for VeSync. 2. Tap to create a scheduled time Create Schedule for the device to turn on/off. - Page 19 3. Select the time to set the time for Start sunrise or sunset.
- Page 20 4. When the time selection comes onto the screen, tap on the left or right arrows to select “Sunrise” or “Sunset”.
- Page 21 5. To confirm, tap to program the time. 6. You can also select “Sunrise” or √ “Sunset” for your end time.
- Page 22 7. Tap at the top right of the screen to save your 8. You can turn on or off a schedule at any time on √ times. the detailed view page.
-
Page 23: Set Timer
Set Timer 1. On the detailed view page, tap then tap 2. Set your timer and command to turn the outlet Timer on or off. Tap when you are done. Timer. √... - Page 24 3. Tap to start timer. When the timer ends, it will execute the command you have set for the outlet. Note: For your safety, you cannot turn the device off once the timer has started.
-
Page 25: Away Mode
Away Mode The away mode will turn your outlet on or off at 1. On the detailed view page tap Away, then random. This will happen within 30 minutes before to set an away timer. Set Away or after the programmed time. For example, if your programmed away timer is at 10:30 pm, the away timer will turn the outlet on at any time between 10:00 pm to 11:00 pm. - Page 26 2. Set a start and end time, and select the desired 3. Swipe to turn on or turn off your away timer. days for the away timer. Tap in the upper right √ corner when you are done.
-
Page 27: Device Setting
Device Setting This menu allows you to edit your device name and picture, as well as turn on or off notifications. This menu also provides options for the Energy Saving Mode, Power Protection, device sharing, and firmware updates. To access Device Settings, tap on the top right corner of the detailed view page. -
Page 28: Share Device
Share Device 1. To allow your friends and family to control your 2. Enter the person’s email and tap Invite. outlet, tap on the upper right corner to share. - Page 29 3. Tap to delete people who you have share your device with. Note: The person(s) you share your device with cannot edit or delete your device settings.
-
Page 30: Energy Saving Mode
Energy Saving Mode The VeSync App allows you to program the Smart 2. Turn on the Energy Saving Mode. Enter your Cost per kWh and Max Cost. Tap to when you WiFi Outlet to save energy based on the cost per √... -
Page 31: Power Protection
Power Protection This mode allows you to program the outlet to protect your connected devices from power spikes. 1. On the Device Setting menu, tap Power Protection. 2. Activate the Power Protection mode, enter a threshold, and tap √. The device will turn off when power usage has exceeded the threshold. -
Page 32: Reconfiguring A Device
Reconfiguring a Device 1. Unplug your connected device from the WiFi 2. Tap the button to add your device. Outlet. Press and hold the power button on the outlet for about 5 seconds, until the LED indicator shines solid blue. - Page 33 3. Select 4. Select the model. Wi-Fi Outlet ESW01-EU...
- Page 34 5. Plug your smart outlet into a powered electrical 6. Type in the name of your home WiFi network outlet or power strip, press and hold the power and password, then tap Join Network. button for 5 seconds until the blue LED light starts to slow blink.
- Page 35 7. The system will take a moment to connect.
-
Page 36: Link To Alexa
Link to Alexa To view these instructions on the VeSync app, tap on the My Home page, then tap More Link to Alexa. Note: You must create a VeSync account to connect with Alexa. -
Page 37: Link To Google Home
Link to Google Home To view these instructions on the VeSync app, tap on the My Devices page, then More Link to Google Assistant. Note: You must create a VeSync account to connect with Google Home. -
Page 38: Delete A Device
Delete a Device Android Devices: iOS Devices: On the “My Home” On the “My Home” screen, press and hold screen, swipe left to for 2 seconds to delete. delete. 1. You can delete your device on the Device Settings menu by tapping at the Delete Device bottom of the screen. -
Page 39: Log Out
Log Out 1. Tap on More. 2. Tap your profile picture. 3. Tap at the bottom of the profile menu. Log Out... -
Page 40: Using The Vesync Widget
Using the VeSync Widget iOS Devices: 2. Select from the list, then tap VeSync Done 1. On the home screen of your iPhone, swipe all confirm. the way to the right. Scroll to the bottom of the 3. Tap to add your Voltson Smart Add a Device screen and tap Edit. - Page 41 Android Devices: 1. Press and hold any blank space on your home 3. Tap to add your Voltson Smart Add a Device screen, then tap at the bottom of the Widgets WiFi Outlet to your VeSync Widget. screen. 2. Press and hold and drag it to a free space on your home screen.
-
Page 42: Specifications
Specifications IEEE802.11b/g/n (WiFi) Communication Mode 2.4G Communication Frequency 30-50 meters | 98-164 feet Wireless Distance (Outlet to Router) (max visible range) Maximum Switch Current 220-240V~/50Hz AC Power Supply Range & Supply Frequency -10°C~50C° | 14°F~122°F Operating Environment -20°C~60C° | -4°F~140°F Storage &... -
Page 43: Troubleshooting
Troubleshooting Q: How do I change my WiFi network to a 2.4GHz WiFi network? 1. Make sure your router is a dual band router (most dual band routers support both 5GHz and 2.4GHz Q: Why can’t I connect my smart outlet to my WiFi networks). -
Page 44: Warranty Information
Terms & Policy • Check that your Alexa/Google Home is working properly. Etekcity warrants all products to be of the highest • Make sure your outlet name is easy to say aloud. quality in material, craftsmanship, and service for Avoid using numbers or special characters. Different... - Page 45 Connect with us @Etekcity...
- Page 46 Building on better living.
Need help?
Do you have a question about the ESW01-EU and is the answer not in the manual?
Questions and answers