Table of Contents
Advertisement
Advertisement
Table of Contents

Subscribe to Our Youtube Channel
Related Manuals for CamRanger MINI


Summary of Contents for CamRanger MINI
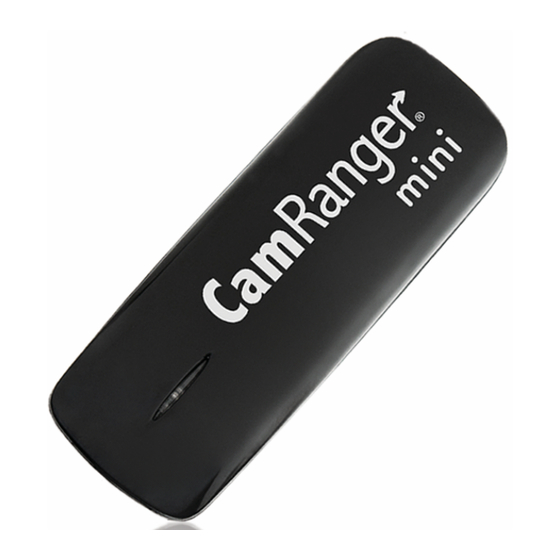
- Page 1 User’s Manual for the CamRanger Mini © CamRanger US Patent 9712688 09/07/18...
-
Page 2: Table Of Contents
CamRanger Mini Hardware ................Setup ....................... CamRanger Mini App ..................Connection Screen ..................Main Screen ....................Status Bar ..................... Recent Thumbnails ..................Main Image View ..................Captured Image ....................Live View Stream ....................Camera Properties .................... Camera Actions ....................HDR/Advanced Bracketing Tab .............. -
Page 3: Camranger Mini Hardware
Setup • Charge CamRanger Mini Connect a USB micro cable to the CamRanger Mini charging port to charge. The device can be charged from a powered USB port or any standard 1V/5A USB AC adapter. © CamRanger US Patent 9712688... - Page 4 • Connect to the CamRanger Mini WiFi network Turn on the CamRanger Mini and wait about 30-45 seconds for the device to initialize. When it is ready the blue WiFi LED will turn on. Go to the Settings on the iPad/iPhone and select the WiFi section. Select and join the WiFi network “CamRanger-___”...
-
Page 5: Camranger Mini App
At the bottom of the screen are two buttons: Cached Images and Settings. The Settings button will bring up the Settings screen (see the Settings section for more details). Note that a connection has not been made with the CamRanger at this point so some settings will not be available. -
Page 6: Main Screen
After ensuring the camera is on, awake, and connected to the CamRanger with a USB cable, press "Connect" to connect to the CamRanger and begin a session. Please see the troubleshooting appendix if there are difficulties connecting. Main Screen After successfully connecting in the app, the main camera control screen will be displayed. -
Page 7: Recent Thumbnails
Images first display at a "fit to window" size. The image's scale percentage is shown at the top right. Images may be zoomed in and out with a two finger pinch or by double © CamRanger US Patent 9712688 09/07/18... -
Page 8: Live View Stream
“touch focus”. For cameras that support it, the focus box that is displayed will temporarily turn green if focus is acquired and turn red if focusing failed. Note that the CamRanger does not © CamRanger US Patent 9712688 09/07/18... -
Page 9: Camera Properties
Other camera properties are set by selecting the value from a list of options. Camera Actions The red capture button initiates the camera trigger. The exact camera behavior is dependent on the © CamRanger US Patent 9712688 09/07/18... -
Page 10: Hdr/Advanced Bracketing Tab
The live view button toggles live view on and off. Live view must be controlled from the CamRanger and not from the camera. The movie button toggles movie mode on and off. When movie mode is on, the Capture button changes to “Record”... - Page 11 The minimum and maximum exposure values for the sequence will be displayed above the Start button. Press the Start button to begin the sequence. Because the CamRanger is actually changing the camera’s exposure parameters, the camera must be set to Manual exposure mode to perform HDR bracketing.
-
Page 12: Timer Tab
HDR sequence of captures. The HDR parameters are those that are set in the HDR tab. Press “Start” to begin the sequence. After started, the iOS device does not need to remain connected to the CamRanger. So there is no need to remain close by during a long time lapse sequence. -
Page 13: Focus Tab
Focus Adjustments The Focus Adjust section of the tab is for performing incremental adjustments to the focus. The arrow buttons will perform a large, medium, or small focus adjustment depending on the © CamRanger US Patent 9712688 09/07/18... -
Page 14: Focus Stacking
The new focus stacking method requires to user to specify the nearest and furthest focus points and then the CamRanger automates the step size and number of shots based on the camera, lens, and aperture. Because the aperture affects the depth of field, this focus stacking method can only be used when the camera is in manual or aperture priority exposure modes. -
Page 15: Advanced Focus Stacking
For Canon cameras, the CamRanger can only know the lens focal length by downloading an image. If an image has not been downloaded in that session yet, the focus stacking section will be disabled and instead a button will be shown to take a configuration shot. Pressing the button will result in the camera capturing an image, downloading the image to determine the lens focal length and then immediately deleting the image. -
Page 16: Settings
Canon cameras. When set to PC, the camera is physically locked but the CamRanger can control more camera settings. In Camera mode shooting from the camera is possible, but changing certain settings with the CamRanger is not. Image and Live View Overlays •... - Page 17 • Canon - Give the image a rating • Nikon - “lock” the image Note that for both of these methods, the change can immediately be reversed. • Other Controls © CamRanger US Patent 9712688 09/07/18...
-
Page 18: Pt Hub & Mp-360 Tripod Head
• Legal - Display terms, conditions, warning information, and licenses • CamRanger Version - the first digits are the software/app version and the digits after the final period is the CamRanger firmware version • Exit - closes the current session and returns to the connection screen PT Hub &... -
Page 19: Specifications
Maximum Camera Weight: 6 lb (2.7 kg) • Size (LxHxW): 5.75 x 4.5 x 4 inches (145 x 115 x 103 mm) • Weight: 1.75 lb (800 g) Setup Required Parts: • CamRanger Mini © CamRanger US Patent 9712688 09/07/18... -
Page 20: App Additions With The Pt Hub And Tripod Head
• Camera • Mobile Device (iOS/Android) • Connect the CamRanger Mini, PT Hub, tripod head, and camera as shown in the above diagram. • Set the tripod head power switch to “M” to turn on the tripod head • Setup and start the rest of the equipment as normally done App Additions with the PT Hub and Tripod Head ©... - Page 21 When the CamRanger app is started with the PT Hub and MP-360 connected, a tripod button will appear next to the other tab buttons. A directional pad is displayed on the tripod tab. Press and hold to move the tripod head in the desired direction.
-
Page 22: Tips & Troubleshooting
Any camera WiFi connectivity and built-in camera sharing must be disabled • The CamRanger mini has the same limitations as any WiFi network and can be negatively impacted by environmental interference. Strong interference can result in a failure to join the CamRanger mini WiFi network. - Page 23 • If the camera has multiple memory cards, the image playback card should be set accordingly on the camera. © CamRanger US Patent 9712688 09/07/18...
-
Page 24: Important Information
CamRanger is a registered trademark of CamRanger LLC. iOS, iPad, iPhone, and iPod Touch are registered trademarks of Apple Inc. CamRanger is not for use for illegal purposes. CamRanger LLC is not responsible for damage or loss incurred to the camera, memory card, images, iOS device, or any third party equipment.
Need help?
Do you have a question about the MINI and is the answer not in the manual?
Questions and answers