
Related Manuals for ELRO CC60RIP11S


Summary of Contents for ELRO CC60RIP11S
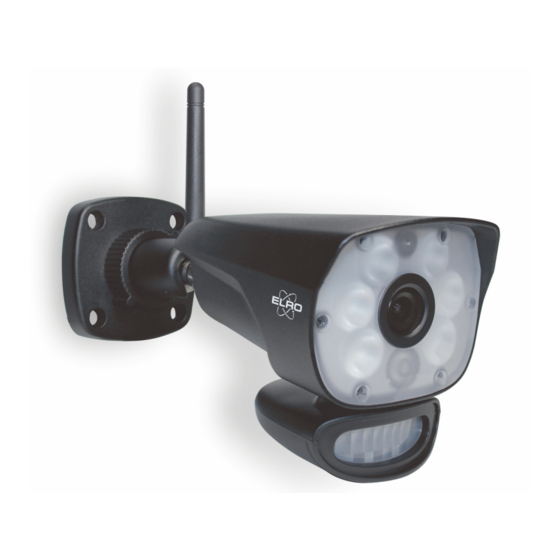
- Page 1 User Manual ELRO CC60RIP11S HD IP surveillance camera with real white light for colour nightview...
-
Page 2: Table Of Contents
HD Wi-Fi Camera with LED Light Table of contents (1) What’s in the box? -------------------------------03 (2) Camera Overview----------------------------------04 (3) iOS Device Operation----------------------------05 Getting Start ---------------------------------------------------------05 Internet Connection -----------------------------------------------06 Direct Connection--------------------------------------------------08 App icons/ buttons function and description------------11 Advanced Setting--------------------------------------------------13 Notice-------------------------------------------------------------------15 (4) Android Device Operation----------------------19 Getting Start ---------------------------------------------------------19 Internet Connection -----------------------------------------------20 Direct Connection--------------------------------------------------22... -
Page 3: What's In The Box
What’s in the box? WF692 Camera Power Adaptor Screws & Anchors User Manual Check your package to confirm that you have received the complete system. -
Page 4: Camera Overview
Camera Overview... -
Page 5: Ios Device Operation
1) Carefully unpack the camera 2) Attach power adapters to the cameras. Plug into power Once power on ELRO CC60RIP11S, the power LED will start with solid green, after 10 seconds it turns off, about 15 seconds later, it will change... -
Page 6: Internet Connection
3. There are two options to connect the camera with cell phone: internet connection and direct connection Internet Connection 1) Make sure your smart phone or tablet is connected to the same local WiFi network (which the camera is using) and the power LED of the camera is in fast flash mode. - Page 7 3) Input the local network password on the pop-up, then input camera password(default 000000)on next pop-up, touch “save” to complete the connection Notice: At the first time you add a camera, to make the camera password more secure, you need to change the password. Reset the new password (8-16 alphanumeric characters), and “Save”...
-
Page 8: Direct Connection
1) Press the “reset” button on the camera, the power LED will stay on. Remark: Once power on ELRO CC60RIP11S, the power LED will start with solid green, after 10 seconds it turns off, about 15 seconds later, it will change to fast flash, means initialize finished. - Page 9 4) There are three ways to complete direct connection: search in local network, QR code scan, manual input. A: Search in Local network Touch “Search in local network”, it will automatically search the camera DID, then touch the selected camera and get the camera name and DID, input the camera password (default 000000) and press “Save”...
- Page 10 B. QR code scan Touch QR code scan, and scan the QR code attached on the back of the camera, then get the camera name and DID, input the camera password (default 000000) and save the password. C. Manual input Touch Manual input, and get the camera name, input the DID attached on the back of the camera and camera password (default...
-
Page 11: App Icons/ Buttons Function And Description
When the power LED in “stay on” mode, press and hold the camera reset button for more than 5 seconds will change camera to factory default mode, power LED will then be in fast flash mode. 4 In Live View While the connection is completed, you can see the live video on the phone. - Page 12 1 snapshot icon : Take snapshot of the image you are watching. The picture will be saved automatically to your photo albums. :Check the snapshots you took. 2 View icon 3 Talk-back icon : Activate the two-way communication function. 4 Event list : Playback the recorded files.
-
Page 13: Advanced Setting
5 Manual Recording button : Tap to activate manual recording, tap again to stop manual recording.(manual recording lasts 2 minutes every time, however, automatic record only lasts 15 seconds per trigger ). 6 Light icon : Turn on/ off the LED light. 7 Advanced Setting button : Enter Advanced Setting menu. - Page 14 While the camera is connected to the router and power LED in slow flash mode, you will be able to use any Wi-Fi or GSM signal to see the video from the app.
-
Page 15: Notice
3) Light Setting: you can set duration of the camera light (off, 1 minute, 3 minutes, 10 minutes), Dimmer ( 25%, 50%, 75%,100%) and Timer( the time for light on or off, repeat) as per your preference. 5. Notice 1 You can enter the advanced setting by tapping the icon on the right of the connected camera. - Page 16 2 Once the advanced setting is completed, please remember to press “ Save”and “OK” to preserve the setting. 3 Default Wi-Fi Camera: press “ reset” button of the camera for more than 5 seconds and then release, the power LED will flash quickly. The default setting completes.
-
Page 17: Android Device Operation
1) Carefully unpack the camera 2) Connect to a local power outlet using the included power adapter. Once power on ELRO CC60RIP11S, the power LED will start with solid green, after 10 seconds it turns off, about 15 seconds later, it will change... -
Page 18: Internet Connection
3 There are two options to connect the camera with cell-phone: internet connection and direct connection. 3.1 Internet Connection 1) Make sure your smartphone or tablet is connected to the same local network (which the camera is using, non-5G) and the power LED of the camera is in fast flash mode. - Page 19 3) Input the local network password on the pop-up, then input camera password(default 000000)on next pop-up, save the password to complete connection Notice: At the first time you add a camera, to make the camera password more secure, you need to change the password. Reset the new password (8-16 alphanumeric characters), and touch “Save”.
-
Page 20: Direct Connection
1) Press the “reset” button on the camera, the power LED will light up continuously. Remark: Once power on ELRO CC60RIP11S, the power LED will start with solid green, after 10 seconds it turns off, about 15 seconds later, it will change to fast flash, means initialization finished. - Page 21 4) There are three ways to complete direct connection: search in local network, QR code scan, manual input. a. Search in Local network Tap “Search in local network”, it will automatically search the camera, then touch the selected camera and get the camera name and DID, input the camera password (default 000000) and press “Save”...
- Page 22 b. QR code scan Tap QR code scan, and scan the QR code attached on the back of the camera, then get the camera name and DID, input the camera password (default 000000) and touch “Save” to complete the connection. c.
-
Page 23: App Icons/ Buttons Function And Description
Remark: When the power LED in “stay on” mode, press and hold the camera reset button for more than 5 seconds will change camera to factory default mode, power LED will then be in fast flash mode. 4 In Live View While the connection is completed, you can see the live video on the phone. - Page 24 1 snapshot icon : Take snapshot of the image you are watching. The picture will be saved automatically to your photo albums. :Check the snapshots you took. 2 View icon 3 Talk-back icon : Activate the two-way communication function. 4 Event list : Playback the recorded files.
-
Page 25: Advanced Setting
3 Manual Recording button : Tap to activate manual recording, tap again to stop manual recording.(manual recording lasts 2 minutes every time, however, automatic record only lasts 15 seconds per trigger ). 6 Light icon : Turn on/ off the LED light. 7 Advanced Setting button : Enter Advanced Setting menu. - Page 26 3) WLAN Networks: when your Smartphone and camera are in direct connection, you can use WLAN network to choose a local router for the WF692, and change the camera to internet mode. Touch WLAN Networks and select the local network, input your local Wi-Fi password.
-
Page 27: Notice
4) Light Setting: you can set duration of the camera light (off, 1 minute, 3 minutes, 10 minutes), Dimmer ( 25%, 50%, 75%,100%)and Timer( the time for light on or off, repeat) as per your preference. 5 . Notice 1 You can enter the advanced setting directly by touching the right icon of the connected camera, and choose more. - Page 28 2 Once the advanced setting is completed, please remember to press “ Save”and “OK” to preserve the setting. 3 Default Wi-Fi Camera: press “ reset” button of the camera for more than 5 seconds and then release, until the Power LED turn off. The default setting completes.
-
Page 29: Specification
Specification Item Specification Power supply DC 9V ±5% Wi-Fi Frequency range 2.412GHZ-2.462GHZ(Channel 1-11) Wi-Fi Security WPAPSK Wi-Fi Standard IEEE 802.11b/g/n,1T1R Video Encode H.264 VGA, 720P Image Sensor Type OV9712 CMOS Image Sensor 11b:<18dBm Wi-Fi transmitting power 11g:<14dBm 11n:<13dBm 11M: -86dBm@8% (typical) Receive Sensitivity(typical) 54M: -73dBm@10% (typical)... -
Page 30: Camera Power Led Indication
Camera Power LED Indication Once power on ELRO CC60RIP11S, the Power LED will start with solid green, after 10 seconds it turns off, about 15 seconds later, it will change to fast flash, means initialize finished. Power Camera condition Remark Click the "reset"...
Need help?
Do you have a question about the CC60RIP11S and is the answer not in the manual?
Questions and answers