Primera Signature User Manual
Slide printer
Hide thumbs
Also See for Signature:
- Service manual (36 pages) ,
- User manual (32 pages) ,
- Operator's manual (18 pages)

Related Manuals for Primera Signature


Summary of Contents for Primera Signature
- Page 1 062812-511311 © 2012 All rights reserved For the most recent version of this manual please visit http://www.primera.com/manuals.html...
- Page 2 Notices: The information in this document is subject to change without notice. NO WARRANTY OF ANY KIND IS MADE WITH REGARD TO THIS MATERIAL, INCLUDING, BUT NOT LIMITED TO, THE IMPLIED WARRANTIES OF MERCHANTABILITY AND FITNESS FOR A PARTICULAR PUR- POSE.
-
Page 3: Table Of Contents
Table of Contents Section 1: Getting Started ................1 A. Choosing a Good Location ..............1 B. Unpacking and Inspection..............2 C. Identifying the Parts ................3 D. Slide Specifications ................5 E. Connect Power..................6 Load a Ribbon ..................7 G. Load a Slide Cartridge ..............10 H. - Page 4 Interactive Feature in this PDF Document There are interactive features that will allow you to jump to different locations within the document. Each listing in the Table of Contents is interactive. Place the cursor on either the words or the page number. A small hand with a pointing finger icon appears.
-
Page 5: Section 1: Getting Started
To begin using your Signature, please read this manual care- fully. This Operator's Manual is a guide to the Signature Slide Printer only. There are other accessories and software that work with the Signature Slide Printers. Those items are purchased separately and include their own user's manual. -
Page 6: Unpacking And Inspection
While unpacking your Printer, inspect the carton to ensure that no damage has occurred during shipping. Make sure that all supplied accessories are included with your unit. The following items should be included: • Signature Slide Printer • Power cord Power converter •... -
Page 7: Identifying The Parts
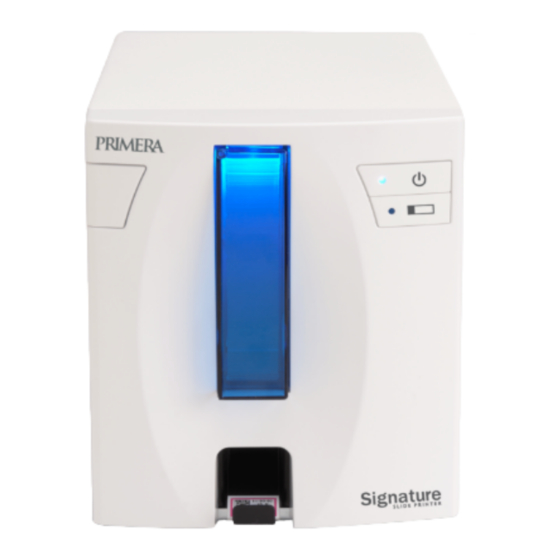
C. INDENTIFYING THE PARTS The following illustrations show the various parts of the printer. These parts will be referred to throughout this manual so return here if you ever encounter a term that is unfamiliar to you. Power Button Slide Button Slide Cartridge Cover Release Slide Bin... - Page 8 Rear View Power Rear Access Panel 4 Getting Started...
-
Page 9: Slide Specifications
The frosted coating should cover 20mm of the length of the slide. The coating must be of uniform thickness across the entire width of the slide. The Signature Slide Printer uses thermal transfer print technology. This print technology requires stricter standards on the surface finish and cleanliness of the slide's frosted coating compared to slides that are used with ink jet technology printers. -
Page 10: Connect Power
E. CONNECT POWER Attach the power cord to the Power brick. Plug the power cord into a grounded outlet and the 5mm barrel connector to the back of the printer. The power converter is a universal 100v-240v input and a 12v output. DO NOT CONNECT USB UNTIL THE PRINTER DRIVER HAS BEEN INSTALLED. -
Page 11: Load A Ribbon
F. LOAD A RIBBON The Signature Slide Printer uses either a Black ribbon (5000 prints) or a CMYK Color ribbons (1000 prints). You must use Primera ribbons to print with the Signature Slide Printer. 1. Remove a Color or Black Ribbon from its packaging. - Page 12 3. Remove the ribbon from its shrink wrapped packaging. Hold the take up (back) ribbon core with your left hand. Hold the supply (front) ribbon with your right hand. Install the take up ribbon by depressing the spring loaded hub inside the printer. Snap the take up ribbon core into place.
- Page 13 5. Rotate the hubs until the tabs on the right side hubs match the notches on the ribbon. Manually turn the take up core until the ribbon is taut. Getting Started 9...
-
Page 14: Load A Slide Cartridge
G. LOAD A SLIDE CARTRIDGE 1. Remove the empty blue slide cartridge by pulling up and out. 2. Open the blue side cartridge. 3. Locate the 100 pack slide box. 10 Getting Started... - Page 15 4. Place the slides next to the blue side cartridge so that the printable surface is on the TOP of the slide with the orientation shown below. Note: To achieve the proper orientation, it may be necessary to replace the box top, flip the box over and remove the other side of the box.
- Page 16 6. Once the slides are in place, straighten any that did not properly fall in the cartridge and ensure the printable surface is facing up and near the front of the cartridge as it is placed in the printer. Important Note! To prevent Printable Surface feeding problems, a).
-
Page 17: Install The Printer Driver
H. INSTALL THE PRINTER DRIVER If you have purchased the Primera Touch Screen you will not need to install the printer driver. It will be preinstalled on the Touch Screen. If you have your own computer that you will be connecting to Printer please follow these instructions. -
Page 18: Section 2: Printing Slides
If you have purchased the Primera PTLAB software or the Primera Touch Screen Computer with the PTLAB software you can use it to print to the Signature Slide Printer. The PTLab software has its own manual. Please refer to it for detailed capabilities. - Page 19 Paper Size: Default paper size is set to the maximum. Edit these settings if you are printing to slides with a smaller print- able area. Orientation: Change the orientation to Portrait or Landscape. Print Heat: Increase or decrease the Print Heat from 1-255. Increase to print heat to improve print quality.
-
Page 20: Section 3: Maintenance And Troubleshooting
Section 3: Maintenance and Troubleshooting A. INDICATOR LIGHTS AND ERROR CODES Power light on Steady - Ready to receive Print. Slide Cartridge light ON Power light on Steady - No ribbon installed and/ Slide Cartridge light OFF or No Slide Cartridge Installed. Flashing Slide Cartridge light An error is present. -
Page 21: Cleaning The Print Head
Slide Cartridge Invalid 80 0 Ribbon PWM 40 0 Head Load 20 0 Input Empty 10 0 Input Jam 08 0 Ribbon Advance Error 04 0 Ribbon Invalid 02 0 Lifter Not Functioning 01 0 Ribbon Out 00 01 Ribbon Break 00 02 Output Full 00 08... -
Page 22: Replacing The Print Head
3. Locate the Print head mounted to the underside of the cover. Burn Line 4. Clean the print head using the print head pen. Swipe the tip across the burn line 1 or 2 times. If you notice the tip getting dirty, clean it by wiping it across a clean paper surface. - Page 23 4. Push back , then down and then flip it 180 degrees to reveal the cable connector. Watch the pin on the side of the print head mechanism to guide the print head out of the metal housing. Important Note: To prevent damage to print head, do not touch the print head with a...
-
Page 24: Troubleshooting Print Quality
6. Connect the new print head. 7. Rotate the printhead 180 degrees and push it back into the metal housing. 8. IMPORTANT! Find the Resistance value printed on the the printhead. Example: R= 3180 Resistance Value Printed Here Before printing, enter this value in the advanced settings area of the PTLab software. - Page 25 Vertical Line. A line vertically through the entire print is cause by dust or debris on the print head burn line or blown pixel on the print head. See Section 3B for cleaning instructions and 3C for print head replacement instructions.
-
Page 26: Repairing/Preventing Ribbon Breaks
Random Missing Area (Printable Surface Missing). If the printable surface is missing or scratched off, the printer cannot print in these areas. Low quality slides, defective slides or mishandling of slides may be the cause of this problem. Rounding at the leading edge. Rounding at the leading edge of any new color on a slide is typically caused by low quality slides or slides that are not thermal printable (inkjet).. -
Page 27: Retrieving A Broken Or Stuck Slide
3. Feed the supply side of the ribbon under the take up roll. Tape the supply ribbon to the take-up roll. 4. Manually turn the take-up roll several complete rotatations to prevent the tape from coming loose. 5. Close the Cover. F. - Page 28 3. Remove the slide cartridge. 4. In the slide cartridge compartment check near the bottom roller for a slide. 5. Check under the ribbon. Use the Power and Slide buttons to move the slide to a position where you can remove it. Tip! Once the slide is on the rubber belts near the back, you can close the cover and press the slide button to advance the side down the slide chute.
-
Page 29: Cartridge Or Ribbon Recognition Problems
7. Finally if the slide is broken you can remove it using the bottom catch bin. Pick up the slide printer and rotate it in multiple directions until all of the pieces are in the bin. Now pull out the bin and empty it into the trash. Catch Bin G. -
Page 30: Technical Support
If you still have difficulty, con- tact the technical support number using one of the methods listed below. Source Location Primera Knowledge Base www.primera.com/kb Email Support www.primera.com/contact_tech_support.cfm Phone Support 763-475-6669 (Mon - Fri 8 a.m. - 6 p.m CST) -
Page 31: Section 4: Technical Specifications
Section 4. Technical Specifications Printing technology: Thermal transfer Print speed: Up to 7 slides/minute (monochrome) Up to 5 slides/minute (solid colors) Up to 3 slides/minute (process colors) Print resolution: 300 dpi Ink type: Resin thermal transfer Ribbon types: CMYK: 1000 prints Black: 5000 prints Printable colors: 8 solid colors... - Page 32 Printed in the United States of America P/N 511311...
Need help?
Do you have a question about the Signature and is the answer not in the manual?
Questions and answers