Table of Contents
Advertisement
Quick Links
Advertisement
Table of Contents

Subscribe to Our Youtube Channel
Related Manuals for Gigaset GS160


Summary of Contents for Gigaset GS160
- Page 1 GS160 You can also find the user guide online on your smartphone...
-
Page 2: Table Of Contents
Gigaset GS160 ........ -
Page 3: Overview
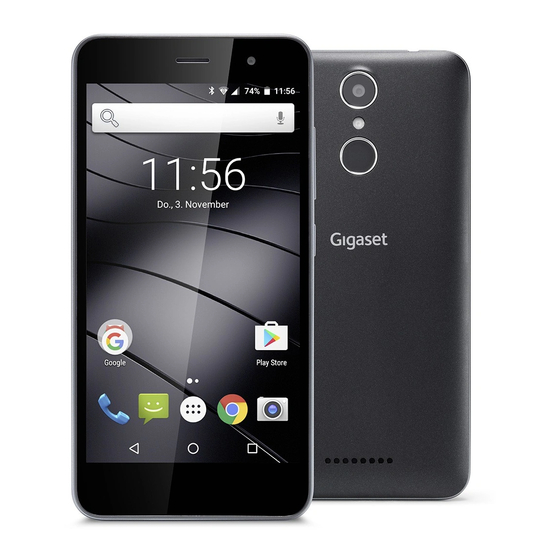
Gigaset GS160 Overview Gigaset GS160 Headset connector (3.5 mm jack) Rear camera Light / proximity sensor Flash / torch Front camera Fingerprint sensor Receiver Speaker Volume button (top: +, bottom: –) On/Off button Touchscreen Micro-USB socket Microphone... -
Page 4: Start Screen
Start screen Start screen Notifications and Status bar Icons show the arrival of notifications and various states ( p. 84) Access to notifications ( p. 22) Access to quick settings ( p. 17) Google search ( p. 16) Area for apps and widgets They can be placed anywhere ( p. -
Page 5: Illustration In The User Guide
Illustration in the user guide Illustration in the user guide Icons Warnings, the non-adherence to which can result in damage to devices or personal injury. Important information regarding function and appropriate handling or functions that could generate costs. Prerequisite for carrying out the following action. Additional helpful information. -
Page 6: Safety Precautions
Please explain to your children the contents of this document as well as the potential risks associated with using this device. Only use chargers approved and certified by Gigaset. Using incompatible chargers can damage the mobile phone and entail hazardous sit- uations. - Page 7 High volumes can impair hearing. Listening to music or conversation with headphones set to a loud volume can be unpleasant and permanently impair hearing. To prevent loss of hearing, do not have the volume turned up too high for long periods. If you wear headphones whilst out walking or jogging, please ensure that the cord does not wrap itself around your body or objects on your person.
- Page 8 Use a qualified maintenance service The installation and repair of products are the sole preserves of qualified maintenance person- nel. Battery Not replacing the battery properly can cause a risk of explosion. Dispose of used batteries in line with the instructions. •...
- Page 9 Consult a doctor straight away if your condition persists. More important information on safety • For your own safety, only use original, approved accessories from Gigaset for your mobile phone. Original accessories can be purchased from Gigaset Customer service (see Customer ¢...
-
Page 10: Getting Started
The device detects SD cards with a storage capacity of 32 GB. Higher capacity cards (to 128 GB) can be used if formatted on the GS160 (not from a PC). Inserting the battery ¤ Insert the battery into the device with the connector... - Page 11 Closing the cover ¤ Align the cover with the side tabs on the slots on the inside of the casing. ¤ Press the cover until it clicks into place. Charging the battery ¤ Plug the Micro-USB connector of the charger cable provided into the Micro-USB socket of the smartphone ¤...
- Page 12 Inserting SIM cards This screen is only shown when no SIM card is inserted: ¤ Insert card now ( p. 10) Insert SIM card later: Skip Establishing a WLAN connection Wireless networks (WLANs) in range are displayed. ¤ Tap the required WLAN Enter the WLAN password Connect .
- Page 13 Setting up protection for the phone Protect your smartphone from unauthorised use. Fingerprint ¤ Add fingerprint Next . . . A wizard opens to guide you through the necessary steps. Additional information p. 29 PIN, pattern or password ¤ Configure PIN, pattern or password Next Select Pattern | PIN | Password Next...
-
Page 14: Using The Device
Getting to know your device Using the device Getting to know your device Switching the device on and off Switching on ¤ Press and hold the On/Off button Unlock the display if required (if a display lock is set up to protect against unauthorised starting) . - Page 15 Getting to know your device Switching the device to and ending idle mode Switching the device to idle mode ¤ Briefly press the On/Off button If the device is not used for a defined time, it automatically switches to idle mode. Setting the period of inactivity for transitioning to idle mode ¤...
- Page 16 Getting to know your device Spreading apart / pinching together your fingers ¤ Place two or more fingers on the screen at the same time ¤ Zoom in: Spread your fingers apart ¤ Zoom out: Pinch your fingers together Example: Scaling screen content. Only possible for special screens (such as Google Maps and Chrome).
- Page 17 Getting to know your device Switching between start screens and apps At the bottom of every screen are three Navigation buttons: Opens the screen last viewed, even if it belongs to another app. You can go back several times (only as far as the start screen). Opens the start screen which was open last time.
- Page 18 Getting to know your device Quick settings for ringtone volume Adjust the ringtone volume to the ambient conditions or situation. Selecting an audio profile from the quick setting screen ¤ From the Status bar, swipe down using two fingers . . . The quick settings are displayed Volume set as in profile General ( p.
- Page 19 Getting to know your device Adding text ¤ Entering letters and symbols: Tap a key ¤ Entering uppercase letters: Tap the shift key ( ¤ Enabling/disabling Caps Lock: Double tap the shift key ( ¤ Showing umlauts: Touch and hold the key Whilst text is being entered, suggestions from the keypad dictionary are shown above the keypad.
-
Page 20: Configuring The Start Screens
Configuring the start screens Configuring the start screens You can create several start screens and configure them as you wish - to be able to quickly access favourite apps and content. Tailoring the Favourites bar At the bottom of every start screen is the Favourites bar, from which you are able to quickly access the apps you use most frequently. - Page 21 Configuring the start screens Adding a widget to a start screen Widgets are components that are specifically intended to be displayed on a start screen, e.g. a clock, a calendar extract for the current day, an important entry from the contact list or a direct dial.
-
Page 22: Notifications
Notifications Rearranging start screens ¤ Touch and hold a free space on a start screen . . . Images for the start screens are displayed in the background Touch and hold an image for a start screen Drag it to the left or right to the required position and release your finger Removing a start screen ¤... - Page 23 Notifications Settings for notifications Changing the default notification sound ¤ Settings Device – Sound & notification next to General Default notification sound Select a ringtone • If you do not wish to be disturbed, you can mute your device. No notification sound is then played.
-
Page 24: Apps
Apps Apps The apps available on the device are stored in the App menu. The device is supplied with a number of default apps. Additional apps from your mobile operator are installed as soon as you insert a SIM card. You can download and install more apps, or disable and uninstall existing apps. - Page 25 Apps Switching between apps ¤ in the Navigation bar . . . Recently used apps are displayed Tap the app you want to open Navigation bar: p. 17 Ending/exiting apps Exiting an app ¤ in the Navigation bar . . . The start screen is displayed. The app stays open and is included in the app overview.
- Page 26 Apps Preinstalled default Google apps The smartphone makes available many of the default apps from Google, including: Search Browse Internet and search smartphone Chrome Browser for surfing on the Internet Gmail Receive, write and send emails Maps Look for and find out about places in all corners of the globe YouTube Play YouTube videos and playlists Drive...
- Page 27 Apps Enabling Verify apps When the function is enabled, your device verifies apps when being installed, and regularly searches the device for potentially harmful apps. ¤ Settings Users – Google Security Verify apps – Enable the Scan device for security threats switch The following actions are possible when you install an app which is not from Google Play: •...
-
Page 28: Downloads
Downloads Downloads You can download files from websites onto your device. Downloaded files are stored mainly in the Downloads app. Content such as music, TV programs and books are generally not stored in Downloads but in the app with which the download was performed. Working with downloaded files ¤... -
Page 29: Fingerprint Sensor
Fingerprint sensor Fingerprint sensor The device has a fingerprint sensor ( p. 3). It enables for example the device to be unlocked using a fingerprint, purchases to be authorised, you to register with certain apps and opening of a contact quickly from idle mode. Setting up the fingerprint ¤... - Page 30 Fingerprint sensor Locking an app with a fingerprint Specify which apps can only be opened with a fingerprint. ¤ Settings Users – Fingerprint App-Sperre Use the alternative method for unlocking (pattern, PIN or password) . . . The app list is displayed Use the switch to enable/ disable apps to be opened only with a fingerprint The setting applies for all registered fingerprints.
-
Page 31: Do Not Disturb
“Do not disturb” “Do not disturb” The “Do not disturb” function mutes the device. It does not ring or vibrate. It prevents for example the phone ringing at night and during meetings, and all interruptions apart from a wake-up call. You can choose between three modes: Total silence (total silence) No ringtones, no vibrating, no audible signalling of wake-up calls or notifications, no sound for music, videos, games or other media. -
Page 32: Additional Functions
Additional functions Specifying important interruptions Specify events which are to be signalled acoustically in the Priority only mode. ¤ From the Status bar, swipe down using two fingers . . . The quick settings are displayed Do not disturb More settings Priority only allows Enable/disable events for Alarms, Reminders, Events and Repeat callers with the switch... - Page 33 Additional functions Sending files between a computer and the smartphone Use a USB cable to send photos, music, ringtones and other files between a computer and the smartphone. A computer detects the device connected via USB. It is linked in as a drive. Connecting the USB cable ¤...
- Page 34 Additional functions Printing Apps with a print function enable you to print from your device. A printer is available which is able to receive data over a WLAN connection or mobile network. Printing via apps The procedure for printing depends on the used app. ¤...
-
Page 35: Communication
Making calls Communication Making calls To make calls, use the Phone app. It is in the Favourites bar on the start screen by default p. 20). Making a call ¤ Phone . . . Enter the number ¤ . . . The dialpad is shown Type in the phone number Whilst a number is being entered, contacts with a potential matching phone number are displayed. - Page 36 Making calls Rejecting a call ¤ Display lock enabled: Touch the white circle and drag it to the left to the red circle ¤ No display lock: Tap Dismiss Rejecting a call and sending an SMS to the caller ¤ Touch the white circle and swipe it upwards to the message icon Select a predefined quick response or write your own message...
- Page 37 Making calls Merging two calls into a conference call One call active, one call on hold. ¤ Merge calls . . . The calls are merged Ending a conference call: Manage conference call . . . The phone numbers of those taking part are displayed next to the number to no longer take part in the conference call...
- Page 38 Making calls Setting tones and vibration ¤ Phone Settings Sounds and vibration . . . Changing the ringtone: Phone ringtone Select ringtone Vibrate for incoming calls: Enable option Also vibrate for calls Tones when tapping the dialpad: Enable option Dialpad tones More tone settings are available from app Settings p.
- Page 39 Making calls Call log The call log shows all outgoing, accepted and missed calls. Showing the call log ¤ Phone . . . The calls are listed with phone number, place and date. Arrow icons show the types of calls: Missed call Accepted call Outgoing call...
-
Page 40: Contacts
Contacts Contacts You can use the Contacts app to enter and organise all information on your contacts, such as different numbers, address, mail address and much more. Other apps, such as the Phone app, access the information and make it available where it is needed. Using contacts If you require frequent access to the contacts, move the Contacts app to the start screen... - Page 41 Contacts Adding a contact to a group: ¤ Tap the group Edit . . . All contacts belonging to the account are listed Tick the checkboxes next to the contacts to be assigned to the group A contact can belong to more than one group. Removing a contact from a group: ¤...
- Page 42 Contacts Editing the ME entry The first entry in the contact list is called Me. This is where you define details about yourself. If you have already entered a name for personalising your smartphone when getting started, this name is assigned to the Me entry. You can add more information to this name.
-
Page 43: Messages (Sms/Mms)
Messages (SMS/MMS) Messages (SMS/MMS) To send and receive messages, use the Messaging app. It is in the Favourites bar on the start screen by default ( p. 20). Instead of using Messaging as the standard app for sending and receiving messages, use Hangouts: ¤... - Page 44 Messages (SMS/MMS) Writing an MMS A multimedia message (MMS) can contain text, a picture, a recorded voice message, an audio file, a video, a slide show with images, a contact or an appointment. ¤ When writing a message, tap Select the required attachment . . . Pictures .
- Page 45 Messages (SMS/MMS) Responding to received messages When a new message arrives, you receive a notification and the icon is shown in the Notifications bar. ¤ Tap the notification . . . The message opens ¤ Messaging . . . The list of conversations is displayed Tap the new conversation ¤...
- Page 46 Messages (SMS/MMS) Opening message text for editing: ¤ Select text Edit message Deleting message from the conversation: ¤ Delete Confirm once again with Delete Deleting a conversation ¤ Messaging . . . The list of conversations is displayed Touch and hold one or more conversations Deleting all conversations ¤...
- Page 47 Messages (SMS/MMS) SMS settings ¤ Messaging Settings Text Message (SMS) . . . Requesting a delivery confirmation for sent text messages: ¤ Tick the checkbox next to Delivery reports Managing text messages stored on the SIM card: ¤ Manage SIM card messages . . . The messages stored on the SIM card are displayed ¤...
- Page 48 Messages (SMS/MMS) Settings for notifications about received SMS/MMS messages ¤ Messaging Settings Notifications . . . Showing notifications about new messages in the Notifications bar: ¤ Tick the checkbox next to Notifications Selecting the ringtone for notifications about new messages: ¤...
-
Page 49: Settings
Device Settings Device Language Set the language for the displays. ¤ Settings Users – Language & input Language Select the language Display Brightness Change the screen brightness or adapt it the surroundings. ¤ From the Status bar, swipe down using two fingers . . . The quick settings are opened ¤... - Page 50 Device Tones and volume Volume Change the volume for ringtone, music and alarm. Using the Volume button ¤ Press the Volume button on the right-hand side of the device . . . The slider bar for the volume opens Tap the arrow on the right next to the slider bar Set the volume using the slider bar...
- Page 51 Device Adding new ringtones Ringtone apps: Download and install ringtone apps from the Google Play Store Transferring a music file (MP3) from a computer: ¤ Use the USB cable provided to connect the device to a computer p. 33 ¤ Transfer the music file (MP3) to the Ringtones folder Setting rules for automatic muting Automatically mute the smartphone at certain times (”Do not disturb").
- Page 52 Device Enabling/disabling other tones Set whether tones are sounded or the device vibrates when the dialpad is used - for every touch when the display lock is enabled. ¤ Settings Device – Sound & notification next to General Enable/ disable the required option with the switch Power management To prolong the life of your smartphone as long as possible, the device has various ways to make best possible use of the battery capacity.
- Page 53 Device When Power Save mode is enabled, the upper and lower areas of the screen are shown in orange. Power Save mode ends automatically when the device is being charged. Using Intelligent Power Save mode In Intelligent Power Save mode, unused peripherals are disabled and system performance is optimised.
- Page 54 Device Other power and resource consumption settings ¤ Battery Manager Auto-start management Select the apps which may / may not be started automatically on system start Clean up background processes when in standby Select the apps for which background information is deleted when you switch to standby mode Clear background app Select the apps which may / may not be started in the background...
- Page 55 Device Device storage management with SD card The device detects SD cards with a storage capacity of 32 GB. Higher capacity cards (to 128 GB) can be used if formatted on the GS160 (not from a PC). ¤ Settings Device – Storage & USB . . .
- Page 56 Device Accessibility features For those with disabilities, there are a number of useful settings for adapting the usage of the smartphone to personal needs. ¤ Settings System – Accessibility Enable/disable or set up the required function Talk Back Enable spoken feedback for users with impaired vision. The device describes the controls the user touches.
-
Page 57: Security
Security Security Display lock The display lock protects the device from unauthorised use. When you switch the device on or enable the display, you are prompted to unlock the device. The display lock becomes active after a defined time after the device has switched to idle mode. A pattern, PIN or password is used as the display lock. - Page 58 Security Setting the time for automatic display lock The display lock is enabled once the device has been in idle mode for a certain time. ¤ Settings Users – Security Automatically lock Select the duration of idle mode Enabling the display lock when switching on and off ¤...
- Page 59 Security Protection in the event of theft If your smartphone is stolen, you are able to lock it and delete personal data remotely. For this, specify as emergency contacts the phone number(s) of one or more different smartphones, such as those of friends and family members. When the SIM card in your smartphone is swapped out, the emergency contact(s) receive(s) a message requesting the new phone number of the sender to be saved.
- Page 60 Security App permissions When downloading an app from Google Play, specify the functions and data to which this app has access, e.g. to contacts or your location. You can check and change permissions for apps on your device. With App permissions management, you have quick access to all permissions granted to apps on the device.
- Page 61 Security Checking and managing permissions App permissions management provides you a quick overview of all permissions. Specify for every app whether a permission is granted always (Always allow), never (Always deny) or only on request (Always ask). Enabling/disabling app permissions management: ¤...
- Page 62 Security Device administrators Device administrators are apps authorised to create a connection to your smartphone and to exchange data, for synchronisation for example. You can authorise this by setting up an account hosted by a business service, such as for an email, calendar or business app. ¤...
-
Page 63: Accounts And Location Detection
Accounts and location detection Installing client and CA certificates Install additional certificates from an SD card, internal storage, the Download folder or Google Drive. ¤ Save a certificate or keystore file on one of the media mentioned above. ¤ Settings Users –... - Page 64 Accounts and location detection Adding an account ¤ Settings Personal – Accounts Add account Tap the type of account you want to add Enter the account details. Follow the instructions on the screen Removing an account When an account is removed from a device, all associated content is also removed, such as emails, contacts and settings.
- Page 65 Accounts and location detection Location detection Apps with Location detection permission can use the device’s location information to offer location-specific services, such as check-in options, traffic information and nearby restaurants. Enabling/disabling location detection ¤ From the Status bar, swipe down using two fingers . . . The quick settings are displayed Tap ¤...
- Page 66 Accounts and location detection Managing location history When Location history is enabled, Google can also determine the device's location when no Google app is active. Location history information is stored in your Google account for all devices assigned to the account. ¤...
-
Page 67: Apps
Apps Apps Detailed information on working with apps p. 24 Default app If you have several apps with identical functions, you can select which app is used as standard for an action. For example, if you have downloaded from Google Play a different calendar or another app for making calls, you can make these the default apps. - Page 68 Apps Storage Internal storage used by the app. Freeing up storage: Tap Storage Clear data Freeing up temporary app memory: Tap Storage Clear cache Data usage Data volume downloaded or uploaded by the app over the mobile data network or WLAN p.
-
Page 69: Network Connections
Network connections Resetting app settings Reset all the changes made to app settings. ¤ Settings Device – Apps Reset app preferences Network connections The smartphone can establish connections to mobile networks, WLANs and other devices via Bluetooth. Mobile networks To make and receive calls with the smartphone over a mobile network, you require a SIM card from the relevant mobile network operator. - Page 70 Network connections Using two SIM cards ¤ Settings Wireless & networks – SIM cards . . . Detected SIM cards in slots 1 and 2 are displayed Enabling and disabling a SIM card: Enable/disable the switch Showing information: ¤ Tap an entry . . . The name of the SIM card, the colour used for the card, the mobile network operator and the phone number are displayed.
- Page 71 Network connections Establishing a connection to a WLAN ¤ From the Status bar, swipe down using two fingers . . . The quick settings are displayed the arrow under the WLAN icon ¤ Settings Wireless & networks – Wi-Fi . . . All WLANs within range are displayed. Networks protected by a password have a lock next to the icon.
- Page 72 Network connections Connection configuration Align the network settings to the requirements of the WLAN to be used to establish a connection. ¤ Settings Wireless & networks – Wi-Fi Touch and hold the network name Modify network Tap the down arrow next to Advanced options . . . Proxy If a connection to a WLAN is established over a proxy: Tap Proxy...
- Page 73 Network connections Data usage The data usage is the amount of data uploaded or downloaded by the device over a certain period over the mobile data connection or WLAN. Most tariffs include a restriction of data volume. So as not to incur any additional costs, you can check the data usage of the device and change it as required.
- Page 74 Network connections Other ways to reduce data usage Disabling automatic synchronisation When automatic synchronisation is enabled, the data of apps is updated automatically (such as contacts or appointments). Disabling automatic synchronisation: p. 64 Restricting the use of background data ¤ Settings Wireless &...
- Page 75 Enter the name of the device Ending a pairing: Forget Changing the Bluetooth name of the smartphone The smartphone can be seen by other Bluetooth devices under name Gigaset GS160. You can change this name. ¤ Settings Wireless & networks – Bluetooth...
- Page 76 Network connections Virtual Private Networks (VPN) A Virtual Private Network (VPN) enables you to connect the smartphone to your private or a company network. When you are out and about and have access to a WLAN, use the VPN connection to surf free of eavesdroppers, to make free calls over your landline number, and to access your mailbox or data in the company network.
- Page 77 Network connections Enabling/disabling “always-on” VPN With some VPNs, the device remains always connected when the VPN connection is not active. This is a sensible option when moving between insecure public WLANs. Enabling “always-on” VPN: ¤ When registering with a VPN, select option Save account information ¤...
- Page 78 Network connections Connecting a device to the WLAN hotspot Showing the network name and password on the smartphone: ¤ Settings Wireless & networks – More Tethering & portable hotspot Fi hotspot Set up Wi-Fi hotspot Tap Show password . . . The network name and password are displayed Connecting to the hotspot on the other device: ¤...
-
Page 79: System
System System Date and time ¤ Settings System – Date & time . . . Automatic setting The date and time are set automatically using a time server: ¤ Automatic date & time Select the source (network or GPS) Disable it and set the date and time manually Manual setting ¤... - Page 80 System Downloading Android updates You will be informed when a new Android system update is available for your device. Updates use up power and entail high data volumes. So before an installation, check the battery charge level ( p. 52) and data usage p.
- Page 81 System ¤ Backup account Add account Enter the PIN, pattern or password Enter the account details You can set up more than one backup account. Restoring data and settings Restore data backed up with the Android Backup Service. ¤ Settings Personal –...
-
Page 82: Appendix
Country-specific requirements have been taken into consideration. We, Gigaset Communications GmbH, declare that this device meets the essential requirements and other rel- evant regulations laid down in Directive 1999/5/EC. - Page 83 Manufacturer's advice Waste and environmental protection Correct disposal of this product (Directive for electric and electronic equipment (WEEE)) (Applicable in countries with waste separation systems) This label on the product, accessory or in documentation indicates that the product and its electronic accessories (such as charger, headphones and USB cable) may not be disposed of in household waste.
-
Page 84: Icons
Icons Icons Status bar and quick settings Battery charge status / battery is charging WLAN connection enabled. The receive quality is shown on four levels. WLAN connection disabled. Bluetooth enabled / disabled Mobile connection enabled. The receive quality is shown on four levels. Mobile connection disabled / no SIM card inserted VPN connection active Data connection enabled / disabled... - Page 85 Icons Notifications App authorisation management Missed call New text message New email New SD card detected Screenshot created USB cable connected / USB tethering enabled WLAN hotspot activated Multiple tethering connections activated (USB and/or WLAN) Data downloaded / data uploaded Turbo download enabled Update for Google available / Google apps updated .
-
Page 86: Index
Index Index Audio profile Numerics ..... . . Quick setting ........ - Page 87 Index ..........Conference call Date format .
- Page 88 Index ..... . . IP address WLAN ....IP-V6 address WLAN .
- Page 89 Index ....Network connections ..... . . Network services .
- Page 90 Index ..........Notification tone Turbo download .
- Page 91 Issued by Gigaset Communications GmbH Frankenstr. 2a, D-46395 Bocholt © Gigaset Communications GmbH 2017 Subject to availability. All rights reserved. Rights of modification reserved. www.gigaset.com Google, Android, Google Play and other brands are trademarks of Google Inc.
Need help?
Do you have a question about the GS160 and is the answer not in the manual?
Questions and answers