
Related Manuals for LG LVC-SX811HM


Summary of Contents for LG LVC-SX811HM
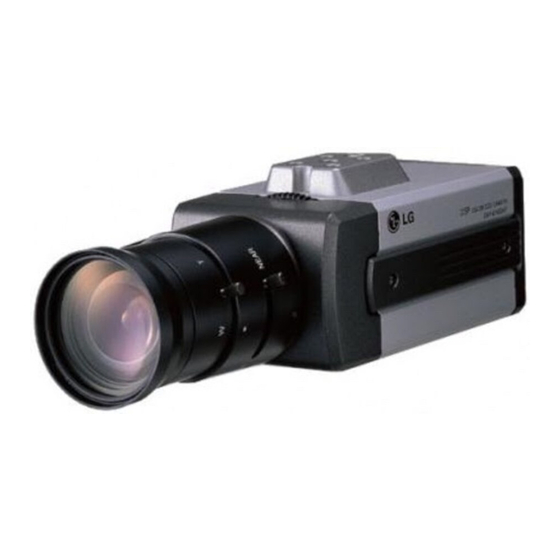
- Page 1 LVC-SX811HP_ENG_MFL-180 7/19/07 3:04 PM Page 1 LG Video Camera Instruction Manual Models : LVC-SX811HM LVC-SX811HP Before installing, operating or adjusting this product, please read this instruction booklet carefully and completely.
- Page 2 LVC-SX811HP_ENG_MFL-180 7/19/07 3:04 PM Page 2 REGULATORY INFORMATION: FCC Part 15 CAUTION This equipment has been tested and found to comply RISK OF ELECTRIC SHOCK with the limits for a Class A digital device, pursuant to DO NOT OPEN Part 15 of the FCC Rules. These limits are designed to provide reasonable protection against harmful inter- CAUTION: TO REDUCE THE RISK OF ELECTRIC SHOCK ference when the equipment is operated in a commer-...
- Page 3 LVC-SX811HP_ENG_MFL-180 7/19/07 3:04 PM Page 3 Warning: Do not install this equipment in a confined Disposal of your old appliance space such as a bookcase or similar unit. 1. When this crossed-out wheeled bin symbol is Warning: Wiring methods shall be in accordance with attached to a product it means the product is the National Electric Code, ANSI/NFPA 70.
- Page 4 LVC-SX811HP_ENG_MFL-180 7/19/07 3:04 PM Page 4 Important Safety Instructions 1. Read these instructions. - All these safety 7. Do not block any ventilation openings. and operating instructions should be read Install in accordance with the manufactur- before the product is operated. er's instructions.
- Page 5 LVC-SX811HP_ENG_MFL-180 7/19/07 3:04 PM Page 5 Important Safety Instructions 9. Do not defeat the safety purpose of the polarized or grounding-type plug. A polar- ized plug has two blades with one wider than the other. A grounding type plug has two blades and a third grounding prong.
-
Page 6: Table Of Contents
LVC-SX811HP_ENG_MFL-180 7/19/07 3:04 PM Page 6 Contents and Features Contents Features This color video camera is designed for use in mon- Part Names and Functions ....7-9 itoring system. -
Page 7: Part Names And Functions
LVC-SX811HP_ENG_MFL-180 7/19/07 3:04 PM Page 7 Part Names and Functions 1. Camera mounting bracket The bracket can be fixed at the top or bottom of the camera. (page 20) 2. Lens mount cap The cap is installed to protect the lens mount section. - Page 8 LVC-SX811HP_ENG_MFL-180 7/19/07 3:04 PM Page 8 Part Names and Functions 5. Power indicator Comes on when the power to the camera is on. 6. Power input terminal AC 24V / DC 12 V input terminal. This camera must always be operated a AC 24V / DC 12 V Certified/Listed, class 2 power sup- ply only.
-
Page 9: Part Names And Functions
LVC-SX811HP_ENG_MFL-180 7/19/07 3:04 PM Page 9 Part Names and Functions 10. Video output connector (BNC type) Connect this connector to a device such as a VCR or monitor with a VIDEO IN connector. 11. Function switches for manual setting To set functions, use these dip switches. 12. -
Page 10: Connections
LVC-SX811HP_ENG_MFL-180 7/19/07 3:04 PM Page 10 Connections Basic connection The peripheral devices (VCR, monitor, lens, etc.), AC adaptor and cables are not supplied. 1. Connecting the monitor Make the video signal connection between the camera and the monitor or time lapse VCR. 2. -
Page 11: Mounting The Lens
LVC-SX811HP_ENG_MFL-180 7/19/07 3:04 PM Page 11 Mounting the Lens 1. Remove the lens mount cap from the camera. 2. Install the auto-iris lens. 2-1. CS mount type lens Carefully align the lens mount with the camera opening, then turn the lens slowly to install it. 2-2. - Page 12 LVC-SX811HP_ENG_MFL-180 7/19/07 3:04 PM Page 12 Mounting the Lens Pin layout for the lens iris output connector Rewire the lens iris plug 1. Cut off the plug of the lens cable, cut off approximately 8mm of the insulation, and then strip approximately 2mm of the ends of the cable sheaths.
-
Page 13: Concerning Auto-Iris Lenses
LVC-SX811HP_ENG_MFL-180 7/19/07 3:04 PM Page 13 Concerning Auto-Iris Lenses DC type auto-iris lens ELC type auto-iris lens A lens without driver circuit that operates only on Use a manual or fixed iris lens (Set the ALC Lens a DC power source. In general, this type of lens is Setting Switch to the ELC position.) referred to as DC type coil lens. -
Page 14: Concerning Auto-Iris Lenses
LVC-SX811HP_ENG_MFL-180 7/19/07 3:04 PM Page 14 Concerning Auto-Iris Lenses VIDEO type auto-iris lens A lens with amplifier circuit that operates on video signal and DC power source. In general, this type of lens is referred to as EE amplifier type lens. ALC and LEVEL volume level controls are available on the lens for iris adjustments. -
Page 15: Function Switch Settings
LVC-SX811HP_ENG_MFL-180 7/19/07 3:04 PM Page 15 Function Switch Settings Name Position Function Effect Auto tracking White Balance White Balance White Balance Hold HOLD AGC level varies from 10dB to maximum 30dB (Auto Gain Control) 10dB (Max.) Sets to this position when strong light comes in behind the target (Back Light Compensation) -
Page 16: Day&Night Function Settings
LVC-SX811HP_ENG_MFL-180 7/19/07 3:04 PM Page 16 Day&Night Function Settings Auto Mode Night Lock function in Auto mode The D&N Auto function is fixed to night mode. The D&N function is activated automatically. Close the connected External S/W for this funciton. Notes : •... -
Page 17: Day&Night Function Settings
LVC-SX811HP_ENG_MFL-180 7/19/07 3:04 PM Page 17 Day&Night Function Settings Manual Mode Night function When you close the external S/W, the D&N funciton You can set the D&N function manually. is set to night mode. Day function When you open the external S/W, the D&N funciton is set to Day mode. -
Page 18: Line Lock Phase Adjustment
LVC-SX811HP_ENG_MFL-180 7/19/07 3:04 PM Page 18 Line Lock Phase Adjustment When using a camera switcher to connect 2 ➀ ② cameras or more to one monitor, there may be a vertical jump of the images when switched. In such a case, refer to the below. - The vertical sync phase can be manually adjusted within the range approximately from -90 C to... -
Page 19: Flange-Back Adjustment
LVC-SX811HP_ENG_MFL-180 7/19/07 3:04 PM Page 19 Flange-back Adjustment The adjustment is required only when a lens with- 1 Loosen the flange-back fixing screw on the out focus-adjusting mechanism is mounted, or flange-back adjusting ring. when a lens with adjusting mechanism is mounted 2. -
Page 20: Installation Of Camera
LVC-SX811HP_ENG_MFL-180 7/19/07 3:04 PM Page 20 Installation of Camera The bracket (optional) can be installed to either the top of the camera as desired. When changing the position of the camera mounting bracket, you should always reuse the screws that have been removed. -
Page 21: Specifications
LVC-SX811HP_ENG_MFL-180 7/19/07 3:04 PM Page 21 Specifications Model LVC-SX811HM LVC-SX811HP Signal System NTSC Total/Effective Pixels 410K/380K 470K/440K Pick-Up Device 1/3 - Inch Interline Color CCD(Super HAD) Lens C / CS MOUNT (Adapter Ring Mount for C Lens: Optional) Iris Control... - Page 22 LVC-SX811HP_ENG_MFL-180 7/19/07 3:04 PM Page 22 Specifications Model LVC-SX811HM LVC-SX811HP Gain Control ON (Max. 30dB) / OFF (Max.10dB) (with DIP Switch) Flickerless ON / OFF (with DIP Switch) White Balance AWB / Hold (White Balance Hold) Exposure Automatic control with DC Iris meter / Video Iris meter / Auto Electronic Shutter (Max.
- Page 23 LVC-SX811HP_ENG_MFL-180 7/19/07 3:04 PM Page 23 P/NO : MFL30580180...
Need help?
Do you have a question about the LVC-SX811HM and is the answer not in the manual?
Questions and answers