Advertisement
Quick Links
Troubleshooting
AC Power LED (blue), Charge Mode LED or Charge Monitor LEDs are not ON.
Check for loss of AC power at the 240 VAC outlet. Confirm GFCI (Ground Fault Circuit
Interrupter) has not tripped. Check with a meter or 240 VAC test light that AC power is present
at the end or in your extension cord. Reset AC power if it was not present. Confirm all charger
cables are installed with the correct polarity connections at each battery and that all connec-
tions are clean and tight. Wait for 2 minutes until the unit completes analyzing stage.
System Check OK LED (green) is OFF and Troubleshoot LED (bank1, bank2 or
bank3) is ON (red).
Identify the battery bank LED that is lit, remove AC power and check the battery bank indicated,
for example bank 1, bank 2 or bank 3 (model specific). The LED indicates there is a fault
present. Below are listed typical faults and instructions on how the fault status can be solved:
Note: After making any corrections, reapply AC power.
Poor battery connections - Make sure all connections are tight and clean.
Blown DC cable fuse - Use the ohm meter or continuity tester to make sure all
fuses are healthy and visually inspect the DC battery cables to ensure they have
not been compromised or shorted in any manner.
Reverse polarity - Make sure all wiring connections are color coded and connected properly
and that each bank cable goes to one 12V battery where (+) = red and (-) = black.
Battery too low to charge - Using a digital voltmeter, make sure the battery is over 2.5 volts
DC. If not, have your battery charged out of the boat and have it load tested by your local
battery dealer to ensure it is safe to charge and that the battery is capable of holding a charge.
High battery voltage input - Make sure a bank lead has not been spread across 2 batteries
connected in series for 24 volts DC. If so, correct by following the wiring diagrams on pages 13-20.
Battery(s) not charging, AC Power LED (blue), Charge Mode LED (red)
and Battery Monitor LEDs are ON
Confirm all charger cables are installed with the correct polarity connections at each
battery, and that all connections are clean and tight. Confirm that there are no bank
Battery Trouble Status LED indicators on. With the charger on, read DC voltage at each
battery. If any of the readings are less than 12.8 volts DC, proceed with the following:
AC
240 VAC
A.Disconnect
power at the
13-20
B.Refer to pages
in this manual and confirm your charger is connected
correctlyto the battery based on the wiring diagram in Installation section.
C. After completing step B, plug your charger into
LED
should be in the charging mode (charging
completely depleted, after completing a full charging cycle that may take up to
LED
maintaining
(green) under Charge Mode and 5 Charge Monitor
Note: If a Digital Volt Meter (DVM) is available to you, instead of waiting to complete a full charging
cycle, you can simply use a DVM and take DC voltage measurements across each 12 volts battery.As
long as the voltage continues to increase while the fast charging LED (red) under Charge Mode is on,
this will serve as a confirmation that the charger is properly connected and is properly charging.
outlet.
AC p
LED
ower and observe the
display. Charger
under Charge Mode is red). In case the batteries were
10~12
hours or more,
LEDs
(green) are also illuminated.
23
Battery Charger
Models
Volts*
A mps
MB3616 12 Amp
12
12
MB3617 20 Amp
12
20
*For use with trolling motor DC voltages.
IMPORTANT INFORMATION
Make sure to save and read all safety, operating and installation instructions prior
installing or applying AC power to your Battery Charger.
This product is designed for 12 Volt Flooded and AGM (Absorbed Glass Mat) Lead
Acid batteries. Do not use with any other type of batteries, such as 4D and 8D large
capacity batteries. For other applications, please refer to our website.
Specification
MB3616
Input Voltage: 240VAC
Output Voltage: 12/24V
Input Current: 1.89A
Output Current: 12A @ 12VDC
6A @ 24VDC
Efficiency: 80%
IP Rating: IP68
Cable Length: 1.8m
Dimensions: 262(L) x 176(W) x 72(H)mm
Max.qty of 12V
Batteries
AC in
2
240VAC +/-10% 50 Hz
3
240VAC +/-10% 50 Hz
MB3617
Input Voltage: 240VAC
Output Voltage: 12/24/36V
Input Current: 3.13A
Output Current: 20A @ 12VDC
10A @ 24VDC
6.6A @ 36VDC
Efficiency: 80%
IP Rating: IP68
Cable Length: 1.8m
Dimensions: 321(L) x 176(W) x 72(H)mm
Advertisement

Related Manuals for PowerTech MB3616


Summary of Contents for PowerTech MB3616
- Page 1 AC in Battery too low to charge - Using a digital voltmeter, make sure the battery is over 2.5 volts MB3616 12 Amp 240VAC +/-10% 50 Hz DC. If not, have your battery charged out of the boat and have it load tested by your local...
-
Page 2: Introduction
MAINTENANCE Introduction Thank you for purchasing the Marine Battery Charger. Our products have been designed and manufac- Item: AC Power Cord tured to meet the harsh environmental, mechanical and electrical conditions that are present in the Process: Visually inspect the AC power cord. Confirm ground blade is present marine industry. - Page 3 Table of Contents Charging Your Batterie Your battery charger is designed to charge, condition, and auto maintain your Introduction batteries during short or long term periods of storage or non use. Please follow CAUTIONS, WARNINGS AND SAFETY INSTRUCTIONS these steps each time you use your charger: General Overview 1.
- Page 4 Typical Wiring Safety Instructions Important Safety Instructions Fig. 7 One Bank Charger for one 12V Battery ABOUT SAFETY INSTRUCTIONS The important safety and operating instructions described in this manual apply Dedicated 12 VDC Trolling Motor, House or Engine Battery Configuration for the Battery Charger.
- Page 5 Safety Instructions Typical Wiring After connecting the extension cord to the charger, proceed to plug the Fig. 6 Two Bank Charger for two 12V Batteries in Parallel extension cord into a nearby 240 VAC GFCI protected (Ground Fault Circuit Interrupt) outlet. Below are manufacturer suggestions for the right size UL or CSA Approved Dedicated 12 VDC Parallel Trolling Motor or House Configuration grounded extension cord.
- Page 6 Typical Wiring Safety Instructions screw in the center of the outlet plate is grounded. The green-colored rigid ear or Fig. 5 Two Bank Charger for two 12V Batteries lug extending from the adapter must be connected to a properly grounded outlet. If necessary, replace the original outlet cover plate screw with a longer screw that Dedicated 24 VDC Trolling Motor Battery Configuration with (2) 12 VDC will better secure the adapter ear or lug to the outlet cover plate and enable...
- Page 7 Safety Instructions Typical Wiring NEVER charge a frozen, damaged or leaking battery. Fig. 4 Two Bank Charger for two 12V Batteries Keep other persons, children and pets away from the batteries and your charger during its operation to avoid serious injury, death, fire or explosion. 12 VDC Trolling Motor or House Battery Configuration with a Dedicated 12 VDC Engine Start Battery PREPARING TO CHARGE A BATTERY...
- Page 8 Typical Wiring Safety Instructions b. DC CONNECTION PRECAUTIONS Fig. 3 Three Bank Charger for three 12V Batteries CAUTION Connect and disconnect the DC output cables only after removing AC cord from Dedicated 36 VDC Trolling Motor Battery Configuration with (3) 12 VDC Batteries an electric outlet.
-
Page 9: General Overview
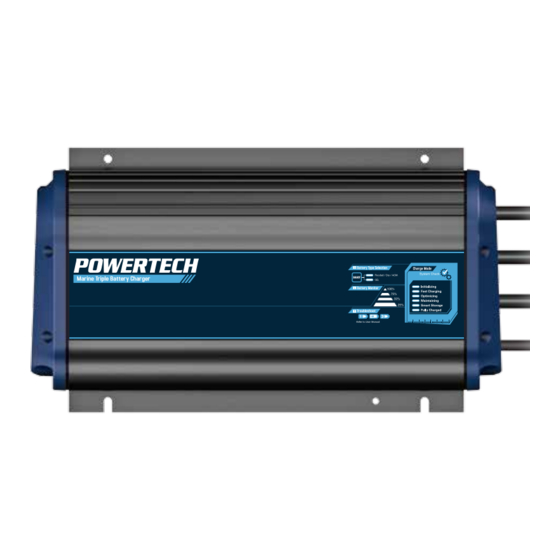
General Overview Typical Wiring Your battery charger features a clean geometric design executed with a heavy duty Fig. 2 Three Bank Charger for three 12V Batteries extruded aluminum housing allowing for increased power and performance. Incorporation of microprocessor and software control adds the latest pulse charging 24 VDC Trolling Motor or House Battery Configuration with (2) 12 VDC Batteries technology resulting in cooler operation and faster charge times. -
Page 10: Getting Started
Typical Wiring Getting Started Follow the guidelines provided in this manual to install your Battery Charger. Fig. 1 Three Bank Charger for three 12V Batteries The battery charger will automatically fully charge and condition your batteries to ensure your batteries last a long time and you get the most out of them. When you Dedicated 12 VDC Trolling Motor or House Battery and 2 Engine Crank Batteries are not at home, always leave your charger plugged in to reduce sulfate build-up Typical Configuration... -
Page 11: Getting Started
Getting Started Installation Smart Storage LED (pulsing green):Smart Storage green LED fades in and out Instructions on Wiring your Charger when performing the storage recondition procedure to your battery(s) The wiring diagrams slightly vary depending on how many banks the charger model supports. -
Page 12: Installation
Installation Installation are located 4 inches from the end of each red (positive) cable. In addition,there Your battery charger is designed to be permanently mounted on-board, and can be are fuses in all but one of the black (negative) leads. These fuses protect mounted either vertically or horizontally.
Need help?
Do you have a question about the MB3616 and is the answer not in the manual?
Questions and answers