
Related Manuals for Belling IB609PYRO


Summary of Contents for Belling IB609PYRO
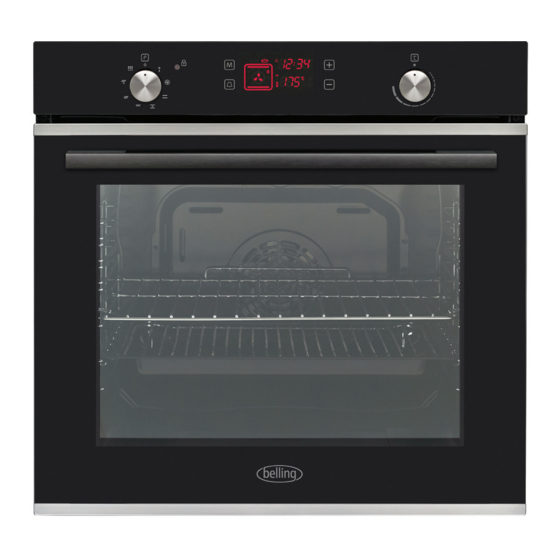
- Page 1 IB609PYRO Built-in 60cm Multi-function Pyrolytic Oven with Visio Display INSTRUCTION MANUAL PLEASE READ THE INSTRUCTION MANUAL CAREFULLY BEFORE USING THE UNIT. www.belling.com.au...
-
Page 2: Table Of Contents
CONTENTS WARNINGS AND PRECAUTIONS PARTS AND ACCESSORIES OPERATION Before First Use Controls Functions Thermostat Visio Display Accessories Cooking Guide CLEANING AND MAINTENANCE Cleaning Maintenance Disposal INSTALLATION Location and Dimensions Wiring TECHNICAL & REFERENCE DATA Model Specifications Warranty www.belling.com.au... -
Page 3: Warnings And Precautions
WARNINGS & PRECAUTIONS IMPORTANT INFORMATION Prior to installation, ensure the local distribution conditions (electricity voltage and frequency) and the requirements stated on the label of the appliance are compatible. CAUTION • Install this oven only in accordance with the installation instructions provided. This appliance should only be installed by a qualified technician. - Page 4 It is hazardous for anyone other than an qualified service agent to carry out any service or repair operation. Having repairs undertaken by anyone other than a Belling certified service agent will make your warranty void. • This appliance is not intended for use by persons (including children) with...
-
Page 5: Parts And Accessories
PARTS AND ACCESSORIES 1. Control panel 2. Handle 3. Door glass 4. Tray 5. Lower Heating Element 6. Upper Heating Element 7. Wire Grill 8. Racks 9. Oven light 10. Turbo Heating Element 11. Fan 12. Air Outlet Shutters... -
Page 6: Operation
OPERATION BEFORE FIRST USE • Please read these instructions carefully before use and keep them for future reference. • Remove any protective films from the appliance surfaces and all materials from the carton and oven cavity. 1. Remove all accessories and wash out the cavity. 2. -
Page 7: Controls
OPERATION CONTROLS Oven function Time setting/Lock Mode Timer/Clock Function Control Knob Temperature Thermostat Control Knob Alarm Time setting/Tone selector FUNCTIONS Pyrolysis Defrost Fan Grill Fan Forced Conventional Dual Grill Single Grill Intensive Bake Oven Light The light remains on during all functions. Defrost The fan starts operating. -
Page 8: Conventional Oven
OPERATION Fan Forced The ring heating element and fan will start operating. This function evenly disperses the heat in the oven. All foods on racks will be cooked evenly. It is recommended to pre-heat the oven for approximately 10 minutes. Conventional Oven The lower heating elements and upper heating elements will start operating. -
Page 9: Dual Grill
OPERATION Dual Grill The grill heating element and upper heating elements will start operating. This function is ideal for faster grilling and for covering a larger surface area, such as grilling meats. Use the upper shelves of the oven. Lightly brush the wire grid with oil to stop foods sticking. -
Page 10: Thermostat
OPERATION The area around the oven should be well ventilated, close any doors leading into the area to avoid smells and fumes emanating throughout the house. For duration of the cycle the oven door will become hot, children should be kept away. If you have a hob fitted above the oven it is advised you do not use it while the pyrolytic cleaning function is operating, as overheating can occur and cause damage to both appliances. -
Page 11: Minute Minder
OPERATION Minute Minder Press the , 00:00 will appear and the will flash on the display. Press the to adjust alarm time. When at the desired length of time, leave and the timer will begin. The on the display will be lit continuously to indicate the alarm is set. Press mode at any point to see the amount of time left on the minute minder. -
Page 12: Accessories
OPERATION Lock The lock is used to avoid unintentional changes being made to the oven settings. Press and hold the until the appears on the display. To unlock, repeat. While the lock is active, only the power button will be usable, all other buttons will remain locked. -
Page 13: Cooking Guide
OPERATION COOKING GUIDE Fan-forced Conventional Dishes Shelf Cook Time Thermostat Shelf Cook Time Thermostat (°C) Position (min) (°C) Position (min) Layered Pastry 170 – 190 1, 2 or 3 35 – 45 170 – 190 1 or 2 35 – 45 Cake 150 –... -
Page 14: Cleaning And Maintenance
CLEANING & MAINTENANCE CLEANING Use cream cleaners or liquid cleaners, which do not contain particles. Do not use caustic creams, abrasive cleaning powders, rough wire wool, sharp metal scrapers or hard tools as they may damage the surfaces of the appliance. - Page 15 CLEANING & MAINTENANCE Oven Door Removal The door of your oven can be removed for cleaning purposes. 1. Ensure the oven hasn’t been used recently so it is cool to touch. Open the oven door. 2. Unscrew the saddle bracket up to the end position, this will require a screwdriver.
-
Page 16: Maintenance
CLEANING & MAINTENANCE MAINTENANCE Troubleshooting Scenario Possible Cause Response / Remedy Oven light not lit. Globe may be broken. Check globe.* Uneven cooking. Rack positions or cooking setting Check rack positions, are incorrect. cooking period and heat settings are set according to table on pg. -
Page 17: Installation
INSTALLATION • This appliance is NOT intended for use in commercial environments. • Please observe the installation instructions provided and note that this appliance should only be installed by a qualified technician. Incomplete or improper installation could lead to safety issues and make your warranty void. •... - Page 18 INSTALLATION The diagram shows the required space for wall cabinets and exhaust fans above the built-in appliance as well as the minimum heights from the oven board. The exhaust fan should be at a minimum height of 65cm from the hob board. If there is no exhaust fan the height should not be less than 70cm.
-
Page 19: Wiring
INSTALLATION Fully insert the appliance into the cabinet and centre it. Open the oven door and insert 2 screws in the holes located on the oven frame. While the product frame touches the surface of the cabinet, tighten the screws. Contact with electrical or insulated parts must be prevented. -
Page 20: Technical & Reference Data
TECHNICAL & REFERENCE DATA MODEL NO. IB609PYRO Rated Voltage 220 - 240V ~50Hz Rated Input Power (Maximum) 3100W Oven Capacity External Dimensions (HxWxDmm) 595 x 595 x 575 Net Weight (kgs) 31.85 WARRANTY The warranty period is 3 years from the date of purchase in Australia and 2 years from the date of purchase in New Zealand.
Need help?
Do you have a question about the IB609PYRO and is the answer not in the manual?
Questions and answers