Advertisement
Quick Links
3001
For DOLPHIN caddy assembly
see page 4
Minimum 3 m. [10 ft]
G. F. I.
READ CAREFULLY BEFORE USING YOUR DOLPHIN ROBOTIC POOL CLEANER
DOLPHIN CADDY ASSEMBLY INSTRUCTIONS
Insert the wheel assembly (c-1 p.4) firmly into the groove underneath the yellow base ensuring it
Fig
is centered with a plastic washer (c-2 p.4) on each side.
A
Insert the 2 metal pipes (c-3 p.4) into the holes at the top of the white Caddy tower (c-4 p.4) until
they clip onto the wishbone clips in the studs at the base of the tower.
Fit the 2 hooks (c-5 p.4) to the top of the pipes until they clip into the wishbone clips.
Fit the top of the handle (c-6 p.4) in the upright position (see diagram) until it clips on the wishbone
clips in the hooks. Fig A.
INSTALLATION
The caddy and power supply (#1 p.5) should be positioned so that the DOLPHIN can reach all the
Fig
walls of the swimming pool. It must be in the shade and at a minimum distance of 10 ft (3 meters)
B
from the edge of the pool. Fig B.
Use only the original DOLPHIN power supply.
The power supply has been tested, and ETL approved (to UL1012 standard) for outdoor use.
Do not submerge power supply.
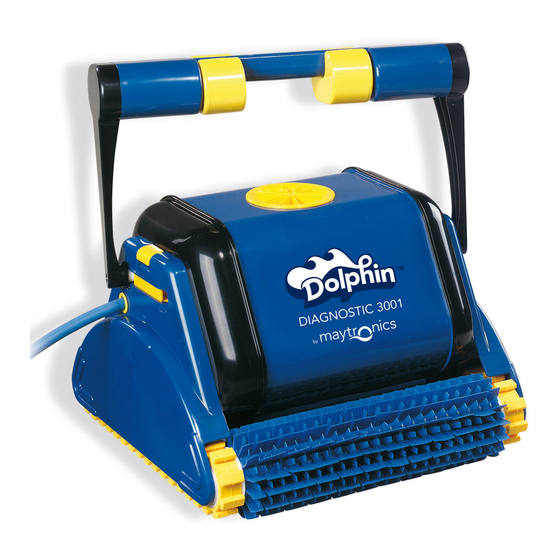
HANDLE
Fig
C
The DOLPHIN features an adjustable handle (#2 p.5) that is fitted into slots on each side of the
DOLPHIN body. This handle must be locked in a diagonal position across the top of the DOLPHIN
body in order to ensure optimum cleaning results.
Press downwards on each yellow latch (#3 p.5) to move each handle arm. Fig C.
To avoid cable coiling and for the most efficient cleaning pattern, reverse handle position after each
use. Fig D.
OPERATION
Fig
AVOID ENTERING THE SWIMMING POOL WHILE THE DOLPHIN IS IN OPERATION
D
• Connect the cable (#4 p.5) to the power supply.
• Properly line up notch and groove, push cable in firmly before closing screw collar.
• Place the DOLPHIN in the pool. Fig. E.
• Rock from side to side, releasing trapped air, until the DOLPHIN sinks slowly to the bottom
of the pool.
• Connect the power supply to a protected grounded outlet and switch on.
Caution: Do not operate the DOLPHIN out of water. This may result in extensive damage to the
Fig
pump motor seals, thus voiding the warranty.
E
• Optimum water temperature for the DOLPHIN is 64˚F-90˚F (18 ˚C-32 ˚C).
1
Advertisement

Related Manuals for Dolphin 3001


Summary of Contents for Dolphin 3001
- Page 1 Fig A. INSTALLATION The caddy and power supply (#1 p.5) should be positioned so that the DOLPHIN can reach all the Minimum 3 m. [10 ft] walls of the swimming pool. It must be in the shade and at a minimum distance of 10 ft (3 meters) G.
-
Page 2: Automatic Shutdown
• Change the position of the handle by pressing downwards on the yellow latches and locking the handle in the opposite diagonal position. • Store the Dolphin upright on the Caddy and coil the cable loosely around the Caddy hooks. Fig. L. • Store the Dolphin in a dry, shaded place Fig. K. -
Page 3: Important Tips
An additional cleaning cycle, with the handle in the reverse diagonal, may be necessary to clean entire pool. • When first used the Dolphin may climb too high and suck in air when it reaches the waterline. If so, remove the yellow handle fioats by pushing them downward. Fig M. - Page 4 DOLPHIN CADDY ASSEMBLY • Store the Dolphin upright on the Caddy and coil the cable loosely around the Caddy hooks.
- Page 5 DOLPHIN ASSEMBLY...
- Page 6 • Air caught in filter bag • Turn Dolphin upside-down under water or machine-wash filter bag Note: Operating the Dolphin out of the water will void warranty. Dolphin Customer Support 866-730 9880 Monday to Friday 8.30 to 5.30 Eastern Time or email to customersupport@smartpool.com .
Need help?
Do you have a question about the 3001 and is the answer not in the manual?
Questions and answers