Table of Contents
Advertisement
Quick Links
Advertisement
Table of Contents

Subscribe to Our Youtube Channel
Related Manuals for Vitus Audio MP-L201


Summary of Contents for Vitus Audio MP-L201
- Page 1 MP-L201 Owner’s Manual...
-
Page 2: Table Of Contents
Connecting the MP-L201 . . . . 14 liabilities can be accepted for MP-L201 rear panel . . . . . . . 15 MP-L201 Specifications . . . . . 33 errors . - Page 3 Example 2 .2 . . . . . . . . . . . . 63 MP-L201 Inside view . . . . . . . 76 RC-010 System Remote .
-
Page 4: On A Personal Note
Certificate Model: MP-L201 Product ID/Serial __________________________________ Product Build Date __________________________________ Signed __________________________________ All products details, specifications and measurements are recorded for your MP- L201 and kept by Vitus Audio . MP-L201 | Version 1... -
Page 5: From The Creator
Vitus Audio This way we always try to super dynamic reproduction MP-L201 Line Stage, we push the limits and explore without “loosing” the nerve are sure you will enjoy it for the unexplored . As a result in the music which often is many years to come . -
Page 6: About This Manual
About this manual Introduction to the Masterpiece Series This is your MP-L201 owner’s manual . The following pages The Vitus Audio Masterpiece will describe, as clearly Series is a true high-end series as possible, how to get of products, which is build on... - Page 7 Remember for any damage that also that condensation is a consequence of can form when you uncareful handling of move the amplifier from the unit. a cold place to a warm room. MP-L201 | Version 1...
-
Page 8: Getting Started
. Now remove the side protective foam, this will make it easier Foam Sides to grab hold of the MP-L201 . 6 pieces Two people carefully lift the amplifier out of the box, and put it directly onto the floor . -
Page 9: Mp-L201 Device Overview
1. getting started MP-L201 device overview The body of the MP-L201 is constructed of anodized aluminium . Material: anodized aluminium . Dimensions (H x W x D): 130 x 435 x 430 Weight: 20 KG 435 mm Figure 2 Device overview... -
Page 10: Unpacking The Box Mp-Psu
. MP-PSU Store the empty box and the protective foam for later use . Foam bottom What’s in the box MP-PSU Andromeda Power Cord Foam top Foam Sides 6 pieces Foam bottom Box exploded view MP-L201 | Version 1... -
Page 11: Mp-Psu Device Overview
The body of the MP-PSU is constructed of anodized aluminium . Material: anodized aluminium . Dimensions (H x W x D): 130 x 435 x 430 Weight: 30 KG 435 mm Figure 2 Device overview MP-L201 | Version 1... -
Page 12: The Topology Of The Volume Control
1. getting started The topology of the volume control. The topology of the volume To prevent pop in the output, control used in the MP-L201 we have chosen to first add is very different compared the new shunt resistors, and to the “standard”... -
Page 13: Connecting
2. connecting Turning the MP-L201 on and off. Always turn on the products beginning from the source: CD-Player a pre-amplifier a power amplifier. Always turn off your products in reverse order: Power amplifier a pre-amplifier a CD-Player Not following this procedure, may cause damage to any of your products/speakers. -
Page 14: Connecting The Mp-L201
Moving and transporting MP-L201 the MP-L201 Always follow this procedure. Place the MP-L201 on its shelf . Connect all the sources to 1. Turn the MP-L201 off. the inputs of the MP-L201, 2. Disconnect the mains power supply Connect the outputs of the (take the andromeda cable out). -
Page 15: Mp-L201 Rear Panel
2. connecting MP-L201 rear panel Inputs. Input 1,2,3 . XLR XLR in Input 4,5 RCA RCA in PSU Right / Left DC in Outputs Output 1,2, XLR (R+L) XLR out (L+R) Output 3,4 RCA (R+L) S/PDIF) RCA out ( Ground/Earth... - Page 16 2. connecting NEUTRIK NEUTRIK NEUTRIK NEUTRIK NEUTRIK NEUTRIK MAINS Master piece Series Handcrafted in Denmark External Powersupply for: By Vitus Audio an MP-P201 and MP-L201 AVA Group Company Denmark PSU Right PSU Left PUSH PUSH NEUTRIK NEUTRIK MP-PSU Rear panel .
- Page 17 PUSH PUSH PUSH PUSH PUSH NEUTRIK NEUTRIK NEUTRIK NEUTRIK NEUTRIK NEUTRIK MP-L201 Rear panel . MAINS Master piece Series Handcrafted in Denmark External Powersupply for: By Vitus Audio an MP-P201 and MP-L201 AVA Group Company Denmark PSU Right PSU Left...
-
Page 18: Operation
This is the mode you use when INPUT + listening to music . 2. Menu mode In this mode you can alter the settings of the MP-L201 . 3. Standby mode. In this mode the controls of STANDBY POWER the MP-L201 are deactivated . -
Page 19: Functions - Mp-Psu Front Panel
Switches the MP-PSU on and off . In Standby Mode the power to the MP-L201 is cut off . The MP-PSU itself does not shut down, it is in a sleep mode, this in order to maintain an optimal working temperature... -
Page 20: Functions - Mp-L201 Left Front Panel
3. operation Functions – MP-L201 left front panel INPUT M P - D MENU SELECT MUTE STANDBY MP-L201 Left front panel . Figure 6 Normal mode Menu mode In normal mode there are You enter menu mode, by 3 basic functions/buttons pushing the ”MENU”... -
Page 21: Functions - Mp-L201 Right Front Panel
3. operation Functions – MP-L201 right front panel INPUT M P - D MENU SELECT MUTE STANDBY MP-L201 Right front panel . Figure 7 Normal mode Menu mode In normal mode there are In the text-menu it is possible 3 basic functions/buttons... -
Page 22: Mp-L201 Menu: Introduction
RESET V .INIT BRIGHT FILTER the output signal, for example if INPUT you want to use the MP-L201 for RESET bi-amping . Restore the settings of the MP- L201 to its default settings . Volume settings The MP-L201 starts up in the same volume step on initialization . -
Page 23: Input Settings
. You can adjust Each time you initialize the the sensitivity of each input MP-L201, the last saved setting between ≤ 2 Vrms, ≤ 4 Vrms is restored . You can manually and ≤ 8 Vrms . to minimize save a setting by pressing the these differences . -
Page 24: Mp-L201 Menu
. Even when after the power dB step . (Input X is now locked to cord has been disconnected the a dB step and can not be adjusted MP-L201 still starts up in the new with the volume control) volume step . ADJUST... - Page 25 3. operation MENU LEAVE MP-L201 menu structure SETUP BACK DATA RESET RES: NO / RES: YES V.INIT VOL.STEP -99 dB / +6 dB REMEMBER BACK BRIGHT 0 / 3 FILTER OUT 1 OUT# ON / OUT# OFF OUT 2 OUT 3...
-
Page 26: Operation & Service
. There are potentially contain no user serviceable dangerous voltages present parts except from the mains inside . Should your MP-L201 fuse . Should your MP-L201 show signs of malfunction, show signs of malfunction, then please contact your please contact your dealer or dealer or Vitus Audio . -
Page 27: Mains Fuses
. In case of guarantee . malfunction the unit must be returned to Vitus Audio for For an explanation of how to replace the repair . fuse see “Replacing a blown fuse”chapter 4 . -
Page 28: Replacing A Blown Fuse
. the fuse carrier Pull out the fuse carrier . Remove the blown fuse(s) . Fit new fuses into the fuse carrier . Figure 9 Replacing a blown fuse MP-L201 | Version 1... - Page 29 Positioned the new fuses Push the fuse carrier back into The fuse carrier is in place straight-up in the fuse carrier . the back of the MP-L201 . when you hear “CLICK” . Figure 9 Replacing a blown fuse MP-L201...
-
Page 30: Warranty
. Warranty Statement transported, or the defect (modified to fit Vitus Audio) is due to the product being 3 . REMEDY repaired or tampered with by In the event the above 1 . - Page 31 Vitus Audio the customer at his or her sole Att .: Customer Service by the cooperating partner expense . Vitus Audio will pay at his or hers sole expense . return freight of its choice . Vitus Audio will pay return freight of its choice .
- Page 32 . In the unlikely event of service required beyond the capabilities of the importer, Vitus Audio will fulfill the conditions of the warranty . Such products must be returned at the owner’s expense to the Vitus Audio...
-
Page 33: Specifications
6. specifications MP-L201 Specifications INPUT VOLUME CONTROL Analog Analog Available 3 (L+R) 2 (L+R) Type Relay controlled fixed resistor network Sensitivity 2/4/8 V RMS 2/4/8 V RMS Gain XLR 40dB to +12dB Impedance 75Ω 75Ω Gain RCA 40dB to +6dB Slew rate 1000V/ μs... -
Page 34: Examples Operation
INPUT + of the MP-L201 Press the MENU button to enter Menu Mode . MENU STANDBY POWER MP-L201 Left front panel . Navigate to the RESET submenu, using the function buttons on the left front LEAVE SETUP SELECT 1 . ... -
Page 35: Example 3
In the V .INIT submenu you VOL.STEP can adjust the initial volume step . This is the volume step the MP-L201 starts up in when Next time you turn on the it leaves standby mode . The MP-L201, it will initialize in initial volume step is as a volume step -30 dB . -
Page 36: Example 4
. Then the MP- The display now shows VOL .INIT . L201 will initiate in the volume The MP-L201 will now start up in the step as it is defined in the V .INIT current volume step on initialization . -
Page 37: Example 5
0 to 1. The standard setting for brightness is 1 . STANDBY POWER MP-L201 Left front panel . MENU In this example we will show you how to set the brightness to 2 . Press the MENU button to LEAVE enter Menu Mode . - Page 38 1 In this example we will enable the filter on output 1 . MENU STANDBY POWER MP-L201 Left front panel . The filter is optional, this menu item is only working when the LEAVE filter is installed. SETUP SELECT Press the“MENU”button to...
- Page 39 SELECT MUTE INPUT + on on input 5. You can invert the phase the inputs . STANDBY POWER MP-L201 Left front panel . MENU Press the“MENU”button to LEAVE enter Menu Mode . SETUP SELECT Navigate to the PHASE sub- BACK...
- Page 40 DATA volume step of -30.0 RESET STANDBY POWER V.INIT MP-L201 Left front panel . BRIGHT You can set the volume of an buttons on the left front input to a fixed dB step . The input FILTER 1 . Scroll forward in the...
- Page 41 2 . MENU/ Enter & Exit SELECT submenus and You can set different offset- selectsettings . values for the different inputs . MP-L201 Left front panel . STANDBY POWER You actually adjust the gain Scroll backward in MENU of one individual input .
-
Page 42: Example 6
5 from 8 V rms to 4 V rms The sensitivity is as a standard STANDBY POWER MENU MP-L201 Left front panel . set to 4 Vrms . LEAVE In this example we will change SETUP the sensitivity of input 5 from 4 SELECT Vrms to 2 Vrms . -
Page 43: Example 8
INPUT M P - L MENU SELECT MUTE INPUT + INPUT 5 to MP-T201. Press the“MENU”button to MP-L201 Left front panel . enter Menu Mode . MENU STANDBY POWER Navigate to the TEXT submenu, using the function LEAVE buttons on the left front... -
Page 44: Example 9
Press MUTE STANDBY POWER predefined list, then it is (The first character in the MP-L201 Right front panel . possible to manually add a display starts blinking) MENU name to the list . Press or until the first... -
Page 45: Example 12
M P - L MENU SELECT MUTE INPUT + If you only use some of the MP-L201 Left front panel . inputs, then it is possible to MENU disable the inputs that you are not using . The system will skip STANDBY... -
Page 46: Examples Connecting Devices
The MP-T201 is connected to a MP-L201 . The MP-L201 is also connected to a media center and a PC . The MP-L201 is connected to a MP-L201 . The MP-L is connected to a set of MP-M201 . The MP-M201 are powering the speakers . - Page 47 7. examples connecting devices Connecting devices MP-L201 | Version 1...
- Page 48 7. examples connecting devices Connecting devices MP-L201 | Version 1...
-
Page 49: System Remote
RC-010 is the Vitus Audio buttons 1 and 3 . With these System Remote that comes hotkeys you can jump to SIA-025 standard with the MP-L201 . another product without The RC-010 uses an infrared scrolling through the list sensor and communicates of products . -
Page 50: Getting
8. RC-010 getting started What’s included SIA-025 RC-010 System Remote AC/DC Adapter RC-010 Manual A/AB VITUS RC-010 System Remote AC/DC Adapter MP-L201 | Version 1... -
Page 51: System Remote Device
8. RC-010 getting started RC-010 System Remote Device SIA-025 overview Material: Anodized Aluminium Weight :287 gr . A/AB VITUS 21 mm 55 mm MP-L201 | Version 1... -
Page 52: Operation
In this mode the controls of the RC-010 are deactivated . The motion sensor is deactivated so the RC-010 cannot be woken up by movement . Exit flight mode by pressing any button . RC-010 Front panel . Figure 6 MP-L201 | Version 1... - Page 53 Next input Hotkey standard set to be Volume down a shortcut to INPUT2 . A/AB 10 . Change class 11 . Standby VITUS *A hotkey is a button that can be programmed by the user . MP-L201 | Version 1...
- Page 54 KEY 1 : INPUT 1 10 . - KEY 3 : INPUT 2 11 . - MP-T201 PRODUCT INPUT 2 VITUS The screen layout for the *only available in the EDIT sub-menu: EDIT PRODUCT . PRODUCT sub-menu . MP-L201 | Version 1...
- Page 55 RC- predefined list under button 3, 010 . Scroll through this list with item 7, to the right number . button 3 . Selection indicator . Indicates which item on the display you have selected . MP-L201 | Version 1...
- Page 56 3 . Delete the settings for this button . Now you can reinstall Selection indicator . Indicates this button . which item on the display you have selected . MP-L201 | Version 1...
-
Page 57: The Menu Structure
. You can disable 2 more products . or delete the products in the list or you can change the settings for buttons 1 and 3 MP-L201 | Version 1... -
Page 58: Discription Of
Set the delay of the display . Give a discription to the button . EDIT PRODUCT PRODUCT Change settings of the selected Switch between products . product . DISABLE Disable the selected product VITUS ENABLE Enable the selected product . MP-L201 | Version 1... -
Page 59: The Menu Structure
The same KEY 3: INPUT 2 sequence INPUT 1/2/3/4/5 as key 1 *This sub-menu becomes MP-T201 available when you add a product to the predefined MP-L201 MP-t201 product list. Figure 9 The RC-010 Menu strukture MP-L201 | Version 1... -
Page 60: Examples
3.rd party products • MP-T201 ( transport ) • Pickup • MP-L201 ( DAC ) • Computer • MP-P201 ( Phono stage ) • MP-L201 ( Line stage ) • MP-M201 ( Mono Power Amplifier ) . MP-L201 | Version 1... -
Page 61: Example 1
8. RC-010 examples Example 1 MP-L201 Disabling products LEAV E MEN U The RC-010 has all the Vitus OUTPUT PRODUCT Audio products installed as a standard . VITUS VITUS 1 . Press and hold button 2 for 3 2 . Navigate to the edit product seconds to enter menu mode . -
Page 62: Example 2
1 to be MP-T201 and VITUS 7 . Hotkey 1 is now set to MP-T201 hotkey 2 to be MP-L201 . and hotkey 2 is set to MP-L201 . MP-L201 | Version 1... -
Page 63: Example 2 .3
PRODUCT MP-L201 VITUS VITUS 6 . Leave the menu . 5 . Press select MP-T201 MP-T201 PRODUCT MP-L201 VITUS 7 . Hotkey 1 is now set to MP-L201 and hotkey 2 is set to MP-L201 . MP-L201 | Version 1... -
Page 64: Example 4
PRODUCT MP-L201 VITUS VITUS 6 . Leave the menu . 5 . Press select MP-L201 MP-T201 PRODUCT MP-L201 VITUS 7 . Hotkey 1 is now set to MP-T201 and hotkey 2 is set to MP-L201 . MP-L201 | Version 1... -
Page 65: Example 5
MP-P201 LEAV E MEN U ENABLE DISABLE LOAD PRODUCT MP-L201 VITUS VITUS 6 . Leave the menu . 5 . Press select MP-P201 MP-T201 PRODUCT MP-L201 VITUS 7 . Hotkey 2 is set to MP-L201 . MP-L201 | Version 1... -
Page 66: Example 2 .5
MP-L201 Setting the hotkeys LEAVE ME NU with MP-L201 selected. PRODUCT With the MP-L201 selected, VITUS VITUS 1 . Press and hold button 2 for 3 2 . Navigate to the edit product we will show how you can set seconds to enter menu mode . - Page 67 Example 3 MP-L201 MP-L201 LEAV E MEN U Adding a product. The RC-010 has all the Vitus MP-T201 PRODUCT MP-T201 Audio products installed as a standard . The RC-010 can VITUS VITUS 1 . Press and hold button 2 for 2 .
-
Page 68: Example 6
7 performs when VITUS VITUS 8 . Leave the menu . 9 .Now the display shows NEXT you press it . We give it the when you press button 7 . name NEXT . MP-L201 | Version 1... - Page 69 PRODUCT SP-102 INPUT 3 PRODUCT SP-102 VITUS VITUS VITUS 7 . Select MP-L201 and press 8 . Leave the menu 9 . The item under hotkey 1 is select . now set to INPUT 3 . MP-L201 | Version 1...
- Page 70 8. RC-010 examples Example 6 MP-L201 MP-L201 FABR IC Resetting the RC-010. You can restore the settings of MP-T201 PRODUCT MP-L201 the RC-010 . In the following steps we will show you how to VITUS VITUS 1 . Press and hold button 2 for 2 .
-
Page 71: Example 7
8. RC-010 examples Example 7 MP-L201 MP-L201 DI SP LAY Changing the delay from 5 to 10 seconds. MP-T201 PRODUCT MP-L201 The delay of the display is as VITUS VITUS 1 . Press and hold button 2 for 2 . Navigate to the DISPLAY a standard set to 5 seconds . -
Page 72: Specifications
Type……………………………… ..……FW74010/05 Switchmode Input……………………… . .…… . . .100 - 240 V~/ 50-60 Hz / 310 mA Output…………………… . . .……………………………… ..5V / 2A MP-L201 | Version 1... -
Page 73: Controls
8. RC-010 controls The functions of the buttons for the different products. MP-L2101 MP-P201 MP-L201 MP-T201 MP-M201 SIA-025 Button 1: MP-T201 Load OUTPUT Pause Button 2 Product Product Product Product MP-T201 PRODUCT INPUT 2 Button 3: MP-P201 Input 2 / SP-102... -
Page 74: Decimal
8. RC-010 controls The RC 5 codes for the remote. Decimal MP-P201 MP-L201 MP-D201 MP-T201 MP-M201 Address Address Address Address Address Standby Standby Standby Standby Standby Mute Mute Mute Next Track Class Sens up Vol up Vol up Prev Track... -
Page 75: Hexadecimal
8. RC-010 controls The RC 5 codes for the remote. Hexadecimal MP-P201 MP-L201 MP-D201 MP-T201 MP-M201 Address 0x18 Address 0x16 Address 0x15 Address 0x14 Address 0x13 Standby 0x3F Standby 0x3F Standby 0x3F Standby 0x0C Standby 0x13 Mute 0x11 Mute 0x3A... -
Page 76: Pictures
9. pictures MP-L201 Inside view MP-L201 Inside view MP-L201 | Version 1... -
Page 77: Mp-Psu Inside View
9. pictures MP-PSU Inside view MP-PSU Inside view MP-L201 | Version 1... -
Page 78: Mp-L201 Front View
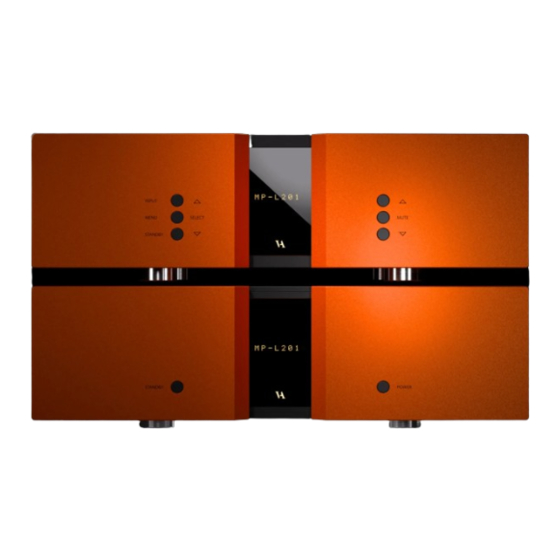
9. pictures MP-L201 Front view MP-L201 Front MP-L201 | Version 1... -
Page 79: Rc-010 Front View
9. pictures RC-010 Front view RC-010 Front MP-L201 | Version 1... - Page 80 Handcrafted in Denmark AVA Group A/S (Vitus Audio), Sandgaardsvej 31, DK-7400 Herning, Denmark, Phone: +45 9626 8046, Fax: +45 9626 8045 e-mail: info@vitusaudio .com, web site: www .vitusaudio .com...
Need help?
Do you have a question about the MP-L201 and is the answer not in the manual?
Questions and answers