Advertisement
Quick Links
Download this manual
See also:
User Manual
Choosing a channel...
From your receiver, you can switch between a locally connected computer (if present) and any number
of linked transmitters in two main ways:
...using the channel list
The channel list shows all of your switching
options:
1 If the channel list is not already displayed,
press and hold the CTRL and ALT keys and
then press C
Ü
2 Click on the required channel (or use the
up/down arrow keys and Enter) to connect.
...using hotkeys
Hotkeys offer the quickest way to switch between channels:
1 Press and hold the CTRL and ALT keys and then press the number for the required channel, e.g. 0
for the locally connected computer, 1 for the first transmitter in the list, 2 for the second, etc.
Changing the hotkeys
You can change the default hotkeys
to suit your installation:
RECEIVER
1 Display the channel list and then
Receiver 1
click the
icon. Enter the admin
General
password.
OSD Settings
Setup Channels
2 Choose the OSD Settings page
Ü
Manage Ports
3 Here you can alter all aspects of
Advanced
hotkey operation.
Software Upgrade
4 For more details, please see the
AdderLink XDIP full user guide.
Restoring an XDIP node
In order to obtain the full benefit of the configuration wizard when creating a new installation, it may
be necessary to restore the default settings to your XDIP nodes. This can be done in two ways:
• [Receivers only] Display the channel list and then click the
password and then choose the Software Upgrade page. Click the Restore button.
• Use a narrow implement (such as a straightened out paper clip) to press and hold the recessed reset
button on the front panel (while power is applied) for fourteen seconds. Note: The reset button is
within the hole to the left of the USB socket. The front panel indicators will flash and then the Recovery
page will be displayed. Click the Restore button.
Receiver 1
Description
#
Name
Description
Local Computer
Description
0
1
Transmitter 1
Description
2
Transmitter 2
Description
3
4
5
6
7
8
ADMIN - OSD Settings
Update this node's OSD timeout and hotkeys.
Configure OSD Settings
Language
English
Keyboard
gb
OSD Mouse Launch
None
Hotkeys
Left Ctrl
Left Alt
Next Channel Hotkey
Left Ctrl + Left Alt +
Letter
Previous Channel Hotkey
Left Ctrl + Left Alt +
Letter
OSD Hotkey
Left Ctrl + Left Alt +
c
Left Ctrl + Left Alt +
x
Disconnect Hotkey
OSD Timeout
1
min
Cancel
Apply
icon. If requested, enter the admin
Welcome
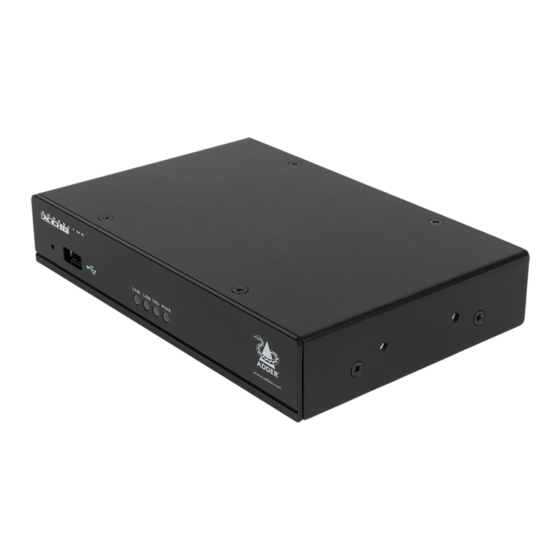
Thank you for choosing the AdderLink XDIP extenders. These flexible modules (nodes) can be
configured either as transmitters or receivers and then mixed in a variety of combinations to suit.
A D D E R L I N K
Reset
USB
Indicators
button
port
LNK
(Console)
USB
PWR
indicates overall mode: TX: Green, RX: Blue, Start of Life: Red).
On TX: [Optional] Feed
to a local console
On RX: Feed to the
12VDC power
user console
port
(PoE option
USB
available)
ports
Audio
Audio
line
line
in
out
jack
jack
* The network switch must support
IGMP - see the full user guide for details.
Connect and power on all required nodes. On the console connected to an unconfigured node, that
will become a receiver, you should see the Welcome screen. The node's PWR indicator should be red
at this stage. If not, restore the node to its default settings (see the rear page). Continued overleaf.
AdderLink XDIP
Quick Start
LNK USB VID PWR
www.adder.com
- indicates the presence of a valid data link.
and
- indicate active connections.
VID
- indicates the presence of input power (color also
Data link - either
connect directly to
another node or
indirectly to multiple
others via a supported
HDMI
network switch*
video port
(PoE 802.3af supported)
CONSOLE
COMPUTER
INDOOR USE ONLY
USB
HDMI
port
video port
On TX: Link to the
main computer
On RX: [Optional] Link
to a local computer
Advertisement

Summary of Contents for ADDER AdderLink XDIP
-
Page 1: Quick Start
Welcome From your receiver, you can switch between a locally connected computer (if present) and any number Thank you for choosing the AdderLink XDIP extenders. These flexible modules (nodes) can be of linked transmitters in two main ways: configured either as transmitters or receivers and then mixed in a variety of combinations to suit. - Page 2 Adder’s total liability under the terms of this warranty shall in all circumstances be limited to the replacement value of this product. If any difficulty is experienced in the installation or use of this product that you are unable to resolve, please contact your supplier.


Need help?
Do you have a question about the AdderLink XDIP and is the answer not in the manual?
Questions and answers