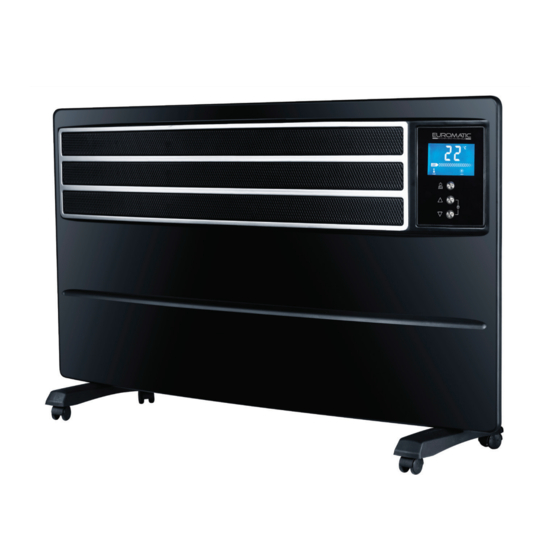
Summary of Contents for Euromatic NHD-240
- Page 1 Curved Metal Panel Heater INSTRUCTION MANUAL MODEL: NDH-24D AFTER SALES SUPPORT (AU) 1300 886 649 (NZ) 0800 836 761...
-
Page 2: Table Of Contents
Contents Important Safety Instructions Product Overview Getting Started Operating Instructions Other Useful Information After Sales Support (AU) 1300 886 649 (NZ) 0800 836 761 | info@tempo.org... -
Page 3: Important Safety Instructions
Important Safety Instructions Read this manual thoroughly before first use, even if you are familiar with this type of product. The safety precautions enclosed herein reduce the risk of fire, electric shock and injury when correctly adhered to. Make sure you understand all instructions and warnings. -
Page 4: Usage Conditions And Restrictions
Important Safety Instructions (Cont.) • After use: Always disconnect power when the heater is not in use and before cleaning, servicing or moving the heater. • Disconnect: To disconnect the heater, switch it off and remove the plug from outlet. When disconnecting, grip the plug, do not pull on the cord. •... - Page 5 Important Safety Instructions (Cont.) • WARNING: Varying heat output! The output of this heater may vary and its temperature may become intense enough to burn exposed skin. Use of this heater is not recommended for persons with reduced sensitivity to heat or an inability to react in order to avoid burns.
-
Page 6: Product Overview
Product Overview Scope of delivery Parts of the heater Air Outlet Display Control panel Power switch Castor wheel assemblies (one for each side) Castor wheels (two on each assembly) NOTE: Due to continued product improvement, images and illustrations in this manual may vary slightly from the product purchased. - Page 7 Product Overview (Cont.) í É Control panel and display Remote Control Temperature (°C) indicator 18 POWER button Timer indicator 19 LOW/HIGH heat selector Power & setting (SET) button 20 UP button 10 UP button 21 DOWN button 11 DOWN button 22 SET button 12 Temperature scale indicator 13 Temperature display...
-
Page 8: Getting Started
Getting Started Unpacking • Packaging: This product has been packaged to protect it against transportation damage. Unpack the appliance and keep the original packaging carton and materials in a safe place. It will help prevent any damage if the product needs to be transported in the future, and you can use it to store the appliance when it is not in use. - Page 9 Getting Started (Cont.) Wall-mounting Your Panel Heater can be mounted onto a wall, if you choose to, or assembled onto the castor wheel assemblies. If wall-mounting the heater, please use the mounting instructions below and on the following pages as a guide, or consult qualified personnel, if required.
- Page 10 Getting Started (Cont.) • NOTE: Leave a clear space of at least 10cm above the floor and 1m below the ceiling when wall-mounting the heater. • To take down the heater from the wall, pull the heater upwards about 10mm, then gently pull the heater away from the mounting screws and remove from the wall.
- Page 11 Getting Started (Cont.) Castor wheel assembly If you want to use your Panel Heater freestanding, follow the instructions below for the castor wheel assembly. • Place a soft towel on the floor and carefully place your panel heater upside down. Be gentle so you won’t damage the heater. •...
-
Page 12: Operating Instructions
Operating Instructions Using the heater Before switching on the heater for the first time, check it again to be sure it did not get damaged during wall-mounting or castor wheel assembly. • Connection: Make sure the On/Off switch is in the OFF position, then plug the heater into an appropriate power point and switch on power to the outlet. -
Page 13: Safety Features
Operating Instructions (Cont.) • Heat (output power) selection: Press the LOW/HIGH Heat Selector button on the remote control to select the output power. The heater will work with the full rated output when the high heat indicator is displayed, and with reduced output when the low heat indicator is selected. -
Page 14: Other Useful Information
Other Useful Information CAUTION! Always switch off and disconnect the appliance from the power supply before attempting any maintenance or cleaning the heater. Troubleshooting If your heater fails to operate, or you experience any other problem with the appliance, contact our after sales line for advice or to arrange a service. But before phoning for a service, please ensure that your heater is properly plugged in and that the outlet is working and the circuit breaker or fuse are also working properly. -
Page 15: Technical Specifications
Other Useful Information (Cont.) Battery replacement The remote control comes with a CR2032 3V lithium button cell. If the battery needs to be replaced, pull out the battery holder at the bottom of the remote control, following the illustration on the remote control. Insert a fresh battery of the same type and size, as indicated on the diagram, then push the holder with the battery back into the unit. - Page 16 Warranty returns Should you for any reason need to return this product for a warranty claim, make sure to include all accessories with the product. Product does not work? If you encounter problems with this product, or if it fails to perform to your expectations, make sure to contact our After Sales Support Centre on (AU) 1300 886 649 or (NZ) 0800 836 761 before returning it to the store for a refund.


Need help?
Do you have a question about the NHD-240 and is the answer not in the manual?
Questions and answers