
Related Manuals for i-mobile i858


Summary of Contents for i-mobile i858
-
Page 1: User Manual
HSDPA/WCDMA/EDGE/GPRS/GSM 850/900/1800/1900/2100MHz Mobile Phone User Manual Model:i-mobile i858... - Page 2 Claims We reserve our right to make changes and improvements to any of the products described in this manual without prior notice. Under no circumstances shall we be responsible for any loss of data, income, or any special, incidental, consequential or indirect damages howsoever caused. The content of this manual is provided “as is”.
-
Page 3: Table Of Contents
Contents For Your Safety ............10 Brief Introduction .............12 Your phone’s label ..........12 Phone image............12 Key definition............13 Touch screen ............14 Silent mode ............15 Screen sleep ............16 Screen lock ............16 Shortcuts ..............17 Wireless off............18 Making phone calls ........18 Power on/off............19 USB storage............19... - Page 4 Update software to your phone....19 Home screen ...............21 Home screen ............21 Extended Home screen .........21 Create Home screen shortcuts widgets..............21 Remove items from the Home screen ...22 Move objects on the Home screen ..22 Create and delete folders on the Home screen ..............22 Customize Home screen wallpaper ..23 Notification and connection status icons...
- Page 5 Installing a memory card ......29 Charging the battery........29 Battery tips ............30 Use and maintenance........31 System settings............32 Wireless controls..........32 Call settings ............34 Sound & display..........35 Security & location..........36 Applications............37 SD card & phone storage ......38 Date & time............39 Locale & text ............39 Search..............40 About phone ............41 Bluetooth...............42...
- Page 6 Turn on Bluetooth services......42 Discoverability ...........42 Name your Bluetooth device ......42 Pair & connect with Bluetooth devices 43 Rescan for Bluetooth devices ....44 Contacts ................45 Your contact list..........45 Search for a contact ........45 Add a contact .............46 Assign favorites..........46 Edit contact details.........47 Delete contact............47 Communicate with a contact.....47 Display a contact group ........49...
- Page 7 Email................50 SMS and MMS messaging ......53 Browser................59 About the Browser ...........59 Zoom and navigation in Web pages ..59 The Browse screen..........60 Open pages in separate windows....60 Manage bookmarks .........62 Set your home page.........64 Links in Web pages..........64 Browser history ..........65 View the most visited webs......65 Download Web files and applications ..66 View your downloads ........66...
- Page 8 About the dialers ..........70 Answer an incoming call ......72 In-call options.............72 Call log ..............73 Call settings ............74 Calendar ................76 Calendar views ..........76 Create an event ..........76 Go to today............76 View an event .............76 Camera, Camcorder & Gallery ......77 Before you begin ..........77 Camera ..............77 Video Recorder ..........78 Settings of...
- Page 9 Gallery ..............80 Music & Video player..........84 Music ...............84 Video player............88 Search..............90 Favorites..............90 Options ..............90 Tools ................91 Alarm Clock ............91 Calculator .............93 File Manager............94 Spare parts ............94 FM radio ..............95 Battery Information..........97 Accessories ..............98 Safety of the battery........98...
- Page 10 Rapid travel charger ........98 Data cable ............98...
-
Page 11: For Your Safety
For Your Safety SWITCH ON SAFELY Do not use in prohibited areas or when it may cause any interference or danger. SWITCH OFF IN HOSPITALS Follow any restrictions. Switch the phone off near medical equipment. SWITCH OFF WHEN REFUELING Do not use the phone at a refueling point. Do not use near fuel or chemicals. - Page 12 MAINTENANCE Only authorized and qualified personnel may repair this product. WATER RESISTANCE Your phone is not water-resistant. Keep it dry. INTERFERENCE All wireless devices may be susceptible to interference, which could affect its performance. Damage to the security seal will invalidate the warranty. Warning: Improper use will invalidate the warranty.
-
Page 13: Brief Introduction
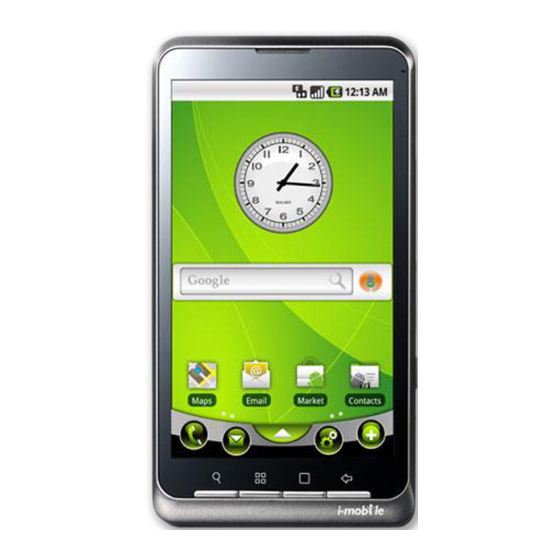
Brief Introduction Your phone’s label The barcode label includes important information about services and customer support. Please keep it properly. Phone image Note: All the illustrations, simulated screen and related images in the manual are for reference a refer to your handset for actually. -
Page 14: Key Definition
1 _ Side key(volume key) 2 _ Battery cover button 3 _ Charging indication light 4 _ Receiver 5 _ Camera 6 _ Light sense 7 _ Call log key 8 _ Menu key 9 _ Home key 10 _ Back key 11 _ Power &... -
Page 15: Touch Screen
• Press to enter the call log interface. Home key • Press to return to the home screen from anywhere on your phone. • Press & hold to bring up the recent applications window. Back key: Press to go back to the previous menu, or to dismiss a dialog box or menu. Menu key •... -
Page 16: Silent Mode
Scroll To scroll up or down in a list or page on the screen, you can Slide your finger up/down on the screen. Crop pictures When creating wallpaper or an icon from a picture, you can control how the picture is cropped. Touch &... -
Page 17: Screen Sleep
Screen sleep After a period of inactivity, your screen will go to sleep (display will turn black). In sleep, your phone uses less battery power. You can control this behavior: Set screen timeout period Return to the Home screen, then press the Menu key to select Settings>Sound &... -
Page 18: Shortcuts
When you unlock your screen, if you want your pattern to be hidden as you draw it, clear the Use visible pattern check box. Shortcuts Use these control buttons from anywhere on your phone: Lock screen and put phone to sleep Press the Power &... -
Page 19: Wireless Off
an application to open it. Wireless off When you need to turn off all your phone radios, switch to “airplane” mode: Return to the Home screen, then press the Menu key and select Settings. Select Wireless controls, then select the Airplane mode check box. -
Page 20: Power On/Off
Power on/off To power off your phone, press and hold the Power & End key. On release, the phone options menu opens. Select Power off. To power on again, press and hold the Power & End key. (Tip: The phone will vibrate after you press and hold the Power &... - Page 21 Press the Back key to restore the factory settings. Press the Power & End key to reboot your phone after the update finishes.
-
Page 22: Home Screen
Home screen Home screen The Home screen is your starting point for using all the applications on your phone. You can customize your Home screen to display applications, shortcuts and widgets as you like. Note: To enter the Application screen, press the icon in the Home screen. -
Page 23: Remove Items From The Home Screen
Tip: To create an application shortcut quickly, touch the application tab to reveal all the application icons, then touch & hold an application icon. Its shortcut is added to the Home screen. Remove items from the Home screen To remove a shortcut or widget from your Home screen, touch & hold the item. The application tab turns into a Trash button. -
Page 24: Customize Home Screen Wallpaper
Select Folders>New folder. A new folder appears on the screen. Touch & hold any of the application icons or shortcuts to enter move mode (the icon will magnify), then drag the item to the top of the new folder. Touch the folder once to open it; touch the folder’s title bar to close it. To rename a folder, first open the folder. -
Page 25: Notification And Connection Status Icons
When you’re happy with the cropped area, select Save or press the Back key. Tip: You can also set a picture as wallpaper in camera capture mode. Press the Menu key to select Gallery to view the pictures you captured. Touch and hold a thumbnail to open the context menu, and select as>Wallpaper. -
Page 26: Read Your Notifications
Ringer on vibrate only Phone on mute Content downloaded Sign-in/sync error GSM signal, roaming, no signal GPRS service connected, data flowing Edge service connected, data flowing Wi-Fi service connected, network available Battery charge indicators: full, half-full, low, very low! Battery is charging Wireless services are off (Airplane mode) Bluetooth®... -
Page 27: Wireless Operator
• Notifications report the arrival of new messages, calendar events, and alarms. You can clear notifications list by selecting Clear notifications at the top of the notifications window. Touch the item to open the message, reminder, or other notification. To close the notifications window, slide your finger up the screen. -
Page 28: Getting Started
Getting Started Installing the battery Release the battery cover button. Take off the battery cover. Put in the battery. -
Page 29: Installing A Sim-Card
Installing a Sim-card Note:The sim-card slot is at the downside of the battery. -
Page 30: Installing A Memory Card
Release the sim-card lock. Then put in the sim-card and lock it up Installing a memory card Insert the memory card into the card slot, which is at the right side of the handset. Charging the battery Warning: To avoid damaging the phone, please do not remove the battery when the phone is charging. -
Page 31: Battery Tips
The device is a 3G product. So it consumes more power than in 2G network. Tips: ♦ If your phone is off, there will be a yellow light at the upper right corner of the phone’s front side when being charged. When the phone is fully charged, the blue light will disappear. It may take 4-5 hours to fully charge. -
Page 32: Use And Maintenance
Use and maintenance The following suggestions will help you use and maintain your mobile. Please keep dry. Rainwater, humidity, and any kinds of liquid or moisture might contain minerals which could corrode the circuit. Moving parts may be damaged if you put or use the phone in a dirty or dusty place. Please do not use or store the phone in a high temperature environment, as this may result in damage to the electronic or plastic parts. -
Page 33: System Settings
System settings Control phone-wide settings from the Home settings screen: Press the Menu key to select Settings. You can also select the Settings icon from the Application screen. Wireless controls Wi-Fi on/off Select this check box if you prefer to use Wi-Fi for your data connection. Wi-Fi settings screen Open the Wi-Fi settings screen to: View and scan for available networks - Press the Menu key and select Scan. -
Page 34: Usb Modem
Send/Receive files 1. Scan for devices. 2. Select the device you want to pair with. 3. Type PIN to pair. 4. After the pair succeeds, you can send/receive files between two devices bia bluetooth. 5. You can send bookmarks in browser, pictures in gallery, camera and camcorder, or files in FileManager. -
Page 35: Call Settings
Mobile network settings Select data roaming capability. Connect to data services when in local. Use only 2G networks to save battery. Select a wireless operator network - Scan for all available networks, or select a network automatically. Add or edit network Access Point Names (APNs) - Do not change this setting unless advised to do so by your wireless operator! Airplane mode on/off When airplane mode is selected, all wireless connectivity is off. -
Page 36: Sound & Display
Sound & display Sound settings Silent mode Select to open the silent mode. All sounds except media&alarms are silenced. Ringer volume Select to open the volume control, then slide your finger along the volume bar to set incoming call volume and notification volume. Media volume Select to open the volume control, then slide your finger along the volume bar to set the volume for playing back music, videos, FM or voice recordings. -
Page 37: Security & Location
Orientation Select to switch orientation automatically when the phone orientation changes (except the home screen) Animation Select to show animation when opening/closing windows. Brightness Select to open the brightness control, then slide your finger along the brightness bar to set the level. -
Page 38: Applications
Lock your SIM card for extra security. You can also change your SIM card PIN from this screen. If you don’t know your SIM PIN, you can obtain it from your wireless operator. Visible passwords Select to have your password display as you type it. Use secure credentials Allow applications to access secure certificates and other credentials Set password... -
Page 39: Sd Card & Phone Storage
Clear your user data (if you have any associated with a particular application). Disassociate the application with any actions. For example, you may have selected to use YouTube to open any Browser links to videos. If you’d like to use another application to open video links, simply select the Clear defaults button. -
Page 40: Date & Time
Monitor and manage the use of your memory card from this screen: View the total space of your memory card. View how much space you are using on your memory card. Unmount your memory card from your phone. Note: When you mount the USB storage, you cannot view pictures or play any media stored on the card from your phone. -
Page 41: Search
Android keyboard settings Vibrate on keypress - When selected, your phone will vibrate while you touch the characters. Sound on keypress - When selected, your phone will make a sound while you touch the characters. Auto-capitalization - When selected, automatically capitalizes the first letter in a text field, or the first letter after a period (.), question mark (?), or exclamation point (!).(The initial is capitalized following dot+blank )... -
Page 42: About Phone
search box Contact: When selected, relevant contact shows as you type the word in the search box Music: When selected, relevant music information including the name of song, singer, or album shows as you type the word in the search box About phone View your phone Status. -
Page 43: Bluetooth
Bluetooth You can use Bluetooth to send and receive calls using a headset or hands-free car kit. Turn on Bluetooth services Press the Menu key to select Settings in the Home screen Select Wireless controls, then select the Bluetooth check box to turn on Bluetooth services. When it on, the Bluetooth icon appears in the status bar. -
Page 44: Pair & Connect With Bluetooth Devices
Type the name for your device in the dialog box, then select OK. Your new device name appears on the Bluetooth settings screen. Pair & connect with Bluetooth devices Before your phone can communicate with a Bluetooth headset or hands-free car kit, the devices must “pair”, then “connect”: Make sure you have turned Bluetooth on, as described in “Turn on Bluetooth services”. -
Page 45: Rescan For Bluetooth Devices
“unable to connect” message. • If you pair with a second headset while connected to the first, the first headset will remain connected. To switch connection to the second headset you must manually select that headset again after pairing. Rescan for Bluetooth devices If you want to update the list of Bluetooth devices, press the Menu key to select Scan for devices. -
Page 46: Contacts
Contacts Your contact list To view the contacts on your phone, select Contacts in the Home screen. Contacts belonging to a specific group (you can choose which group) are listed in the Contacts tab. Only those contacts you star as “favorites” are listed in the Favorites tab. -
Page 47: Add A Contact
the text box, then tap the magnifier beside the text box to start searching. Add a contact Press the Menu key to select New contact in the Contacts main menu. Add all the information you want to store for this contact in the appropriate fields. You must add some information to save a contact. -
Page 48: Edit Contact Details
Edit contact details You can always make changes to the information you’ve stored for a contact: From Contacts, touch & hold the contact whose information you want to edit. The context menu opens. Select Edit contact. The Edit contact screen appears. Make your edits, then select done To cancel, select Revert. - Page 49 To send a text or multimedia message to a contact, you must have a mobile number stored for them in contact details. From the contact list Touch & hold the contact’s name to open the context menu. Select Send SMS/MMS. A Compose screen opens for your new message. From the Contact details screen In the Text mobile section, select a phone number.
-
Page 50: Display A Contact Group
Display a contact group To select which contact group to display in Contacts, press the Menu key and select Display group. You can select from the following: All contacts Displays every contact you’ve created or that has been added automatically. Contacts with phone numbers Displays only contacts with phone numbers, no matter whether you've created them on the phone or Web. -
Page 51: Email And Messaging
Email and Messaging Email POP3 and IMAP email accounts Add an email account Open the Application menu to select the Email application. The Set up new account screen appears. Type your account email address and password. If you want, select the Send email from this account by default check box. - Page 52 From the Inbox, press the Menu key and then select Refresh to update your Inbox with any previously-unfetched email. Read email You can display or collapse the messages in your Inbox by selecting Inbox. Unread messages display with a colored band. (Each account you add will use a different color.) To open an email for reading, select it.
-
Page 53: Remove An Email Account
you have not typed anything. Empty Trash Once you’ve moved a message to the Trash, a Trash folder will display below your Inbox. To empty messages in the Trash you must delete each message individually: Expand the Trash folder to display the messages. Touch &... -
Page 54: Sms And Mms Messaging
regardless of this setting. Default account If you have more than one POP3 or IMAP email account set up on your phone and want to use this account by default when selecting Compose from the Accounts screen, select this check box. Email notifications If you want an icon to appear in the status bar when a new message arrives, select this check box. -
Page 55: The Message List
multimedia message as soon as you add a subject or an attachment, or if you address the message using an email address rather than a phone number. The message list Text and multimedia messages are grouped with the replies you receive into conversations or “message threads”... - Page 56 If a message contains a link to a Web page, it will be selectable. To view the Web page in the Browser, simply select it. Forward messages In the message read view, touch & hold the message to open the context menu, then select Forward to forward it to others.
-
Page 57: Compose Text And Multimedia Messages
View message delivery or read reports If a message contains a delivery or read report (you would have requested it in Settings), you’ll see this icon to the right of the message. Touch & hold the message to open the context menu. Select View report. -
Page 58: Save Message As Draft
Type your message. As you type, you’ll be able to track how many characters/messages you’re creating. Remember that text messages have a limit around 160 characters. Once you go over that limit, a new message is actually created but automatically joined into one when received. - Page 59 Delivery reports: To receive a report on the delivery status of your message, select this check box. Status can be: • Successful delivery • Temporary delivery failure; an attempt to deliver will be made again • Unsuccessful delivery, where no attempt to re-deliver will be made Read reports: To receive a report on whether each recipient has read or deleted the message without reading it, select this check box.
-
Page 60: Browser
Browser About the Browser To open the Browser, select the Browser application in the Home screen. The Browser always opens to the last Web page you were viewing. The first time you enter the Browser after powering on, your home page will display. You can change your home page by pressing the Menu key and selecting More >... -
Page 61: The Browse Screen
The Browse screen From the Browse screen you can do the following: Go to a Web page You can press the Menu key and select to open the Go to window opens. Possible matches appear in the drop-down menu. Select a match or continue typing the URL. Select beside the URL to go to the page. -
Page 62: View Page Info
screen opens, showing the Web page you started from, plus a “new window”. .Your home page opens in a new window. To return to one of the other windows, press the Menu key and select Windows. Select the page you want to view. View the page in a window Select a window to view it full-screen. -
Page 63: Manage Bookmarks
From a Web page, press the Menu key and select Windows. The Current windows screen appears. Touch & hold the window whose page you want. The context menu opens. Select Page info. When you’re finished reading the information, select OK. Go to Bookmarks screen From the Current windows screen, press the Menu key and select Bookmarks... -
Page 64: Edit Bookmark
Send the link via email or message, and then a Compose screen opens with the URL as the message. Address your message and finish composing. View bookmarked page Press the Menu key and select Bookmarks. The Bookmarks screen opens. Touch & hold the bookmark you want to open. The context menu opens. Select Open Open in new... -
Page 65: Set Your Home Page
Set your home page You set your home page from the Settings screen: Press the Menu key and select More>Settings. The Settings screen opens. In the Page content settings section, select Set home page to open the dialog box. Type the URL of the page you want to set as home, then select OK. Links in Web pages Links are outlined in yellow when highlighted. -
Page 66: Browser History
• Copy the link to the clipboard Phone numbers Select a linked phone number to: • Call the number - The Dialer opens, ready for you to send the call. • Add the number to your Contact list - Opens the New contact screen for you to complete and save. -
Page 67: Download Web Files And Applications
Download Web files and applications Before you download any files or applications using the Browser, note the following: • Before you download Web applications, you must explicitly “allow” downloading from the Settings screen in Home screen: 1. Press the Menu key and select Settings. 2. -
Page 68: Page Content Settings
Page content settings Text size Select to open the Set text size menu. Default setting is Normal, but you can increase the size to Large or Huge, or decrease to Small or Tiny. Note that this text size setting only affects pages you view through the Browser. -
Page 69: Privacy Settings
Privacy settings Select one of the privacy settings to clear the following: • Browser cache • Browser page-visited history • stored cookie data • saved form data Accept cookies Select this check box if you want the Browser to save cookies. Some Web sites might not work properly with cookies disabled. - Page 70 richer platform for Web applications. Gears settings View permissions granted to Web sites to use Gears. Reset to default Select if you want to reset all Browser settings to factory default values, except for your home page.
-
Page 71: Dialer & Voice Dialer
Dialer & Voice Dialer About the dialers You can use your phone to make phone calls by using either the Dialer or the Voice Dialer: To dial a number using the on-screen dial pad, touch To dial by speaking either a number or contact name, select the Voice Dialer in the Application... - Page 72 You can tell the Voice Dialer any of the following: • “Dial number”, where number can be 3 digits (e.g., 911), 7 digits (e.g., 555-0123), or 10 digits (e.g., 205-555-0123). If you’re speaking a phone number, then always say “Dial” before the number.
-
Page 73: Answer An Incoming Call
Answer an incoming call To answer a call, simply Call log key, and the Call-in-progress screen appears. Press the Power & End key to reject the incoming call. In-call options While on a call, press the Menu key to reveal the in-call options: Speaker, Mute, and Hold. Note that if Bluetooth services are on and you are connected to a hands-free device, the menu indicator will show Bluetooth on. -
Page 74: Call Log
Show dial pad If you need to enter numbers while on a call (such as to select in-call menu options) slide the dialer tab up Call log The call log is one of the tabs on the Dialer. The Call log displays by default. •... -
Page 75: Call Settings
add the number to an existing contact. Remove from call log Select to remove only this entry from the call log. Call settings Press the the Menu key in the Home screen and select Settings>Call settings. Wait a few moments while your current call settings are fetched from the service. The following settings are available: Fixed Dial Number (FDN) list Select this setting to manage your FDN list of numbers. - Page 76 Select this setting to set or change your voicemail number. Note that this number is usually set by your wireless operator and is stored on your SIM card. GSM call settings Call forwarding Set the following: • Always forward- Select to specify a forwarding number and to enable this feature. When this feature is enabled, the following three features are disabled.
-
Page 77: Calendar
Calendar To open Calendar service, select the Calendar application in the Application screen. You can view calendar, view month, edit event, etc. Calendar views You can slide the blue-bar at the bottom of the screen to view the Calendar by Week, Day, List, Month. -
Page 78: Camera, Camcorder & Gallery
Camera, Camcorder & Gallery Before you begin All the pictures you can capture or view and all the videos you can record or play on your phone are stored on a memory card, which must be installed in your phone. Before you can use the Camera or Camcorder, or view pictures/videos in Gallery, make sure you have a card installed. -
Page 79: Video Recorder
View your pictures To view the pictures you’ve captured, press the image at the upper-right corner, or in capture mode, press the Menu key to select Gallery. Video Recorder Record a video To open the Camcorder, select Camcorder in the Home screen. The Camcorder opens in record mode. - Page 80 Select the video quality from Low (for MMS message) High (for SD card). Select video duration Select the limited time you can shoot the video. Select picture size Select picture size from 5M(2560*1920),3M(2048*1536),2M(1600*1200). Select picture quality Select picture quality from Super Fine, Fine, Normal. Select focus mode Select forcus mode from multi-zone, single-zone, face-detection.
-
Page 81: Gallery
Gallery View pictures and videos in Gallery To view the pictures you’ve captured, the video you’ve recorded, as well as any you’ve stored on your memory card, go to the Gallery application. To open Gallery, select the Gallery in the Home screen. Depending on how many pictures and videos you’ve stored, they may take a few minutes to load. -
Page 82: Picture Options
Touch the – control to zoom out. With each touch you zoom out further. Scroll through pictures in full-screen view Touch the screen to reveal the left and right arrows, then touch an arrow to go to the previous or next picture. - Page 83 In full-screen view, press the Menu key and select Rotate. Select from Rotate left (counter-clockwise) or Rotate right (clockwise). Your picture rotates and is saved automatically. Delete picture In full-screen view, press the Menu key and select Delete. The picture will be removed from the memory card after you confirm. Crop picture In full-screen view, press the Menu key and select Crop.
- Page 84 Settings In the Gallery main screen, press the Menu key and select Settings. Display size The individual pictures and videos display in a grid in thumbnail format. You can select the picture or video display sizes from Large or Small. Sort order You can select to sort pictures and videos with the newest one first or newest one last.
-
Page 85: Music & Video Player
Music & Video player Music Your library of music Press the Home key and select the Music to open your music library. Your music is organized into four categories: Artists, Albums, Songs, and Playlists. Select a category to view the lists within each. Once in a category, keep selecting until you reach the music you want to play. -
Page 86: Play Back Music
number of files or folders at the root level to a minimum. So, if you wish, create a folder at the top-level called “music” (or whatever you want) to store your files. Open this folder and copy music files into it. If you want, create folders within “music” to organize your music further. - Page 87 Go to next song Touch once Rewind Touch & hold Go to beginning of song Touch once Go to previous song Touch twice View current playlist Touch Party shuffle To start “party shuffle” (all the songs in your library are added to a playlist in random order), press the Menu key and select Party shuffle.
-
Page 88: Create Ringtones From Songs
Select Add to playlist. In the Add to playlist menu that opens, select to create a new playlist, or one of the existing playlists. The song(s) are added. Manage your playlists Go to the Library screen and select Playlists. All your playlists appear. You can do the following from this screen: Play songs in list Select the playlist. -
Page 89: Video Player
All the music you play on your phone is stored on the inserted memory card. From your phone, you can delete music stored on the card: From the Library screen, select either the Artists, Albums, or Songs category. Go to the screen that shows the artist, album, or song that you want to delete. Touch &... -
Page 90: Search For Videos
Touch once Adjust volume Press the Volume keys to adjust the volume. Search for videos To find a video by typing a keyword, press the Menu key and select Search. The search window appears. Type your keyword, then tap the magnifier to start to search. Settings Screen pixel: Set the size of video-playing. -
Page 91: Search
Search Note: At the first time you use this feature, please press Search to search for TV channels.(when using this feature, please stretch out the antenna.) Favorites Your favourite TV channels will be stored in Favorites. Options Country and Region Select the region to get TV channels. -
Page 92: Tools
Tools Alarm Clock To open alarm clock, select the Alarm Clock Application screen. The Alarm clock offers as many alarms as you want. Set an alarm Three alarms are set up for you, ready to customize. All three alarms are turned off by default. To begin, select one of the default alarms to open Alarm settings. -
Page 93: Add More Alarms
Label To name an alarm, select Label, then touch the textbox to change the label, then select save it. Delete alarm To delete the alarm, press the Menu key and select Delete alarm. Once your alarm goes off, you will receive an alert with the options to Snooze (for 10 minutes) or Dismiss. -
Page 94: Calculator
Select the Select date format option to open the menu of various date formats. Alarm in silent mode Go to the main Alarm Clock screen, then press the Menu key and select Settings. Select the check box to make the alarm clock play alarm even when the phone is in silent. Calculator To open Calculator, select the Calculator... -
Page 95: File Manager
panel switches back to Basic, where your operator appears. • When you touch a key on the screen, the key flashes red to let you know the selection was made. Make sure you see the red flash before entering your next number or completing the operation. -
Page 96: Fm Radio
Battery history: To view the summary of how battery has been used. Battery information: To view the current battery status information. Usage statistics: To view the summary of application usage. General info Window animations: To select the speed of animations in individual windows. Transition animation: To select the speed of animations moving between screens. -
Page 97: To Listen To The Radio
return to the Home screen and play the FM radio in background mode. If you want to turn off the FM radio, open the Fm radio application first, then press the Menu key to select Exit to turn off the radio. Turn on/off the speaker In FM radio, press the Menu key to select Speaker... -
Page 98: Battery Information
Battery Information Type Capacity Li-ion 1500mAh --The battery life depends on many factors, including the SIM card, network conditions, settings , usage and enviorenment. --Making calls, turning on the backlight and multimedia player will consume more battery power. --The standby time is shorter when the network is not available than in the standard status. --For power saving, the backlight turns off automatically if your phone stands idle for an assigned time. -
Page 99: Accessories
Accessories Safety of the battery Please use the battery provided by the original manufacturer. Use of any other battery will invalidate the warranty and the manufacturer of the phone will take no responsibility in repairing the phone damaged by the use of unapproved fittings. Please keep any metal things (e.g. - Page 100 Federal Communication Commission Interference Statement This equipment has been tested and found to comply with the limits for a Class B digital device, pursuant to Part 15 of the FCC Rules. These limits are designed to provide reasonable protection against harmful interference in a residential installation. This equipment generates, uses and can radiate radio frequency energy and, if not installed and used in accordance with the instructions, may cause harmful interference to radio communications.
- Page 101 antenna or transmitter. Federal Communication Commission (FCC) Radiation Exposure Statement This EUT is compliance with SAR for general population/uncontrolled exposure limits in ANSI/IEEE C95.1-1999 and had been tested in accordance with the measurement methods and procedures specified in OET Bulletin 65 Supplement C. This EUT is compliance with SAR for general population/uncontrolled exposure limits in ANSI/IEEE C95.1-1999 and had been tested in accordance with the measurement methods and procedures specified in OET Bulletin 65 Supplement C.
Need help?
Do you have a question about the i858 and is the answer not in the manual?
Questions and answers