Table of Contents
Advertisement
Quick Links
Advertisement
Table of Contents

Subscribe to Our Youtube Channel
Related Manuals for i-mobile istyle 8.2


Summary of Contents for i-mobile istyle 8.2
- Page 1 USER MANUAL...
- Page 2 Welcome Thank you for purchasing this product. For your cellular phone works properly, please follow the instructions in this manual. To prevent any possible incidents or malfunctions, please follow all safety warnings. Screen displays and illustrations in this user’s manual are designed to help you operate this phone to its optimum performance...
- Page 3 Contents ...
- Page 4 ...
-
Page 5: About Android
About Android An Android phone can perform many of the same functions as a computer. But you can also adjust it to better suit your needs, to receive the information you want, and have fun at the same time. You can add and delete applications, or enhance them to improve functionality. -
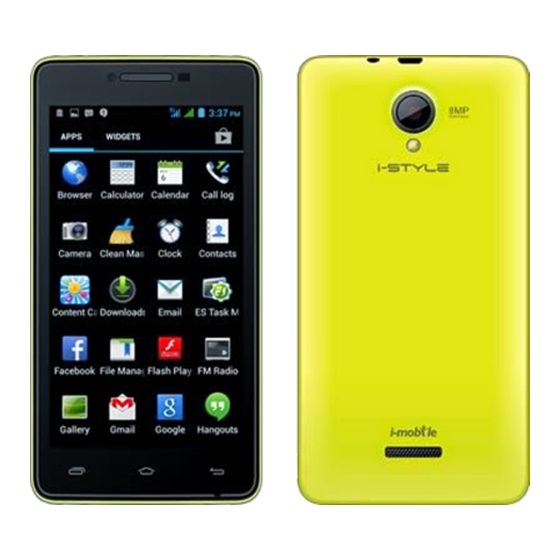
Page 6: Your Phone
shown are for representation purpose only. The content of the manual is correct when it is released, but we reserve the right to modify the technical specification without additional notification. Some content in the manual may be different from the mobile phone, as the accessory software, SIM card or service varies by providers. - Page 7 1. Charge/USB Port To connect charger or USB data cable for data exchange 2. Earphone Jack To connect an earphone so you can listen to music/radio. 3. Front Camera Allow you to take pictures while Lens facing the screen. 4. Receiver To hear the voice of the other side when calling.
- Page 8 8. Volume Keys To adjust the ringer volume, adjust the voice volume during a call, and adjust media volume. Switch the phone on and off; 9. Power/Lock Key Press and hold to open phone options menu. For taking photos. 10. Back Camera Lens To take photos in low-light 11.
-
Page 9: Getting Started
Getting started let's get you up and running Assemble & charge SIM card in Make sure that the clipped corner of the SIM card is facing the correct direction and the metallic contacts are facing the correct direction. Slide the SIM card into the card slot until it stops. -
Page 10: Touch Screen & Keys
The battery symbol indicates the charging status. While charging, the charge indicators will scroll. When all the scroll bars are steady, the battery is fully charged. Disconnect the charger from the phone. Disconnect the charger from the AC power socket. Note: If the battery is powerless, the battery icon will reappear after a few minutes of charging. - Page 11 options will be available to you. For example: play, add to playlist, delete, etc. Drag To scroll through a list or move slowly, drag across the touchscreen. Try it: on the Home screen, touch Contacts icon to enter contacts list, you can drag contacts list up or down to scroll list.
-
Page 12: Power/Lock Key
On some screens, the orientation of the screen rotates with the phone as you turn it from upright to its slide and back again. You can turn this feature on and off. Key tips Power/Lock key When powering off status, press and hold to turn on the ... -
Page 13: Volume Keys
Press and hold Home key to view the applications you have used recently. Back key Press Back key to return to the previous screen you were working on. Volume keys Press Volume keys to change the volume. When ... - Page 14 Phone status bar and notifications Phone Contacts Launcher: Main menu Messaging Browser You need slide the Home screen left or right to view more content in other panels on the Home screen. You can add shortcuts, widgets, folders, etc. to Home screen. Note: Your Home screen might look a little different.
-
Page 15: Working With Menus
Working with Menus The phone provides you with Options menus and context menus. Options menus Options menus contain tools that apply to the activities of the current screen or application, not to any specific item on the screen. You can open options menu by pressing the Menu key . - Page 16 Context menus Context menus contain tools that apply to specific item on the screen. You can open a context menu by touching and holding an item on the screen. Not all items have context menus. If you touch and hold an item that has no context menu, nothing happens.
- Page 17 back to the Home screen, and drag it to the desired location. To remove a shortcut on Home screen If you want to remove the shortcut, you can touch and hold the shortcut icon on Home screen until it vibrates, and then drag it to Remove tab.
-
Page 18: Arranging Your Home Screen
the widget icon on Home screen, and then drag it it to Remove tab. Arranging your Home screen To move an item on Home screen Touch and hold an item on Home screen until it vibrates, then drag it where you want. To organize your apps with folders To make a new folder on your Home screen, stack one app on top of another. -
Page 19: Changing The Background Of Your Home Screen
Changing the background of your Home screen Adapt the Home screen to your own style using wallpapers from Gallery, Live wallpapers, Video wallpaper, Pictures, or Wallpapers. Touch and hold the Home screen to select Wallpapers from Gallery, Live wallpapers, Video wallpaper , Pictures, or Wallpapers. -
Page 20: Checking Notifications And Ongoing Activates
To open the Application menu 1. On Home screen, touch Launcher icon. 2. Touch APPS tab. To browse the Application menu Open the Application menu, then slide the screen right or left. Phone status bar and notifications The status bar at the top of the screen contains icons that tell you about messages and phone status and shows what’s going on in your phone. - Page 21 Drag the status bar downwards. To close the Notification panel Drag at the bottom of the Notification panel upwards. To open a running application from the Notification panel From the Notification panel, touch the icon for the running application to open it. Toolkits In the toolkits you can quickly start the common applications such as Bluetooth, Wi-Fi and so on.
-
Page 22: Options Available During A Call
Dial pad Make a call Touch Phone icon on the Home screen. In dialing screen, input number and touch Dial icon to dial the inputted number. Options available during a call During a call, there are some call options available to you. - Page 23 These call options can be seen only during a call. When a call is in progress, you can put it on hold, initiate a phone conference, mute your microphone etc. Key pad: Go to the Touch key pad. Speaker: To turn on/off Touch the speaker.
-
Page 24: Text Entry
Text entry On-screen keyboard Touch the keys of the on-screen QWERTY keyboard to enter text conveniently. You can open this keyboard by touching a text field. Android keyboard input method Touch this icon to select desired contact from phonebook. Text field Send message Touch to capitalize the next letter you type. -
Page 25: Enter Various Characters
you have entered appear in a strip. Use the Delete key to erase characters to the left of the cursor. When you are finished typing, Press Back key to close the keyboard. Enter Various Characters Touch the symbols key to switch to the numbers and ... -
Page 26: Cut /Copy/Paste Text
Touch and hold the portion that contains text. Some options open with icons. Move the cursor to select the text. Copy Select all Cut /Copy/Paste Text 1. Touch Cut icon or Copy icon in the menu that opens. 2. - Page 27 into a text field in any application. Communication it’s good to talk, text or email. . . Messaging Find it: Application menu > Messaging You can compose, send and receive text messages from your phone, and also can compose, send and receive multimedia messages, which contain media files such as pictures, videos and audios.
- Page 28 4. After you finish marking contact(s), touch OK. 5. Touch Type text message to enter your message text. 6. If you want to insert a media file, touch , and select an attachment. 7. Touch , to send the message When editing message, press Menu key, some additional options will be available to you.
- Page 29 2. Touch and hold the message thread. 3. Select the conversations you want to delete. 4. Touch , then touch Delete in the menu that pops up. You can also press Menu key and touch Delete all threads to delete all message threads from the window. Forward a message ...
- Page 30 3. Touch and hold the message you want to lock. 4. Touch Lock in the menu that opens. A lock icon appears. Unlock a message by touching and holding the message and then touch Unlock. Messaging settings 1. From your Home screen, touch Messaging icon or find it: Application menu >...
- Page 31 Favorites tab Groups Contacts tab Touch a contact to Touch a contact view its thumbnail to details access the quick contact menu Touch to add Touch to new contact search Add a contact 1. From your Home screen, touch Contacts icon or find it: Application menu >...
-
Page 32: Additional Options
2. Touch 3. Input the first character of the name you are searching for in the cursor, and then all records meeting the conditions will be displayed. Search results will be different due to different input content. Additional options From contacts list screen, press Menu key, some additional options will be available to you. - Page 33 new group such as VIP, schoolmate, friends, family or co-worker. To create a new group 1. From your Home screen, touch Contacts icon or find it: Application menu > Contacts. 2. Touch Groups tab. 3. Touch 4. Choose account under which you want to create group. 5.
- Page 34 1. From your Home screen, touch Contacts icon or find it: Application menu > Contacts. 2. From contacts list, touch a contact which you want to set as favorite. 3. Touch . If you want to cancel the favorite, touch Phone Find it: Application menu >...
-
Page 35: Receive Emails
Application menu > Email. 2. Enter your email address and password, then touch Next. 3. If the settings for the email account cannot be downloaded automatically, complete the setup manually. If necessary, contact your email service provider for detailed settings. 4. - Page 36 Read your emails 1. From your Home screen, touch Launcher icon, then find it: Application menu > Email. 2. In the email inbox, scroll up or down, and touch the email you want to read. Reply to an email ...
- Page 37 it: Application menu > Email. 2. Touch at the bottom of the email inbox. Multimedia listen it, watch it, capture it, enjoy it! Camera Find it: Application menu > Camera Take a photo or record a video with the camera in your phone.
- Page 38 1. Preview your pictures or videos you captured 2. Take a photo 3. Record a video 4. Settings 5. Switch between front camera and back camera 6. Shooting mode Take a photo Adjust your picture size, color effect, and other ...
-
Page 39: Music Library
Music Find it: Application menu > Music The phone comes with a Music player that plays songs, listen to audio book and podcasts you have stored in your T-Flash card. It gives you a host of setting options to make your listening experience interesting. - Page 40 The Music library offers the following multiple categories that you can select. Categories Artists: Songs classified by singers Albums: Songs classified by albums Songs: Display all songs Playlists: Display playlists If you touch and hold a artist, a song, or a album, some options will be available to you.
- Page 41 Music player playing Settings controls Song details Music controls Progress bar Total song time You can return to the main library screen from music player screen in the Music applications by pressing Menu key and touch Library. Controls Play/Pause Touch...
- Page 42 Controls Previous/Next Touch Rewind/Forward Touch and hold Volume adjust Press Volume keys Now playing Touch Shuffle Touch Repeat: Touch to Touch repeat the current playlist; touch again to repeat the current track. Press Menu key, some additional options such as Party shuffle, Add to playlist, and Library will be available to you.
- Page 43 through the speaker in the phone. 1. Channel list 2. To auto search, speaker, or record FM 3. Radio on/off button 4. Save or remove a channel as a favorite 5. To fine-tune the FM frequency 6. To fine-tune the FM frequency 7.
- Page 44 Gallery Find it: Application menu > Gallery The Gallery offers you to view photos and play videos which are preloaded as well as those taken by the phone camera. From Gallery, you can also share your photos and videos with your friends, via messaging, Bluetooth, or email. 1.
-
Page 45: Sound Recorder
2. Press Menu key, touch Select album in the menu that opens. 3. Select the albums you want to share. 4. Touch 5. In the menu that opens, touch the application to use to share the selected albums. You can share via Email, Bluetooth, and Messaging. - Page 46 1. To start recording 2. Recording files list 3. To stop recording 4. To pause recording 5. Review and play recorded file Tools Stay on Top of things Calendar Find it: Application menu > Calendar You can use the calendar to keep track of important events.
- Page 47 2. Touch Menu key, then touch New event in the menu that opens. 3. Enter the name, location, time, and description for the event. 4. Select a reminder for the event. 5. After you finish, touch DONE. Clock Find it: Application menu > Clock The clock allows you to view time and date.
- Page 48 Keep your calculations on your finger tips with the calculator. Using this applcation allows you to make calculations. The calculator provides the basic arithmetic functions; addition, subtraction, multiplication, and division. How to use the calculator 1. From your Home screen, touch Launcher icon or find it: Application menu >...
- Page 49 and switch among them easily. Open the web browser From your Home screen, touch Browser icon or find it: Application menu > Browser. Application menu > Browser. Search and address bar Cancel the download of the current web page Enter a search word to search View the download for a web page, or...
-
Page 50: Connect To Networks And Devices
Connect to networks and devices Your phone can connect to a variety of networks and devices, including Wi-Fi, Bluetooth, devices, such as headsets. You can also transfer files to/from your PC through the data cable. Determine the Network You Are Using 1. - Page 51 3. Touch an existing APN to edit it, or press Menu key and touch New APN. Enter the APN settings that you obtained from your wireless service provider. 4. When you finished, press Menu key and then Save. 5. If you created a new APN, touch it in the APNs screen to start using it.
- Page 52 2. Touch Wi-Fi. 3. Check Wi-Fi to turn it on. The phone scans for available Wi-Fi networks and displays the names of those it finds. Secured networks are indicated with a Lock icon. 4. Touch a network to connect to it If the network is secured, you are prompted to enter a password or other credentials (Ask your network administratorfor details)
-
Page 53: Connect To A Computer Via Usb
2. Touch Bluetooth. 3. Check or uncheck Bluetooth to turn it on or off. Pair With Bluetooth Devices You must pair your phone with a device before you can connect to it. Once you pair your phone with a device, they stay paired unless you unpair them. -
Page 54: Working With Secure Certificates
USB is prohibited. Working with Secure Certificates If your organization’s VPN or Wi-Fi Network relies on secure certificates, you must obtain the certificates and store them in your phone’s secure credential storage, before you can configure access to those VPN or Wi-Fi networks on your phone. - Page 55 Settings the settings for various features of the phone Get to know the settings in your phone so that you can personalize them to your own requirements. Go to Settings to configure how your phone looks, sounds, communication, privacy, and operations in a variety of ways: SIM management Set preferences on how you use SIMs inserted in your...
- Page 56 search for available Bluetooth devices, and make your phone visible or invisible to other Bluetooth devices. Data usage Turn the mobile data traffic on or off, and keep track of your data usage details over a specified period of time. More...
- Page 57 Display Let you set the screen brightness, select to switch orientation when you rotate your phone, and configure other screen settings. Storage Let you check out available space on your phone’s internal storage, phone storage and on your SD card. Battery Check battery status and battery level.
- Page 58 Language & input Let you select the language for the text on your phone and for configuring the onscreen keyboard. Backup & reset Manage your personal data and reset your phone. Accounts & sync Let you add, and manage supported accounts. Enable your phone synchronize data with the synchronization accounts that you add.
- Page 59 Developer options Set options for application development. For example, you can also set the phone to enter debug mode when USB connections are active. About phone View information about your phone, such as status, and legal information.
-
Page 60: Accessing Password
Accessing Password The cell phone and SIM card use several accessing passwords. These passwords help to prevent the cell phone from being embezzled. You can use the function options in the security settings of settings menu to change accessing password (except for PUK and PUK2). -
Page 61: Puk Code
If a wrong PIN2 code has been input for 3 times straight, it is needed to input the PUK2 code, then input a new PIN2 code and input it again for confirmation. PUK Code PUK code (Personal Unlock Key) is used to change locked PIN code. - Page 62 Precautions Safe power on Do not use your mobile phone where it is forbidden to use or you might cause a disturbance or danger. Safe transportation first Please observe all related local laws and regulations. Do not use your mobile phone while driving.
- Page 63 Use qualified after sales service Only a qualified technician can install or repair your mobile phone. Please contact an i-mobile authorized service center in case of phone failure. Accessories and batteries Only use the authorized accessories and batteries and do not connect to incompatible manufacturers or products.
- Page 64 Waterproof Your mobile phone is not waterproof. Please keep it away from water. Backup Remember to make a backup or keep a written record of all important information saved in your mobile phone. Connect to other devices Please read the user manual of the device to get more detailed security instructions before connecting to other devices and do not connect to an incompatible product.
-
Page 65: Frequently Asked Questions And Troubleshooting
Frequently Asked Questions and Troubleshooting Cause and Solution Fail to turn Press the power on key for over 1 second. Check if the battery is properly connected. Please remove and install it again, retry to turn it on; Fail to Weak signal. - Page 66 Cause and Solution Poor quality Please check if the sound volume is tuned of calling improperly In an area with poor receiving condition, example: basement, the signal might be weak. Try searching a location with stronger signal reception and call again. While using the mobile phone in the peak period of communication, like commute time, you may be unable to call because of...
- Page 67 Cause and Solution Fail to dial Please check if you press the dial key after dialing. Please check if calling is forbidden because of defaulting. Please check if the SIM is valid. Please check if the call barring is set. Please check if the fixed dial function is set.
- Page 68 If the instruction above can not help you solve problems, please record, Mobile phone model and serial number,Specific content of warranty, Clear statement of problems,Then contact your local dealer or an i-mobile authorized service center in your area. Safety Information and Noticesutions Using the Mobile Phone and Charger Danger: Only use authorized battery and charger.
-
Page 69: Using The Mobile Phone
Warning: Do not bump, shake or tamper with the phone or charger. This may cause battery leakage, overheating, explosion or even fire. Do not place the battery, phone or charger near a microwave or high-voltage device. This may cause battery leakage, overheating, explosion or even fire;... - Page 70 Do not use the phone near electronic medical devices such as hearing aids, pacemakers and auto-control devices such as fire detectors and automatic doors. If you have to use your mobile phone near an electronic medical device such as a pacemaker, please contact your manufacturer or dealer for information about preventing interference.
-
Page 71: Using The Battery
can damage the mobile phone or the battery. Using the Battery Danger: Do not dispose of the battery into a fire. Doing so may cause battery explosion or even fire. If you have difficulties installing the battery, do not force the installation. -
Page 72: Using The Charger
changed shape or color. If battery liquid leaks onto your skin or clothes, immediately wash the affected parts with water. If the battery begins to leak or emits a strange odor, properly dispose of the battery according to local regulations. Do not throw it into a fire. Caution: Do not leave the product or its battery inside a vehicle. - Page 73 If liquid does spill onto the charger, immediately unplug the power cable to prevent overheating, fire or another type of breakdown. Do not use the charger in places with high humidity like a bathroom. This may cause a fire or other breakdown. Do not touch the charger, power cable or socket with wet hands.
-
Page 74: Cleaning And Maintenance
Caution: Risk of explosion if battery is replaced by an incorrect type. Dispose of used batteries according to the instructions. Requirements for the Charger and AC Adapter Please confirm if the environment temperature is within the range of 0ºC ~40ºC while charging. Cleaning and Maintenance The mobile phone, the battery and the charger are not waterproof. -
Page 75: Specific Absorption Rate (Sar) Information
Specific Absorption Rate (SAR) information Your phone has been designed to comply with applicable safety requirements for exposure to radio waves. These requirements are based on scientific organizations through periodic and thorough evaluation of scientific studies. These guidelines include safety margins designed to assure the safety of all persons, regardless of age and health. - Page 76 Band Position SAR 10g(W/kg) GSM900 Head 0.62 GSM1800 Head 0.66 SAR data information for residents in countries/ regions that have adopted the SAR limit recommended by the Institute of Electrical and Electronics Engineers (IEEE), which is 1.6 W/kg averaged over one (1) gram of tissue.
-
Page 77: Battery Informations
Battery Informations Type Capacity Li-ion 2000 mAh • The battery life depends on many factors, including the SIM card, network conditions, settings, usage and enviorenment. • Making calls, turning on the backlight and music player will consume more battery power. •... -
Page 78: Condition Of Waranty
Within the warranty period, maintenance or parts replacement is free of charge. Should be noted that i-mobile reserves the rights no return the damaged part. i-mobile provides warranty for mobile phone and accessory with the terms and conditions that are stated... - Page 79 Therefore, i-mobile will not be responsible for the working process, the readiness of the service, and the area covered. Any mobile phone and accessories that are already...
- Page 80 Using of mobile phone and accessory together with, or connect with the mobile phone or accessory that are neither provided nor certified by i-mobile including any accessory are inappropriate to use together with mobile phone and accessory.
- Page 81 additional...
- Page 82 Customer has already purchased. The warranty will not cover the damage that occurs from the use of any device under “i-mobile brand” with other products which are not the product of i-mobile. The warranty will not cover any expenses in the...
-
Page 83: Sw Upgrade (Ota)
SW upgrade (OTA) Notice: Before testing, please make sure: 1. WIFI is available. 2. Battery power is more than 40%. Check the firmware: Check the firmware version before the System Software Update. Settings -> About phone -> Build number Pic. 1... - Page 84 Android Mode: 1. Click the icon “System Software Update” in Application Manager(Pic.2) System Software Update initializing interface will pop up (Pic.3) Pic. 2 Pic. 3 2. Pic.3->Press Yes, will try to connect to server, 3 cases will happen:...
- Page 85 Case 1: Connect to server successfully, a new firmware is found on server. Pic.4->Pic.5, will show you the information and description of the new firmware package. Pic. 4 Pic. 5 Case 2 : There is no new firmware available on server. It will pop up”...
- Page 86 Pic. 6 Case 3 : Fail to connect to server. It will pop up "Error occurred" , then if you press ”OK”, the application will exit. (Pic.7) Pic. 7...
- Page 87 3. Pic.5->Press Yes, will show up the downloading interface, or if you press ”Cancel”, the application will exit. Pic. 8 4. Updating interface: 4.1 Update Now->Update confirmation interface. If you press ”Yes”, the phone will reboot, enter the Recovery Mode.(Pic.9->Pic.10->Pic.11)
- Page 88 Pic. 10 Pic. 9 Pic. 11...
- Page 89 4.2 Update later: Will exit the application. When you enter the application next time, will show you Step 4 directly. Recovery Mode: Some codes and a progress bar will show in phone screen. Phone will reboot after the recovery is finished. Then the phone will enter the Android mode again.
- Page 90 Check the firmware again: Check the firmware version again after the System Software Update. Settings -> About phone -> Build number Pic. 13...
Need help?
Do you have a question about the istyle 8.2 and is the answer not in the manual?
Questions and answers