Table of Contents
Advertisement
Quick Links
Advertisement
Table of Contents

Related Manuals for i-mobile i-style 2.8


Summary of Contents for i-mobile i-style 2.8
- Page 1 USER MANUAL...
- Page 2 Welcome Thank you for purchasing this product. For your cellular phone works properly, please follow the instructions in this manual. To prevent any possible incidents or malfunctions, please follow all safety warnings. Screen displays and illustrations in this user’s manual are designed to help you operate this phone to its optimum performance...
- Page 3 Contents ...
- Page 4 ...
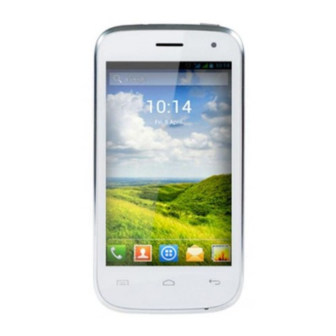
- Page 5 Phone Display Key Headset Port USB Port Power Key Volume Key Menu Key Back Key Home Key Function Home Key Press to return to the Home screen from anywhere on your phone. Press and hold to bring up the recent ...
-
Page 6: Key Function
Function MENU Key Press to open a list of actions available in the current screen. Back Key Within a menu, press to return to the previous screen, or to dismiss a dialog box or menu. When the onscreen keyboard is open, ... -
Page 7: Getting Started
Getting Started Please read the safety instructions in the "Safety Information and Notices" section before use. In order to use your phone, you must insert a valid SIM card supplied by your operator or retailer. The SIM card contains your subscription information, your mobile telephone number, and a small amount of memory in which you can store phone numbers and messages. -
Page 8: Remove The Back Cover
Inserting the SIM Card Remove the back cover Make sure that the phone is turned off. You need to remove the back cover of your phone before you can insert the SIM card. Insert the SIM card Make sure that the clipped corner of the SIM card is facing the correct direction and the metallic contacts are facing downwards. -
Page 9: Install The Back Cover
Install the back cover Align and hook the back cover to the top of the battery slot and then press the back cover down until it locks into place... -
Page 10: Power On/Off
Power on/off To power on the phone, press and hold the Power Key. Enter the PIN code if required (the 4 to 8 digit secret code of your SIM card). It is preconfigured and provided to you by your network operator or retailer. If you enter an incorrect PIN code 3 times in succession, your SIM card will be locked. -
Page 11: Inserting A Microsd Card
disconnect the charger. The only way to turn off the charger is to unplug it, so it is advisable to use an easily accessible AC power socket. If you do not intend to use your phone for several days, we recommend that you remove the battery. -
Page 12: Wireless Off
if you are going to remove your SD card, first you must remove it from your phone by selecting HOME, then tap the application tab to select Settings > Storage >Unmount SD card. Transfer files to the Phone storage To transfer music, picture, and other files from your computer to your Phone storage, you need to set the Phone storage into a USB drive... -
Page 13: Touch Screen
mode check box. Your phone will switch to “airplane” mode now. An airplane mode icon will be displayed in the status bar and all wireless connections will be disabled. To enable wireless connections again, return to the settings screen and clear the Airplane mode check box. Touch screen Your mobile phone features a touch screen which provides a faster and more intuitive way for you to navigate through... -
Page 14: Extended Home Screen
Touch the item on the screen with your fingertip. Press Menu key to open context menu. Zoom in or out Zoom in / out on a picture when viewed in full screen, web page, or map: Home Screen The Home screen is your starting point for using all the applications on your phone. -
Page 15: Set Wallpaper
Find an application quickly From the home screen, tap the application tab Add a Home screen item To create an application shortcut quickly, touch the application tab to reveal all the application icons, then touch & hold an application or widget icon and drag it to the home screen. -
Page 16: Remove Items From The Home Screen
highlighted, and then select Set wallpaper. If you select Gallery, the picture album opens. Slide your fingers to find the picture you want to use, and then touch it. If this picture is too large ,you must crop it first . Remove items from the Home screen To remove a shortcut or widget from your Home screen, touch and hold the item to enter “Remove mode”. -
Page 17: Making An International Call
Calling Making a Call Note You can make a call only when the network is available. Tap the Dialer icon on the HOME screen. Enter the phone number, select a contact, or a call log. Press the Call icon to dial the number To end the call, press the End Call icon Adjusting speaker/earpiece volume... -
Page 18: Making An Emergency Call
Enter the country code. Enter the area code (normally without the 0 before it), followed by the phone number. Press the Call icon to call directly. Making an Emergency Call On the Dialer tab, enter the emergency number and then press the Call icon on your phone. -
Page 19: Swapping Calls
Swapping calls When you have one active call and one call on hold, you can touch to switch between the 2 calls. Merging calls When you have one active call and one call on hold, you can select to make a conference call between the two calls. -
Page 20: Rejecting A Call
Calling Hands-Free During a call, select Answering a Call Drag icon to the green phone icon onthe right. If you were already on a call, the first call is placed on hold while you answer the new call. To silence the ringer before answering the call, press the Volume Down button Rejecting a Call Drag... -
Page 21: Ending A Call
Ending a Call Press the End Call icon to end a call. Your phone supports Bluetooth function. Bluetooth is a short-range wireless communications technology that allows Bluetooth devices to exchange information over a short distance without requiring a physical connection. ... -
Page 22: Name Your Bluetooth Device
Discoverability By default, your phone is not “discoverable”. This means other Bluetooth devices will not see your phone in their scans for Bluetooth devices. If you make your phone discoverable, it will be visible to other Bluetooth devices . To make your phone discoverable: Make sure you have turned Bluetooth on. -
Page 23: Rescan For Bluetooth Devices
Pair & connect with Bluetooth devices Make sure you have Bluetooth turned on. Go to Settings > Bluetooth . This phone will automatically start scanning for Bluetooth devices. As they are found, the devices will appear in the list of Bluetooth devices. Touch a particular device in the list to pair with it. -
Page 24: Main Menu
Main Menu Please read the following sections for a detail description of the main menu. Clock Your mobile phone has a built-in alarm clock. You can separate alarms and choose whether or not the alarm should repeat. How to set an alarm To set an alarm: To open Alarm Clock, press HOME to return to the home screen, tap the application tab... -
Page 25: Delete An Alarm
Ringtone: Select one ring tone for your alarm. The ring tone plays when selected. Vibrate: Press to set the vibration on or off. Label: Touch it to set a name for the alarm. Finally, press Back Key to save the settings. In the alarm, verify that you’ve activated either Saturday or Sunday on the Repeat area. -
Page 26: Adjust Browser Settings
Note Browser automatically opens when you touch a web link in an email or text message. It may involve the transmission of large amounts of data through your service provider’s network. Contact your service provider for information about data transmission charges. - Page 27 Tap the Go icon to follow the link to the selected address. Set your home page You can set your home page from the settings screen: Press MENU and select Settings >general> Set Home Page to open the dialog box. You can select Current Page,Blank Page,Default page ,Most visited sites or Site Navigation to set as your home page .you can also select Other , Type the URL...
- Page 28 Windows view If you wish to open several web pages at the same time and want to view them on the screen, please use the Windows function. while in the web page browsing , touch the in the bottom of the window . You will now see all web pages that you’ve opened.
- Page 29 Type the name and URL of the bookmark and touch the OK button to continue. On a browser screen, press MENU to access the option, and then touch Bookmarks./History.Below the new bookmark it lists all the bookmarks that you have stored.
-
Page 30: Taking A Photo
you to take and share pictures and videos. Please ensure that the camera lens is clean before you take pictures, as small dust particles can strongly affect the picture and video quality. To access this menu, press Home Key, , touch the application tab , and select Camera. -
Page 31: Recording A Video
Touch to change Settings Touch to Touch to shoot video take a photo Recording a video In camera mode, press to Switch to video. You can change the capture video quality by touching the related icons on the top of the screen. Touch to starting recording the video. -
Page 32: Turn On/Off Fm Radio
View your photos and videos To view the pictures and videos you have captured, as well as any you have stored on your phone storage, please go to Gallery menu to view the details. FM Radio This feature allows you to listen to your favorite FM radio station anytime with frequencies ranging from 87.5 MHz to 108.0 MHz. -
Page 33: Auto Search
Auto search Your phone supports to auto scan the radio stations and the stations searched will be memorized in the channel list. To access the FM radio menu. Press to access previous/next available channels. Contacts You can store phone numbers on your phone’s memory. This menu gives you quick and easy access to the people you want to search. -
Page 34: Creating A Contact
Browse through your contacts by sliding your fingertip up and down on the screen. Creating a contact Use this menu to add a new contact to the Phone book. Press HOME, and touch the application tab, and then select People. Press to access the option and choose location your favorite . - Page 35 In the contacts list, press MENU, touch Import /Export. If you have stored names and phone numbers on your SIM card, phone, phone storage, SD card , you can add these to the contacts stored on your phone by selecting this option.
-
Page 36: Call Log
Beside the Name field icon indicates contact favorites or not. Tap this icon until it changes color. Now the contact will be copied to Favorites. Call log Use this menu to view the calls you have dialed, received, or missed, and the length of the calls. To access this menu, press HOME, touch the application tab, and select Call icon , tap the... -
Page 37: Dial By Using Bluetooth Devices
Phone Use this menu to call your friends. To access this menu, press HOME, touch the application tab, and select Phone. Or you can press the Call icon in the home screen. How to dial a number? Enter the number you want to dial, and then press the Call icon to dial. -
Page 38: Viewing An Image
Gallery Use this menu to access photos and videos you have taken. For photos, you can also do basic editing tasks, set them as wallpaper or contact picture, or share them with your friends. To open pictures and videos, press Home Key and touch the application tab. -
Page 39: To Watch Videos
Select an album to view the pictures. Touch an album to open it and view its contents. The pictures and videos in the album are displayed in chronological order. Touch a picture or video in an album to view it. Return to the main Gallery screen at any time by touching its icon at the top left of the screen. -
Page 40: Messages List
Messaging Use the Messages menu to send and receive text messages and multimedia messages. To access this menu, press Home Key, touch the application tab and touch Messaging. Messages list Touch the Messaging icon on the Home screen or in the Launcher The Messaging window opens, where you can create a new message or open an ongoing message thread. -
Page 41: Reply To A Message
Reading multimedia messages If you have selected to auto-retrieve your multimedia messages, both the message header and body will download. If you are downloading only the headers, then you must first select the Download button to retrieve the message body. If you are concerned about the size of your data downloads, you can check the message size first. -
Page 42: Play Music
the options menu. When prompted to confirm, touch Delete. To delete all messages on the message list, press Menu Key on the message list and then touch Delete all threads Music This menu allows you to listens to your favorite music. To open your music library, press Home key and touch the application tab, and then touch Play Music. - Page 43 Shuffle Repeat Play/ Pause Touch to play Touch to the next song playthe previous song Progress bar The following actions are available on the playback screen: Shuffle songs: Shuffle songs in random order. Touch to toggle shuffle on or off. When the icon is grey, shuffle is off.
-
Page 44: Wireless And Networks
Go to next song: Touch once. Rewind: Touch & hold Go to beginning of the song: Touch once. Settings This menu allows you to control and customize phone settings on the Settings screen. Press Home, tap the application tab and touch Settings. You can also press MENU in the home Wireless &... -
Page 45: Audio Profiles
in the status bar when airplane mode is selected. VPN: Opens a screen that prompts you to select the type of VPN to add. You are then prompted for VPN configuration details. Tethering & portable hotspot: In this menu, you can ... -
Page 46: Location Access
Battery Your phone supports Battery feature. You can use the settings to turn on or off the displaying of Battery Percentage. In this menu, you can view how many applications are using the battery and used percentage. Apps This menu allows you to manage applications. Location access Use the Location settings to set your preferences for using Language &... -
Page 47: Scheduled Power On &Off
Accounts Use the Accounts settings to add, remove, and manage your Google and other supported accounts. You also use these settings to control how and whether all applications send, receive, and sync data on their own schedules, and whether all applications can synchronize user data automatically. -
Page 48: Developer Options
accessibility plug-ins you have installed on your phone. Developer options If you're an application developer, you may be more concerned about this part of the set. About phone View your phone Status. This screen lists a variety of information, including the network you are currently using, the type of network, signal strength, roaming status, any Wi-Fi addresses you’re connected to, and more. -
Page 49: To Start Recording
To start recording In any mode, press Home Key, touch the application tab and then touch Sound Recorder. Touch button to start recording. During the recording, you can pause the voice recording anytime by touching button . Then choose save the recording fil. -
Page 50: Sw Upgrade (Ota)
SW Upgrade (OTA) Notice: Before testing, please make sure: 1. WIFI is available. 2. Battery power is more than 40%. Check the firmware: Check the firmware version before the System Software Update. Settings -> About phone -> Build number Pic. 1... - Page 51 Android Mode: 1. Click the icon “System Software Update” in Application Manager(Pic.2) System Software Update initializing interface will pop up (Pic.3) Pic. 2 Pic. 3 2. Pic.3->Press Yes, will try to connect to server, 3 cases will happen:...
- Page 52 Case 1: Connect to server successfully, a new firmware is found on server. Pic.4->Pic.5, will show you the information and description of the new firmware package. Pic. 4 Pic. 5 Case 2 : There is no new firmware available on server. It will pop up”...
- Page 53 Pic. 6 Case 3 : Fail to connect to server. It will pop up "Error occurred" , then if you press ”OK”, the application will exit. (Pic.7) Pic. 7...
- Page 54 3. Pic.5->Press Yes, will show up the downloading interface, or if you press ”Cancel”, the application will exit. Pic. 8 4. Updating interface: 4.1 Update Now->Update confirmation interface. If you press ”Yes”, the phone will reboot, enter the Recovery Mode.(Pic.9->Pic.10->Pic.11)
- Page 55 Pic. 10 Pic. 9 Pic. 11...
- Page 56 4.2 Update later: Will exit the application. When you enter the application next time, will show you Step 4 directly. Recovery Mode: Some codes and a progress bar will show in phone screen. Phone will reboot after the recovery is finished. Then the phone will enter the Android mode again.
- Page 57 Check the firmware again: Check the firmware version again after the System Software Update. Settings -> About phone -> Build number Pic. 13...
-
Page 58: Safety Information And Notices
Safety Information and Notices Using the Mobile Phone and Charger Danger: Only use authorized battery and charger. Using other brands may cause battery leakage, overheating, explosion or even fire. Caution: Keep the phone away from dust, water and damp areas. Dust, water or other liquids may cause overheating, electrical leakage, and/or phone failure. -
Page 59: Using The Mobile Phone
fire, breakdown or damage. To avoid any damage or breakdown, do not disassemble the phone, battery, charger or internal components by yourself. Using the Mobile Phone Warning: Do not use the phone while you are driving. Pull over and stop your automobile to dial or listen to a phone call. Usage of mobile phones in aircrafts or hospitals is prohibited. -
Page 60: Using The Battery
usually not influenced by wireless devices. Manufacturers of these systems will tell you whether they are provided with good screening functions. If you suspect that an automobile failure is caused by a wireless wave, please contact your automobile dealer. Avoid using your phone in crowded places. Do not store your mobile phone near or with a credit card, disk or other magnetic materials. -
Page 61: Using The Charger
battery to short circuit, overheat or explode. Do not weld the polarities of the battery directly together. This may cause battery leakage, overheating, explosion or even fire. Battery liquid is severely harmful for your eyes. If battery liquid gets in your eyes, do not rub them. Instead, wash your eyes with water first and then go directly to a doctor for help. -
Page 62: Requirements For Mobile Phone
a different charger may cause the phone to breakdown or explode. If the charger short circuits, a fire may occur. Do not use a damaged, worn or broken charger. This may cause a fire. Clean dust away from the power socket to avoid the possibility of a fire. -
Page 63: Requirements For The Charger And Ac Adapter
When not in use, store the battery in a cool, well-ventilated place with sunshine. If you will not be using the mobile phone for an extended period of time, charge the battery on a regular basis to avoid battery breakdown. Caution: Risk of explosion if battery is replaced by an incorrect type. -
Page 64: Specific Absorption Rate (Sar) Information
Specific Absorption Rate (SAR) information Your phone has been designed to comply with applicable safety requirements for exposure to radio waves. These requirements are based on scientific organizations through periodic and thorough evaluation of scientific studies. These guidelines include safety margins designed to assure the safety of all persons, regardless of age and health. - Page 65 Band Position SAR 10g(W/kg) GSM900 Head 0.62 GSM1800 Head 0.66 SAR data information for residents in countries/ regions that have adopted the SAR limit recommended by the Institute of Electrical and Electronics Engineers (IEEE), which is 1.6 W/kg averaged over one (1) gram of tissue.
-
Page 66: Battery Informations
Battery Informations Type Capacity Li-ion 1300 mAh • The battery life depends on many factors, including the SIM card, network conditions, settings, usage and enviorenment. • Making calls, turning on the backlight and music player will consume more battery power. •... -
Page 67: Condition Of Waranty
Battery, headset, USB data connector, memory card, are in-warranty of 6 months after the date of purchase. This warranty shall apply to mobile phone and accessory under “i-mobile” brands that are purchased from Shop namely, I-mobile by Samart and Authorized Distributor or Authorized Service Center as appointed in Thailand only. - Page 68 loss...
- Page 69 Mobile phone and accessory are damaged due to the natural disaster. Mobile phone and accessory are repaired, changed parts, adjusted, modified, connected, customized without any authorization by i-mobile. Using of mobile phone and accessory together with, or connect with the mobile phone or accessory that...
- Page 70 Damaging of the label, warranty sticker on the mobile will be deemed as termination of the warranty. i-Mobile will not assure provided that the software from i-mobile will be up to your wishes or the working process...
- Page 71 i-mobile.
- Page 72 Customer has already purchased. The warranty will not cover the damage that occurs from the use of any device under “i-mobile brand” with other products which are not the product of i-mobile. The warranty will not cover any expenses in the...
Need help?
Do you have a question about the i-style 2.8 and is the answer not in the manual?
Questions and answers