
Related Manuals for i-mobile i651


Summary of Contents for i-mobile i651
- Page 1 HSDPA/WCDMA/EDGE/GPRS/GSM 850/900/1800/1900/2100MHz Mobile Phone User Manual...
- Page 2 Claims We reserve our right to make changes and improvements to any of the products described in this manual without prior notice. Under no circumstances shall we be responsible for any loss of data, income, or any special, incidental, consequential or indirect damages howsoever caused. The content of this manual is provided “as is”.
-
Page 3: Table Of Contents
Contents For Your Safety ............9 Brief Introduction .............11 Your phone’s label ..........11 Phone image............11 Key definition............13 Touch screen ............14 Silent mode ............15 Screen sleep ............15 Screen lock ............15 Wireless off............16 Making phone calls..........17 Power on/off............17 Home screen ...............19 Home screen ............19 Extended Home screen .........19... - Page 4 Create Home screen shortcuts widgets..............19 Remove items from the Home screen ...20 Move objects on the Home screen ..20 Create and delete folders on the Home screen ..............20 Customize Home screen wallpaper ..21 Notification and connection status icons ..................21 Getting Started ............25 Installing the battery........25 Installing a Sim-card........27 Charging the battery........28...
- Page 5 Wireless & networks ........31 Call settings ............33 Sound & display..........34 Location & secutiry.........35 Applications............36 Accounts & sync..........37 Privacy..............38 SD card & phone storage ......38 Search..............39 Language & keyboard ........39 Date & time............40 About phone ............40 Bluetooth...............41 Turn on Bluetooth services......41 Discoverability ...........41 Name your Bluetooth device ......41...
- Page 6 Pair & connect with Bluetooth devices 42 Rescan for Bluetooth devices ....43 Contacts ................44 Your contact list..........44 Search for a contact ........45 Add a contact .............45 Assign favorites..........45 Edit contact details .........46 Delete contact............46 Display contact..........46 Communicate with a contact.....46 Contacts settings ..........47 Email and Messaging..........49 Email................49...
- Page 7 About the Browser ...........58 Zoom and navigation in Web pages ..58 The Browse screen..........58 Open pages in separate windows....59 Manage bookmarks .........60 Set your home page.........62 Browser history ..........62 View the most visited webs......62 Download Web files and applications ..62 View your downloads ........63 Browser settings..........63 Dialer &...
- Page 8 Call log ..............71 Calendar ................72 View date ..............72 Create an event ..........72 Go to today............72 View an event .............73 Camera, Camcorder & Gallery ......74 Before you begin ..........74 Camera ..............74 Video Recorder ..........75 Settings of Camera ,Camcorder and Gallery ..............75 Music &...
- Page 9 Icon definition ............88 Wireless Tether............88 Tools ................89 Alarm Clock ............89 Calculator .............90 File Manager............90 FM radio ..............91 Battery Information..........93 Accessories ..............94 Safety of the battery........94 Data cable ............94...
-
Page 10: For Your Safety
For Your Safety SWITCH ON SAFELY Do not use in prohibited areas or when it may cause any interference or danger. SWITCH OFF IN HOSPITALS Follow any restrictions. Switch the phone off near medical equipment. SWITCH OFF WHEN REFUELING Do not use the phone at a refueling point. Do not use near fuel or chemicals. - Page 11 MAINTENANCE Only authorized and qualified personnel may repair this product. WATER RESISTANCE Your phone is not water-resistant. Keep it dry. INTERFERENCE All wireless devices may be susceptible to interference, which could affect its performance. Damage to the security seal will invalidate the warranty. Warning: Improper use will invalidate the warranty.
-
Page 12: Brief Introduction
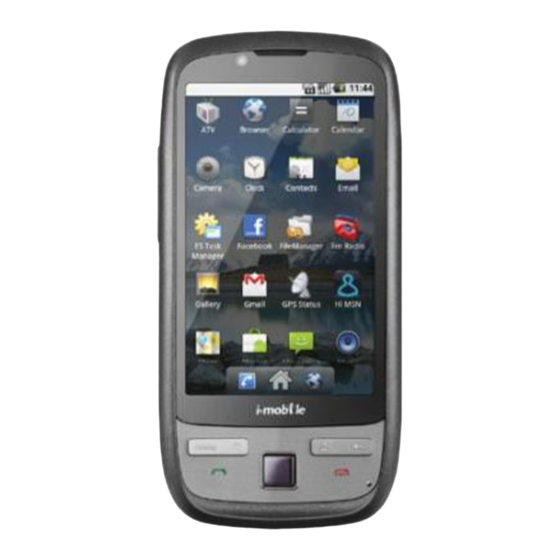
Brief Introduction Your phone’s label The barcode label includes important information about services and customer support. Please keep it properly. Phone image Note: All the illustrations, simulated screen and related images in the manual are for reference a refer to your handset for actually. - Page 13 1 _ Side key(volume up key) 2 _ Side key(volume down key) 3 _ USB port 4 _ Earphone jack 5 _ Front camera 6 _ Receiver 7 _ Touch lens 8 _ LCD screen 9 _ Search key 10 _ Menu key 11 _ Call log key 12 _ Optical mouse 13 _ Microphone...
-
Page 14: Key Definition
Key definition A few simple keys make it easy to operate. Call log key: • When there is an incoming call, press to answer the call. • Press to enter the call log interface. Home key • Press & hold to bring up the recent applications window. •... -
Page 15: Touch Screen
Touch screen Selection To select an item or button on the screen, touch the item directly with your fingertip. You will know when an item on the screen is selected when its color changes. Context menus To open the context menu for an item on the screen, touch & hold the item on the screen with your fingertip. -
Page 16: Silent Mode
the check box to let your screen keep the portrait orientation. Silent mode To silence your phone quickly, press and hold the Power & End key to open the option menu, and select Silent mode. Other ways to silence your phone: Press and hold the Volume down key to zero volume. -
Page 17: Wireless Off
order to unlock your screen, you’ll have to draw the correct unlock pattern. You can set your screen unlock pattern as follows: Return to the Home screen, then press the Menu key and select Settings. Select Location & Security, then scroll down to the Screen unlock pattern section. Select the Require pattern check box. -
Page 18: Making Phone Calls
Return to the Home screen, then press the Menu key and select Settings. Select Wireless & networks, then select the Airplane mode check box. When selected airplane mode icon displays in the status bar, all wireless connections are disabled. To enable wireless connections again, return to this settings screen and clear the Airplane mode check box. -
Page 20: Home Screen
Home screen Home screen The Home screen is your starting point for using all the applications on your phone. You can customize your Home screen to display applications, shortcuts and widgets as you like. Note: To enter the Application screen, press the icon in the Home screen. -
Page 21: Remove Items From The Home Screen
screen. Remove items from the Home screen To remove a shortcut or widget from your Home screen, touch & hold the item. The application tab turns into a Trash button. Drag the item to the Trash button and release. You’ll know when your item is in the Trash because the item and the tab will turn red. -
Page 22: Customize Home Screen Wallpaper
To delete a folder, touch & hold the folder to enter move mode. Drag the folder to the Trash button and release. Customize Home screen wallpaper Wallpaper your Home screen with pictures you have stored on your memory card, or select a picture from the Wallpaper gallery that is preinstalled on your phone: From the Home screen, press the Menu key and select Wallpaper. - Page 23 you of a new message, upcoming calendar event, alarm, or something else you should notice. On the right side of the status bar, you’ll see connection status icons. New email message New SMS or MMS Alarm is set Song is playing Data is syncing Preparing sd card SD card removed...
- Page 24 Battery charge indicators: full, half-full, low, very low! Battery is charging Wireless services are off (Airplane mode) Bluetooth® is on, Bluetooth device connected No SIM card in phone USB connected Read your notifications When you see a notification in the status bar, touch the bar and slide your finger down the screen to open the list of notifications displayed in the sliding window.
- Page 25 Open the notifications window to reveal the New voicemail notification. Select the notification. Your voicemail number is dialed.
-
Page 26: Getting Started
Getting Started Installing the battery Take off the battery cover. Put in the battery... - Page 27 Install the cover.
-
Page 28: Installing A Sim-Card
Installing a Sim-card Note:The sim-card slot is at the topside of the battery. Release the sim-card lock. Then put in the sim-card and lock it up Insert the memory card into the card slot, which is at the right side of the handset. -
Page 29: Charging The Battery
Charging the battery Warning: To avoid damaging the phone, please do not remove the battery when the phone is charging. To ensure the best performance of your phone’s battery, please charge the battery fully before using it for the first time (Approx. 12 hours), using the method described below. Please note: some batteries require several full charge/discharge cycles to reach their best performance. -
Page 30: Battery Tips
Battery tips Use only the batteries, data cable and chargers approved by the original manufacturer. Do not use a non-approved data cable or chargers, as it may damage the battery. Do not short-circuit the battery. Please store the battery inside the battery box to prevent accidental short-circuiting of the battery contacts. - Page 31 Only use the headset provided, or an approved spare. If the mobile has gotten wet, please switch it off immediately and remove the battery. Leave it to dry thoroughly before using it again. To get the maximum talk and standby times from your battery, please turn down the volume and reduce the backlight and contrast.
-
Page 32: System Settings
System settings Control phone-wide settings from the Home settings screen: Press the Menu key to select Settings. You can also select the Settings icon from the Application screen. Wireless & networks Mobile network settings Select data roaming capability. Connect to data services when in local. Add or edit network Access Point Names (APNs) - Do not change this setting unless advised to do so by your wireless operator! Use only 2G networks to save battery. - Page 33 required. Bluetooth on/off Use this check box to turn Bluetooth services on or off. Bluetooth settings With Bluetooth services on, you can open the Bluetooth settings screen to: Device name: Rename your device. Discoverable: Select to be discoverable, or not discoverable. Scan for devices: Search for devices that can be connected.
-
Page 34: Call Settings
your handset is still disconnected with your computer). (All the following steps are taken in your PC) Create a new connection in your PC( Right click Internet explore on the desktop> Attribute> Connection> Build connection> Select “connect to the network at my workplace”>Dial-up connection Enter the name of your company (whatever your want) Enter the phone number which must be in accordance with the type *99***3 Right click My Computer>... -
Page 35: Sound & Display
Sound & display Sound settings Silent mode Select to open the silent mode. All sounds except media&alarms are silenced. Ringer volume Select to open the volume control, then slide your finger along the volume bar to set incoming call volume and notification volume. Media volume Select to open the volume control, then slide your finger along the volume bar to set the volume for playing back music, videos, FM or voice recordings. -
Page 36: Location & Secutiry
powers on. Display settings Orientation Select to switch orientation automatically when the phone orientation changes (except the home screen) Animation Select to show animation when opening/closing windows. Brightness Select to open Automatic brightness. Screen timeout Select to decide how long your phone must be inactive before the screen turns off. Location &... -
Page 37: Applications
Select to have your password display as you type it. Use secure credentials Allow applications to access secure certificates and other credentials Install from SD card Install encrypted certificates from SD card Set password Set or change the credential storage password. Clear storage Clear credential storage of all contents and reset its password. -
Page 38: Accounts & Sync
YouTube to open any Browser links to videos. If you’d like to use another application to open video links, simply select the Clear defaults button. The next time you try to perform that action, you’ll be shown a dialog box so you can select an application. To make it the default, make sure you select the Use by default for this action check box on this dialog box before... -
Page 39: Privacy
You can add account here which you want to sync. Privacy Use My Location You can use this function for Google search results and other Google services. Back up my settings You can back up your handset setting here. Factory data reset: You can also select to reset your phone to factory settings. -
Page 40: Search
Available space: Report how much internal storage is free. Search Web search Google search settings Show web suggestions:When selected, suggested word will show as you type it in google web page. Search history Search history will show as you type content in the search box. Searchable items Contacst: When selected, relevant contact shows as you type the word in the search box Browser: When selected, relevant information in the network shows as you type the word in the... -
Page 41: Date & Time
first letter after a period (.), question mark (?), or exclamation point (!).(The initial is capitalized following dot+blank ) Quick fixes - This feature is not a spell-checker, but automatically corrects commonly-mistyped words when selected. Show suggestion - When selected, automatically display suggested words while typing. Auto-compete - When selected, automatically inserts a period (.) when you type two spaces in succession. -
Page 42: Bluetooth
Bluetooth You can use Bluetooth to send and receive calls using a headset or hands-free car kit. Also, you can send/receive files by Bluetooth. Turn on Bluetooth services Press the Menu key to select Settings in the Home screen Select Wireless &... -
Page 43: Pair & Connect With Bluetooth Devices
Press the Menu key to select Settings> Wireless & networks> Bluetooth settings>Device name in the Home screen. Type the name for your device in the dialog box, then select OK. Your new device name appears on the Bluetooth settings screen. Pair &... -
Page 44: Rescan For Bluetooth Devices
• The phone supports only the headset and hands-free Bluetooth profiles, so if you try to connect to a device that is not a headset or hands-free car kit, then you will receive an “unable to connect” message. • If you pair with a second headset while connected to the first, the first headset will remain connected. -
Page 45: Contacts
Contacts Your contact list To view the contacts on your phone, select Contacts in the Home screen. Contacts belonging to a specific group (you can choose which group) are listed in the Contacts tab. Only those contacts you star as “favorites” are listed in the Favorites tab. -
Page 46: Search For A Contact
Search for a contact Browse through your contacts by sliding your fingertip up and down on the screen. A rapid brush movement in either direction accelerates the scrolling. Touch the screen to stop the scrolling. Or press the Menu key to select Search in the Contacts main menu, type the keywords in the text box, then tap the magnifier beside the text box to start searching. -
Page 47: Edit Contact Details
Now your contact will be listed in Favorites and display with a colored star. Their details screen will also display the colored star. Edit contact details You can always make changes to the information you’ve stored for a contact: From Contacts, touch & hold the contact whose information you want to edit. The context menu opens. -
Page 48: Contacts Settings
From the contact details In the Call mobile section, select the number you want to dial. The number is dialed. Send a text or multimedia message to a contact To send a text or multimedia message to a contact, you must have a mobile number stored for them in contact details. - Page 49 SIM contacts importer If you have stored names and phone numbers on your SIM card, you can add these to the Contacts stored on your phone by selecting this settings option Import/Export. Once the list of names and numbers appears you can: Import all names/numbers in the list –...
-
Page 50: Email And Messaging
Email and Messaging Email POP3 and IMAP email accounts Add an email account Open the Application menu to select the Email application. The Set up new account screen appears. Type your account email address and password. If you want, select the Send email from this account by default check box. - Page 51 To open an email for reading, select it. Forward, Reply, Reply all, Delete, Mark as read You can forward, reply, reply all, delete or mark as read to an email message from either the Inbox or the read view: From the Inbox, touch & hold the message to open its context menu. Select the action you want to take.
- Page 52 Touch & hold the account you want to remove to open the context menu. Select Remove account. You will be asked to confirm before the account is removed. Edit account settings To open your Account settings screen, do the following: From your account Inbox, press the Menu key and select Account settings.
-
Page 53: Sms And Mms Messaging
To save your settings, press the Back key. SMS and MMS messaging Press the icon to open the SMS & MMS Messaging application. About text and multimedia messages SMS messages are also know as “text” messages and can each be around 160 characters. If you continue to type after the limit is reached, your message will be delivered as one, but count as more than one message. - Page 54 and body will be downloaded. To view your message, select the “play” button. If you are downloading only the headers, then you must first select the Download button to retrieve the message body. If you are concerned about the size of your data downloads, you can check the message size before you download.
- Page 55 Delete all message threads: From the message list, press the Menu key and select Delete threads. Delivery problems Touch & hold the message to open the context menu. You can edit, retry sending, or delete the message. To see all your undelivered messages (assuming there is at least one), from the message list, press the Menu key and select Undelivered messages.
- Page 56 Type your message. As you type, you’ll be able to track how many characters/messages you’re creating. Remember that text messages have a limit around 160 characters. Once you go over that limit, a new message is actually created but automatically joined into one when received.
- Page 57 card, delete them, and copy them to your phone memory, select this setting. Multimedia message settings Delivery reports: To receive a report on the delivery status of your message, select this check box. Status can be: • Successful delivery • Temporary delivery failure;...
-
Page 59: Browser
Browser About the Browser To open the Browser, select the Browser application in the Home screen. The Browser always opens to the last Web page you were viewing. The first time you enter the Browser after powering on, your home page will display. You can change your home page by pressing the Menu key and selecting More >... -
Page 60: Open Pages In Separate Windows
Go to a Web page You can press the Menu key and select Windows to the open window. Add a bookmark Bookmark the Web page you are currently viewing: Press the Menu key and select Bookmarks. From the Bookmarks screen, select bookmark. -
Page 61: Manage Bookmarks
Touch the “X” at right of the window you want to close. Alternatively, you can use the context menu: Bookmark the page displayed in a window From a Web page, press the Menu key and select Bookmarks. Touch & hold the window whose page you want to bookmark. The context menu opens. Select Bookmark. - Page 62 Press the Menu key and select Bookmarks. The Bookmarks screen opens. Touch & hold the bookmark you want to send. The context menu opens. Select Share link. Send the link via email or message, and then a Compose screen opens with the URL as the message.
-
Page 63: Set Your Home Page
Set your home page You set your home page from the Settings screen: Press the Menu key and select More>Settings. The Settings screen opens. In the Page content settings section, select Set home page to open the dialog box. Type the URL of the page you want to set as home, then select OK. Browser history Recently-visited pages (history) screen lists the recent sites you’ve visited on the Web. -
Page 64: View Your Downloads
• The Browser will only allow you to download items that are supported by an application installed on the phone. Warning: Applications downloaded from the Web can be from unknown sources. To protect your phone and personal data, only download applications from sources you trust, such as Android Market. - Page 65 Select a text encoding for your web browser. Block pop-up windows Select this check box if you want pop-up windows to be blocked. Load images Select this check box if you want images on Web pages to load. For faster page loading, clear this check box.
- Page 66 • Stored cookie data • Saved form data • Location access Accept cookies Select this check box if you want the Browser to save cookies. Some Web sites might not work properly with cookies disabled. Remember form data Select this check box if you want the Browser to remember text you have typed in forms, so that you can select the same text later rather than retyping it.
-
Page 68: Dialer & Voice Dialer
Dialer & Voice Dialer About the dialers You can use your phone to make phone calls by using either the Dialer or the Voice Dialer: To dial a number using the on-screen dial pad, touch in the screen. To dial by speaking either a number or contact name, select the Voice Dialer in the Application... -
Page 69: Answer An Incoming Call
You can tell the Voice Dialer any of the following: • “Dial number”, where number can be 3 digits (e.g., 911), 7 digits (e.g., 555-0123), or 10 digits (e.g., 205-555-0123). If you’re speaking a phone number, then always say “Dial” before the number. -
Page 70: In-Call Options
In-call options While on a call, press the Menu key to reveal the in-call options: Speaker, Mute, and Hold. Note that if Bluetooth services are on and you are connected to a hands-free device, the menu indicator will show Bluetooth on. Speaker To use the speaker, press the Menu key and select Speaker... -
Page 71: Multiple Calls
Multiple calls (Note: if you want to run this feature, your sim-card must be activated on this feature.) Incoming call during call in progress If you are on a call (“call in progress”) when another call comes in (“incoming call”), you have a few choices: Answer incoming, hold call in progress The incoming call will display in the foreground. -
Page 72: Call Log
Call log The call log is one of the tabs on the Dialer. The Call log displays by default. • To call any of the numbers in the list, simply select the name or number. • To clear the entire call log, press the Menu key and select Clear call log. -
Page 73: Calendar
add the number to an existing contact. Remove from call log Select to remove only this entry from the call log. Calendar To open Calendar service, select the Calendar application in the Application screen. You can view calendar, view month, edit event, etc. View date Slide up or down the screen to alter the month. -
Page 74: View An Event
View an event With any event edited, there appears a colored bar in the date box. Press the date box to view the event. -
Page 75: Camera, Camcorder & Gallery
Camera, Camcorder & Gallery Before you begin All the pictures you can capture or view and all the videos you can record or play on your phone are stored on a memory card, which must be installed in your phone. Before you can use the Camera or Camcorder, or view pictures/videos in Gallery, make sure you have a card installed. -
Page 76: Video Recorder
2. Move the handset following the arrow until the line gathers to one point. View your pictures To view the pictures you’ve captured, press the image at the upper-right corner, or in capture mode, press the Menu key to select Gallery. Video Recorder Record a video To open the Camcorder, select... - Page 77 Select picture quality Select picture quality from Super Fine, Fine, Normal. Select scene mode Select scene from auto, portrait, landscape, night, beach, snow. Select focus mode Select forcus mode from Macro, single-zone, face-detection. Select white balance Select white balance from auto, daylight, fluorescent, cloudy, warm fluorescent Select color effect Select color effect from none, mono, negative, sepia.
- Page 78 Select the video quality from Low (for MMS message) High (for SD card). Select video duration Select the limited time you can shoot the video. Select white balance Select white balance from auto, daylight, fluorescent, warmflurescent, cloudy. Select color effect Select color effect from none, mono, negative, sepia.
- Page 79 Zoom in Touch the screen to open the zoom-in and zoom-out controls Touch the control to zoom in. With each touch you zoom in closer. Or put your two fingers on the screen, then drag your fingers in opposite direction. Zoom out Touch the screen to open the zoom-in and zoom-out controls Touch the –...
- Page 80 Share a picture In full-screen view, press the Menu key and select Share. Select to share your picture via email, Messaging (MMS), etc. The relevant compose screen opens. Complete your message and send it. Rotate picture In full-screen view, press the Menu key and select Rotate. Select from Rotate left (counter-clockwise) or...
- Page 81 View picture details In full-screen view, press the Menu key and select More > Details. The picture details window opens. You can see the title, resolution, file size, and date of the picture. Show picture on maps(pictures should include location information) In full-screen view, press the Menu key and select More >...
- Page 82 Shuffle slides Select this check box to shuffle your pictures in the slideshow.
-
Page 83: Music & Video Player
Music & Video player Music Your library of music Your music is organized into four categories: Artists, Albums, Songs, and Playlists. Select a category to view the lists within each. Once in a category, keep selecting until you reach the music you want to play. - Page 84 top-level called “music” (or whatever you want) to store your files. Open this folder and copy music files into it. If you want, create folders within “music” to organize your music further. When finished copying, close the USB drive window and unmount or eject the drive as required by your computer's operating system.
- Page 85 Touch once Rewind Touch & hold Go to beginning of song Touch once Go to previous song Touch twice View current playlist Touch Party shuffle To start “party shuffle” (all the songs in your library are added to a playlist in random order), press the Menu key and select Party shuffle.
- Page 86 In the Add to playlist menu that opens, select to create a new playlist, or one of the existing playlists. The song(s) are added. Manage your playlists Go to Playlists. All your playlists appear. You can do the following from this screen: Play songs in list Select the playlist.
-
Page 87: Video Player
you can delete music stored on the card: From the Library screen, select either the Artists, Albums, or Songs category. Go to the screen that shows the artist, album, or song that you want to delete. Touch & hold the item to open the context menu. Select Delete. -
Page 88: Atv
Adjust volume Press the Volume keys to adjust the volume. Search for videos To find a video by typing a keyword, press the Menu key and select Search. The search window appears. Type your keyword, then tap the magnifier to start to search. Settings Screen pixel: Set the size of video-playing. -
Page 89: Icon Definition
Icon definition : Zoom in&out the screen. : Change to previous channel. : Change to latter channel. : Search for channel. : Channel list. :Adjust the volume Wireless Tether This feature can make your device become a wireless network launcher. 1. -
Page 90: Tools
Tools Alarm Clock To open alarm clock, select the Clock Application screen. The Alarm clock offers as many alarms as you want. Set an alarm Select defalut alarm to change the time or select Add alarm to add new alarm. Time The time the alarm will go off is shown. -
Page 91: Calculator
To delete the alarm, press&hold one alarm and select Delete alarm. Once your alarm goes off, you will receive an alert with the options to Snooze (for 10 minutes) or Dismiss. Add more alarms To add more than three alarms, from the main Alarm Clock screen, press the Menu key and select alarm. -
Page 92: Fm Radio
Touch SD card to open the folder. Touch and hold the screen to open the context menu, select New Folder to create a new folder. Or touch and hold a folder to open the context menu, then you can copy, cut, paste, rename, or delete the folder. Touch and hold a file to open the context menu, you can copy, cut, paste, send, rename the file, view the detail or delete the content in the file. - Page 93 In FM radio, press the Menu key to select Speaker to listen to the radio with speaker; select Speaker again to listen to the radio with headset. To listen to the radio In FM radio, touch , to switch among the channels you saved in the channel list. Search channel In FM radio, press the Menu key to select Seek, enter the frequency of the radio channel, and select...
-
Page 94: Battery Information
Battery Information Type Capacity Li-polymet 1500mAh --The battery life depends on many factors, including the SIM card, network conditions, settings , usage and enviorenment. --Making calls, turning on the backlight and multimedia player will consume more battery power. --The standby time is shorter when the network is not available than in the standard status. --For power saving, the backlight turns off automatically if your phone stands idle for an assigned time. -
Page 95: Accessories
Accessories Safety of the battery Please use the battery provided by the original manufacturer. Use of any other battery will invalidate the warranty and the manufacturer of the phone will take no responsibility in repairing the phone damaged by the use of unapproved fittings. Please keep any metal things (e.g. - Page 96 Caution: Use the mobile phone in the environment with the temperature Between-10 °C and 45°C; otherwise, it may damage your phone. It can be operating under 2000m。 Forthefollowingequipment:HSDPA/WCDMA/EDGE/GPRS/GSM 850/900/1800/1900/2100MHz BT/WiFi/GPS Mobile Phone is in compliance with the essential requirements and other relevant provisions of Directive 1999/5/EC.
- Page 98 Federal Communication Commission Interference Statement This equipment has been tested and found to comply with the limits for a Class B digital device, pursuant to Part 15 of the FCC Rules. These limits are designed to provide reasonable protection against harmful interference in a residential installation. This equipment generates, uses and can radiate radio frequency energy and, if not installed and used in accordance with the instructions, may cause harmful interference to radio communications.
- Page 99 antenna or transmitter. Federal Communication Commission (FCC) Radiation Exposure Statement This EUT is compliance with SAR for general population/uncontrolled exposure limits in ANSI/IEEE C95.1-1999 and had been tested in accordance with the measurement methods and procedures specified in OET Bulletin 65 Supplement C. This EUT is compliance with SAR for general population/uncontrolled exposure limits in ANSI/IEEE C95.1-1999 and had been tested in accordance with the measurement methods and procedures specified in OET Bulletin 65 Supplement C.
Need help?
Do you have a question about the i651 and is the answer not in the manual?
Questions and answers