Table of Contents
Advertisement
Quick Links
Advertisement
Table of Contents

Related Manuals for BenQ A520


Summary of Contents for BenQ A520
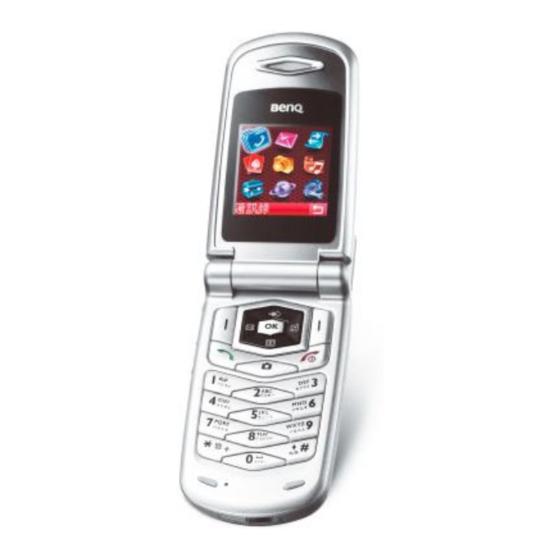
- Page 1 A520...
- Page 2 Copyright © 2005. BenQ Corporation. All rights reserved. No part of this publication may be reproduced, transmitted, transcribed, stored in a retrieval system or translated into any language or computer language, in any form or by any means, electronic, mechanical, magnetic, optical, chemical, manual or otherwise, without the prior written permission of BenQ Corporation.
-
Page 3: Safety Information
Safety Information For your safety, please read the guidelines below carefully before you use your phone: Exposure to Radio Frequency Signals Max. SAR measurement EU: GSM900: 0.81 mW/g; DCS1800: 0.34 mW/g. USA: PCS1900: 0.51mW/g (head); 0.69 mW/g (body). Your wireless handheld portable telephone is a low power transmitter and receiver. - Page 4 The design of your phone complies with these standards when used normally. For body worn operation, this phone has been tested and meets the FCC RF exposure guidelines when used with the A520 accessories supplied or designated for this product. Use of other accessories may not ensure compliance with FCC RF exposure guidelines.
- Page 5 • All batteries can cause property damage, injury or burns if a conductive material such as jewelry, keys or beaded chains touches exposed terminals. The material may complete electrical circuit and become quite hot. To protect against such unwanted current drain, exercise care in handling any charged battery, particularly when placing it inside your pocket, purse or other container with metal objects.
- Page 6 Pacemakers The Health Industry Manufacturers Association recommends that a minimum separation of six (6") inches be maintained between a handheld wireless phone and a pacemaker to avoid potential interference with the pacemaker. These recommendations are consistent with the independent research by and recommendations of Wireless Technology Research. Persons with pacemakers: •...
- Page 7 Vehicles RF signals may affect improperly installed or inadequately shielded electronic systems in motor vehicles. Check with the manufacturer or its representative regarding your vehicle. You should also consult the manufacturer of any equipment that has been added to your vehicle. Posted Facilities Turn your phone OFF in any facility where posted notice so requires.
- Page 8 For Vehicles Equipped with an Air Bag An air bag inflates with great force. DO NOT place objects, including both installed or portable wireless equipment, in the area over the air bag or in the air bag deployment area. If in-vehicle wireless equipment is improperly installed and the air bag inflates, serious injury could result.
-
Page 9: Table Of Contents
Table of Contents Safety Information ............i 1. Preparing Your Phone For Use........1 Inserting a SIM Card ............1 Installing a Battery and Charging the Phone ...... 2 Turning the Phone On ............4 2. Getting to Know Your Phone ........7 Your Phone at a Glance............ - Page 10 Dialing an Extension Number ........... 30 Speed Dialing ..............30 Voice Dialing ..............30 Listening to Voicemails ............31 Phone Book................. 32 Adding Contacts to the Phone Book........32 Finding Contacts in the Phone Book ........35 Last Missed, Dialed, and Received Calls......37 Operations During a Call ...........
- Page 11 Messages Menu..............57 New ..................59 SMS....................59 MMS .................... 61 SIM Folder ................66 Inbox ..................67 Templates................71 SMS Template ................71 MMS Template ................72 Outbox ..................72 Drafts..................72 Voicemail ................72 Settings..................72 Cleanup...................77 Memory Status ...............77 The Games menu..............78 God Damn Fish ..............78 Pilates Tutor ................78 ExtreMe_Racing ..............79 Diamond.................80...
- Page 12 Add..................83 Edit ..................84 Copy ..................84 Delete ..................84 Caller Group ................84 Privacy Manager ..............85 Business Card .................86 Activate ...................87 My Number ................87 SIM Status................87 Messages................87 Calls ..................88 Missed ..................88 Received ..................88 Dialed ..................88 Delete All.................88 Duration..................88 Cost ..................89 Games.................. 91 Camera ................
- Page 13 Help ..................... 98 Tools..................99 Alarm ..................99 Calendar................101 To Do List ................103 Note..................104 Shortcuts ................104 Voice Memo .................104 Calculator................105 Currency Converter .............105 Stopwatch ................107 Countdown Timer ...............107 Service Number ..............108 SIM Toolkit Menu..............108 Oper.Services ..............109 Start Browser ................110 WAP Message................116 Goto URL ..................
- Page 14 Theme..................121 Wallpaper .................. 121 Welcome Message ..............122 Contrast ..................122 Brightness .................. 122 Keypad Backlight ..............123 OLED Duration................. 123 OLED Animation Setting ............124 Audio..................124 Power Saving Mode..............124 Call Settings ................124 Call Divert ................. 124 Call Barring ................125 Call Waiting................
- Page 15 User Group ................133 Restore ..................133 5. The A520 Tools Gallery CD-ROM......134 6. The WebCam Function ........... 136 7. Care and Maintenance ..........139 8. Troubleshooting............140 Table of Contents xiii...
- Page 16 Table of Contents...
-
Page 17: Preparing Your Phone For Use
Preparing Your Phone For Use Inserting a SIM Card Slide the SIM card in under the metal plate in the SIM card slot, with the SIM card's metal contacts facing down and the cut corner at the top right. Metal plate SIM card A SIM card can be easily damaged if its metal contacts become scratched. -
Page 18: Installing A Battery And Charging The Phone
Installing a Battery and Charging the Phone 1. With the battery's metal contacts facing down, push the battery toward the top of the battery bay and then press down to lock the battery in place. 2. Place the battery cover on the back of the phone and slide toward the top of the phone to lock the cover in place. - Page 19 4. Insert the charger connector deep into the phone until the connector locks into place. Make sure you insert the connector in the correct orientation (the side showing the "UP"/arrow icon faces you). • Charging requires approximately 4 hours. • When charging the phone while it is turned off, the status indicator light will flash blue and the external and main displays will be activated:...
-
Page 20: Turning The Phone On
5. Once the phone is fully charged, remove the charger from both the power outlet and the phone. • Do not remove the battery while the phone is charging. • When the battery is out of power, the phone will play an alert sound to remind you to recharge it and then will automatically turn off. - Page 21 The PIN (Personal Identification Number) is a password provided by a network operator with a SIM card. You need this password in order to use the SIM card. If you enter the PIN incorrectly 3 times in a row, the SIM card will lock down and no longer be usable.
- Page 22 7. The standby screen will be displayed, as well as network signal strength and the name of the network operator. You can now use the phone. If the phone is not able to detect the designated network, or links to a network that you are not authorized to use, the on-screen signal strength meter will show no bars.
-
Page 23: Getting To Know Your Phone
Getting to Know Your Phone Your Phone at a Glance The figure below shows the main parts of your phone: Front view 1 Antenna Status indicator light External display External speaker Getting to Know Your Phone... - Page 24 Front view 2 Earpiece Main display OK key Scroll key Left soft key Right soft key Dial/Answer key Power on/off key Camera key Alphanumeric keys Microphone Getting to Know Your Phone...
- Page 25 Side and back views Hands-free headset/Data cable/WebCam cable jack Volume key Mirror used to take a self portrait. Camera lens Battery cover To avoid potential RF interference, please do not wear the phone in front of your chest. Getting to Know Your Phone...
-
Page 26: Status Indicator Light
Status Indicator Light The status indicator light has the following functions: • Flashes blue when the phone detects a network or is charging. • Flashes purple when the battery is fully charged. • Shows red when battery power is too low. •... -
Page 27: Standby Screen
Standby Screen External Display The external display's status bar will show icons for network signal strength, battery power, alarm (if active), etc. The current time and animations will appear in sequence. The external display also alerts you to incoming calls, messages, and missed calls. •... -
Page 28: Icons In The External Display's Status Bar
Icons in the External Display's Status Bar Icon Function Description Signal strength of the network. The more Signal strength bars indicated, the stronger the signal. Shows the current level of battery power. The more bars indicated, the more power Battery status that remains. - Page 29 Icon Function Description Divert The call divert function is active. Roaming has been activated (not your Roaming regular network) Getting to Know Your Phone...
-
Page 30: Main Screen
Main Screen Status bar Name network operator Time and date Wallpaper Soft key bar Press to enter Press to use enter Press to enter the Phone Book the Games menu. the main menu. Getting to Know Your Phone... - Page 31 • You can set the the wallpaper used for the main display's standby screen by going to the menu Media Center > Picture or Animation, or Settings > Display > Wallpaper. See page 92 and page 121. • To set the current time and date, as well as the format in which they will be shown in the main display's standby screen, go to the menu Settings >...
-
Page 32: Icons In The Main Display's Status Bar
Icons in the Main Display's Status Bar Icon Function Description Signal strength of the network. The more Signal strength bars indicated, the stronger the signal. Shows the current level of battery power. The more bars indicated, the more power Battery status that remains. - Page 33 Icon Function Description Meeting Th Meeting profile is in use. Outdoors Th Outdoors profile is in use. Personal The Personal profile is in use. Handsfree The Handsfree profile is in use. Divert The call divert function is active. Roaming has been activated (not your Roaming regular network) Getting to Know Your Phone...
-
Page 34: Using The Keys In The Standby Mode
Using the Keys in the Standby Mode The chart below is meant only to introduce the commands accessible with keys when the phone is in standby mode. For information on other key commands available in other operating modes, see the pertinent sections in this user manual. - Page 35 Commands and functions Power on/off key • Long-press to turn the phone on or off. • Press this key to reject incoming calls or cancel a call being dialed. • Press this key to delete all digits entered and return to the standby screen.
- Page 36 Commands and functions Right soft key • Press this key to open the Games menu (when Games is shown). For details on the Games menu, see page • Press this key to delete entered digits one by one; long- press to delete all digits entered (when Clear is shown).
- Page 37 Commands and functions Asterisk key • Press this key to enter an asterisk " * ". • To make an international call, long-press this key until the display shows "+" ,Then enter the recipient's country code, area code and phone number. Voicemail key •...
- Page 38 Alphanumeric keys Digit Digit/Symbol/Function * + (long-press) # P(long-press after entering a phone number) Getting to Know Your Phone...
-
Page 39: Menu Navigation
Menu Navigation From the standby screen, press to bring up the main menu. For details on how to use the various functions listed in the menu, see page 83, "Menus". You can choose a display color for the menus by going to the menu Settings >... - Page 40 Sub-menus The highlighted The name of the row is the currently current menu. selected item. Press to scroll up or down to an item. Press to bring up Press to bring up the the previous screen. next screen. Press return to the previous menu Press to enter the...
- Page 41 Turning a function on or off Press to turn the selected function on or off (the currently selected function will be highlighted). After the selected function is activated, the display will usually show further setting options. Press to scroll to the desired setting option. Press Press to cancel and return to the...
- Page 42 Menu navigation through number shortcuts The example given below demonstrates how to change the language setting by the menu number shortcuts. 1. In the standby mode, press to bring up the main menu. 2. The location of items in the main menu corresponds to the position of the keys in the alphanumeric keypad.
-
Page 43: Using Your Phone
Using Your Phone Making a Phone Call Open the flip and enter the desired number using the alphanumeric keys . Press to dial your call. Ending a Phone Call Press or close the flip to end a call. The display will show the total call time, and then return to the standby screen. -
Page 44: Answering A Phone Call
Answering a Phone Call When a call is received, your phone rings or vibrates, with the display showing the caller's number (if supported by your network vendor). If the caller is a contact stored in the Phone Book, the phone will show the name recorded in the Phone Book. -
Page 45: Rejecting An Incoming Call
Rejecting an Incoming Call • Regardless of whether the flip is open or closed, you can reject an incoming call by long-pressing the upper portion of the volume key on the left side of the phone. • When the flip is open, you can reject an incoming call by closing the flip or pressing Turning Off the Ring Tone for an Incoming Call... -
Page 46: Making An Emergency Call
Making an Emergency Call To call emergency services, enter 112 (the international emergency number) and then press to dial the call. You can make an emergency call even if your phone is locked or cannot access your network, or there is no SIM card inserted, so long as you are within range of a network of the type supported by your phone. -
Page 47: Listening To Voicemails
a. If there is only one phone number stored for the contact identified, your phone will automatically dial this number. b. If there are two or more phone numbers stored for the contact identified, the display will show the contact's Phone Book data. You can then scroll to the number you wish to dial, pressing to make the call. -
Page 48: Phone Book
Phone Book Adding Contacts to the Phone Book The Phone Book will have different formats and data headings depending on whether you have chosen to use a phone book stored on your SIM card or in your phone's memory. The phone book in your phone's memory can store up to 500 contacts. - Page 49 Used to select a caller group for the contact. When there is an incoming call from this contact, the ring tone assigned to this group will sound and the display will show the image associated with the group. To set a ring tone and image for each caller group, go to the menu Phone Book >...
- Page 50 • The default data fields for a contact are as follows: The contact's name. The contact's mobile phone number. The contact's home phone number. The contact's e-mail address. Used to assign a contact to a caller group. Used to assign a voice dialing prompt to a phone number. After the beep, speak the contact's name into the microphone.
-
Page 51: Finding Contacts In The Phone Book
The contact's job title. Used for notes about the contact. Used to mark dates of special significance associated with the contact. Used to set a ring tone for the contact. When there is an incoming call from the contact, the phone will play this ring tone. A ring tone set in this field will replace the one associated with the contact's caller group, if any. - Page 52 When the desired contact's name is highlighted, you can do one of the following: • Press to dial the first phone number saved in that contact. • Press (O O ption) to bring up a pop-up menu, which contains the following items: Edit: Edit the Phone Book data for this contact.
-
Page 53: Last Missed, Dialed, And Received Calls
Scroll to the desired data field. If the complete contents cannot be displayed on the screen, press to display the complete contents (if the data field is for a voice dialing prompt , you can press to play the sound of this voice dialing prompt. Press (O O ption) to bring up a pop-up menu that contains the following items:... -
Page 54: Operations During A Call
The icon will appear beside missed calls; the icon will appear beside dialed calls; the will appear beside received calls. If a phone number has already been stored in the information for a contact in the Phone Book, the display will show the name of this contact. - Page 55 Mute Press (M M ute) to turn off the microphone. The person on the other end of the line will not be able to hear your voice. To restore the microphone's function, press (U U nmute). Putting a Call on Hold* 1.
-
Page 56: Call Menu
Call Waiting* If there is an incoming call while you are on the phone, a tone will sound through the earpiece and the display will show that a second call is currently waiting. You can handle the waiting call and currently active call in the following ways: 1. - Page 57 Conference* Conference calls allow you to converse with more than one party at a time. The conference menu contains the following options: The maximum number of parties that can be accommodated during a conference call depends on the particular service provided by a network vendor.
- Page 58 End Call End All Ends all calls, whether active or on hold. End Active Ends only the active call. End Hold Ends only a call or calls on hold. End One Ends only a single call. Hold/Unhold/Swap Toggles the call status. Mute/Unmute Activates/cancels the silent mode.
-
Page 59: Using The Silent Profile
Using the Silent Profile From the standby screen, you can long-press to activate the Silent profile. Once it is activated, the phone will alert you to an incoming call by vibrating with no ring tone. • When you long-press to activate the Silent profile, the phone will vibrate for one second. -
Page 60: Camera Function
Camera Function Taking a photo Your phone's camera enables you to take photos to use as wallpapers for the phone's main display, photo caller ID images, or send them through MMS. 1. Press from the standby screen or choose the menu Camera > Camera to bring up the view finder. - Page 61 5. When your object is in focus, press to photograph the object. Its photo will then show up on the main display. Please note the following while shooting photos • The camera does not have a flash. Please take photos in a well-lit area.
-
Page 62: Shooting A Video
Exist Entry: Uses this photo as an existing contact's caller ID. Select the contact you want and press to attach the photo to that contact. This function is only available for contacts saved in the phone memory's phone book. Please go to the menu: Phone Book > Database to select the Phone Book for use. -
Page 63: Using The Album
Using the Album From the standby screen press to enter the Album menu. You can also access the Album menu by choosing Media Center > Album. Photos taken using the phone's digital camera are stored in this menu. After entering this menu, the two most recently saved photos will be displayed on the left of the screen as thumbnails (i.e. - Page 64 • Adjust: Enables you to adjust your photo's brightness, contrast, Saturation, etc. Press to select the desired setting item and press adjust the setting. • Set to Wallpaper: Designates this photo as the wallpaper for the main display's standby screen. •...
-
Page 65: Profiles
Profiles From the standby screen, press to enter the Profiles menu. A profile is a group of settings that determine whether the phone will alert you to incoming calls through a ring tone or a vibrating alert, and how ring tones in general are used on the phone. These settings allow the phone's operation to best suit the environment you are in. - Page 66 Airplane When you are on a plane, you can select this profile to turn off the phone. Once this profile is activated, the phone will automatically be powered off, and all alarms will be suspended. If the phone is turned off by long-pressing , the alarms will still turn the phone at the appointed times.
- Page 67 • Vibrate Only: When there is an incoming call, the phone will use a vibrating alert but no ring tone. Call Ring Scroll to the desired ring tone, and then press to confirm your selection. Message Tone The ring tone that your phone uses when a message is received. Alarm Tone The ring tone used by the Alarm Clock.
-
Page 68: Shortcuts Menu
• Flip Answer: Allows incoming calls to be answered by opening the flip. Rename Allows you to provide a new name for the profile (only available for the P P ersonal profile). Restore Returns the above settings for the profile to their factory default values. -
Page 69: Setting Phone Number Shortcuts
3. From the A A dd Function menu, select the function to be represented by the shortcut key, and then press . Alternatively, you can press a corresponding alphanumeric key to select the function you want. 4. Repeat the above step to add or modify function shortcut key assignments. -
Page 70: Using Function And Phone Number Shortcuts
Using Function and Phone Number Shortcuts There are two ways to use shortcuts: 1. From the standby screen, long-press to access the function represented by that key or dial the number it represents. 2. From the standby screen, press to enter the Shortcuts menu. You can then: a. -
Page 71: Letter Input Mode (Abc)
iTap (predictive input mode) for uppercase letters. iTap (predictive input mode) for lowercase letters. Numeric input mode (123). You can set the default input mode to the one you most frequently use. Go the menu Settings > Input. See page 133. Letter Input Mode (ABC) In this mode, press the key containing the desired letter repeatedly to scroll through the available characters in order until it is reached. -
Page 72: Predictive Input Mode (Itap)
Predictive Input Mode (iTap) iTap analyzes letters as they being inputted, making intelligent predictions about the words you are attempting to enter, and speeding up text entry. How to use iTap • Press once the alphanumeric key corresponding to the first letter of the word you wish to enter without considering where that letter falls in the sequence of characters available through that key. -
Page 73: Symbol Input Mode
4. Press to enter "HOME". 5. Since "GOOD" is not the word that you wish to enter, press display the next candidate word, "HOME". 6. Press to place "HOME" into the message. Symbol Input Mode When editing messages, press to open the symbols field along the bottom of the screen. - Page 74 • When a message has arrived, it will be saved either to the the phone's memory or to your SIM card's memory, depending on the preferred memory you have selected in the menu: Messages > Settings > SMS > Save Msg To (See page 73). Messages saved to the phone's memory will be stored in the menu: Messages >...
-
Page 75: Templates
1. Used to bring up the message editing screen so you can write a new SMS/EMS message. Use the alphanumeric keys to enter text. From the standby screen, you can press to open this message editing screen directly. For information on how to use the input methods provided by the phone for writing messages, see page 54, "Input Modes".
Need help?
Do you have a question about the A520 and is the answer not in the manual?
Questions and answers