Table of Contents
Advertisement
Quick Links
Advertisement
Table of Contents

Related Manuals for BenQ F5 Smartphone


Summary of Contents for BenQ F5 Smartphone
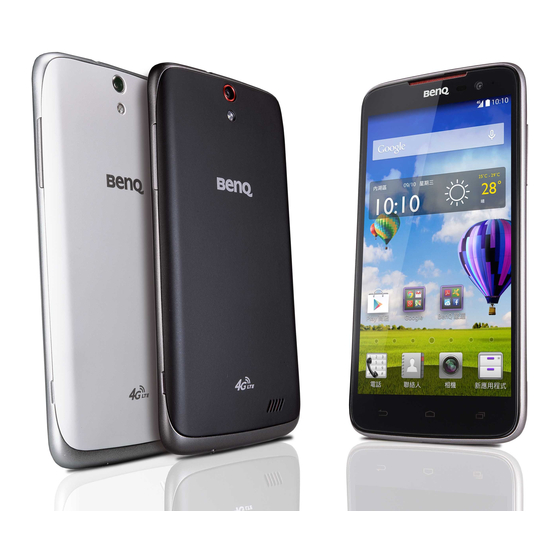
- Page 1 Smartphone User Manual...
- Page 2 ® The Bluetooth word mark and logos are registered trademarks owned by Bluetooth SIG, Inc. and any use of such marks by BenQ Corporation is under license. Windows is a registered trademark of Microsoft Corporation. All other logos, products, or company names mentioned in this manual are the registered trademarks or copyrights of their respective owners, and are used for informational purposes only.
-
Page 3: About This User Manual
Further, BenQ Corporation reserves the right to revise this publication and to make changes from time to time in the contents hereof without obligation of BenQ Corporation to notify any person of such revision or changes. - Page 4 Operations described in this manual are written based on holding the phone • in portrait mode. If the phone is held in landscape mode, part of the user interface may position differently. ™ For information on Google GMS (Google Mobile Services) applications, •...
- Page 5 Any third party content or service preinstalled in this product is provided “as is”. BenQ does not, by expression or by implication, make any warrant to the content or to the services provided by third parties. BenQ does not warrant or guarantee that the content or services provided by third parties are accurate, effective, most up-to-date, legal, or complete.
- Page 6 In addition, BenQ is not involved in any transactions you conduct in the websites or similar resources maintained by third parties.
- Page 7 BenQ ecoFACTS label lists key eco-friendly design highlights of each product, hoping to ensure that consumers make informed green choices at purchase.
-
Page 8: Table Of Contents
Contents Important safety information ......................12 Operating temperature .........................14 Battery ...............................14 Electrical safety ..........................15 About your phone..........................17 Check the package contents ......................17 Front view............................18 Rear view ............................20 Set up your phone..........................22 Remove the back cover.........................22 Insert a micro-SIM card.........................23 Insert a microSD card........................24 Install the back cover ........................25 Charge your phone ........................26 Use the touch screen .........................29... - Page 9 Check notifications.........................36 Use the Quick Settings ........................37 Put your phone to sleep........................38 Navigate the lock screen.......................39 Set up an Internet connection ......................42 Connect to a WLAN network ....................42 Enable your phone’s mobile data connection ................43 Add your accounts ..........................44 Sync your account...........................44 Remove your account........................45 Manage your location data ........................46 Enter and edit text ..........................48...
- Page 10 Manage your contacts.........................52 Share your contacts........................53 Import/export your contacts .......................54 Send text or multimedia messages ....................55 Navigate the Web ..........................56 Send email .............................58 Connect your phone to your computer..................60 Connect your phone to other devices...................61 Bluetooth ............................61 WLAN Direct..........................63 Tethering & portable hotspot ......................64 Wireless display..........................66 Connect to a network printer.....................67 Use the Camera...........................68...
- Page 11 Manage your images and videos.......................75 Manage your downloads ........................76 Set current time and date........................77 Use the Clock app..........................78 Set an alarm............................78 Show current time and date......................79 Set a timer ............................79 Use the stopwatch..........................80 Other settings ............................81 Optimize your phone’s battery ....................81 Adjust your phone’s display......................84 Manage your phone’s storage ......................86 Protect your phone ........................87...
-
Page 12: Important Safety Information
Important safety information Read the safety information carefully before using your phone. Failure to observe these instructions may result in damage to, or loss of, personal property, bodily injury, or even death. Don’t make/receive handheld calls while Keep your phone and accessories away •... - Page 13 Avoid extreme temperatures. Avoid contact with anything magnetic. • • Don’t rely on your phone for emergency Avoid contact with liquids. Keep your • • communications. phone dry. Don’t hold your phone close to your ear • while using the loudspeaker. Your phone can produce a loud sound and may damage your hearing.
-
Page 14: Operating Temperature
Operating temperature Use this phone in environmental temperatures between -10 °C and 40 °C. Battery Use only the supplied or approved battery. Using an unapproved battery may • cause your phone to explode and result in serious damage to your health or property. -
Page 15: Electrical Safety
Don’t disassemble the battery or throw the battery in fire as it may explode. • Your phone’s battery is non-removable. Don’t attempt to remove the battery. Electrical safety Use only the charger supplied with your phone. Using an unapproved • charger may cause malfunction and danger. - Page 16 Don’t use the charger or USB cable if they are broken or damaged. • Don’t attempt to repair the charger. Replace the charger if it is damaged or • exposed to excessive moisture. Consult your BenQ dealer or service center for help and maintenance.
-
Page 17: About Your Phone
About your phone Check the package contents Open the package and confirm that the following items are included. If anything is missing or damaged, contact your place of purchase immediately. F5 Smartphone x 1 Headset x 1 • • (with a non-removable battery) Quick Start Guide x 1 •... -
Page 18: Front View
Front view... - Page 19 1 Earpiece Used to listen to voice calls. 2 Proximity and Proximity sensor: Turns off the screen as you bring the phone • ambient light close to your ear during a call. sensors Ambient light sensor: Controls screen brightness according to •...
-
Page 20: Rear View
Rear view... - Page 21 1 Rear camera Captures photos and videos. 2 Headphone You can connect a headset to listen to music, FM radio, and conduct voice calls. connector To prevent hearing damage, don’t listen at high volume levels (above 100 dB) for long periods (over 30 minutes). 3 Secondary The secondary microphone receives ambient noise in a noisy microphone...
-
Page 22: Set Up Your Phone
7 Micro USB Connects the USB cable to transfer data to and from a computer. • port Connects the USB cable and charger to charge the phone. • 8 Primary Used to conduct voice calls. microphone Set up your phone Remove the back cover Insert your fingernail into the notch and lift up the back cover. -
Page 23: Insert A Micro-Sim Card
Insert a micro-SIM card With the metal contacts facing down, align the micro-SIM card with the mark next to the card slot, and fully insert the micro-SIM card into the card slot, until the micro-SIM card is locked in place. To avoid damaging your phone and SIM card, don’t use a Nano SIM card or a SIM card adapter. -
Page 24: Insert A Microsd Card
Insert a microSD card With the metal contacts facing down, align the microSD card with the mark next to the card slot, and fully insert the microSD card into the card slot. The phone supports microSD cards up to 64 GB in size. •... -
Page 25: Install The Back Cover
Install the back cover 1. Align the back cover onto the top of your phone (a). 2. In a clockwise direction (b), press the sides and the bottom of the back cover against your phone to lock the back cover into place. -
Page 26: Charge Your Phone
Charge your phone Your phone’s battery is not fully charged when you first unpack your phone. Fully charge the battery before using the phone. 1. Insert the smaller end of the USB cable into your phone’s micro USB port. 2. Insert the larger end of the USB cable into the USB wall charger. -
Page 27: Led Indicator
Fully charging the battery takes approximately 3 to 3.5 hours. • When the battery gets too low, your phone will shut down automatically. • Charger plug type may vary by country/region. • Your phone’s battery is non-removable. Don’t attempt to remove the battery. •... - Page 28 Turn your phone on/off Turn on: Press and hold the power button. • Turn off: Press and hold the power button > touch Power off > OK. • The first time you turn on your phone, select your language and touch .
-
Page 29: Use The Touch Screen
Use the touch screen Touch Drag Touch the screen gently to select an Touch and hold an item. Drag it to a item or perform an action. new position. - Page 30 Swipe Quickly slide your finger across the screen surface.
-
Page 31: Viewing Images
Zoom in or out (when browsing the Web or viewing images) Do one of the following: Quickly double-tap the screen. Spread or pinch images with two fingers. • •... -
Page 32: Navigate Your Home Screens
Navigate your Home screens 1. Status bar: Shows notifications on the left, and system status icons and current time on the right. 2. Widget: A small app that provides convenient functions and information on your Home screen. 3. Home screens: To move between Home screens, swipe left or right. - Page 33 7. Home screen indicator: Indicates the number of Home screens and current Home screen. 8. App icon Open an app: Touch an app icon. • Move an icon: Hold the icon. Slide and drop it in a new position. • Remove and uninstall an app: Hold the app icon.
-
Page 34: Organize Your Home Screens
Organize your Home screens Touch and hold to open the menu: Edit mode Add widgets: Swipe the widgets at the bottom. Hold and drag a widget to • where you want it to be on the Home screen. Add more Home screens: Swipe to the rightmost/leftmost screen and touch •... - Page 35 Search Open Google Now to search for information. To use Google Now you need to sign in to your Google account. Preview Change the central Home screen: Touch on a Home screen thumbnail. • The central Home screen’s thumbnail will show Touch a Home screen thumbnail to quickly jump to the Home screen you •...
-
Page 36: Check Notifications
Home settings Change Home screen settings. Check notifications When the status bar shows notifications, swipe down from the status bar at the top to open the notification drawer: Touch a notification to open an associated app. • To expand or contract an email notification, you can swipe a notification •... -
Page 37: Use The Quick Settings
Use the Quick Settings Use the Quick Settings to quickly enable/disable WLAN and mobile data connections, adjust brightness, and access the Settings app and other features. 1. Open the Quick Settings: Swipe down the notification drawer and touch at the top right. •... -
Page 38: Put Your Phone To Sleep
To change the settings available from the Quick Settings: • 1. Touch to enable the edit mode. 2. Touch to select the settings that you want to display in the Quick Settings. 3. Touch to close the edit mode. In the Quick Settings, touch at the top right to return to the notification •... -
Page 39: Navigate The Lock Screen
Wake up your phone and unlock the screen 1. Press the power button to turn on the screen. The lock screen appears. If you select Settings > Gesture > Double tap screen to wake up, you can quickly double-tap on the middle of the screen to wake up your phone. 2. - Page 40 Add widgets to the lock screen 1. To enable the lock screen widget feature, select Settings > Security > Enable widgets. 2. When the lock screen appears, swipe right from the left edge of the lock screen. 3. Touch the plus icon .
- Page 41 Reorder lock screen widgets 1. Touch and hold a widget. 2. Drag the widget and release it in a new location. Remove a lock screen widget 1. Touch and hold a widget. 2. Drag it onto X Remove and release.
-
Page 42: Set Up An Internet Connection
Set up an Internet connection To browse the Web, send email, and perform other online activities, a WLAN (Wireless Local Area Network, IEEE 802.11 b/g/n supported) or mobile data connection is required. Connect to a WLAN network Availability and strength of a WLAN signal depend on the distance and objects that the WLAN signal has to penetrate, such as buildings or walls between rooms. -
Page 43: Enable Your Phone's Mobile Data Connection
4. Touch a WLAN to connect to it. To connect to a secured network indicated by , type a password and touch Connect. 5. When the status bar at the top shows , your phone’s WLAN connection is successful. Enable your phone’s mobile data connection Go to Settings >... -
Page 44: Add Your Accounts
Add your accounts Using certain apps such as Email or Play Store requires you to set up and sign in to your personal account on your phone. 1. Go to Settings > ACCOUNTS > Add account. 2. Touch the type of account you wish to add. Select Corporate if you wish to set up an Exchange account. -
Page 45: Remove Your Account
3. Touch to select the data types that you wish to sync automatically (for example, Gmail or Contacts). Touch > Sync now to manually sync the selected data types. Remove your account 1. Go to Settings > ACCOUNTS > your account type (for example, Google). -
Page 46: Manage Your Location Data
Manage your location data You can let your phone collect your location data from WLAN, mobile networks, GPS satellites, and Google’s location service. To estimate your location, apps that have your permission may use your location data to deliver location-based services, such as local weather forecast, traffic data, etc. -
Page 47: Touch Mode
3. Touch Mode. 4. Select a location mode to decide what sources your phone uses to get your location data. Select the Battery saving mode to let your phone estimate your location using • low battery-intensive sources, such as WLAN and mobile networks. Using GPS to find your location requires a clear view of the sky and may consume •... -
Page 48: Enter And Edit Text
Enter and edit text Use the Google Keyboard When you touch a text box where you want to enter text, the Google Keyboard appears. When appears on the status bar, swipe down the notification drawer and touch “Choose input method” to use another input method keyboard, or change keyboard settings. -
Page 49: Move The Cursor
Move the cursor Touch where you want to edit in a text box, or drag the cursor tab Copy and paste text 1. Select text: Touch and hold or double-tap to select text. 2. When the selected text highlights, drag the tabs to change selection. -
Page 50: Make Calls
Make calls Touch Phone. Use the dial pad Touch the keys on the dialpad to enter phone numbers. • To make international calls, touch and hold to enter “+”. • To make calls, touch • When a phone number is entered on the dial pad, touch to add the •... -
Page 51: Use The Phone App's Main Screen
Use the Phone app’s main screen Touch to hide the dial pad and display the main screen. To find a contact, type a name or phone number into the search bar at the • top. To use voice search, touch and say a contact name or phone number. -
Page 52: When An Incoming Call Arrives
When an incoming call arrives Touch and hold , and swipe it over: : Answer the call. : Reject the call. • • If you cannot answer, touch a • message to send it to the caller. Manage your contacts Touch People. -
Page 53: Share Your Contacts
: People you talk to frequently or marked as favorites with a star. Touch to add new contacts/create caller groups. • If you have an Exchange (Corporate) or Google account on your phone, you can • choose to save and sync a new contact to the account. The contacts you choose to save in your phone or micro-SIM card will not be •... -
Page 54: Import/Export Your Contacts
Import/export your contacts 1. Touch > Import/export. 2. Choose from the following actions: Import from SIM card Contacts saved on the micro-SIM card will be copied to your account or phone. Export to SIM card Contacts saved on your phone or account will be copied to your micro-SIM card. -
Page 55: Send Text Or Multimedia Messages
Export to SD card Contacts will be copied as vCard files and saved on your microSD card or internal phone storage. Send text or multimedia messages Touch Messaging. 1. Touch 2. Type a mobile number or a contact’s name into the To text box. You can also touch to select a recipient from your contact list. -
Page 56: Navigate The Web
Navigate the Web Navigating the Web requires a WLAN or mobile data connection. See “Set up an Internet connection” on page Touch Browser. To visit a web page, type a web address into the address bar at the top of the •... - Page 57 Touch : Open new windows or switch among windows. • Touch : Open a new window. Touch : View bookmarks, browsing history, and saved web pages. Touch : Refresh, forward, open bookmarks, save the current page to • bookmarks, and access other options and settings.
-
Page 58: Send Email
Send email To send email, you need to: 1. Connect your phone to a WLAN or mobile data network. See “Set up an Internet connection” on page 2. Set up an email account on your phone. See “Add your accounts” on page 1. - Page 59 6. Compose your email content. 7. To perform further actions, such as attaching a picture, touch > Attach file. 8. Touch : Send the email.
-
Page 60: Connect Your Phone To Your Computer
Connect your phone to your computer 1. Use the supplied USB cable to connect your phone to your computer. 2. Swipe down the notification drawer from the top. 3. Select Connected as a media device > Media device (MTP). 4. On your computer, your phone is detected as a media device. Click on the device or select an action from the data transfer window that appears. -
Page 61: Connect Your Phone To Other Devices
Connect your phone to other devices Bluetooth You can connect your phone to another Bluetooth device to transfer files, or connect to a Bluetooth headset to make calls or listen to music. Using features requiring a Bluetooth connection may consume more battery power. To extend battery life between charges, turn off Bluetooth when not using it. -
Page 62: Unpair A Bluetooth Device
3. Touch Bluetooth. Your phone scans for and displays the IDs of all available Bluetooth devices within range. To make your phone visible to nearby devices, touch your phone’s name so that it shows Visible to all nearby Bluetooth devices. 4. -
Page 63: Wlan Direct
WLAN Direct WLAN Direct lets your phone connect to another device over a WLAN network, and then send data such as photos to the connected device using a sharing application available on both devices. 1. Touch Settings. 2. Slide the WLAN switch on: 3. -
Page 64: Tethering & Portable Hotspot
Tethering & portable hotspot You can share your phone’s mobile data connection via USB or as a portable WLAN hotspot. Go to Settings > More... > Tethering & portable hotspot. USB tethering Your computer can share your phone’s mobile data connection via USB. 1. - Page 65 Portable WLAN hotspot You can turn your phone into a portable WLAN hotspot, so that other devices can share your phone’s mobile data connection over a WLAN network. Set up a WLAN hotspot You can change your phone’s SSID (hotspot name), security type, and password.
-
Page 66: Wireless Display
Bluetooth tethering You can select Bluetooth tethering to share your phone’s Internet connection with other paired devices via Bluetooth. To share your phone’s Internet connection via Bluetooth, you also need to go to • Settings > Bluetooth to complete the following settings: 1. -
Page 67: Connect To A Network Printer
1. Go to Settings > Display > Cast screen > . 2. Select Enable wireless display. Connect to a network printer Go to Settings > SYSTEM > Printing. You can connect your phone wirelessly to a network printer that supports wireless printing, and then print the content on your phone to the printer. -
Page 68: Use The Camera
Use the Camera Touch Camera. To open the Camera app from the lock screen, swipe left from the right edge of the lock screen. Use the camera viewfinder (in Auto mode) Capture a photo 1. Touch : Switch between the front camera and the rear camera. 2. - Page 69 4. When the camera focuses on the subject in the selected focal point, touch to capture a photo. You can also press the volume up or volume down button to capture photos. In photo capture mode, select one of these auto-focus modes: : When you touch an object that you want to focus on, the camera •...
- Page 70 Record a video 1. Touch : Start recording a video. During recording, touch pause. 2. Touch : Stop recording. In video recording mode, select one of these auto-focus modes: : The camera will auto focus during recording. • : Allows you to touch the subject that you want to focus on during •...
-
Page 71: Use Other Capture Modes
Use other capture modes Touch to choose from the following capture modes: Photo Ultra Sensitivity Enhance camera sensitivity to lighting conditions, suitable for taking photos at night and in a dark place. Smile The camera captures a photo immediately when the viewfinder detects a smile on a person’s face. - Page 72 Panorama You can create a 360-degree panorama. 1. Frame one side or the other of the scene you want to include in a panorama. 2. Touch . Pan slowly and steadily across the scene you want to include in the panorama. 3.
- Page 73 Denoise Reduces a photo’s dark or bright spots. Lets you capture three photos of different exposure values. 1. Touch to capture three photos with these values: EV 0, EV +1, EV -1. 2. Swipe to view the photos. Touch and hold the photo thumbnails to select/deselect the photos.
-
Page 74: Camera Settings
Camera settings Touch these icons to perform the following operations: : Switch to another capture mode. : Set flash. Configure camera settings, including Resolution, Scene Mode, Face : Apply effects. Detection and Storage location. View captured photos/videos 1. Swipe the viewfinder screen away to the left to view photos/videos. 2. -
Page 75: Manage Your Images And Videos
Manage your images and videos 1. Touch Gallery. 2. Touch an album > image/video thumbnail to view the image/video. Touch and hold an image/video thumbnail to select the image/video. 3. To zoom in or zoom out on an image, spread or pinch the image with your fingers, or double-tap the image. -
Page 76: Manage Your Downloads
To save your phone’s screen as an image, press and hold the power and volume down buttons simultaneously. To view your screenshots, go to Gallery > Albums > Screenshot. Manage your downloads Touch Downloads to manage files and media items downloaded by your phone’s apps. -
Page 77: Set Current Time And Date
: Share selected items using available sharing apps. • : Delete selected items. • Set current time and date Go to Settings > SYSTEM > Date & time. You can set date and time manually or use your mobile network as the time source, select the time zone, and choose display format of date and time. -
Page 78: Use The Clock App
Use the Clock app Touch Clock. Set an alarm 1. Touch 2. Touch the time shown on an existing alarm, or touch to add a new alarm. 3. Set the alarm time using the clock image that appears, and then touch Done. -
Page 79: Show Current Time And Date
Show current time and date 1. Touch 2. Touch to add clocks for other cities around the world. Set a timer 1. Touch 2. Enter countdown time. Touch START. 3. When the timer is going: Touch : Add an additional minute. •... -
Page 80: Use The Stopwatch
Use the stopwatch 1. Touch 2. Touch the stopwatch image to start/pause the stopwatch. 3. To add laps while the stopwatch is running, touch... -
Page 81: Other Settings
Other settings Optimize your phone’s battery Use these settings to extend your phone’s battery life. Lower display brightness 1. Go to Settings > Display > Brightness. 2. Touch or drag the color bar to a lower brightness level. Touch AUTO to let your phone’s ambient light sensor adjust brightness according to surrounding lighting. -
Page 82: Power Management
Set sleep mode Choose the shortest time your phone takes to go into sleep mode. 1. Go to Settings > Display > Sleep. 2. Choose the shortest inactivity period possible. When the inactivity period ends, your phone automatically turns off the screen and goes to sleep. Power Management Go to Settings >... - Page 83 2. Touch Smart Connectivity. 3. Choose from the following modes: Regular: When the screen is off during the off-peak time, WLAN and data • connectivity is disabled after a defined delay timeout. You need to set the off-peak time’s start and end points, and the delay timeout. Aggressive: When the screen is off, WLAN and data connectivity is always •...
-
Page 84: Adjust Your Phone's Display
Battery You can check remaining battery power percentage, individual power consumption percentages of the functions currently in use, and total time of battery usage. Adjust your phone’s display Low blue light mode Go to Settings > Display > Low blue light mode. The Low blue light mode reduces the blue light emitted by the screen and helps ease eye strain. - Page 85 Daydream You can let your phone display screensavers when it is charging or docked during sleep. 1. Go to Settings > Display > Daydream. 2. Slide the switch on: 3. Choose what to display as screensavers. 4. Touch WHEN TO DAYDREAM to choose when to display screensavers.
-
Page 86: Manage Your Phone's Storage
Manage your phone’s storage Go to Settings > Storage. View space usage status for your phone’s internal storage and microSD card. Safely remove your microSD card 1. Slide down toward the bottom of the Storage screen. 2. Touch Unmount SD card > OK. 3. -
Page 87: Protect Your Phone
2. After being warned of losing all data on the card, touch the Erase SD card button to confirm. Deleted data cannot be restored. Consider backing up important data to your computer or a secondary storage device first. Protect your phone Here are the settings you can use to secure your phone and personal data stored on it. -
Page 88: Face Unlock
Face Unlock You can look at your phone to unlock the screen. Follow on-screen instructions to set up Face Unlock. When your phone tries to capture your face image, show your entire face within the suggested area on the viewfinder screen. -
Page 89: Encrypt Phone
Encrypt phone Encrypt all data on your phone. You must enter a numeric PIN or password to decrypt your phone each time you turn it on. Encryption is irreversible. The only way to revert to an unencrypted phone is to perform a factory data reset, which erases all your data. -
Page 90: Back Up And Reset Your Phone
Verify apps Some apps can harm your phone. You can choose to verify apps in order to help prevent harmful software from being installed on your phone. We strongly recommend not selecting the Unknown sources option. Apps from sources other than Play Store may contain malicious content to harm your phone or steal your personal data. -
Page 91: Factory Data Reset
Automatic restore Selecting this option lets your phone restore backed up settings and data when reinstalling apps. Factory data reset Performing this action will restore your phone to its factory state, and erase all your user data from your phone’s internal storage, including your accounts, system and app data, downloaded apps, and photos. -
Page 92: Check Phone Information
Check phone information Go to Settings > About phone. You can view your phone’s status including battery, IMEI, IP address, serial number, etc., and check the legal information, model number, and Android version. -
Page 93: Update Your Phone's Operating System
Update your phone’s operating system When your phone has a WLAN or mobile data connection, its Android • system automatically checks for system updates and notifies you. Swipe down the notification drawer and touch the system update notification to start the update process. You can also perform a manual update check by selecting Settings >... -
Page 94: Troubleshooting
Troubleshooting This chapter explains frequently asked questions and common problems that may occur while using your phone. If a problem persists, contact your place of purchase or BenQ service center. Power/battery My phone does not turn on. If your phone’s battery is completely discharged, your phone cannot be •... - Page 95 Touch screen Follow the instructions below when using the touch screen. Use the pad on the end of your finger to touch the screen. • To avoid damaging the screen, don’t hit the screen with sharp or hard • objects. Don’t apply excessive pressure or force to the screen surface.
- Page 96 Internet connectivity I have trouble connecting to WLAN. Check the following to ensure that: Your phone’s WLAN is turned on. • If the WLAN connection icon doesn’t appear on the status bar or • shows poor signals, connect your phone to another WLAN access point that has strong signals.
- Page 97 Why can’t I download apps from the Internet? Check the following to ensure that: Your phone has a WLAN or mobile data connection. • Your phone has enough storage space to save your downloads. • The microSD card where you wish to save your downloads is correctly •...
- Page 98 How do I update my phone’s operating system? “Update your phone’s operating system” on page Others Why can’t my phone read the micro-SIM card/microSD card? Ensure that you have fully inserted the micro-SIM card/microSD card • into the correct card slot. See “Insert a micro-SIM card”...
- Page 99 BenQ.com © 2014 BenQ Corporation. All rights reserved. Rights of modification reserved.
Need help?
Do you have a question about the F5 Smartphone and is the answer not in the manual?
Questions and answers