Page 1
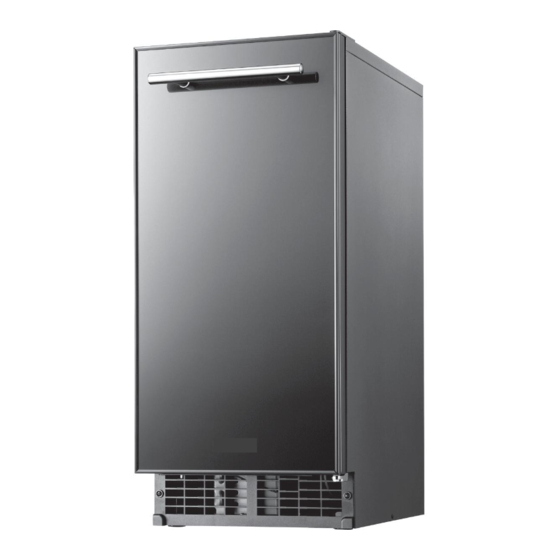
INDOOR/OUTDOOR ICE MAKER Models BIM68OSGDR BIM68OSPUMP User’s Manual BEFORE USE, PLEASE READ AND FOLLOW ALL SAFETY RULES AND OPERATING INSTRUCTIONS Write Model and Serial Numbers here: FELIX STORCH, INC. Summit Appliance Division Model No.: _____________________ An ISO 9001:2015 registered company 770 Garrison Avenue Ser.
ICE MAKER SAFETY Your safety and the safety of others are very important We have provided many important safety messages in this manual and on your appliance. Always read and obey all safety messages. This is the Safety Alert Symbol. This symbol alerts you to potential hazards that can injure or kill you and others.
IMPORTANT SAFEGUARDS Before the ice maker is used, it must be properly positioned and installed as described in this manual, so read the manual carefully. SUMMIT® APPLIANCE strongly recommends that you have a professional install your new machine. The warranty may be affected or voided by an incorrect installation. To reduce the risk...
It is important for the ice maker to be leveled in order to work properly. Otherwise water may not flow properly through the evaporator (ice mold). The ice production will be less than normal. You may need to make several adjustments to level it. ...
label on the appliance. This provides the best performance and also prevents overloading house wiring circuits which could cause a fire hazard from overheated wires. Never unplug your ice maker by pulling on the power cord. Always grip the plug firmly and pull straight out from the outlet.
Page 7
The mineral content of the ice produced by the ice maker is reduced compared to the content in the water before conversion into ice. Water containing a low level of impurities is rapidly frozen. The reason for this is that the impurities elevate the temperature of the water.
Water supply socket (inlet) Drain hose Power cord Notes: Model BIM68OSGDR is a gravity-drain ice maker. Model BIM68OSPUMP includes an internal pump. Each has a heavy-duty power cord and stainless steel door and cabinet, and is suitable for either indoor or outdoor use.
Figures 4, 5, 6 and 7 show the dimensions of the ice makers. Model BIM68OSGDR is a gravity drain pipe model that requires a drain pipe to run from the exhaust hole at the back of the product to an appropriate drain.
Installation in a narrow or underground space: Either the gravity drain model (BIM68OSGDR) or the drain pump model (BIM68OSPUMP) may be used. If there is no space for drainage/sewage at the back of the ice maker, the drain tube should be placed under the bottom.
Gravity Drain Pipe Model (BIM68OSGDR) Before connecting the drain tube and the water supply pipe with the ice maker, pipes should be arranged as follows. The horizontal distance of the drain tube should be 1/4" for every 12" (305 mm) distance.
Drain Pump Model (BIM68OSPUMP) 1) Arrange the ice maker at the front of the installation opening. 2) Adjust the leveling legs to the appropriate height. 3) Install the inlet pipe (copper pipe with a diameter of 1/4”) on the wall and connect the water supply valve. 4) Connect the drain pipe from the wall to the ice maker.
What to check prior to installation Follow this process The water supply valve may have different shapes depending on the installation ● condition. The filter may be located close to the water source or back of the product ● depending on the situation. Water Avoid uneven surfaces or places with too much moisture, inlet:Connectthewatertapadaptortothewa...
Changing Door-opening Direction The direction in which the door with fixed hinges opens may be changed. The hinges are attached to the right-hand side of the door when the product is shipped from the factory. However, the ice maker is designed so that the hinges may be installed on either side. If the hinges are moved to the holes on the left-hand side, the door will open to the left.
Installation Checklist Important Information: The installation engineer should check whether any installation part has been omitted and follow the check list below to ensure safe and proper installation. If you have any questions or problems regarding installation, address your queries to the distributor or dealer.
SpecificFeatures Fig. 9: Ice maker Sink-Mounted Ice Maker The gravity drain-type naturally drains water, whereas the drain pump-type drains water to an adjacent sink using a built-in pump. A perfect and unified design system with a depth of 24" (610 mm). ...
Operation Initial operation ① Open the water supply valve connected with the ice maker. ② Insert the plug of the ice maker into the electric outlet. ③ Open the door and turn the switch at the lower end of the product to the “ICE”...
Operation time It takes about 20-35 minutes to produce a batch of 24 ice cubes. The length of one cycle of the ice maker (ice production and ice removal) differs depending upon the cleanness of the ice maker, the surrounding temperature, and the temperature of the water supplied to the ice maker.
Cleaning Cleaning the nozzle / ice slide / water tank 1. Open the door and remove two front injection bolts on the top cover. 2. Pull the top cover to remove it. 3. Slightly lift the ice slide to remove it. 4.
5. Clean the gap of the nozzle frame fixed on the vessel sheet (water tank). 6. Lift the drain projectile inside the vessel sheet (water tank), clean it, and drain the water. • Make sure the drain projectile is assembled back in the correct position after cleaning;...
2. Open the front door and remove the filter screens from the bottom of the ice tank and water tank. Water tank Ice tank 3. Rinse the screens with running water, and then assemble them back to the tanks. • Otherwise, the water nozzle will get clogged, or dregs inside the ice tank may damage the product by clogging the draining port.
Cleaning the condenser 1. Remove two screws on the front panel at the center of the inside. 2. Remove dust from surface of the condenser with a vacuum cleaner. 3. Reassemble the screws to the panel after cleaning. Cleaning the condenser: Clean at least once a month after turning off power.
To adjust the three items, an inspection kit is required. If the ice maker is adjusted by the user at his/her discretion, a serious incident may occur. Important Information: The three items mentioned above should be adjusted by the engineer of a service center designated by SUMMIT.
Troubleshooting POSSIBLE PROBLEM POSSIBLE SOLUTION CAUSE Ice maker is unplugged Plug ice maker in. Breaker tripped Reset breaker - if it happens again, call an authorized service center. Ice maker Switch turned to “OFF” Turn switch to “ICE”. does not operate The ice maker has stopped since the ice detection sensor inside the tank is activated.
Limited Warranty ONE-YEAR LIMITED WARRANTY Within the 48 contiguous United States, for one year from the date of purchase, when this appliance is operated and maintained according to instructions attached to or furnished with the product, warrantor will pay for factory-specified parts and repair labor to correct defects in materials or workmanship.
Need help?
Do you have a question about the BIM68OSGDR and is the answer not in the manual?
Questions and answers