Summit BIM-44 G User Manual
Automatic undercounter ice maker
Hide thumbs
Also See for BIM-44 G:
- User manual (60 pages) ,
- User manual (88 pages) ,
- User manual (88 pages)
Table of Contents
Advertisement
Available languages
Available languages
Automatic Undercounter Ice Maker
Máquina automática para hacer hielo
User's Manual (pages 1 - 26)
Manual del usuario (páginas 27 a 52)
Be sure ice maker is standing upright 24 hours prior to plug-in.
Asegúrese que la máquina esté parade en posición vertical 24 horas antes que sea conectada.
SUMMIT® APPLIANCE DIVISION
Model/Modelo
Felix Storch, Inc.
BIM-44 G
P.O. Box 1357
Bronx, NY 10472
Website: www.summitappliance.com
Advertisement
Chapters
Table of Contents

Related Manuals for Summit BIM-44 G


Summary of Contents for Summit BIM-44 G
- Page 1 Manual del usuario (páginas 27 a 52) Be sure ice maker is standing upright 24 hours prior to plug-in. Asegúrese que la máquina esté parade en posición vertical 24 horas antes que sea conectada. SUMMIT® APPLIANCE DIVISION Model/Modelo Felix Storch, Inc.
-
Page 2: Table Of Contents
TABLE OF CONTENTS Page ICE MAKER SAFETY ....................2 IMPORTANT SAFEGUARDS ................3 - 5 TECHNICAL INFORMATION ..................5 INTRODUCTION ......................6 COMPONENT LOCATIONS .................. 6 - 7 ICE MAKER INSTALLATION ................7 - 14 Unpacking ...................... 7 - 8 Location requirements .................. -
Page 3: Ice Maker Safety
ICE MAKER SAFETY Your safety and the safety of others are very important We have provided many important safety messages in this manual and on your appliance. Always read and obey all safety messages. This is the Safety Alert Symbol. This symbol alerts you to potential hazards that can injure or kill you and others. -
Page 4: Important Safeguards
IMPORTANT SAFEGUARDS Before the ice maker is used, it must be properly positioned and installed as described in this manual, so read the manual carefully. SUMMIT® APPLIANCE strongly recommends that you have a professional install your new machine. The warranty may be affected or voided by an incorrect installation. -
Page 5: Save These Instructions
· Do not kink or pinch the power supply cord between the ice maker and cabinet. · The fuse (or circuit breaker) size should be 15 amperes. · It is important for the ice maker to be leveled in order to work properly. Otherwise water may not flow properly through the evaporator (ice mold). -
Page 6: Technical Information
Extension Cord Because of potential safety hazards under certain conditions, it is strongly recommended that you do not use an extension cord with this ice maker. TECHNICAL INFORMATION Model: BIM-44 Electrical power: 115VAC ~ 60Hz Power consumption: 13.2 kWh/100 lbs of ice Ice-making /-harvest rated current: 3.7A/4.8A Refrigerant:... -
Page 7: Introduction
INTRODUCTION The SUMMIT® BIM-44 G Ice Maker produces hard, crystal-clear, gourmet cube ice, and offers convenience for homeowners and hotel guests. An insulated ice storage bin is built in. In addition, you have the option of using an internal or external drainage system. -
Page 8: Ice Maker Installation
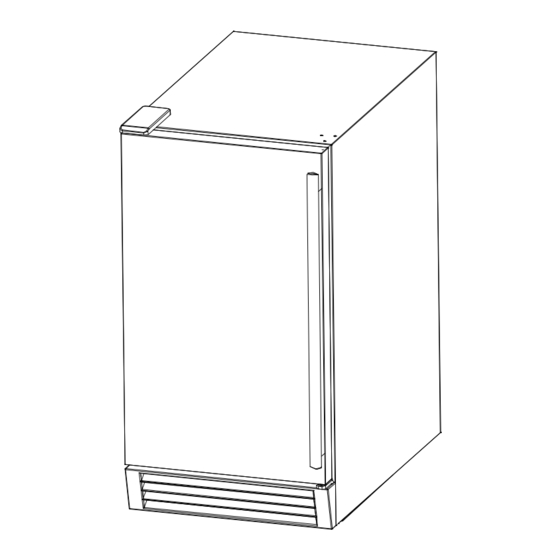
Ice scoop Power cord Water inlet Ice scoop Drain outlet Water supply hose Drain hose ICE MAKER INSTALLATION Unpacking Excessive Weight Hazard Use two or more people to move and install ice maker. Failure to do so can result in back or other injury. Remove packaging materials IMPORTANT: Do not remove any permanent instruction labels or the data label on your ice maker. -
Page 9: Location Requirements
Cleaning before use After you remove all of the packaging materials, clean the inside of your ice maker before using it. See the "Interior cleaning" in the Cleaning and Maintenance section. Location requirements INSTALLATION CLEARANCES: SIDE VIEW TOP VIEW 1” 4”... -
Page 10: Electrical Requirements
Normal operating ambient temperature should be between 50°F (10°C) to 100°F (38°C). Normal operating water temperature should be between 41°F (5°C) and 90°F (32°C). Operation of the ice maker for extended periods out- side of these normal temperature ranges may affect production capacity. ·... -
Page 11: Leveling The Ice Maker
Before you move your ice maker into its final location, it is important to make sure you have the proper electrical connection: A standard electrical supply (115V AC only, 60Hz, 15A), properly grounded in accordance with the National Electrical Code and local codes and ordinances, is required. The ice maker should always be plugged into its own individual electrical outlet. -
Page 12: Reversing The Door Swing
floor, you must adjust the feet to level the ice maker and lock the rollers. If the floor is level, just revolve the two front feet to touch the floor. Reversing the door swing Tools needed: flathead screwdriver, Phillips screwdriver IMPORTANT: Before you begin, unplug the ice maker or disconnect power. -
Page 13: Water Supply
Water Supply The water supply should be ready at the point of installation. The water supply pressure should be a minimum of 15 psig with a static pressure not more than 80 psig. (A wall outlet directly behind the ice machine will make installation easier.) IMPORTANT: 1. - Page 14 NOTE: Never allow the drain hose to hang or loop higher than the floor of the ice storage bin. 3. All horizontal runs of drain lines must have a fall of ¼” per foot. An air gap will likely be required between the ice maker drain tube and the drain/waste receptacle. A stand pipe with a trap below it would be acceptable for the drain/waste receptacle.
-
Page 15: Installation Types
Installation Types This ice maker has been designed for Mobile (free-standing) installation. However, it can also be Enclosed (as under a cabinet) or Built-in (sealed to the floor). In any case, there must be adequate air space around the unit for ventilation. Mobile installation: A mobile installation will allow you to install the ice maker free-standing in any place you desire provided you have access to a water supply. -
Page 16: Operation
OPERATION Final Check List before Operation 1. Have all packing materials and tape been removed from the interior and exterior of the ice maker? 2. Do you clean the ice storage bin? 3. Have the installation instructions been followed, including connecting the machine to water and electricity? 4. -
Page 17: How The Machine Makes Ice
ice storage bin. 4. When the ice storage bin is full, the sheet of cubes will not fall completely and will hold the bin-full probe open. The machine automatically stops making ice and progresses to the cold preservation stage. During this stage, the compressor works regularly to keep the temperature low for less ice melting. -
Page 18: Normal Sounds
Evaporator Water inlet Water pump Hot gas valve Compressor Fan motor Condenser Normal sounds Your new ice maker may make sounds that are not familiar to you. Most of the new sounds are normal. Hard surfaces like the floor and walls can make the sounds louder than they actually are. - Page 19 6. Leave the door open to allow for circulation and to prevent mold and mildew. 7. Leave water supply line and power cord disconnected until ready to reuse. IMPORTANT: · Do not touch the power plug when your hands are wet. ·...
-
Page 20: Cleaning And Maintenance
CLEANING AND MAINTENANCE If the ice maker is left unused for a long time, before the next use it must be thoroughly cleaned. Follow carefully any instructions provided for cleaning or use of sanitizing solutions. Do not leave any solution inside the ice maker after cleaning. -
Page 21: Interior Cleaning
If the door panel is stainless steel, stainless steel can discolor when exposed to chlorine gas and moisture. Clean stainless steel with a mild detergent and warm water solution and a damp cloth. Never use an abrasive cleaning agent. Interior cleaning The ice storage bin should be sanitized occasionally. -
Page 22: Water Distribution Tube Cleaning
DO NOT touch the condenser fins. They are sharp and can be easily damaged. Water distribution tube cleaning When you find the ice cubes are incompletely formed or the output is low, the water distribution tube may be blocked. Turn off the power button, rotate the water distribution tube, locate the holes in the distribution tube and use a pointed object such as a toothpick to dredge the holes. -
Page 24: Major Functions
Description of LEDs and buttons: Bin Full (Red) LED Bin full indicator light When this is lit, the ice storage bin is full of ice or there is some thing blocking the bin-full probe. The unit will stop working. When ice cubes are removed from the ice storage bin, freeing the bin-full probe, the red LED will remain flashing for 3 minutes, then the unit will restart and return to the ice making mode. -
Page 25: Troubleshooting
TROUBLESHOOTING Before Calling for Service If the unit appears to be malfunctioning, read through the OPERATION section of this manual first. If the problem persists, check the Troubleshooting Guide on the following pages. Some of the problems mentioned in the Guide can be solved easily without a service call. - Page 26 Check if the water supply pressure is below Cubes are partially 15 psig. Not enough water in the formed or are white Check water supply or filter may be water trough. on the bottom. restricted. Check for a water leak at the water trough. The feet are not leveled and Level and lock the feet.
-
Page 27: Limited Warranty
Any parts determined to be defective will be replaced by SUMMIT® at no charge to you. Plastic parts and outer cabinets are warranted to be manufactured to commercially acceptable standards and free from defects at the time of delivery. - Page 28 ÍNDICE Página SÍMBOLOS DE SEGURIDAD..................28 ADVERTENCIAS DE SEGURIDAD..............29 - 31 INFORMACIÓN TÉCNICA..................31 INTRODUCCIÓN ......................32 UBICACIÓN DE COMPONENTES DE LA MÁQUINA ........32 - 33 INSTALACIÓN DE LA MÁQUINA ..............33 - 40 Desembalaje ...................... 33 Requisitos del lugar de instalación.............. 34 - 35 Requisitos de alimentación eléctrica ............
-
Page 29: Símbolos De Seguridad
SÍMBOLOS DE SEGURIDAD Su seguridad y la seguridad de los demás es de suma importancia. Tanto en este manual como en la máquina, encontrará varios mensajes de importantes de seguridad. Lea y observe siempre los mensajes de seguridad. Este es el símbolo de Alerta de Seguridad. Advierte sobre posibles riesgos que pueden causar accidentes lesivos e incluso fatales, tanto para usted como para los demás. -
Page 30: Advertencias De Seguridad
Leer atentamente este manual, ya que antes de poner en servicio la máquina para hacer hielo, es necesario ubicarla e instalarla tal como aquí se explica. SUMMIT® APPLIANCE recomiendan fuertemente que un mecánico professional instala su máquina nueva. La garantía se puede afectar o anular por una instalación inexacta. - Page 31 Las conexiones eléctricas y de agua de la máquina para hacer hielo, deben cumplir con · todas las reglamentaciones vigentes que correspondan a nivel municipal y estatal. La máquina se debe conectar a un tomacorriente de 115 Voltios de corriente alterna, 60 Hz, 15 Amperes de capacidad, con descarga a tierra, instalado de acuerdo con el Código Eléctrico Nacional (National Electrical Code) y los reglamentos municipales.
-
Page 32: Información Técnica
mínimo las posibilidades de electrocución accidental. Es conveniente hacer revisar por un electricista profesional el tomacorriente y el circuito del mismo para verificar que tengan descarga a tierra. Si el tomacorriente disponible para enchufar la máquina fuera uno de dos patas solamente, es responsabilidad del usuario cambiarlo por uno de tres patas con circuito de descarga a tierra. -
Page 33: Introducción
INTRODUCCIÓN La máquina para hacer hielo BIM-44 G de SUMMIT® produce cubos de hielo de impecable dureza y transparencia, y es cómoda y práctica para uso en el hogar como para huéspedes de hoteles. Un recipiente de hielo con aislación térmica está integrado con la máquina. -
Page 34: Instalación De La Máquina
Cuchara para hielo Cordón eléctrico Entrada de agua Salida de drenaje Manguera de drenaje Manguera para suministra agua INSTALACIÓN DE LA MÁQUINA Desembalaje ADVERTENCIA Peligro de peso excesivo Mover e instalar la máquina entro dos personas como mínimo. Si lo hace una sola persona, hay riesgo de que se lesione por el esfuerzo excesivo. -
Page 35: Requisitos Del Lugar De Instalación
Requisitos del lugar de instalación DISTANCIAS DE INSTALACIÓN: Vista superior Vista lateral 1” 4” Parte superior Parte de atrás 1” 1” Lado Lado Frente de la unidad Esta máquina debe ser instalada por el personal calificado. · Para que la máquina tenga ventilación adecuada, no debe haber ninguna obstrucción en ·... -
Page 36: Requisitos De Alimentación Eléctrica
Se recomienda fuertemente que un filtro de agua sea usado. Un filtro · adecuado para este tipo de servicio puede eliminar del agua olores, gusto y partículas suspendidas. El agua tratada por su dureza puede producir cubos de hielo blancos y porosos, que se pegan entre sí. -
Page 37: Nivelación De La Máquina
Circuito de descarga a tierra Por razones de seguridad personal, esta máquina debe tener circuito de descarga a tierra. La máquina viene equipada con un cordón eléctrico con un enchufe de 3 patas, una de la cuales es la conexión al circuito de tierra. Para reducir al mínimo las posibilidades de electrocución, el enchufe se debe conectar a un tomacorriente de 3 patas con circuito de descarga a tierra instalado de acuerdo con el Código Eléctrico Nacional (National Electrical Code) y los reglamentos municipales que correspondan. -
Page 38: Cambio Del Lado De Apertura De La Puerta
Cambio del lado de apertura de la puerta Herramientas necesitadas: destornillador plano, destornillador Phillips IMPORTANTE: Antes de comenzar, desenchufe la máquina o desconecta la potencia. Para quitar la puerta de las bisagras: 1. Quite la cubierta de la bisagra superior. 2. -
Page 39: Conexiones De Entrada De Agua
Conexiones de entrada de agua La conexión de suministro de agua debe estar preparada en el lugar de instalación. La presión del suministro de agua debe ser una minima de 15 psig con una presión estática nada menos que 80 psig. (La instalación se simplificará considerablemente si hubiera un tomacorriente directamente detrás de la máquina.) IMPORTANTE: 1. - Page 40 debería estar a menos de 5 pies (unos 1,5 metros) de distancia de la máquina, ya que esa es la longitud aproximada de la manguera de drenaje suministrada con la máquina. 2. Ubique la salida de drenaje en el trasero de la máquina. Conectar la salida de drenaje a la manguera de drenaje, y insertar el otro extremo de la manguera al drenaje en piso.
-
Page 41: Tipos De Instalación
Tipos de instalación Esta máquina para hacer hielo se ha diseñado para instalación libre (sola, no empotrada). No obstante se puede ser también en cerramiento (insertada, pero no empotrada) y empotrada. En cada caso, debe tener el espacio aéreo adecuado alrededor de la unidad para ventilación (vea las esquemas en la página 34). -
Page 42: Uso De La Máquina
USO DE LA MÁQUINA Lista de control final antes de la puesta en servicio 1. ¿Se han quitado todos los materiales de embalaje y cintas adhesivas del interior y exterior de la máquina? 2. ¿Se ha limpiado el recipiente de hielo? 3. -
Page 43: Ciclos De Funcionamiento De La Máquina
4. Cuándo el recipiente de hielo está repleto, la capa de cubos no caerá completamente y tendrá abierto el sensor de lleno de hielo. La máquina para hacer hielo y progresa automáticamente a la etapa de conservación del frío. Durante esta etapa, el compresor opera regularmente para mantener la temperatura más baja para reducir derretir del hielo. -
Page 44: Sonidos Normales
Evaporador Entrada de agua Bomba de agua Válvula de gas caliente Compresor Ventilador Condensador Sonidos normales La máquina para hacer hielo emite algunos sonidos que aunque parezcan extraños, son parte de su funcionamiento normal. Algunas de las superficies duras que rodean la máquina, tal como el piso, las paredes y los gabinetes, contribuyen a que estos sonidos se perciban aún más fuerte de lo que realmente son. -
Page 45: Limpieza Y Mantenimiento
Abrir la puerta para facilitar la circulación de aire y evitar la formación de moho. · Dejar la línea de agua y el cordón eléctrico desconectados hasta que la máquina esté · lista para entrar nuevamente en servicio. IMPORTANTE: No toque el enchufe cuando las manos se mojan. ·... -
Page 46: Limpieza Externa
Limpieza externa La puerta y el gabinete se pueden limpiar con una solución de detergente y agua tibia, preparada, por ejemplo, con una onza de detergente de cocina con 2 galones (7,5 litros) de agua tibia. No usar productos limpiadores con solvente ni abrasivos ni fuertes para limpiar la unidad. -
Page 47: Limpieza Del Condensador
delantero. 3. Con una aspiradora usando el aditamento de cepillo, limpiar la tierra y las pelusas de las aletas del condensador, y limpiar el compartimiento. 4. Volver a colocar la tapa frontal. 5. Volver a enchufar la máquina o conectar la alimentación eléctrica de la línea. ADVERTENCIA NO TOCAR las aletas del condensador, ya que son filosas y se pueden dañar con facilidad. -
Page 49: Tablero De Control
2. LED verde: Luz indicadora de ciclo de congelamiento Cuando se enciende esta luz en forma continua, significa que la máquina está haciendo hielo, controlada por un sensor de temperatura en el evaporador. Cuando la luz se enciende en forma intermitente, significa que la máquina está haciendo hielo, controlada por un regulador eléctrico fijo. -
Page 50: Funciones Principales
FUNCIONES PRINCIPALES 1. Activación de funcionamiento es totalmente automático. 2. Cuando el recipiente de hielo está lleno, la máquina se detiene la fabricación de hielo y progresa automáticamente a la etapa de conservación del frío. Vuelve a arrancar cuando el nivel de cubos haya descendido. 3. -
Page 51: Diagnóstico De Fallas
DIAGNÓSTICO DE FALLAS Antes de llamar al servicio de reparación Si la máquina manifestara síntomas de estar funcionando defectuosamente, leer atentamente la sección de USO DE LA MÁQUINA en este manual. Si el problema continuara, leer la GUÍA DE DIAGNÓSTICO DE FALLAS más abajo y en las páginas siguientes. - Page 52 Problema Posible causa Solución probable Verificar que la presión de agua no sea inferior a 15 psig. Los cubos de hielo no se terminan No hay suficiente agua en el recipiente. de formar o son de color blanco Revisar el filtro de agua: podría en la parte inferior.
-
Page 53: Garantía Limitada
Garantía Limitada de SUMMIT® SUMMIT® Appliances garantiza este producto para ser libre de defectos en materias y destreza por un período de un año de la fecha de la compra original o de la entrega. Cualquier pieza que es determinada a ser defectuosa será reemplazada por SUMMIT® sin carga a usted. - Page 56 Tested and certified to NSF standard 12 by NSF International Probado y certificado por NSF International de acuerdo con la norma NSF 12 BIM-44 G OM-ES-4 Printed in China...
Need help?
Do you have a question about the BIM-44 G and is the answer not in the manual?
Questions and answers