SWELLPRO Splash Drone Quick Manual
Hide thumbs
Also See for Splash Drone:
- User manual (42 pages) ,
- Quick manual (2 pages) ,
- User manual (39 pages)
Advertisement
Quick Links
Download this manual
See also:
User Manual
PRO
Splash Drone Quick Guide
V1. 0
www. swellpro. com
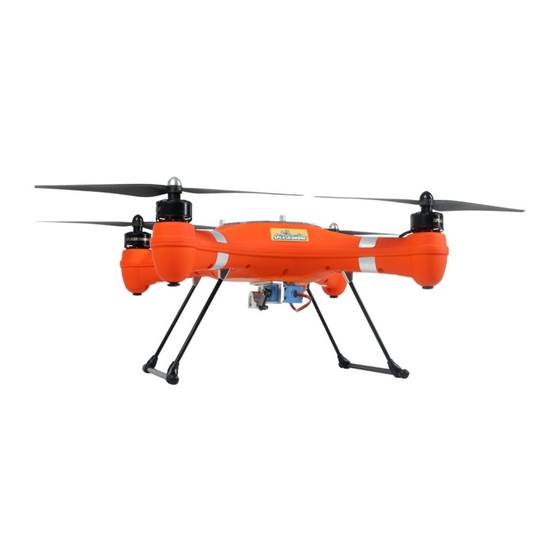
Splash Drone
Quick Guide
1. Start:
a. Check the all aircraft parts are in good condition
b. Ensure aircraft and remote controller battery are full
c. Before flight, please calibrate aircraft and remote controller
2. Ready for remote controller
Before powering on remote controller,
ensure all switch are in default position.
If any switch is in the incorrect position, the
controller will make "BB—BB—BB
......"warning noises.
SWA and SWB should be in position 1 (top
position)
left and right stick are to be kept in the
neutral position.
3. Ready for Splash Drone
a. Land Gear
Insert land gear to the bottom of the aircrafts aluminum brackets and
ensure installation is firm.
Splash Drone
01
02
03
04
05
06
1. Cover screw
7. Land Gear
2. Prop
8. Seal Screw
3. Aircraft Nose
9. Rubber Root
4. Flight Indicator LED
10. Motor
5. Gimbal Damper ball
11. Prop Nut
6. Waterproof Gimbal
12. Seal Cover
Splash Drone
Suggestion Installation
Gimbal
controller
board
Flight
controller
Receiver
b. Gimbal
1. Uninstall the seal screw under the
aircraft
2. Push VTX cable(3PIN), IMU
cable(4PIN), Gimbal Roll direction
control cable M1 (3PIN) and Gimbal Pitch direction control board M2(3PIN)
through the hole and tighten seal screw fix firmly
3. VTX. IMU. M1. M2 cable connect to the VTX module and gimbal control
board corresponding ports as labelled
4. Gimbal board power cable connects with main board "12V Out JST",
pitch control (green cable) connects to receiver CH5. Roll control (blue
cable) connects to receiver CH6. Ground (black cable) connects to CH5 or
CH6 ground port
01
Remote Controller
02
01 19
12
03
18
11
04
10
05
17
06
16
07
15
09
08
08
14
09
13
07
10
11
12
1. Antenna
2. VRA
3. Switch A(SWA)
4. Hanger
5. Left trims
6. Left Stick
7. Left trims
8. Up Key
9. Down Key
10. Binding Key
11. LCD Display
Splash Drone
Quick Guide
5. Install gimbal control board between fight controller and GPS antenna
corresponding location (Back of board installed 3M glue)
Video transmitter
Gimbal
controller
A1
Battery
board
A0
5V
USB
IMU
GND
Video transmitter
GPS
Receiver
6. Install gimbal mount to the bottom of aircraft . Adjust to the correct
position and use screw to lock firmly.
7. Open dive case and connect sport camera AV output port to the AV cable
from within the dive case
c. Payload Release ( Can not install with gimbal together)
1. Uninstall the seal screw
2. Push the payload release control cable through the hole and fix firmly
with seal screw. Use screws to fix the mechanism to the body firmly.
02
Safety Guide
1. Obey relevant regulations of the International Civil Aviation Organization
and local airspace control law and UAV management rules. Forbid flying in
any no-fly zones.
2. When flying the Splash Drone always keep it in an open area without
buildings, trees and obstacles.
20
3. Keep 3-5 meters away from you and others. Do not operate close to
crowds.
4. Before flight need calibrate the aircraft and Remote Controller
21
5. If detect abnormal operation while using the Splash Drone and/or remote
controller please stop using immediately
6. Before flight, ensure the propllers are installed in correct direction and
firmly on motor
22
7. Do not attempt to touch the motor until motors stop rotating .
8. If use WiFi Sport camera with aircraft. please disable WiFi function
before flight. Wifi should not be used in the area of flying.
9. If aircraft has low battery, land immediately to avoid damage.
10. Do not move aircraft for 6-10 seconds after powering on aircraft.
11.If loss of radio signal occours, aircraft will enter into Auto Return Home
12. Power Switch
mode automatically ; If signal is received again, please switch to GPS
13. Cancel Key
mode control aircraft.
14. OK Key
15. Right trims
Forbidden flight conditions:
16. Right Stick
a. Forbid flying nearby strong radio interference activity areas.
17. Right trims
b. Forbid flying nearby any crowds.
c. Forbid flying in extreme weather, like heavy rain, thunderstorms or
18. Switch B(SWB.
conditions causing poor visual range
19. VRB
d. Forbid flying around strong magnetic fields
20. Handle
e. Forbid flying when you are tired or affected by alcohol.
21. Trainer Jack
f. Forbid flying when remote controllor can not control aircraft due to any
22. Battery cover
other reasons
Splash Drone
Quick Guide
3. Use screw through fixed sheave, and choose a correct position lock
firmly
4. Payload release control cable connects with the receiver at CH5 or CH6.
(CH5 controlled by remote controller VRA. CH6 by VRB)
12V
Gimbal
d. Propellers
1. Put aircraft on a flat level surface
2. Install the sliver nut propellers with motor marked "CCW" . and Black nut
propellers with " CW " motor. ensure all propellers tighten firmly .
03
Quick Guide
04
Advertisement

Related Manuals for SWELLPRO Splash Drone


Summary of Contents for SWELLPRO Splash Drone
- Page 1 1. Obey relevant regulations of the International Civil Aviation Organization and local airspace control law and UAV management rules. Forbid flying in any no-fly zones. 2. When flying the Splash Drone always keep it in an open area without Splash Drone Quick Guide 01 19 buildings, trees and obstacles.
- Page 2 Right Stick We strongly recommend aircraft search over 6 satellites before starting Specification to fly. Splash Drone & Battery & Transmitter Specification 3. In flying process do not stop motors for any reason. Lock/Unlock motor Splash Drone Weight (Battery & Propellers Included)
Need help?
Do you have a question about the Splash Drone and is the answer not in the manual?
Questions and answers