Table of Contents
Advertisement
Quick Links
Download this manual
See also:
Instruction Manual
Advertisement
Table of Contents

Related Manuals for Manhattan 162579


Summary of Contents for Manhattan 162579
- Page 1 USB Audio/Video User Manual Grabber Model 162579 manhattanproducts.com MH-162579_UM-0418_REV-5.01...
-
Page 2: Table Of Contents
CONTENTS Introduction......................3 Hardware Connections ................4 Software Installation ..................5 Starting the Program ..................5 Navigation ....................5 Capture ......................6 Start Capturing .....................6 Step One — Connections ................7 Step Two — Record Settings .................7 Step Three — Optional Settings ..............8 Step Four — Preview..................8 Step Five —... -
Page 3: Introduction
Video input supported: capture device (VCR, Camcorder, TV, DVD Player) Video outputs supported: VCD, SVCD, DVD, Long DVD, WMV, MPEG-4 (PSP & iPod) The Manhattan Audio/Video Grabber uses honestech™ VHS to DVD™ 4.0 SE to create professional videos from your home movies. It has three modes:... -
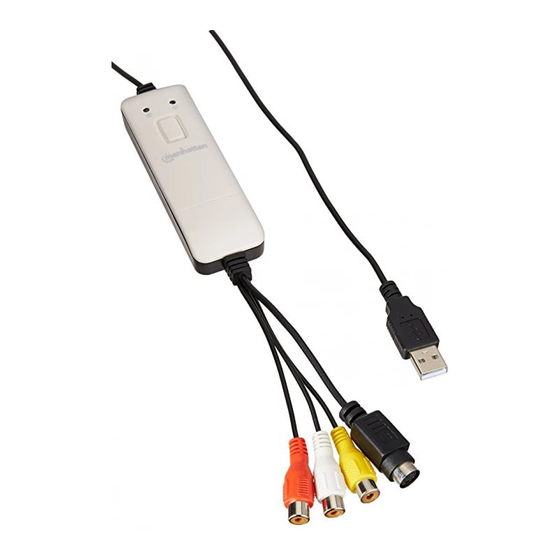
Page 4: Hardware Connections
The basic installation/operation steps are similar. Hardware Connections Connect your Manhattan Audio/Video Grabber’s USB plug to your com- puter. Then connect to the RCA cables to the appropriate ports on your media source — camcorder, TV or VCR, etc. -
Page 5: Software Installation
Software Installation 1 Insert the CD in your CD-ROM drive to display the initial menu. If installation does NOT start automatically, double-click the “Setup.exe” file on the installation CD. 2 Follow the on-screen instructions. The setup status screen will display installation progress. -
Page 6: Capture
Capture The Capture screen records video from any external video source such as a camcorder, VCR, etc. It provides several functions and task areas designed to make the recording process as easy as possible, which are described below. • Screen Selection — 1. Capture 2. Edit 3. Burn •... -
Page 7: Step One - Connections
Step One — Connections Make sure your video device is connected to the A/V Grabber. Then connect the A/V Grabber to your computer (refer diagram on page 3). Step Two — Record Settings Access the Record Settings control panel using the Record Settings Button at the bottom of the Capture Screen. -
Page 8: Step Three - Optional Settings
folder location. *Changing the Output Folder location is not recommended unless space is low on the current drive.* Save your settings and click the OK button when finished. Step Three — Optional Settings • Set Recording Time enables Capture Mode to stop recording once the time entered has elapsed. -
Page 9: Start Editing
• Preview Panel lets you preview and edit your video clips. • Merge & Save merges the clips in the Storyboard to create a new, video clip. Start Editing There are five steps to editing: Step 1: Preview Clip Step 2: Split Clip Step 3: Arrange Clips Step 4: Adding Effects (optional) Step 5: Merge &... -
Page 10: Step Three - Arrange Clips
or a special effect — split the clip to isolate the section. Splitting provides two clips that are automatically placed in the Video Clipboard. Repeat this procedure to further isolate sections of your video; rearrange clips as desired. • Split splits your video clip at its current play position. -
Page 11: Step Five - Merge & Save
• Transitions provide a specific look in the change from one clip to another. To add, drag and drop a transition from the Transitions tab onto a transition box between two video segments in the Storyboard panel. • Visual Effects add unique effects to your video. To add a visual effect, drag and drop one from the Visual Effects tab onto a video segment within the Storyboard panel. -
Page 12: Start Burning
Start Burning There are five steps to burning: Step 1: Insert Disc Step 2: Settings Step 3: Add Clips Step 4: Customize Menu (optional) Step 5: Burn Chapters Menu Navigation Themes Background Background Images Music Clip Panel Disc Menu Screen Erase Disc Import Video to... -
Page 13: Step Three - Add Clips
Encoding Settings • Select encode type specifies your encoding settings. Unless you prefer to make advanced encoding settings, Manhattan recommends choosing “Fit to Disc” or “Preset. ” Otherwise, select “Custom” and adjust the remaining encoding selections based on your needs. -
Page 14: Step Four - Customize Menu (Optional)
Step Four — Customize Menu (optional) Use the following features to create and customize menus for your discs. A disc menu functions as a visual table of contents, providing the option for selective viewing. • Chapters add chapter points to clips in the Disc Menu Screen. To add chapter points, first select a clip in the Disc Menu Screen and then click the Chapter button. -
Page 15: Step Five - Burn
• Menu Navigation buttons let you navigate through your Disc Menu screens and view the changes you have made. Chapter Menu allows you to make changes to your Chapter Menu (only available when a Chapter Menu has been created) Previous Menu Screen navigates to the previous menu screen. (Only available with multiple menu screens) Next Menu Screen navigates to the next menu screen. -
Page 16: Uninstall Honestech™ Vhs To Dvd™ 4.0 Se
Burn Process: • Burn begins the burning process, which is made up of four automated steps that convert your audio and video to disc format and burn the converted information to disc. A finish message will appear when the burning is complete. *Warning: Manually ejecting your disc before completion can cause the disc to malfunction. -
Page 17: About Maximum Recording Time (Mrt)
If the MRT indicates less than one hour of recording time available, it may be time to backup or remove some files from your hard drive. Tip: Because video files consume large quantities of hard drive space, Manhattan recommends that you check your Output Folder from time to time for any previous video recordings that can be permanently deleted. -
Page 18: Second Adjustment
Installation Problems Manhattan recommends that you disable any Anti-Virus or other background software you may have running while you install this software. Failure to do so can cause the software to exhibit unexpected or unpredictable behavior. -
Page 19: Access Denied Error
Access Denied error • Verify you are logged in as an Admin user for the computer. Product Key • Check the back of the envelope or jewel case that the Install CD was packaged in. Invalid Product Key error • Enter the key manually, five characters per box (avoid copying and pasting). Disc Problems Media non-applicable error: •... -
Page 20: Audio Problems
• Avoid the following actions while recording and burning: • Locking the workstation. • Running other applications in full-screen mode or running CPU-intensive programs. • Distorted lines at top or bottom of screen: • Clean VCR/camcorder tape heads. • Adjust VCR/camcorder video tracking. (These lines are not usually visible on a regular television because a TV typically presents in overscan mode, which causes the edges of the video to be out of view) Audio Problems... -
Page 21: Notes
NOTES... -
Page 22: Additional Information
ITALIANO: Per informazioni sulla garanzia, accedere a manhattanproducts.com/t/warranty. EN MÉXICO: Póliza de Garantía Manhattan — Datos del importador y responsable ante el consumidor IC Intracom México, S.A.P.I. de C.V. • Av. Interceptor Poniente # 73, Col. Parque Industrial La Joya, Cuautitlán Izcalli, Estado de México, C.P. - Page 23 distribuidor. Para hacer efectiva esta garantía bastará con presentar el producto al distribuidor en el domicilio donde fue adquirido o en el domicilio de IC Intracom México, S.A.P.I. de C.V., junto con los accesorios contenidos en su empaque, acompañado de su póliza debidamente llenada y sellada por la casa vendedora (indispensable el sello y fecha de compra) donde lo adquirió, o bien, la factura o ticket de compra original donde se mencione claramente el modelo, número de serie (cuando aplique) y fecha de adquisición.
- Page 24 All trademarks and trade names are the property of their respective owners. © IC Intracom. All rights reserved. Manhattan is a trademark of IC Intracom, registered in the U.S. and other countries.
Need help?
Do you have a question about the 162579 and is the answer not in the manual?
Questions and answers