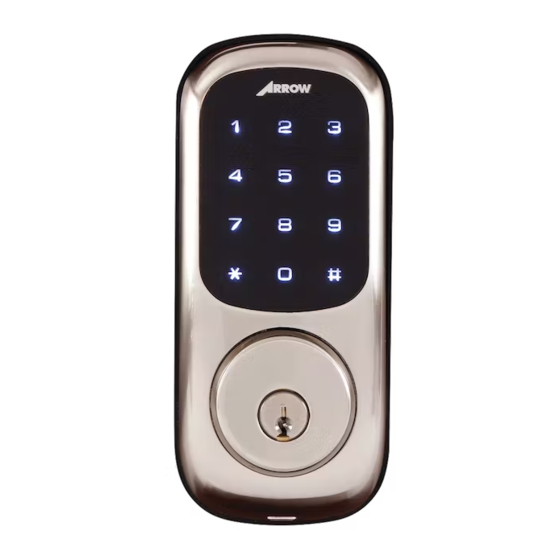
Arrow Revolution Installation And Programming Instructions
Touchscreen deadbolt
Hide thumbs
Also See for Revolution:
- Installation instructions manual (21 pages) ,
- Quick start manual (2 pages) ,
- Quick start manual (2 pages)
Advertisement
Table of Contents
Arrow Revolution™ Touchscreen Deadbolt
Installation and Programming Instructions
NOTE TO INSTALLER
FAILURE TO FOLLOW THESE INSTRUCTIONS
COULD RESULT IN DAMAGE TO THE PRODUCT
AND VOID THE FACTORY WARRANTY
For Technical Assistance contact Arrow Lock at 1-800-221-6529
www.arrowlock.com
P/N LT-503200 Rev A
Advertisement
Table of Contents

Summary of Contents for Arrow Revolution
- Page 1 Arrow Revolution™ Touchscreen Deadbolt Installation and Programming Instructions NOTE TO INSTALLER FAILURE TO FOLLOW THESE INSTRUCTIONS COULD RESULT IN DAMAGE TO THE PRODUCT AND VOID THE FACTORY WARRANTY For Technical Assistance contact Arrow Lock at 1-800-221-6529 www.arrowlock.com P/N LT-503200 Rev A...
-
Page 2: Table Of Contents
Arrow Revolution is engineered for quick and easy installation and fits in place of a standard deadbolt lock door prep (ANSI/BHMA A156.115). -
Page 3: Installation
INSTALLATION COMPONENTS AND TOOLS Included in the box. . . Bolt Quick Start Guide Inside Escutcheon Strike Plate Installation Instructions Inside Mounting Plate Screw Pack (see below) Door Marker Battery Cover Keys Outside Escutcheon 4 AA Alkaline Batteries Parts Illustrations Bolt Battery Cover Inside... -
Page 4: Prepare Lock For Installation
PREPARE LOCK FOR INSTALLATION Unpack the Lock The lock is packed representative of how it will install on the door. Before installing the lock on the door: A. Inside escutcheon 1. Loosen the screw (Phillips #2) holding the battery Battery Cover cover . -
Page 5: Install Lock
INSTALL LOCK 1. Install bolt in door. NOTE: The bolt must be in a retracted (unlocked) position when installing the lockset. (2) M4 x 25.4mm Attach with two (2) M4 x 25.4mm screws supplied. [8-32 x 1"] Flat Head Combination Screws 2. - Page 6 9. Insert four (4) AA alkaline batteries. Lock responds, “Welcome to the Arrow Revolution” and will adjust for proper handing of the lock. Note: Refer to programming instructions prior to completion of step 10.
-
Page 7: Programming
PROGRAMMING Programming Features-Menus-Keys-Definitions ..........7-8 Operation ......................9-11 PROGRAMMING FEATURES - MENU KEYS - DEFINITIONS Outside Inside Phillips Screw " P " Key Touchscreen (Return to Previous) Battery Cover Numbers Alkaline Batteries Low Battery Indicator 4 AA Type Lockout Mode Status Indicator Cylinder Thumb Turn... - Page 8 Status Indicators Low Battery Warning Lock-out Mode Return to previous step Definitions All Code Lockout : This feature is enabled by the Master PIN code. When enabled, it restricts all user PIN code access. When the unit is in Lockout Mode, the red locked padlock will appear on the screen when attempting to enter a code. Low Battery : When battery power is low, the low battery icon will begin blinking.
-
Page 9: Operation
OPERATION Lock Activation The touchscreen can be activated in several ways: Touch lock with Press the key to Touch lock with back of hand or activate. fingers spread to fingers to activate. activate. Lock Operation Change Default Master Code Before Programming* 1. - Page 10 PIN code structure Maximum number of user codes is 25. Set Up User Codes User Codes can only be programmed through the Master PIN Code. 1. Touch the screen with the back of your hand or fingers to activate 2. Enter the 4-8 digit Master PIN code followed by the key.
- Page 11 Feature Programming Through Menu Mode Using Master PIN Code* *NOTE: the Default Master PIN code must be changed prior to programming any features into the lock. 1. Touch the screen with the back of your hand or fingers to acitivate 2.
-
Page 12: Return Lock To Programming Defaults
Reset Button To return the lock to programming defaults: 1. Disassemble the lock using pages 5 and 7. 2. The reset button (see arrow) is located above the PCB cable Cable connector. 3. Hold down the reset button while reinstalling the batteries*. - Page 13 Programming Troubleshooting Symptom Suggested Action Lock does not respond – door is open The touchscreen will become active when pressed with the back of hand or fingers in at least and accessible. 3 areas simultaneously. Use a larger area of the hand or fingers and verify contact with at least 3 areas. If touchscreen numbers are visible, check to see if they respond when pressed.
- Page 14 How to Replace or Install Cylinder 1. Remove cylinder: A. Remove outside escutcheon from door. B. Remove rubber gasket. C. Remove two screws holding plastic guide in place. D. Remove plastic guide. E. Remove screw with washer holding cylinder in place (visible after plastic guide is removed).
- Page 15 PIN CODE MANAGEMENT SAMPLE SHEET PIN Code Management (Up to 25 Users) Location: Door Number: User User Name User # PIN Code User Type User Name User # PIN Code Master User 13 User 1 User 14 User 2 User 15 User 3 User 16 User 4...
- Page 16 Arrow ® is a registered trademark of Arrow Manufacturing Company, an ASSA ABLOY Group company. Revolution ™ is a trademark of Arrow Manufacturing Company, an ASSA ABLOY Group company. Other products or brand names may be trademarks or registered trademarks of their respective owners and are mentioned for reference purposes only.

Need help?
Do you have a question about the Revolution and is the answer not in the manual?
Questions and answers