Table of Contents
Advertisement
Service
Manual
STANDBY
POWER
SECTION
1. TECHNICAL SPEC I FI CA TIONS ........................................................................................... 1
2. SERVICE HINTS AND TOOLS ............................................................................................. 9
3. WARNING AND LASER SAFETY IN STRUC TIONS ...........................................................10
4. TAKING THE DISC OUT OF EMERGENCY .......................................................................11
5. UPDATE BACK END FIRM WARE PRO CE DURE ...............................................................12
6. THE UPDATE DISC CREATION PROCEDURE .................................................................12
7. UPDATE RS-232C MICROPROCESSOR FIRMWARE PROCEDURE ..............................13
8. HOW TO CHECK THE VERSION NUMBER OF RS232C MICROPROCESSOR ............. 28
9. SER VICE MODE ................................................................................................................ 36
10. WIRING DIAGRAM ............................................................................................................. 37
11. BLOCK DIAGRAM .............................................................................................................. 39
12. SCHEMATIC DIAGRAM ......................................................................................................41
13. PARTS LOCATION ............................................................................................................. 69
14. EXPLODED VIEW AND PARTS LIST ................................................................................ 91
15. MICROPROCESSOR AND IC DATA .................................................................................. 95
16. ELECTRICAL PARTS LIST ............................................................................................... 101
17. ABOUT REPLACE THE MICROPROCESSOR WITH A NEW ONE ............................. 119
Please use this service manual with referring to the user guide ( D.F.U. ) without fail.
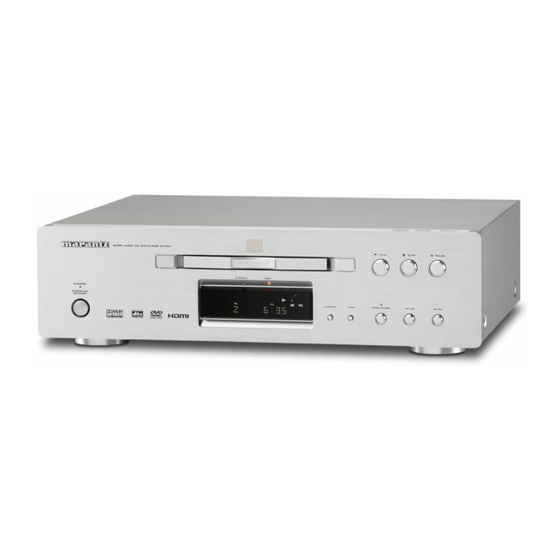
SUPER AUDIO CD/DVD PLAYER DV7001
ON/OFF
GRP
GRP
O OFF
TITLE
PROG
TEXT
1
2
3 4
TABLE OF CONTENTS
DV7001
DV7001 /
Super Audio CD/DVD Player
PLAY
AUDIO EX.
HDMI
SRS TS
PCM
MPEQ
COND
MP3
M
P
M
192
kHz
THX
A-B
96
kHz
AWS
VCD
V-PART
CHP
ALL
1
AUDIO
TOTAL
SUB
BTSTM
MAP
SACD
DOWNMIX
AUDIO EX.
HDMI
OPEN/CLOSE
5 6
7 8
9
10
11
12
13
14
15
16
17
18
19
20
STEREO MULTI
F N/K1G/N1B/N1S/U1B
STOP
PAUSE
PAGE
Part no. 90M30AK855010
First Issue 2007.01
MZ
Advertisement
Table of Contents

Related Manuals for Marantz DV7001/N1B


Summary of Contents for Marantz DV7001/N1B
-
Page 1: Table Of Contents
Service DV7001 / F N/K1G/N1B/N1S/U1B Manual Super Audio CD/DVD Player SUPER AUDIO CD/DVD PLAYER DV7001 PLAY STOP PAUSE AUDIO EX. HDMI STANDBY SRS TS MPEQ COND POWER ON/OFF V-PART O OFF TITLE PROG AUDIO TOTAL BTSTM SACD DOWNMIX AUDIO EX. HDMI OPEN/CLOSE TEXT... - Page 2 MARANTZ Parts for your equipment are generally available to our National Marantz Subsidiary or Agent. ORDERING PARTS : Parts can be ordered either by mail or by Fax.. In both cases, the correct part number has to be specifi ed.
-
Page 3: Technical Specifications
1. TECHNICAL SPECIFICATIONS General 21-pin connector assignment (/N : Europe model only) System ...DVD-Video, DVD Audio, DVD±R/RW, Super Audio CD, AV connector output ........21-pin connector Video CD, CD, MP3 files, JPEG files, DviX and WMA This connector provides the video and audio signals for Power requirements connection to a compatible color TV or monitor. - Page 4 Features ❖ フルデジタル伝送による最高画質・最高 An HDCP-compatible HDMI* 音質を実現するHDMI* 端子を搭載 terminal is provided for fully digital DVIを 拡 張 し た 次 世 代 テ レ ビ 向 け デ ジ タ ルインターフェースであるHDMI(High- transmission that ensures the very Defi nition Multimedia Interface) を搭載し、 highest picture and digital sound 非圧縮のデジタル映像とデジタルオーディオ...
- Page 5 ❖ 映画館のような迫力のあるサウンドが味 Superlative audio performance with わえるDVDオーディオ、ドルビー * デ Super Audio CD, DVD-Audio, Dolby* ジタル/DTS* デコーダー内蔵の高音質 Digital and DTS* software オーディオシステム Logos: The DV7001 delivers breathtaking sound 本機はDVDオーディオの高音質を再生可能 quality with Super Audio CD, DVD-Audio, にする192kHzサンプリング/24bitのDAC Dolby Digital and DTS discs. (デジタル/アナログコンバーター)...
- Page 6 本機で再生できるディスクの種類 Discs compatible with this player Any disc that displays one of the following ・ 本 機 はJEITA標 準、NTSCカ ラ ー 方 式 / logos should play in this player. Other PAL方式に適合していますので、NTSC方式 formats, including DVD-RAM, DVD-ROM, とPAL方式両方のディスクを再生することが CD-ROM (except those that contain MP3/ できます。...
- Page 7 Super Audio CD compatibility: DVDオーディオディスクの再生について DVDオーディオディスクに含まれるドルビーデジ • Logo: タルやDTSはDVDビデオ専用プレーヤーで再生し ていただくためのものです。本機で再生する場合 • Single layer, dual layer or Hybrid layer は[プレーヤーモード]を[DVDビデオ]に切り換 • 12cm (5in.) or 8cm (3in.) discs えてください。 • Digital audio (DSD) DVD-Rディスクの再生について Super Audio CDs are divided into tracks. 本 機 はDVDビ デ オ フ ォ ー マ ッ ト で 記 録 さ れ た Audio CD compatibility: DVD-Rディスクを再生することができます。...
-
Page 8: General Information
DVD-Video regions ❖ MP3・WMA・JPEG・DivX共通イン フォメーション ・ ISO9660レベル1のCD-ROMファイルシス テムに従って記録してください。 ・ MP3、WMA、DivXにおいてファイル数は フォルダー毎に約650ファイルまで対応し ています。フォルダー数はディスク毎に約 300フォルダーまで対応しています。 All DVD-Video discs carry a region mark ・ 可変ビットレートで記録されたMP3、WMA ファイルは、表示窓の時間表示が正しく表示 on the case somewhere that indicates されないことがあります。 which region(s) of the world the disc is compat ible with. Your DVD player also has ❖... - Page 9 ❖ JPEG再生について • This player can not play the disc contents ・ 本機はJPEGフォーマットで記録された画像 protected by Windows Media Digital Right Management (DRM). データを処理できるように設計されています が、JPEGフォーマットで記録されたすべて JPEG compatibility information の画像データの再生を保証するわけではあり • While this player is designed to be able to ません。 handle image data recorded in JPEG format, ・...
- Page 10 About source audio output When the source output mode has been switched among 2CH, Virtual Surround and 5.1 CH mode setting using the Audio Out setting, audio output for each source will be as shown in the following table. Audio Contents Audio Out Setting Mixed 2ch output 5.1CH output...
-
Page 11: Service Hints And Tools
2. SERVICE HINTS AND TOOLS SERVICE HINTS SERVICE TOOLS Audio signals disc 4822 397 30184 Disc without errors (SBC444)+ Disc with DO errors, black spots and fingerprints (SBC444A) 4822 397 30245 Disc (65 min 1kHz) without no pause 4822 397 30155 Max. -
Page 12: Warning And Laser Safety Instructions
3. WARNING AND LASER SAFETY INSTRUCTIONS WARNING WAARSCHUWING All ICs and many other semi-conductors are Alle IC’s en vele andere halfgeleiders zijn susceptible to electrostatic discharges (ESD). gevoelig voor elektrostatische ontladingen Careless handling during repair can reduce (ESD). life drastically. Onzorgvuldig behandelen tijdens reparatie When repairing, make sure that you are kan de levensduur drastisch doen... -
Page 13: Taking The Disc Out Of Emergency
4. TAKING THE DISC OUT OF EMERGENCY 1. Remove the top cover of the player. 2. Remove 2 screws shown in the picture follows. 3. Remove the disc clamper. 4. Now you can remove the disc. Remove those screws... -
Page 14: Update Back End Firmware Procedure
5. UPDATE BACK END FIRMWARE 5. UPDATE BACK END FIRMWARE PROCEDURE PROCEDURE Necessary Equipment 必要機器 • Update Disc (90M-DV7001CDR). • アップデート用ディスク (90M-DV7001CDR) NOTICE : Refer to "6. THE UPDATE DISC 注意:アップデート用ディスクを作成する場合 は、 "6. THE UPDATE DISC CREATION CREATION PROCEDURE", when you make update disc from update data. -
Page 15: Update Rs-232C Microprocessor Firmware Procedure
7. UPDATE RS-232C MICROPROCESSOR 7. UPDATE RS-232C MICROPROCESSOR FIRMWARE PROCEDURE FIRMWARE PROCEDURE When RS-232C microprocessor firmware was updated, RS-232C マイコンのファームウェアが更新された場合、下記の update the firmware in the following procedure. 手順に従ってアップデートしてください。 Installs of the software. Installs of the software. Update firmware setup procedure. Update firmware setup procedure. - Page 16 2. Click the Next. 2. Next をクリックします。 3. Check the I accept the terms in the license agreement, 3. I accept the terms in the license agreement にチェック and click the Next. を入れ、 Next をクリックします。...
- Page 17 4. Click the Next. 4. Next をクリックします。 5. Click the Finish. 5. Finish をクリックします。 NOTE : This installation does not create short cut icon 注意:このインストールでデスクトップやスタートメニュ on a desktop and a startup. ーにショートカットは作成されません。...
- Page 18 [B] Update firmware setup procedure [B] Update firmware setup procedure デスクトップのマイコンピューター上でマウスの右ボタン 1. The right button of mouse click on the My Computer, and をクリックし、メニューからエクスプローラをクリックし select the Explore in a menu. ます。 2. Double click the Flashprog.exe in C:\Program Files\ 2. C:\Program Files\Toshiba\Flash Programmer フォルダ内...
- Page 19 3. Setup window appears. 3. Setup 画面が表示されます。 Device タブをクリックします。 Click the Device tab. 4. Choose the 870/C in Series. 4. Series から 870/C を選択します。 Choose the TMP86FS49 in Device. Device から TMP86FS49 を選択します。...
- Page 20 5. Click the Apply, then TMP86FS49 appears in the Chosen 5. Apply をクリックします。 Chosen Device に Device. TMP86FS49 が表示されます。 And click the Communication tab. Communication タブをクリックします。 6. Choose the Serial Port number in the COM Port. 6. COM Port から使用する Serial Port 番号を選択します。...
- Page 21 8. Setup Password appears. 8. Setup Password が表示されます。 9. Click the Devise is BLANK. 9. Devise is BLANK をチェックします。 Check the Hex in Input Type. Input Type から をチェックします。 Type the 5468652044264d2047726f7570 into Password. Password に 5468652044264d2047726f7570 を入力します。 Type the 0xff00 into Password count storage address. Password count storage address に...
- Page 22 10. Click the OK. 10. OK をクリックします。 [C] Writing Procedure [C] Writing Procedure Flash Programmer starts. Flash Programmer が表示されます。 1. When Flash Programmer did not start, double click 1. Flash Programmer が表示されない場合は、 C:\Program the Flashprog.exe in C:\Program Files\Toshiba\Flash Files\Toshiba\Flash Programmer フォルダ内の...
- Page 23 2. Click the OK. 2. OK をクリックします。 注意: Flash Programmer は自動的に本機と通信を行いま NOTE: Since Flash Programmer communicates with the unit automatically, the following dialog box す、通信接続が出来ないと下記のダイアログボック appears when it fails in communication. スが表示されます。 3. Click the Setup in the menu bar and select the Object メニューバーの...
- Page 24 4. Click the Browse..4. Browse... をクリックします。 5. Choose the iHEX Format[*.h16,*.h20] in Files of type. 5. Files of type から iHEX Format[*.h16,*.h20] を選択します。 Choose the Vxxx_rs232c_boad.h16, and click the Open. Vxxx_rs232c_boad.h16 を選択し、 Open をクリックします。 NOTE : The Vxxx is a revision number. 注意:...
- Page 25 6. Click the OK. 6. OK をクリックします。 7. Disconnect the mains cord from the unit. 本機から電源コードを外します。 Connect RS-232C on the rear panel of the unit and Serial 本機のリアパネルにある RS-232C と Windows PC の Port of windows PC with RS-232C cable. Serial ポートを...
- Page 26 8. Click the Auto Programming. 8. Auto Programming をクリックします。 Auto Programming appears. Auto Programming が表示されます。...
- Page 27 9. Check the all check boxes in Flash Memory 9. Flash Memory Programming 内の全てのチェックボックス Programming. にチェックを入れます。 And click the Start. Start をクリックします。 Firmware is written into the microprocessor. ファームウェアが RS-232C マイコンに書き込まれます。 The writing of firmware takes about 1 minute. 書き込みにかかる時間は約 分です。...
- Page 28 10. Click the No. 10. No をクリックします。 11. Click the Cancel. 11. Cancel をクリックします。...
- Page 29 12. Click the File in the menu bar and select the Exit. メニューバーの File をクリックし、 Exit を選択します。 13. Disconnect the mains cord and RS232C cable from the 本機から電源コードと RS-232C ケーブルをはずします。 unit. 本機のリアパネルにある EXT. INT. 切替えスイッチ( Insert a thin rot to the hole underside of the EXT. INT. REMOTE CONTROL )下側にある穴に細い棒を差し入...
-
Page 30: How To Check The Version Number Of Rs232C Microprocessor
8. RS232C マイコンのバージョン確認方法 8. HOW TO CHECK THE VERSION NUMBER OF RC232C MICROPROCESSOR 必要機器 Necessary Equipment • Windows PC (OS: Windows2000 or WindowsXP) with • Windows PC ( : Windows2000 または WindowsXP) で Serial Serial port. ポートのあるもの • RS-232C ストレートケーブル( 9Pin メス... - Page 31 4. It may become the following screens at the beginning. 最初に以下のような画面が表示される場合があります Note: It may become the screen of No.5 if the が、 " いいえ " をクリックします HyperTerminal has been used for before. In this case, please advance from No. 5. Click "cancel".
- Page 32 5. The following screens are displayed. 次のような画面が表示されます。 " 名前 " に任意の名前を入力し、任意の " アイコン " を選択しま The suitable name is inputted into the Name, and suitable "icon" is chosen. す。 EX. Name: 9600N1 ここでは、例として 9600N1 に設定。 Click "OK". "OK" をクリックします。...
- Page 33 If the following screens come out, input these items. 接続の設定で ポートを使用する ポート番号に Country/Region Ex.: United State of America (1) し、 "OK" をクリックします。 Area Code Ex.: 123 Connect using Ex.: COM4 (choose the COM port number to use.) Click "OK". 6. COM ポートのプロパティの設定をビット...
- Page 34 7. Click set up of the "Property". 7. " プロパティ " の設定をクリックします。 8. " 設定 " のタブをクリックします。 8. Click "Settings".
- Page 35 9. Click "ASCII setup". 9. "ASCII 設定 " をクリックします。 10. Check the following check box. 次のチェックボックスにチェックを入れます。 Send line ends with line feeds. 行末に改行文字をつける Echo typed characters locally. ローカルエコーする Append line feeds to incoming line ends. 着信データに改行文字をつける Click "OK". "OK" をクリックします。 Since it returns to the No.
- Page 36 11. It becomes the following screens. 次の画面が表示されます。 12. Check once again that a connect RS-232C cable from 本機と が RS-232 ケーブルで接続され、電源が入って unit to PC and turn on the unit. いることを確認し、キーボードからハイパーターミナル Type the @RSV:? into the HyperTerminal from the に @RSV:? と入力し、...
- Page 37 REMARK: When it saves with a "File" menu, it is newly 注記: ファイルメニューで、保存をしておくと、次から in the list of this program chosen from the で選択したこのプログラムの一覧の中に新たにハ next by No.3 a HyperTerminal. The program イパーターミナル "9600N1" というプログラムが "9600N1" is added. If this is clicked, a setup 追加になっています。これをクリックすれば、設定...
-
Page 38: Service Mode
9. SERVICE MODE Firmware (Back-end) version check Connect the DVD player to TV and operate by using Remote controller RC001DV. 1. Press the POWER button to turn on the unit. 2. Press the OPEN/CLOSE button to open the disc tray. 3. -
Page 39: Wiring Diagram
10. WIRING DIAGRAM J801 FL OUT FR OUT C OUT LFE OUT SL OUT SR OUT LT OUT RT OUT HDMI OUT JD04 1401 B2P3-VH J852 JD01 JA11 JA31 JC11 JC31 JS11 JS31 JA13 11FMN-SMT-A-TF B11B-EH B11B-EH 11FMN-BMTTN-A-TFT W852 WD04 +8VA +8VA D_GND... -
Page 40: Block Diagram
11. BLOCK DIAGRAM E+5V E+5V DVD LOADER FRONT PF03 PWB STB_LED STB_LED JF08 PF01 PWB JF05 KHM313 L_SW JF04 E+5V E+5V L_SW HDMI_LED HDMI_LED SLED- PF02 PWB EX_LED EX_LED SLED+ JF07 RS232C 1301 MPEG TU_CE/DAC_RST (SD6.3) SDA_DAC PF04 PWB SCL_DAC PCM_CS PCM_CLFE FOCUS... -
Page 41: Schematic Diagram
12. SCHEMATIC DIAGRAM 1101 D2 2232 A10 4158 I2 1102 G1 2241 I3 5101 A1 1103 I1 2242 I3 5102 G13 1104 I6 2243 I3 5103 A3 MPEG (SD6.3) PWB 1 / 2 1105 I3 2245 I4 5104 A3 TO MPEG (SD6.3) PWB 2/2 1107 F5 2247 I5 5105 B4... - Page 42 1301 G13 3359 I12 T233 H12 1302 A13 3361 A11 T234 H12 1303 C13 3362 A11 T235 H12 1304 A9 3363 A11 T236 H12 MPEG (SD6.3) PWB 2 / 2 1305 H9 3364 A11 T237 I12 2301 B2 3365 A11 T238 I12 7307 5306...
- Page 43 1101 B3 3156 D9 2100 A12 3157 D9 2101 A5 3158 I7 2102 A12 3159 I7 2103 A12 3160 E10 2104 A13 3161 E11 +1V8_CORE 5100 F101 +1V8_CORE 2105 B6 3162 E10 DECOUPLING CAP FOR FLI2301/ FLI2310 DECOUPLING CAP FOR FLI2301 / FLI2310 HDMI PWB 1 / 4 2106 A5 3163 E11...
- Page 44 1000 G1 4201 D3 1004 I5 4202 F13 1210 F3 4203 A5 2201 E14 4209 I14 2202 G13 4210 G12 +5VD 2203 G14 4211 G3 HDMI PWB 2 / 4 +5VD 7201 2204 G13 4213 A13 PCF8574T 2205 H13 4214 E11 4213 Remote 8-bit I/O expander for I2C-bus +3V3D_V...
- Page 45 1003-1 B11 5312 E2 1003-2 D11 5313 F7 1003-3 E11 5314 G7 1301 D14 5315 H7 1302 H14 5320 D2 1303 G10 5321 D2 HDMI PWB 3 / 4 1305 D14 5322 F3 1310 B2 5323 C4 2300 B9 6300 C10 2302 C7 6301 D10 2303 C10...
- Page 46 1002 C14 3466 E12 1401 H4 3482 B4 1402 G1 3483 C4 1403 I6 3484 F4 1404 I3 3485 F4 HDMI PWB 4 / 4 1405 H1 3486 F4 1410 G3 3487 D5 1411 H3 3488 D13 2401 B5 3489 D13 +5VD_HDMI +3V3_PLL 2402 B5...
- Page 47 RA07 CA06 220u/16 +8VA +8VA QA09 RX71 CH02 +3.3V TPZ066 RH01 RH02 DTA114EUA PA01 -1 / 2 QH05 CD08 RA08 CA05 2SA1312 IIC ADRESS TPZ067 RA01 RA03 220p AD0:1 AD1:1 4.7k 2.2k QA01 DA21 RA05 2.2k 00MWG30AK101- CD07 QH01 QH04 RH04 RH05 2SC2240...
- Page 48 PA01 -2 / 2 00MWG30AK101- RX14 TPZ169 RX16 TPZ172 RX26 TPF058 MIX LCH CX10 RX07 220u/16 TPZ170 CX13 RX19 TPF059 CH62 RX08 RX25 RH61 RH62 +8VA QH65 2.2k +3.3V 2SA1312 RX83 CX08 RX03 RX01 +8VA 220p JX01 2.2k 4.7K RX05 2.2k IIC ADRESS QX04...
- Page 49 TPF108 TPZ310 TPZ307 MODEL TPF109 TPZ305 RE25 TPZ350 TPZ311 DIST. V-GND QE24 1.5k RE80 2SA1576A T106 Q/R TPZ351 TPZ341 For MARANTZ S1_L3_1 RE81 RE85 RE26 TPZ309 RE29 For OEM-1 For C,L,S Virsion TPZ342 TPZ346 1.5k RE82 RE86 YUV_RGB QE21 TPZ312...
- Page 50 RESERVED PV01 -2 / 2 LT21 TPZ329 TPZ326 BLM21PG600SN1D 00MWG30AK201- YT01 R+12V_V QT21 R+8V R+5V_MO NJM7808DL1A-TE1-#ZM GND TERMINAL FOR PWB TPZ315 TPZ316 JV13 YT03 16FMN-BMTTN-A-TFT GND TERMINAL FOR PWB TPF018 LT23 TPZ330 D_GND D-GND D-GND D-GND BLM21PG600SN1D +12V_STBY +5V_STBY TPF019 D_GND QT24 R+5VV...
- Page 51 DF04 PF01 QF10 02CZ6.8-Z(TE85L) DTC114EUA T106 -24V 00MWG30AK102- CF20 0.1u FRONT TPZ2 TPZ1 DC+3.5V HEATER CF31 RF52 JF01 0.1u 6.8k CF17 CF16 S8B-PH-K-S 100u/10 0.1u TPF01 SF04 SF07 -24V SF01 TPZ39 GND GND TPF02 TPZ36 TPZ34 E+5V RF27 TPZ3 PAUSE NEXT AUDIO_EX TPF03...
- Page 52 1501 A10 5508 G11 1502-1 C2 5509 G11 1502-2 B2 5510 G12 1503 E2 6501 A8 1504 E2 6502 B7 RS232 PWB 1505 G7 6503 C5 1506 G10 6504 D4 1508 G13 6505 E2 +5V_STDBY 1509 G5 6506 F3 1510 G7 7501 A7 +5V_MCU 2501 A11...
- Page 53 Q853 TPF1 KIA7809 C855 C853 C854 TPZ1 0.1u 220u/25 0.1u P801 C851 1000U/35 00MWG30AK202- D854 D852 S5688G S5688G D853 D851 TPZ25 TPZ18 T851 S5688G S5688G F854 TPF4 TPZ19 C852 500mA 250V C856 C858 TPZ26 TPZ4 1000U/35 220u/25 0.1u COMMON TPZ20 F851 D871 C857...
-
Page 55: Parts Location
13. PARTS LOCATION RS232 PWB (A) RS232 PWB (B) 鉛フリー半田 鉛フリー半田 半田付けには、鉛フリー半田 (Sn-Ag-Cu) を使用してください。 Lead-free Solder When soldering, use the Lead-free Solder (Sn-Ag-Cu). - Page 56 MPEG (SD6.3) PWB (A) 鉛フリー半田 鉛フリー半田 半田付けには、鉛フリー半田 (Sn-Ag-Cu) を使用してください。 Lead-free Solder When soldering, use the Lead-free Solder (Sn-Ag-Cu).
- Page 57 MPEG (SD6.3) PWB (B) 鉛フリー半田 鉛フリー半田 半田付けには、鉛フリー半田 (Sn-Ag-Cu) を使用してください。 Lead-free Solder When soldering, use the Lead-free Solder (Sn-Ag-Cu).
- Page 58 AV PWB (A) HDMI PWB (A) 鉛フリー半田 鉛フリー半田 半田付けには、鉛フリー半田 (Sn-Ag-Cu) を使用してください。 Lead-free Solder When soldering, use the Lead-free Solder (Sn-Ag-Cu).
- Page 59 HDMI PWB (B) 鉛フリー半田 鉛フリー半田 半田付けには、鉛フリー半田 (Sn-Ag-Cu) を使用してください。 Lead-free Solder When soldering, use the Lead-free Solder (Sn-Ag-Cu).
- Page 60 PA01 PWB (A) CA01 C5 CH21 E11 DH21 D11 QD21 B12 QX09 C2 RC19 F8 RD66 E13 RH64 D2 RX11 E2 CA02 C5 CH22 E11 DH22 D11 QD41 B9 QX31 E3 RC20 F8 RD67 E13 RH65 D2 RX12 E2 CA03 C6 CH31 E13 DH23 E11 QD51 B3...
- Page 61 PA01 PWB (A) 鉛フリー半田 鉛フリー半田 半田付けには、鉛フリー半田 (Sn-Ag-Cu) を使用してください。 Lead-free Solder When soldering, use the Lead-free Solder (Sn-Ag-Cu).
- Page 62 P801 PWB (A) PV01 PWB (A) CE01 C9 CV02 C5 LE42 B11 RE83 C8 RV45 B6 CE02 C9 CV03 C5 LE43 B10 RE84 C8 RV46 A6 CE03 C9 CV04 C5 LE44 B9 RE85 C8 RV47 B3 CE04 C9 CV05 C5 LT01 B2 RE86 C8 RV48 B3...
- Page 63 PV01 PWB (A) 鉛フリー半田 鉛フリー半田 半田付けには、鉛フリー半田 (Sn-Ag-Cu) を使用してください。 Lead-free Solder When soldering, use the Lead-free Solder (Sn-Ag-Cu).
- Page 64 PF02 PWB (A) DF01 A3 DF02 A1 JF07 A4 PF03 PWB (A) DF03 A2 JF08 A2 PF04 PWB (A) J804 C2 S801 A2 鉛フリー半田 鉛フリー半田 半田付けには、鉛フリー半田 (Sn-Ag-Cu) を使用してください。 Lead-free Solder When soldering, use the Lead-free Solder (Sn-Ag-Cu).
- Page 65 PF01 PWB (A) CF01 B11 CF28 C11 RF01 B11 RF28 B1 RF52 C1 CF02 B12 CF29 C11 RF02 D10 RF29 D10 RF53 C11 CF03 B12 CF30 D11 RF03 B11 RF30 D10 RF55 C11 CF04 B12 CF31 C1 RF04 C12 RF31 D10 RF56 C11 CF05 C12 DF04 C1...
-
Page 66: Exploded View And Parts List
14. EXPLODED VIEW AND PARTS LIST... - Page 67 641010002008S TERMINAL ! AC-P08CN27 K001 00MZK30AK0010 00MZK30AK0010 PWB ASSY PCB ASSY MPEG SD6.3 BOARD 867000029876 K002 00MZK30AK0020 00MZK30AK0020 PWB ASSY PCB ASSY HDMI V1.1 BOARD 867000029879 NOTE : "nsp" PART IS LISTED FOR REFERENCE ONLY, MARANTZ WILL NOT SUPPLY THESE PARTS.
- Page 68 00M14AJ257020 LID TOP COVER BL SLIT LESS 003Z 00MZD01500410 CONN. CORD YAF11-0745N 3PIN RCA (VIDEO&L/R) 1.5M 004Z 605010002002S CONN. CORD TWIN SHIELDED WIRE WITH RCA PLUGS NOTE : "nsp" PART IS LISTED FOR REFERENCE ONLY, MARANTZ WILL NOT SUPPLY THESE PARTS.
-
Page 69: Microprocessor And Ic Data
15. MICROPROCESSOR AND IC DATA QD01 : CS4398 3.3 V to 5 V 1.8 V to 5 V Switched Interpolation Register/Hardware Multibit Left Capacitor Hardware or I C/SPI Filter with Configuration Differential Modulator DAC and Control Data Volume Control Output Filter 1.8 V to 5V Switched... - Page 70 QD61 : TC74LCX541F & (19) (18) (17) (16) (15) (14) (13) (12) (11) Truth Table Inputs Outputs X: Don’t care Z: High impedance...
- Page 71 QE01 : MM1623 Pin no. Pin name Function Pin no. Pin name Function BIAS Bias 2 is power supply for 75Ω driver. Croma signal input Interlace / Progressive select MUTE1 Mute select MUTE2 Using of MUTE and POWER-SAVING. Luminance input The input can select Sync tip clamp or Bias.
- Page 72 QE01 : MM1623 Pin no. Pin name Function Signal output CVBS S1/S2 select S-DC S1/S2 DC output S-DC out 28 V S1/S2 150kΩ Bias 200Ω 27 S-DC 75Ω MUTE1 26 C Driver -6dB 6.75MHz Clamp CVBS 25 S1 YC mix. 24 S2 Clamp 75Ω...
- Page 73 QF01 : R5F21246SNFP QF03 : AT24C04...
- Page 74 QF08 : QD4742G Micro controller reset pin Vout Vref BD47XXG QV01 : BH7868FS 6.75M Vcc1 75Ω COUT S-DC OUT S-DC OUT S1/S2 6.75M 75Ω CVOUT BIAS CVOUT SAG MUTE1 MUTE1 6.75M CLAMP YOUT CVIN 75Ω SEL(CV/MIX) YOUT SAG CLAMP 13.5M BIAS BIAS Py/G OUT...
-
Page 75: Electrical Parts List
16. ELECTRICAL PARTS LIST NOTE ON SAFETY FOR FUSIBLE RESISTOR : PARTS INFORMATION The suppliers and their type numbers of fusible resistors RESISTORS 1) 00MGD05 × × × 140, Carbon fi lm fi xed resistor, ±5% 1/4W are as follows; 2) 00MGD05 ×... - Page 76 00D2472018903 CHIP RES. RM73B--0R0KT +1608 P801 R841 00D2472011942 CHIP RES. RM73B--473JT +1608 P801 R842 00D2472009909 CHIP RES. RM73B--472JT +1608 P801 R843 00D2472009983 CHIP RES. RM73B--103JT +1608 NOTE : "nsp" PART IS LISTED FOR REFERENCE ONLY, MARANTZ WILL NOT SUPPLY THESE PARTS.
- Page 77 134050028401S ELECT CAP ROS-16V221MH5#PE-T2 PA01 CD21 /N1S 134050028401S 134050028401S ELECT CAP ROS-16V221MH5#PE-T2 PA01 CD21 /U1B 134050028401S ELECT CAP ROS-16V221MH5#PE-T2 PA01 CD22 00D2570512903 CER. CAP CK73F1E104ZT +1608 NOTE : "nsp" PART IS LISTED FOR REFERENCE ONLY, MARANTZ WILL NOT SUPPLY THESE PARTS.
- Page 78 CX38 1330100055060 1330100055060 FILM CAP. APSV 0100 J 221 0000 0200 PA01 CX40 134050028401S 134050028401S ELECT CAP ROS-16V221MH5#PE-T2 PA01 CX41 134050028401S 134050028401S ELECT CAP ROS-16V221MH5#PE-T2 NOTE : "nsp" PART IS LISTED FOR REFERENCE ONLY, MARANTZ WILL NOT SUPPLY THESE PARTS.
- Page 79 00MFC90020150 FERRITE CORE BLM18PG300SN1D PA01 LD10 00MFC90020150 00MFC90020150 FERRITE CORE BLM18PG300SN1D PA01 QA01 213050005400S 213050005400S TRS. 2SC2240N-GR_BL(932202943676) PA01 QA02 211050004401S 211050004401S TRS. 2SA970 (GR) OR (BL) TOSHIBA NOTE : "nsp" PART IS LISTED FOR REFERENCE ONLY, MARANTZ WILL NOT SUPPLY THESE PARTS.
- Page 80 2SC2873 (Y) PA01 QH64 00MHX113121B0 00MHX113121B0 CHIP TRS. 2SA1312 (B) PA01 QH65 00MHX113121B0 00MHX113121B0 CHIP TRS. 2SA1312 (B) PA01 QH66 00MHX333241B0 00MHX333241B0 CHIP TRS. 2SC3324 (B) NOTE : "nsp" PART IS LISTED FOR REFERENCE ONLY, MARANTZ WILL NOT SUPPLY THESE PARTS.
- Page 81 00D2470004964 CHIP RES. RM73B--680JT +2125 PA01 RA46 00D2470010929 00D2470010929 CHIP RES. RM73B--153JT +2125 PA01 RA47 00D2472013908 CHIP RES. RM73B--224JT +1608 PA01 RA48 00D2472008926 CHIP RES. RM73B--222JT +1608 NOTE : "nsp" PART IS LISTED FOR REFERENCE ONLY, MARANTZ WILL NOT SUPPLY THESE PARTS.
- Page 82 00D2472003947 CHIP RES. RM73B--220JT +1608 PA01 RD43 00D2472003947 CHIP RES. RM73B--220JT +1608 PA01 RD44 00D2472003947 CHIP RES. RM73B--220JT +1608 PA01 RD45 00D2472003947 CHIP RES. RM73B--220JT +1608 NOTE : "nsp" PART IS LISTED FOR REFERENCE ONLY, MARANTZ WILL NOT SUPPLY THESE PARTS.
- Page 83 RM73B--101JT +2125 PA01 RH54 00D2470005905 00D2470005905 CHIP RES. RM73B--101JT +2125 PA01 RH55 00D2470005905 00D2470005905 CHIP RES. RM73B--101JT +2125 PA01 RH56 00D2470011902 00D2470011902 CHIP RES. RM73B--333JT +2125 NOTE : "nsp" PART IS LISTED FOR REFERENCE ONLY, MARANTZ WILL NOT SUPPLY THESE PARTS.
- Page 84 RM73B--472JT +2125 PA01 RX02 00D2470009901 00D2470009901 CHIP RES. RM73B--472JT +2125 PA01 RX03 00D2470008928 00D2470008928 CHIP RES. RM73B--222JT +2125 PA01 RX04 00D2470008928 00D2470008928 CHIP RES. RM73B--222JT +2125 NOTE : "nsp" PART IS LISTED FOR REFERENCE ONLY, MARANTZ WILL NOT SUPPLY THESE PARTS.
- Page 85 00D2544538913 ELECT CAP CE04W1C220MT SMG/RE3 PF01 CF04 00D2570511920 CER. CAP CK73F1H473ZT +1608 PF01 CF05 00D2570506951 CER. CAP CC73CH1H101JT +1608 PF01 CF06 00D2570506951 CER. CAP CC73CH1H101JT +1608 NOTE : "nsp" PART IS LISTED FOR REFERENCE ONLY, MARANTZ WILL NOT SUPPLY THESE PARTS.
- Page 86 00D2472003947 CHIP RES. RM73B--220JT +1608 PF01 RF34 00D2472003947 CHIP RES. RM73B--220JT +1608 PF01 RF35 00D2472006902 CHIP RES. RM73B--331JT +1608 PF01 RF36 00D2472010927 CHIP RES. RM73B--153JT +1608 NOTE : "nsp" PART IS LISTED FOR REFERENCE ONLY, MARANTZ WILL NOT SUPPLY THESE PARTS.
- Page 87 100 UF M 10V RA-2 PV01 CE14 /N1S 00MOA10701020 00MOA10701020 ELECT. CAP. 100 UF M 10V RA-2 PV01 CE15 /N1B 00D2570512903 CER. CAP CK73F1E104ZT +1608 NOTE : "nsp" PART IS LISTED FOR REFERENCE ONLY, MARANTZ WILL NOT SUPPLY THESE PARTS.
- Page 88 00MOA10701020 00MOA10701020 ELECT. CAP. 100 UF M 10V RA-2 PV01 CV13 1340100715060 1340100715060 ELECT CAP RA2-50V220ME3#8-T2 PV01 CV14 00MOA10701020 00MOA10701020 ELECT. CAP. 100 UF M 10V RA-2 NOTE : "nsp" PART IS LISTED FOR REFERENCE ONLY, MARANTZ WILL NOT SUPPLY THESE PARTS.
- Page 89 RM73B--390JT +1608 PV01 RE02 /N1S 00D2472004904 CHIP RES. RM73B--390JT +1608 PV01 RE03 /N1B 00D2472003989 CHIP RES. RM73B--330JT +1608 PV01 RE03 /N1S 00D2472003989 CHIP RES. RM73B--330JT +1608 NOTE : "nsp" PART IS LISTED FOR REFERENCE ONLY, MARANTZ WILL NOT SUPPLY THESE PARTS.
- Page 90 00D2472004962 CHIP RES. RM73B--680JT +1608 PV01 RT08 00D2472012925 CHIP RES. RM73B--104JT +1608 PV01 RT09 00D2472018903 CHIP RES. RM73B--0R0KT +1608 PV01 RT10 00D2472018903 CHIP RES. RM73B--0R0KT +1608 NOTE : "nsp" PART IS LISTED FOR REFERENCE ONLY, MARANTZ WILL NOT SUPPLY THESE PARTS.
- Page 91 00D2472004904 CHIP RES. RM73B--390JT +1608 PV01 RY92 00D2472003989 CHIP RES. RM73B--330JT +1608 PV01 RY93 00D2472004904 CHIP RES. RM73B--390JT +1608 PV01 RY94 00D2472003989 CHIP RES. RM73B--330JT +1608 NOTE : "nsp" PART IS LISTED FOR REFERENCE ONLY, MARANTZ WILL NOT SUPPLY THESE PARTS.
- Page 92 00D2472003989 CHIP RES. RM73B--330JT +1608 PV01 RY97 00D2472009941 CHIP RES. RM73B--682JT +1608 PV01 RY98 00D2472009941 CHIP RES. RM73B--682JT +1608 PV01 RY99 00D2472009983 CHIP RES. RM73B--103JT +1608 NOTE : "nsp" PART IS LISTED FOR REFERENCE ONLY, MARANTZ WILL NOT SUPPLY THESE PARTS.
-
Page 93: About Replace The Microprocessor With A New One
17. ABOUT REPLACE THE MICROPROCESSOR WITH A NEW ONE When replaced of the U-PRO (Microprocessor) or the Flash ROM, confirm contents of the following. Pos. After Description Remark Name replaced PF01 QF01 R5F21246SNFP FRONT U-PRO After replaced A : Mask ROM (With software). No need write-in of software to the microprocessor. B : Flash ROM (With software).
Need help?
Do you have a question about the DV7001/N1B and is the answer not in the manual?
Questions and answers