Table of Contents
Advertisement
Advertisement
Table of Contents

Related Manuals for Roland Kiwi-8P


Summary of Contents for Roland Kiwi-8P
-
Page 2: Table Of Contents
Table of Contents Kiwi-8P Features..............6 Kiwi 8P Flow Chart............7 Kiwi 8P Front Panel............8 Front Panel Description.............9 RED BUTTONS......................9 WRITE BUTTON......................9 MIDI PANIC BUTTON....................9 CANCEL BUTTON......................9 GREY EDIT BUTTONS.....................10 MASTER TUNE BUTTON..................10 MIDI BUTTON......................10 NAME BUTTON.......................10 PARAMETER BUTTON....................11 CONTROL BUTTONS....................11 HOLD BUTTON......................11 ARP BUTTON......................11... - Page 3 BANK 8........................16 RED BUTTONS......................17 TONE 1-8........................17 PG-800 Support..............18 PG-800........................18 Performance Control Section..........19 Pitch Bender Range....................19 LFO Trigger.......................19 Portamento.......................19 Aftertouch........................19 JX-8P Upgrade Notes............20 Digital Oscillators......................20 Front Panel Buttons....................20 Tuning........................20 Display........................21 Factory Presets......................21 Midi Received......................21 Midi Panic.........................21 Note Hold........................21 Edit Buffer Compare....................21 LFO Generators......................22 Envelopes.........................22 Sequencer...............23...
- Page 4 Chorus........................33 Voice Assign Mode....................34 Voice Mode Steal......................34 Voice Mode Staccato....................34 Detune........................34 Analogue Feel......................34 Seq One Shot......................34 Seq Key Down Play....................35 Seq Auto Transpose....................35 Seq Auto Trans Reset....................35 Sequence Complete....................35 Patch Clock.......................35 ARP Step Timing.......................35 SEQ Step Timing......................36 ENV ADSR........................36 ENV KEY........................36 Quick Edit Assign.....................36 Mod Wheel Destination...................36 Mod Wheel Level......................36...
- Page 5 Adjustments for the JX-8P..........53 Midi Data.................55 Continuous Controllers....................56 Real Time Commands....................60 Midi Sysex Support............61 Midi Sysex Data......................62 www.kiwitechnics.com JX-8P Upgrade User Manual v130...
-
Page 6: Kiwi-8P Features
Full Matrix mod system that can channel any mod source to any destination. The matrix mod control parameter can • itself be modified from various sources making the matrix very powerful A quality Front Panel Overlay is provided with the Kiwi-8P upgrade • CHORD MODE Any chord with up to 6 notes can be set and played from any key •... -
Page 7: Kiwi 8P Flow Chart
Kiwi 8P Flow Chart... -
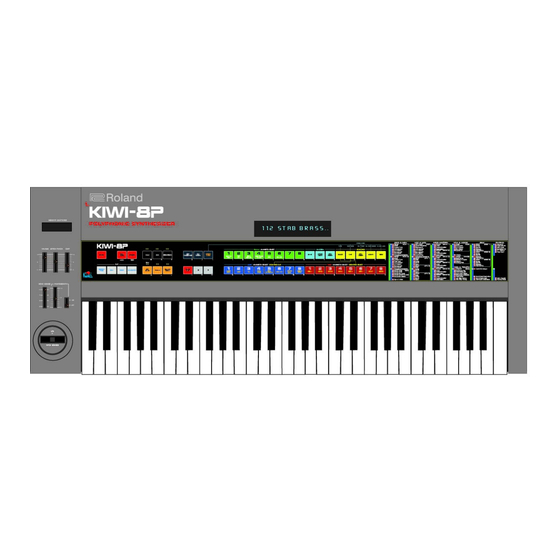
Page 8: Kiwi 8P Front Panel
Kiwi 8P Front Panel... -
Page 9: Front Panel Description
Front Panel Description The Kiwi-8P front panel differs from the original 8P in a number of ways and the Kiwi-8P Upgrade redefines most of the buttons on the Roland JX-8P . Many of the buttons have been assigned new functions and others now operate differently. An overlay label is supplied with the upgrade that fits over the existing JX-8P front panel label. -
Page 10: Grey Edit Buttons
Both In & Out – All Program If omni is set any midi channel is Commands are both sent & received recognised by the Kiwi-8P 6) CC Enable – There are four 2) Midi Out - This can be 1-16 possible options. -
Page 11: Parameter Button
PARAMETER PARAMETER button allows Every parameter will have an ID. For editing of all the parameters for a Tone example the VCF cutoff looks like 212 BUTTON as well as some of the Global (G2B1T2). To get to this parameter for Parameters. -
Page 12: Chord Button
During Name Editing this button will to return to the previous mode. select the letter , (Comma) KEY TRANSPOSE The Kiwi-8P Key Transpose can be During Name Editing this button will changed using this button. select the letter Z Edit Letter “Z”... -
Page 13: Sysex Dump
Move Edit Position Left Note – The Kiwi-8P tone name is 20 characters. Due to display size on the 8P only the first 12 characters are displayed NAME EDIT RIGHT... -
Page 14: Green Buttons
GREEN BUTTONS GROUP 1-8 These buttons will select Group 1 to During Parameter Editing these Group 8 Tones under normal play buttons will select the G1 to G6 parts mode. The Tone will immediately of the parameter number. Edit Letters “1-8” load. -
Page 15: Blue Buttons
BLUE BUTTONS BANK 1 This button will select Bank 1 Tones During Seq Editing this button will under normal play mode. The Tone change the editing step to the first will immediately load. Each Bank has step. This is explained in more detail Edit Letter “G”... -
Page 16: Bank 6
BLUE BUTTONS BANK 6 This button will select Bank 6 Tones During Seq Editing this button will under normal play mode. The Tone allow overdubs existing will immediately load. Each Bank has sequence. This is explained in more Edit Letter “L ” 8 Tones which are selected using the detail in the Sequencer description TONE buttons... -
Page 17: Red Buttons
RED BUTTONS TONE 1-8 These buttons will select Tones 1 to To Load a sequence the SEQ SELECT 8. The Tone will immediately load. button must be pressed before the Tone button. Edit Letters “O-V” The same tone that is selected when synth switched will... -
Page 18: Pg-800 Support
Parameter Editing system and using the Edit slider or by using a midi editor. If this is a problem it is recommended midi controller. All PG-800 Parameters are supported in the Kiwi-8P www.kiwitechnics.com JX-8P Upgrade User Manual v130... -
Page 19: Performance Control Section
Bend lever. In with the Tone. the original JX-8P these ranges were 2, 3, 5 & 7 semitones. The Kiwi-8P has This was not possible with the extended the range and it is now 2, 3, 5 original JX-8P &... -
Page 20: Jx-8P Upgrade Notes
All the front panel buttons on the JX- This also happens in the JX-8P 8P have been designed without but is more obvious in the Kiwi-8P blocking diodes. The result of this is as the display updates any switch if you push two buttons at the same presses. -
Page 21: Display
The HOLD light will flash when the Hold except when using a hold Hold Pedal is used pedal. A Hold Function has been added to the Kiwitechnics Kiwi-8P Upgrade front panel and uses the HOLD button. Pressing HOLD will toggle Hold on or off. The HOLD LED will be lit when hold is on. -
Page 22: Lfo Generators
Each LFO has will only move the base level up. it's own sync divider with 16 Each section of the Kiwi-8P that possible divide ratios including uses LFO input can select from swing options. -
Page 23: Sequencer
Sequencer JX-8P Upgrade contains SEQ SELECT polyphonic 6 track sequencer that capacity step This button followed by a Tone automatic playing. button is used to select and load a sequence. The clock for the Sequencer is There are 8 Sequence memories and always the Master Clock and this can only one of these can be selected at be divided by one of 13 different... -
Page 24: Sequencer Writing / Editing
Sequencer Writing / Editing The memory protect switch on the (3) By playing the keyboard and rear of the JX-8P must be set to Off using the Tie button and Rest to change a sequence in memory. buttons, write steps one after another. - Page 25 Sequencer Writing / Editing Button use in detail Bank 6 – Overdub Bank 1 – First Step When the Bank 6 button is pressed When the Bank 1 button is pressed while in edit mode and notes are while in edit mode the sequence being played the sequence step will step back to the first step and notes already in the sequence...
-
Page 26: C) Playing
C) Playing Load Sequence A Sequence can be loaded in two It is possible to play along with the ways. A Sequence is loaded manually sequencer. The JX-8P has 6 voices in by pressing SEQ SELECT followed by total and if not enough voices remain a Tone Button 1-8. -
Page 27: Arpeggiator
Arpeggiator The KiwiTechnics JX-8P Upgrade has Canceling Arpeggiator Mode. a built in Arpeggiator that can be Arpeggiator mode can be stopped by applied to any sound. pressing the ARP button. The light on the ARP button will go out. Arpeggiator Mode is started and stopped by pressing the ARP Button. -
Page 28: Chord Mode
Chord Mode A Chord is set by playing the Chord As only one chord can be played and then pressing and releasing the at a time the keys played have last CHORD Button while the keys of the note priority. chord are being held. -
Page 29: Parameter Editing
Parameter Editing Parameter Editing can be done in Parameter numbers are in three parts three ways. Using midi, using the and contain a 'G', a 'B' and a 'T' number front panel or by using the PG-800. and will look like 212 for VCF Cutoff for Midi details can be found in the midi example. -
Page 30: Vcf Parameters
VCF Parameters 211 – HFP Cutoff Options are 0, 1, 2, 3 212 – VCF Cutoff Range is 0-127 213 – VCF Resonance Range is 0-127 214 – VCF LFO Range is 0-127 215 – VCF LFO Select Options are LFO1, 2 or 3 and normal or inverted 216 –... -
Page 31: Modulation Matrix
Modulation Matrix 311 – Matrix 1 - 6 Source Matrix Source options are 315, 321, 325, 331, 335 0 - Off 1 - Bend Up 2 - Bend Down 3 - Bend Full 4 - Mod Wheel 5 - Edit Slider 6 - Key Velocity 7 - Key Note 8 - LFO1 (bipolar) - Page 32 313 – Matrix 1 - 6 Mod Matrix Mod options are 317, 323, 327, 333, 337 0 - Fixed Amount 1 - Fixed Amount (Inverted) 2 - Bend Up 3 - Bend Up (Inverted) 4 - Bend Down 5 - Bend Down (Inverted) 6 - Bend Full 7 - Bend Full (Inverted) 8 - Mod Wheel...
-
Page 33: Vca Level
314 – Matrix 1 - 6 Destination Matrix Destination options are 318, 324, 328, 334, 338 0 - Off 1 - DCO1 Freq 2 - DCO2 Freq 3 - All DCO Freq 4 - DCO1 Wave 5 - DCO1 Range 6 - DCO2 Wave 7 - DCO2 Range 8 - Detune amount... -
Page 34: Voice Assign Mode
Voice Assign Mode 421 Voice Assign Mode Voice Assign Mode selects the way the 6 playing voices are assigned to notes played Options are Poly Single – 6 notes trigger 6 voices Poly Dual – 3 notes max trigger 2 voices each Poly Triple –... -
Page 35: Seq Key Down Play
Seq Key Down Play 432 Sequence Key Down Play Options are Off or On. Off = The Sequence will always play when the Sequence button is on On = The Sequence will only play when the Sequence Play button is enabled and a key is being played. -
Page 36: Seq Step Timing
SEQ Step Timing 438 Seq Step Timing The Seq Clock Timing can be set to 1 of 13 options. These are: Half Note (48 Clocks/Step) Quarter note (24 Clocks/Step) 8th note (12 Clocks/Step) 8th note, half swing (14,10 Clocks/Step) 8th note, full swing (16,8 Clocks/Step) 8th note triplets (8 Clocks/Step) 16th note (6 Clocks/Step) -
Page 37: At Destination
Sync'd LFOs will not run Midi Clock Gen 613 Midi Clock Generation Options are Off, On The Kiwi-8P will output a midi clock which is set by the internal clock rate when this parameter is set On Mod Wheel Level... -
Page 38: Hold Pedal Mode
Hold Pedal Mode 617 Hold Pedal Mode Options are O or C This option let you use a normally Open or normally Close sustain pedal. If your Hold Pedal has hold off when you press it and hold on when you release it (HOLD light flashing) then change this option. -
Page 39: Setting Up With External Devices
Setting up with External Devices Midi Notes Hold Pedal Midi though should be used if Any pedal that shorts the tip to multiple units are being used on the ground when pressed or open can midi chain to reduce delays. While be used. -
Page 40: Importing/Exporting Tones
Selected be a single tone or a group of 64 Group at the location specified in the tones. Roland Dump. This is typically 1:1 to 7:2. MKS-70/JX-10 dumps A Single Tone will be loaded into the... -
Page 41: Firmware Updates
To start the firmware upload press boards. and hold the MIDI PANIC button as you power on the Kiwi-8P . The display It is most important therefore that will show 'WAITING 4 UPDATE' and files are loaded in the correct order. -
Page 42: Test Mode
Test Mode Test Mode As each note is pushed the voice that is sounding will display on the LEDs. Test Mode is only used to set the trims on the Voice board and is only HOLD = Voice 1 used during the initial setup. = Voice 2 = Voice 3 There is a special test mode patch... -
Page 43: Upgrade Install
If you are in any doubt at all or do not understand any part of this document then have this work done by a professional. The KiwiTechnics Kiwi-8P Upgrade must be installed by a competent technician with the correct tools or damage to your JX-8P can occur. KiwiTechnics will not be responsible for damage done to your precious JX-8P if this upgrade is not fitted correctly. - Page 44 UNPLUG THE JX-8P! UNPLUG THE JX-8P! There are dangerous voltages inside the unit and it must not be opened until the power plug is removed from the power supply. Two 40 pin cpus, one 40 I/O chip and a 16 pin A to D chip and other components need to be removed and replaced with three 40 pins sockets, some links and some resistors which are supplied with the KiwiTechnics JX-8P Upgrade.
- Page 45 Step 2) Removing the 8P voice board. With the top still closed remove the two small back screws either side of the midi connectors on the rear of the JX-8P . Now open the top. It is a good idea to mark the voice board cables with a felt pen so that you get them back into the correct sockets. Make special note of plug CN3 which is a 10 pin plug in a 12 pin socket.
- Page 46 Step 3) Desolder the listed ICs, resistors and transistor and fit the supplied 40 pin IC sockets, resistors and links. It is very important that this step is done correctly. On the top side of the voice board underneath the ICs (Integrated Circuits) that need to be removed are some fine tracks that will be damaged and difficult to repair if all the solder is not removed correctly.
- Page 47 Step 4) Carefully solder in the supplied 40 Pin Sockets into IC8, IC30 and IC34 holes making sure that the notch in the socket is the same orientation as the mark on the board. This photo shows these fitted and the other components except R35 removed.
- Page 48 Step 5) Fit the two supplied 16k resistors into the R52 & R53 holes. There are 3 x 10k and 2 x 16k resistors supplied in the upgrade so make sure you use the right ones. The 3 x 10k resistors are used in step 6. Fit links into the following holes where IC20 &...
- Page 49 Step 6) Fit the three supplied 10k resistors. These go between RA6 pin 1 and Pin 2, Pin 1 and 3 and Pin 1 and Pin 5 as in the diagram. Pins 4, 6 & 7 should have nothing in them. Pin one has a box around it on the circuit board.
- Page 50 Step 8) Fit the Voice board back into the 8P with the 9 screws removed in step2. Replug all the cable except the ones from the keyboard (6 pin CN4, 10 pin CN5 & 8 pin CN6). Pay special attention to replugging CN3 that you put it back exactly as it was.
- Page 51 Upgrade Label The Kiwitechnics Kiwi-8P Upgrade comes with a label that is placed over the existing front panel label on the JX-8P . It is recommended that you lay the label on a flat surface to let it relax from being rolled into the shipping box. This may take a while (days) so be patient.
-
Page 52: Adjustments For The Jx-8P
Leave the Synth running for at least 10 minutes to let the electronics stabilize. 2) Enter TEST MODE. The next adjustments use a special test mode that is built into the Kiwi-8P Upgrade. This is entered by Pressing and Holding the CANCEL button while the JX-8P is powered on. The display will show 'Test Mode' when test mode is active. - Page 53 G2 B1 T8 VCF KEY G5 B2 T4 VCA Level G5 B2 T7 VCA Mode GATE G5 B3 T1 Chorus 4) Connect an oscilloscope to the output jack or TP5 on the main board. While playing A above middle C adjust each voice (the voice playing is shown on the LEDs) so that the VCA Level is full amplitude.
-
Page 54: Midi Data
Midi Data Function Transmitted Recognized Notes Basic Channel 1-16 1-16 If Omni selected the Kiwi106 will recognize any midi channel Note Number 24(C1)-108(C8) 0-127 Notes that are received outside the Kiwi106 range of 24-108 are transposed to the nearest octave within range. Mode Voice Modes need to be changed using Midi Control or Sysex commands... - Page 55 Continuous Controllers Continuous Controllers Second Third Notes Bank Select MSB $00 (00) $00-$01 0=Bank Selection, 1=Not Used, 2=Seq Selection Used in conjunction with CC32 Bank Select LSB Modulation Wheel Level $01 (01) $00-$7f (0-127) Breath Controller $02 (02) $00-$7f (0-127) Not Supported Portamento Time $05 (05)
-
Page 56: Continuous Controllers
Continuous Controllers Continuous Controllers Second Third Notes LFO 3 Delay $2c (44) $00-$7f (0-127) Internal Clock Rate $2d (45) $00-$7f (0-127) GLOBAL – 0-127=5-299 BPM Patch Clock Tempo $2e (46) $00-$7f (0-127) Matrix Midi CC #1 $2f (47) $00-$7f (0-127) Source Input for Matrix - Use Sysex for Matrix Control Matrix Midi CC #2 $30 (48) - Page 57 Continuous Controllers Continuous Controllers Second Third Notes DCO2 ENV Source $48 (72) $00-$0f (0-15) ENV 1 Normal $10-$1f (16-31) ENV 1 Inverted $20-$2f (32-47) ENV 2 Normal $30-$3f (48-63) ENV 2 Inverted $40-$4f (64-79) ENV 3 Normal $50-$7f (80-127) ENV 3 Inverted High Pass Filter Cutoff $49 (73) $00-$1f (0-31)
- Page 58 Continuous Controllers Continuous Controllers Second Third Notes Midi Control $53 (83) $00-$1f (0-31) All Off (Midi Start/Stop Enable) $20-$3f (32-63) ARP Enabled Note: if a Tone is saved $40-$5f (64-95) SEQ Enabled with ARP and/or SEQ running $60-$7f (96-127) ARP+SEQ Enabled the midi Start Enable will also be saved for each section running...
- Page 59 Continuous Controllers Continuous Controllers Second Third Notes AT Destination $5d (93) $yy = $00-$1f(0-31) $20-$3f(32-63) DCO 1 & 2 $40-$5f(64-79) $60-$7f(80-127) For combinations use sysex control NRPN Data Plus $60 (96) Not Supported NRPN Data Minus $61 (97) Not Supported NRPN Data LSB $62 (98) Not Supported...
-
Page 60: Real Time Commands
Non Real time reply Midi Channel (0-15) Enquiry Message Enquiry Reply $00 $21 $16 Kiwitechnics ID Kiwitechnics Family ID Product Family ID (Kiwi-8P) Product ID Major Program Version Byte Minor Program Version Byte Major BootLoader Version Byte Minor BootLoader Version Byte Build Number... -
Page 61: Midi Sysex Support
Midi Sysex Data Notes $nn = Hexadecimal Data - Decimal data is in Brackets e.g. $0a (10) Sysex Header Sysex Start $00 $21 $16 Kiwitechnics Manufacturers ID Kiwitechnics Family ID Kiwitechnics JX-8P ID Device ID ($00-$0f) (JX-8P Device ID 1-16) Command ID (see table 1.0) Request Global Dump Transmit/Receive Global Dump... -
Page 62: Midi Sysex Data
Table 1.0 Command ID Data Byte Data Type Data Details Byte details 7 ------- 0 $01 (1) Request Global Dump No Data JX-8P transmits a $02 (2) command $02 (2) Transmit or Receive Global $00 (0) = Midi Channel In 000yxxxx xxxx = 0-15 for midi channel 1-16 set for Omni... - Page 63 Table 1.0 Command ID Data Byte Data Type Data Details Byte details 7 ------- 0 $0c (12) = MW Midi Level 0xxxxxxx x = Range $00-$7f (0-127) This parameter only effects the MW Level that is sent to Midi. For Tone MW Level use the parameter in the Tone $0d (13) = Reserved Not currently Used $0e (14) = Memory Protect...
- Page 64 Table 1.0 Command ID Data Byte Data Type Data Details Byte details 7 ------- 0 $17 (23)=DCO1 ENV Amount 0xxxxxxx x = Range $00-$7f (0-127) $18 (24)=DCO1 DYN Amount 0xxxxxxx x = Range $00-$7f (0-127) $19 (25)=DCO1 Control 00wxyyzz zz = DCO1Env(00=Env1,01=Env2,10=Env3) yy = DCO1LFO(00=LFO1,01=LFO2,10=LFO3)
- Page 65 Table 1.0 Command ID Data Byte Data Type Data Details Byte details 7 ------- 0 $27 (39)=HPF Level 000000xx xx = $28 (40)=VCF Cutoff Hi 000xxxxx $29 (41)=VCF Cutoff Lo 0yyyyyyy Hi & Lo are combined to make single 12 bit command. 000xxxxx + 0yyyyyyy = 0000xxxx xyyyyyyy x = Range $0-$fff (0-4095) $2a (42)=VCF Resonance Hi...
- Page 66 Table 1.0 Command ID Data Byte Data Type Data Details Byte details 7 ------- 0 $40 (64)=Matrix 3 Destination 000xxxxx x = 0-25 – See Table 3 $41 (65)=Matrix 4 Source 000xxxxx x = 0-32 – See Table 1 $42 (66)=Matrix 4 Control 000xxxxx x = 0-35 –...
- Page 67 Table 1.0 Command ID Data Byte Data Type Data Details Byte details 7 ------- 0 $5c (92)=LFO 1 Wave 000000xxx xxx = 000=Sine 001=Triangle 010=Square 011=Saw 100=Reverse Saw 101=Random $5d (93)=LFO 1 Rate 0xxxxxxx x = Range $00-$7f (0-127) $5e (94)=LFO 1 Delay 0xxxxxxx x = Range $00-$7f (0-127) $5f (95)=LFO1Control...
- Page 68 Table 1.0 Command ID Data Byte Data Type Data Details Byte details 7 ------- 0 $63 (99)=LFO 2 Control 00xxxxxy 0=Mode (0=Normal,1=Plus) xxxxx= 00000-Free Running 00001-Sync Two Notes (192 Clocks/Step) 00010-Sync Dotted Whole Note (144 Clocks/Step) 00011-Sync Whole Note (96 Clocks/Step) 00100-Sync Dotted Half Note (72 Clocks/Step) 00101-Sync Half Note (48 Clocks/Step) 00110-Sync Dotted 1/4 Note (36 Clocks/Step)
- Page 69 Table 1.0 Command ID Data Byte Data Type Data Details Byte details 7 ------- 0 $68 (104)=Chorus Control 000000xx xx = 00=off 01=Type 1 10=type 2 $69 (105)=Portamento Rate 0xxxxxxx x = Range $00-$7f (0-127) $6a (106)=Load Sequence 000xxxxx Seq number to load (1-8) - 0 is do not load Seq $6b (107)=Voice Mode 1 000wxyyy yyy = 000=Poly Single (1 voice/note –...
- Page 70 Table 1.0 Command ID Data Byte Data Type Data Details Byte details 7 ------- 0 $73 (115)=Patch Clock TempoLo 0000yyyy $74 (116)=ArpClockDivide 0000xxxx xxxx= 0000-Half Note (48 Clocks/Step) 0001-Quarter note (24 Clocks/Step) 0010-8th note (12 Clocks/Step) 0011-8th note, half swing (14,10 Clocks/Step) 0100-8th note, full swing (16,8 Clocks/Step) 0101-8th note triplets (8 Clocks/Step) 0110-16th note (6 Clocks/Step)
- Page 71 Table 1.0 Command ID Data Byte Data Type Data Details Byte details 7 ------- 0 $7a (122) Quick Edit Param 0xxxxxxx X = Range $00-$7b (0-123) Note $29 & $2b are not valid. To edit VCF Cutoff or VCF Resonance use $28 or $2a $7b-$7f (123-127) Reserved Set to $00...
- Page 72 Table 1.0 Command ID Data Byte Data Type Data Details Byte details 7 ------- 0 WARNING! This command will overwrite the $01 (1) - Sequence Number 000xxxxx 0-23 for Sequence 1-24 current sounding Seq with the Seq Seq # 0-7 are full seq & 8-23 are mini seq selected JX-8P transmits a $0a (10) command with 1659 data bytes for seq 0-7 and 463 data bytes for seq 8-23...
- Page 73 Table 1.0 Command ID Data Byte Data Type Data Details Byte details 7 ------- 0 $03 (3) - Parameter Value (Hi) 000xxxxx Data format depends on Parameter Data format the same as $04 Note – This byte is $00 for all non 12 bit parameters $04 (4) - Parameter Value (Lo) 0yyyyyyy Hi &...
- Page 74 Table 2 Matrix Source Types Matrix Level Mod Types Matrix Destinations Fixed Amount Bend Up Fixed Amount (Inverted) DCO1 Freq Bend Down Bend Up DCO2 Freq Bend Full Bend Up (Inverted) All DCO Freq Mod Wheel Bend Down DCO1 Wave Edit Slider Bend Down (Inverted) DCO1 Range...
Need help?
Do you have a question about the Kiwi-8P and is the answer not in the manual?
Questions and answers