Advertisement
Advertisement
Table of Contents

Related Manuals for Hotone Binary Mod


Summary of Contents for Hotone Binary Mod
- Page 1 Binary Mod Owner's Manual DESIGN INSPIRATION...
- Page 2 I/Os make it easy to use, and an OLED screen offers clear, detailed display. Binary Mod is a CDCM-based multi modulation effects pedal with stereo I/O and expression pedal support, delivering precise classic modulation pedal sounds along with new and inspiring Hotone original modulation effects.
- Page 3 ✪ Advanced CDCM modeling system ensures realistic playing experience ✪ Dual DSP-powered platform ensures high sound quality ✪ 24-bit A/D/A conversion, up to 110dB S/N ratio ✪ 24 high quality modulation effects including CDCM-based classics and Hotone originals ✪ Tap Tempo function with Tap Divide ✪ Stereo I/Os ✪...
-
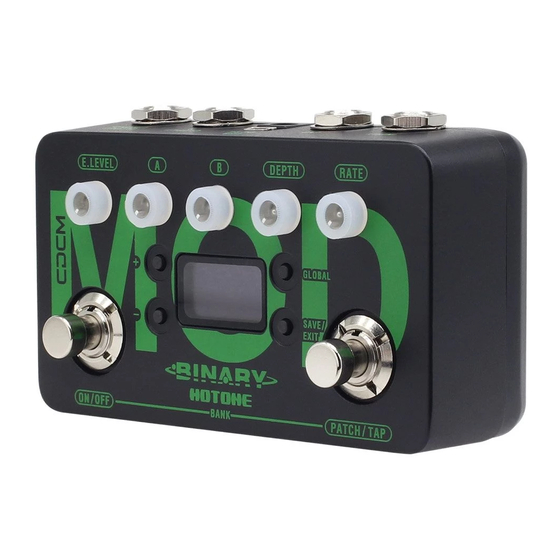
Page 4: Panel Introduction
The expression pedal should have a TRS cable attached to it. We recommend using a Hotone Soul Press (switched to EXP mode) for expression control. 14-15. OUTPUT (L & R): 1/4” (6.35mm) mono jacks, for connecting to amps or other effects. - Page 5 Connections Note: TURN ON FIRST, TURN OFF LAST. Always turn down the volume knob on your amp before plugging or unplugging power jacks, cables, etc. DESIGN INSPIRATION...
- Page 6 Display Plugging in your power supply will turn on the device. The main display will come up as shown below: 1 - Current bank/patch number 2 - Shows the expression pedal controlled parameter 3 - Indicates the effect model you’re using in current patch DESIGN INSPIRATION...
- Page 7 Select a Patch/Bank Tap the PATCH footswitch once to switch to the next patch. Tap it repeatedly to cycle through patches of the current bank in the order 1, 2, 3, 4, 5, then 1. Tap the two footswitches at the same time to switch to the next bank. Tap them repeatedly to cycle through banks in the order A, B, then A.
-
Page 8: Tap Tempo
Tap Tempo Hold the PATCH/TAP footswitch to engage Tap Tempo mode when the effect is on. Then tap the PATCH/TAP footswitch to set a tempo speed. In this mode, the LED under the RATE knob will pulse to indicate the effect rate you set. Hold the PATCH/TAP footswitch again to disengage. In Tap Tempo mode, turn the RATE knob (or any related knobs) to set a proper tap tempo subdivision shown as below: SUBDIVISION DIVIDE RATIO... - Page 9 Use the +/- buttons to set the parameters, press the SAVE/EXIT button (or wait for 5 seconds without any operation) to confirm settings and exit to the main display. Note: 1. There is no parameter in firmware info display. 2. To check firmware version on your Binary Mod, you need to update to firmware v1.1.1 or later. DESIGN INSPIRATION...
- Page 10 Edit 1. Adjust the parameters Use the onboard knobs to adjust the effect parameters. The screen display will be shown as below when adjusting: 1 - Current parameter value you’re adjusting (shown: rate) 2 - Saved parameter value in the current patch (PREV. = Previous value) 2.
- Page 11 Edit 3. Set the expression pedal If you have an expression pedal, you can control an effect parameter in real time. In main display, press the GLOBAL button twice to edit control target: Use the +/- buttons to select a target among E.LEVEL, A, B, DEPTH, RATE. Note: If you change to another patch before saving your edits, all your changes will be lost.
- Page 12 Save Hold the SAVE/EXIT button to activate save function. The screen will be shown as below: Use the +/- buttons to choose a location. Tap the SAVE/EXIT button to confirm saving. Tap either footswitch to cancel saving and go back to edit status. DESIGN INSPIRATION...
-
Page 13: Input Mode
Input Mode In main display, press the GLOBAL button once to select an input mode: Use the +/- buttons to choose from MONO and STEREO. If you choose to use STEREO mode while using mono (L) input, the right output will be MUTED. This is a global setting (it won’t change your patches) and changes will be automatically saved. - Page 14 Expression Pedal Range and Calibration In main display, press the GLOBAL button three times/four times to set the minimum/maximum value ranging from 000 to 100: 3 times (min value) 4 times (max value) Note: 1. The minimum value cannot be set higher than the maximum value. 2.
- Page 15 Expression Pedal Range and Calibration The expression pedal can be calibrated if necessary. If there does not seem to be much effect even when you press the pedal, or effects change greatly when the pedal only moves slightly, use the following procedure to readjust it.In the main display, press the GLOBAL button five times: Press + button to activate calibration and then screen displays “HEEL POSITION”: Press the pedal all the way back towards the heel and press + button, and then it...
-
Page 16: Effect Models List
Effect Models List* Name Description E.LEVEL DEPTH RATE TAP TARGET Based on the legendary green ensemble chorus (chorus Grand Chorus (GRD CHO) E.LEVEL Low Cut (LO CUT) High Cut (HI CUT) DEPTH RATE RATE mode) Sky Chorus (SKY CHO) Based on the Arion SCH-1 Stereo Chorus E.LEVEL Low Cut (LO CUT) High Cut (HI CUT) -
Page 17: Specifications
Specifications Numbers of Effects: 24 Numbers of Patches: 10 (2 banks x 5 patches) Digital Processing: 24-bit A/D/A conversion, 44.1 kHz sample rate Frequency Response: 20 Hz-20 kHz S/N Ratio: Up to 110dB Input Impedance: 1M Ohms Output Impedance: 100 Ohms Power Requirement: DC 9V, center negative Current Consumption: 200mA minimum Dimensions: 121mm (D) x 72mm (W) x 47mm (H)
Need help?
Do you have a question about the Binary Mod and is the answer not in the manual?
Questions and answers